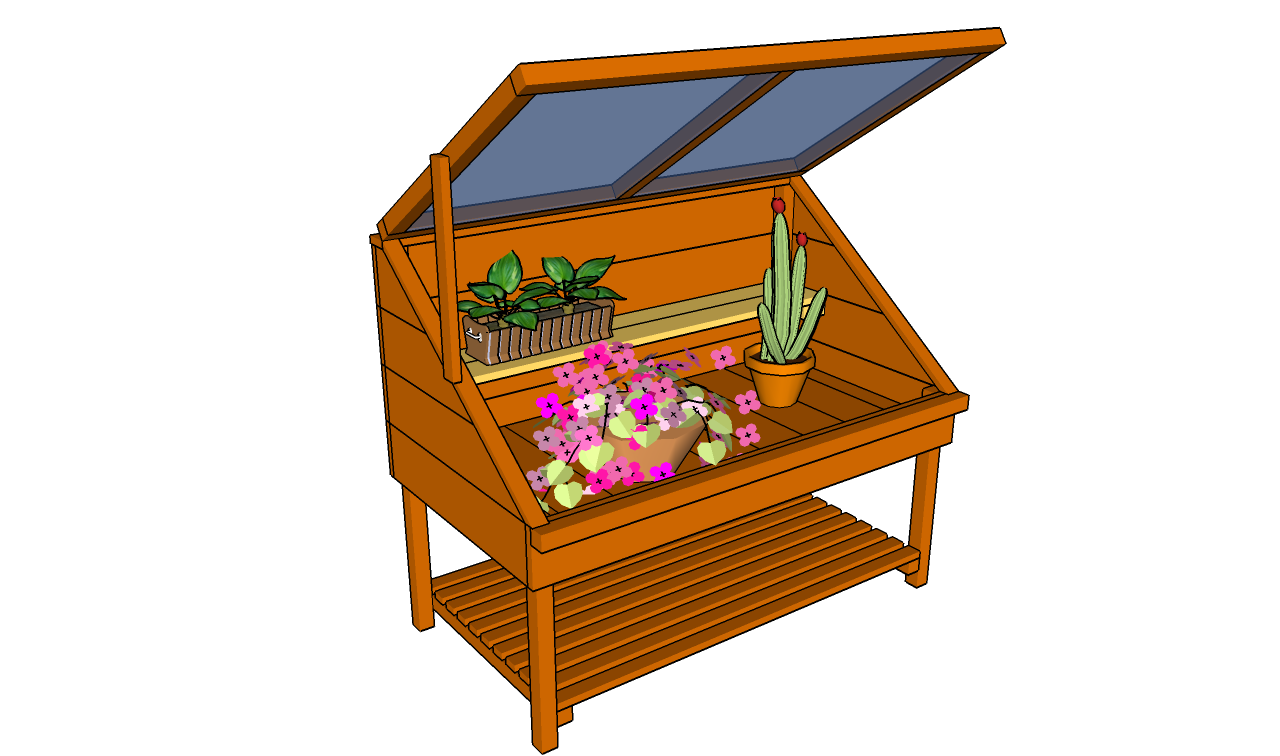
If you want to grow plants in the cold season, you should pay attention to this simple carpentry project. If you select the right cold frame building plans for your needs, you could obtain fresh vegetables a lot earlier than normally. Basically, a cold frame is just a greenhouse miniature, but we also added a bottom shelf to the constructions, as to increase the storage space and to make it versatile.
While the cold frame protect your plants from low temperature, there are days when the sun would heat the interior excessively, so you should open the lid to create a normal climate. If you don’t have to worry about this issue, you should just install an automatic lid opener and set it to the desired temperature. Use cedar siding to build the cold frame, as it both looks nice and it is weather-resistant.
RELATED PLANS:
Building a cold frame

Building a cold frame
Materials
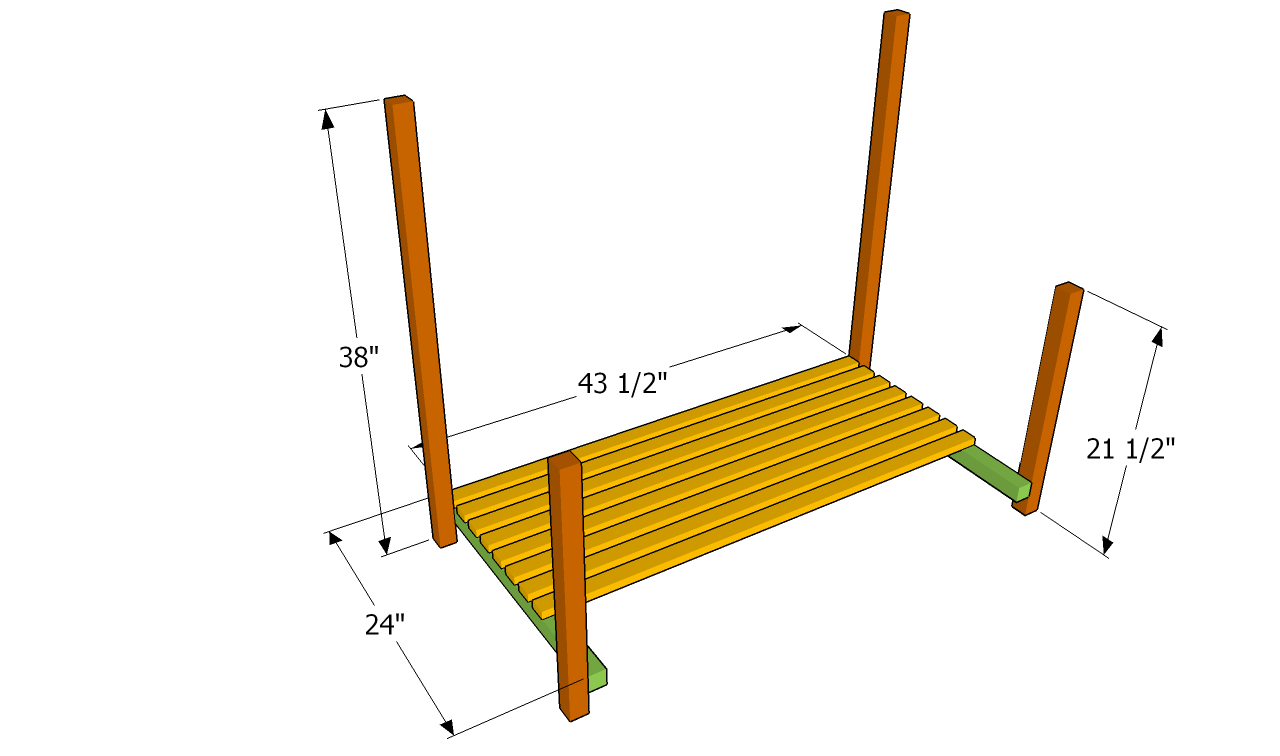
- 1 – 2 pieces of 2×2 lumber – 21 1/2”, 2 pieces of 2×2 lumber – 38” LEGS
- 2 – 2 piece of 2×2 lumber – 24″, 11 pieces of 1×2 lumber – 43 1/2” SHELF
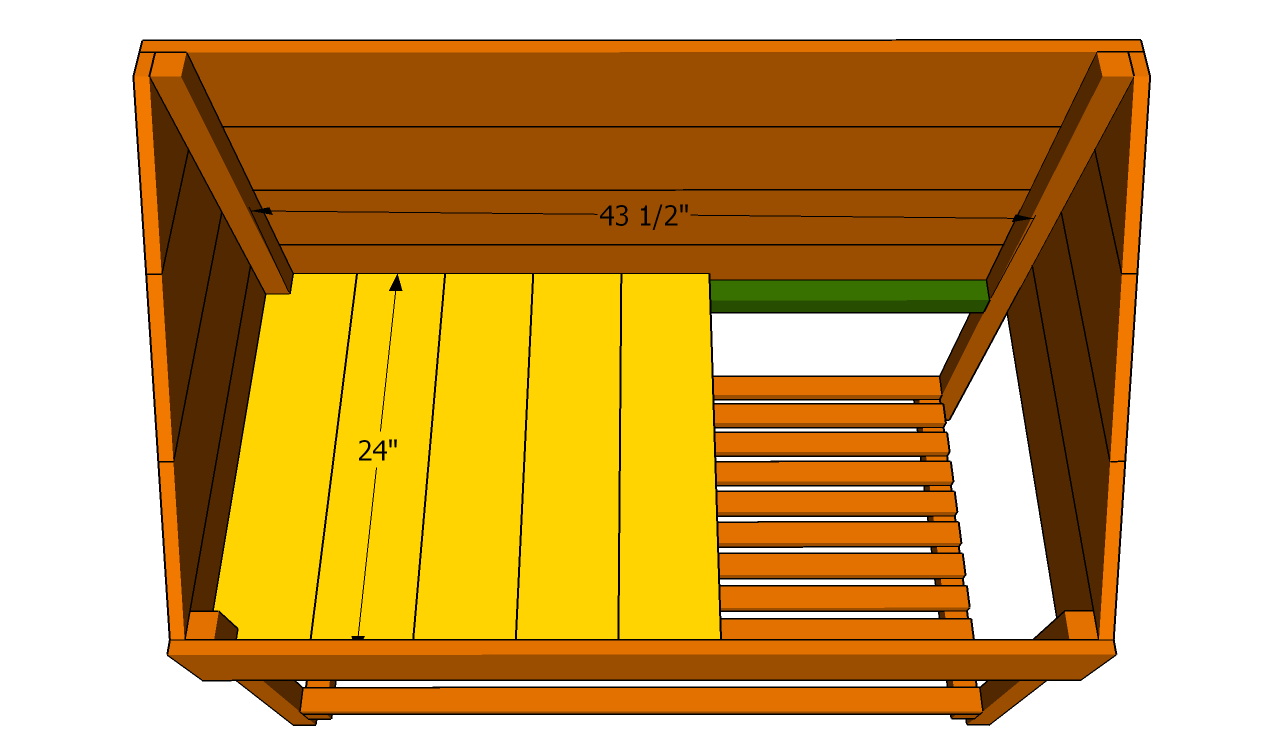
- 3 – 2 pieces of 2×2 lumber – 43 1/2”, 9 pieces of 1×6 cedar – 24” BOTTOM
- 4 – 5 pieces of 1×6 cedar slats – 48”, 8 pieces – 24” FRAMING
- 5 – 2 pieces of 1×2 lumber – 29 1/4”, 1 piece – 48”, 1 piece of 2×2 lumber – 48” TRIMS
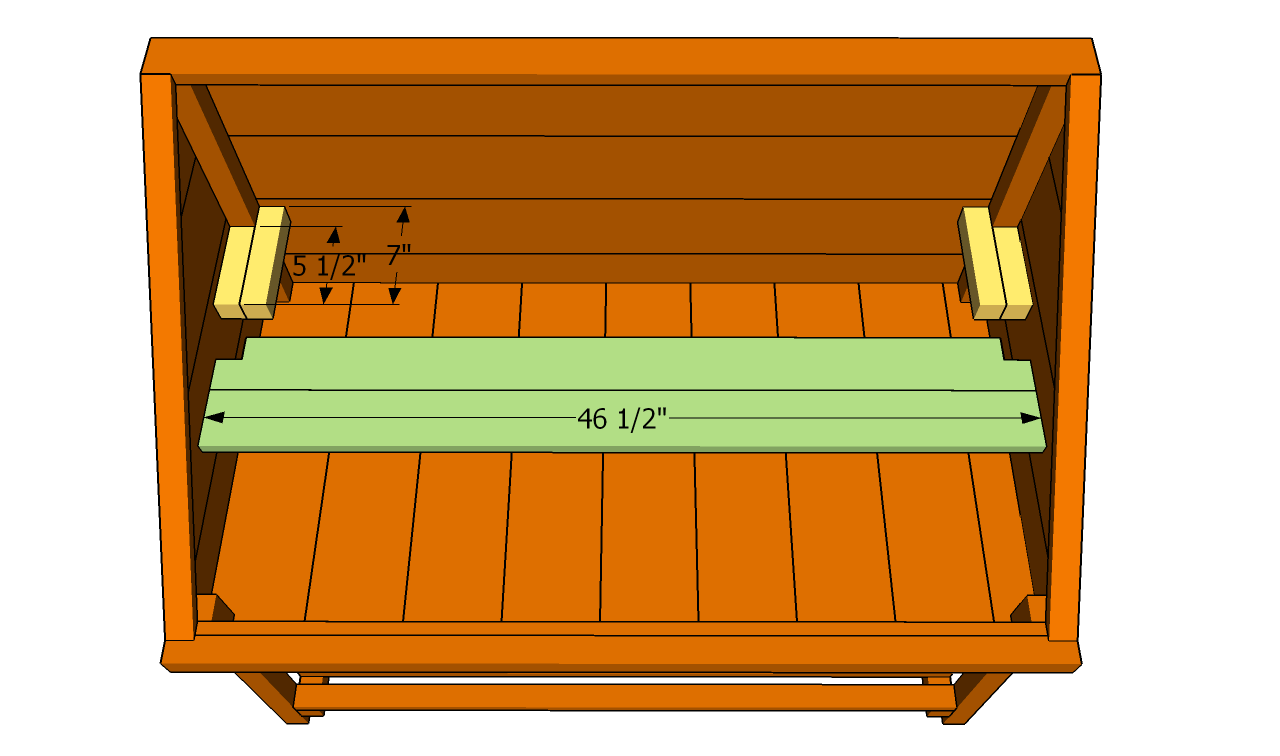
- 6 – 2 pieces of 2×2 lumber – 7”, 2 piece – 5 1/2”, 2 pieces of 1×4 lumber – 48” SHELF
- 7 – 3 pieces of 2×2 lumber – 26 1/4”, 2 pieces of 2×2 lumber – 48” LID
- 7 pieces of 1×2 lumber – 8 ft
- 6 pieces of 2×2 lumber – 8 ft
- 7 pieces of 1×6 cedar – 8 ft
- 1 piece of 1×4 lumber – 8 ft
- 50 pieces of 2 1/2″ screws
- 100 pieces of 1 5/8″ screws
- 100 pieces of 1 1/4″ screws
- 2″ nails
- wood stain
- 36″x48″ poly-carbonate
- piano hinge
- gas struts
Tools
- Hammer, Tape measure, Carpentry square
- Miter saw, Drill machinery, Screwdriver, Sander, Router
- Safety Gloves, Safety Glasses, Respiratory Mask
Time
- One day
Cold Frame Building Plans

Building the frame of the cold frame
The first step of the project is to build the frame of the cold frame. As you can easily notice in the building plans, you just need to attach several braces to the 2×2 legs. Drill pilot holes trough the components, before driving in the 2 1/2” galvanized screws, to prevent the wood from splitting. Attach the 1×2 slats for the bottom shelf. Fit 3/4″ plywood between the slats to create even gaps.
PRO TIP: Use a spirit level to plumb the legs and a carpentry square to make sure the corners of the framing are right-angled.

Installing the side walls
Next, you need to build the side walls of the actual sides of the cold frame from 1×6 lumber. Secure the wooden slats to the legs with 1 5/8” finishing nails or screws. Use a spirit level to check if the walls are plumb and if the top edges are horizontal. Drill pocket holes and insert 1 1/4″ screws to assemble the side panels.Add glue to the joints.

Fitting the floor of the cold frame
In order to build the floor of the cold frame, you should attach 2×2 cleats to the front and back faces of the interior walls. Secure the supports into place with 2” screws. Afterwards, place 1×6 cedar slats to cleats and secure them into place with 1 5/8′ nails. Notch the slats to fit around the corner legs.

Fitting the trims
Attach 1×2 strips of lumber on top edges of the framing, as in the building plans. Secure the trims into place with 2″” finishing nails, to prevent the wood from splitting.

Attaching the shelf
Build a small shelf, if you want to increase the storage surface of the cold frame. Use a spirit level to check shelf is horizontal.

Installing the lid
In order to protect the plants from extreme weather, you should build the lid, using 2×2 lumber and poly-carbonate sheets. Fit 1×1 cleats on the inside of the frame to support the poly-carbonate sheets, or cut a small channel inside the 2×2 lumber components.
PRO TIP: Check if the corners are right-angled, before locking the 2×2 components together with screws. Secure the lid to the cold frame by using a couple of hinges. In addition, you could fit an automatic lid opener to the front panel.

Cold frame building plans
If you need more storage space, you need to build a small shelf inside the cold frame. Secure 2×2 pieces of lumber to the sides of the framing and attach 1×4 slats to build the shelf. Work with great care and attention, if you want to get a professional result.
PRO TIP: Apply several coats of stain or paint, in order to protect the wooden components from decay or rot. Check if the structure is rigid and if the screws are inserted properly.
This diy project was about cold frame building plans. If you have enjoyed the free project, we recommend you to LIKE and SHARE it with your friends, by using the social media widgets.


1 comment
Enjoy your ideas