If you want to grow organic vegetables for your family, you should take into account building a raised garden bed, as it will save you from significant wok. Just don’t forget to adjust the size of the of the raised bed to your needs and to install landscaping fabric on the inside, otherwise you will face constant issues with various weeds. Check if the corners are square and make sure the diagonals are equal.
This project doesn’t require much knowledge in the field nor complex woodworking techniques. Nevertheless, you need to use proper materials, if you want to build a durable raised bed for your garden. Therefore, choose cedar slats and posts, as the components are weather-resistant and also come with a beautiful natural finish. Check if the slats are straight and in a good condition, though.
Raised Garden Bed Plans Free
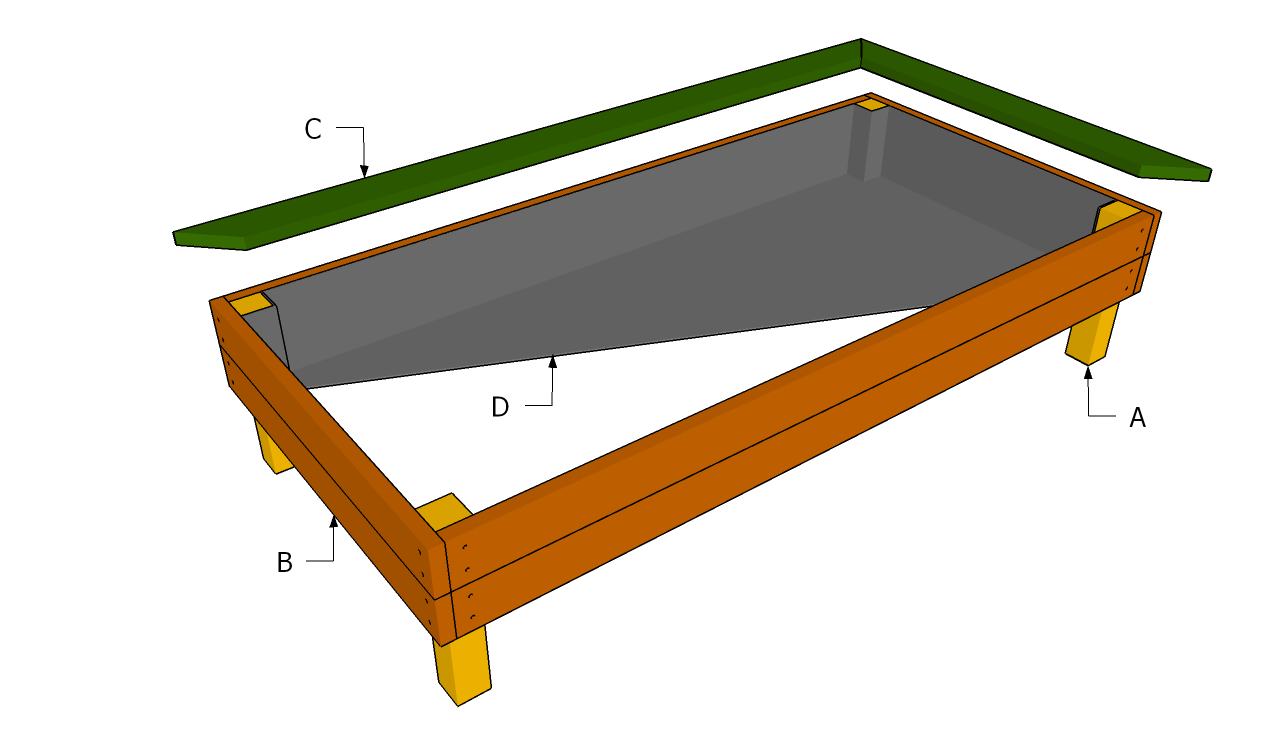
Building a raised garden bed
Materials
- A – 4-6 pieces of 4×4 lumber – 21-23” long LEGS
- B – 4 piece of 2×6 lumber – 96″ long, 4 pieces of 2×6 lumber – 48” long FRAMING
- C – 2 pieces of 2×6 lumber – 101” long, 2 pieces of 2×6 lumber – 56” long TRIMS
- D – 60 sq ft of landscaping fabric FABRIC
- 1 piece of 4×4 lumber – 8 ft
- 8 pieces of 2×6 lumber – 8 ft
- 2 pieces of 2×6 lumber – 10 ft
- 60 sq ft of landscaping fabric
- 50 pieces of 3″ screws
Tools
- Hammer, Tape measure, Carpentry square
- Miter saw, Drill machinery, Screwdriver, Sander, Router
- Safety Gloves, Safety Glasses, Respiratory Mask
Time
- One day
Building a raised garden bed
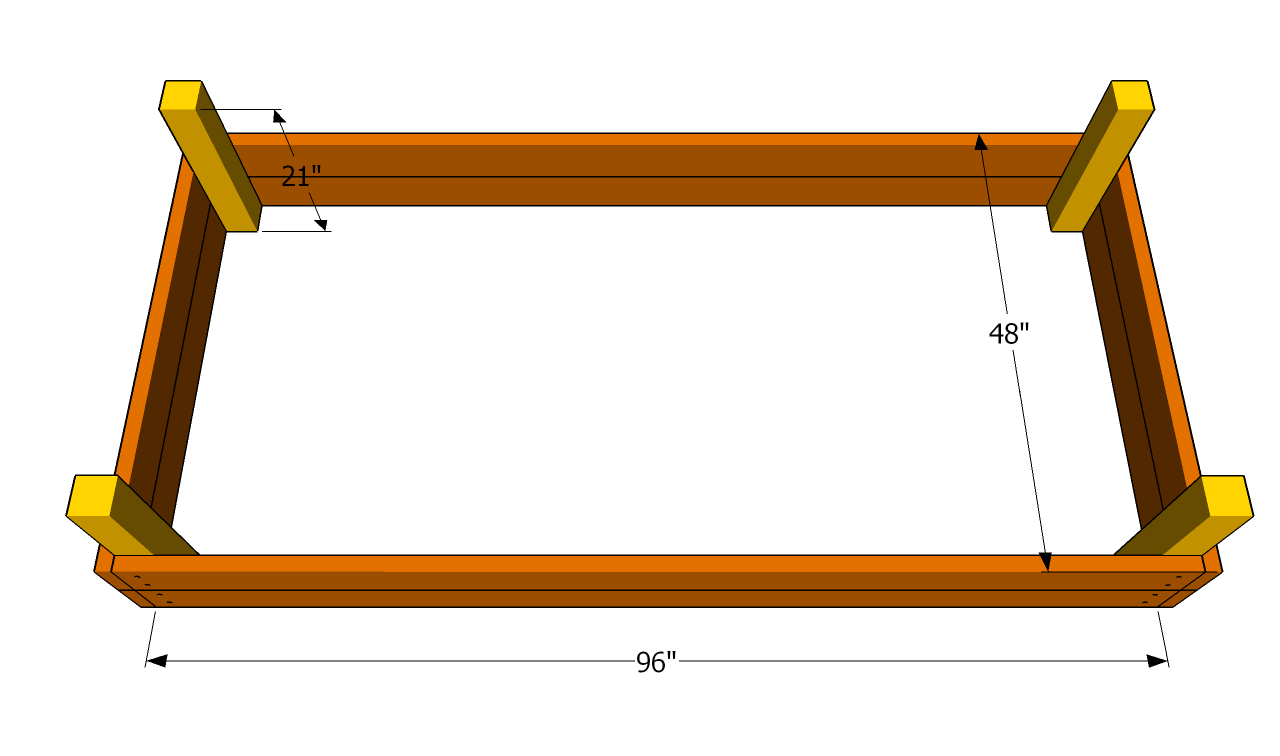
Building the frame of the raised bed
First of all you need to build the frame of the raised garden bed. As you can easily notice in the plans, you should use 2×6 lumber and 44 corner posts. Cut the slats at the right size and attach them to the corner posts using 3” wood screws, after drilling pilot holes. Alternatively, you could insert drive in lag screws, if you want to get rigid joints.
PRO TIP: Check if the corners are right-angled, using a carpentry square. In addition, plumb the side components with a spirit level.
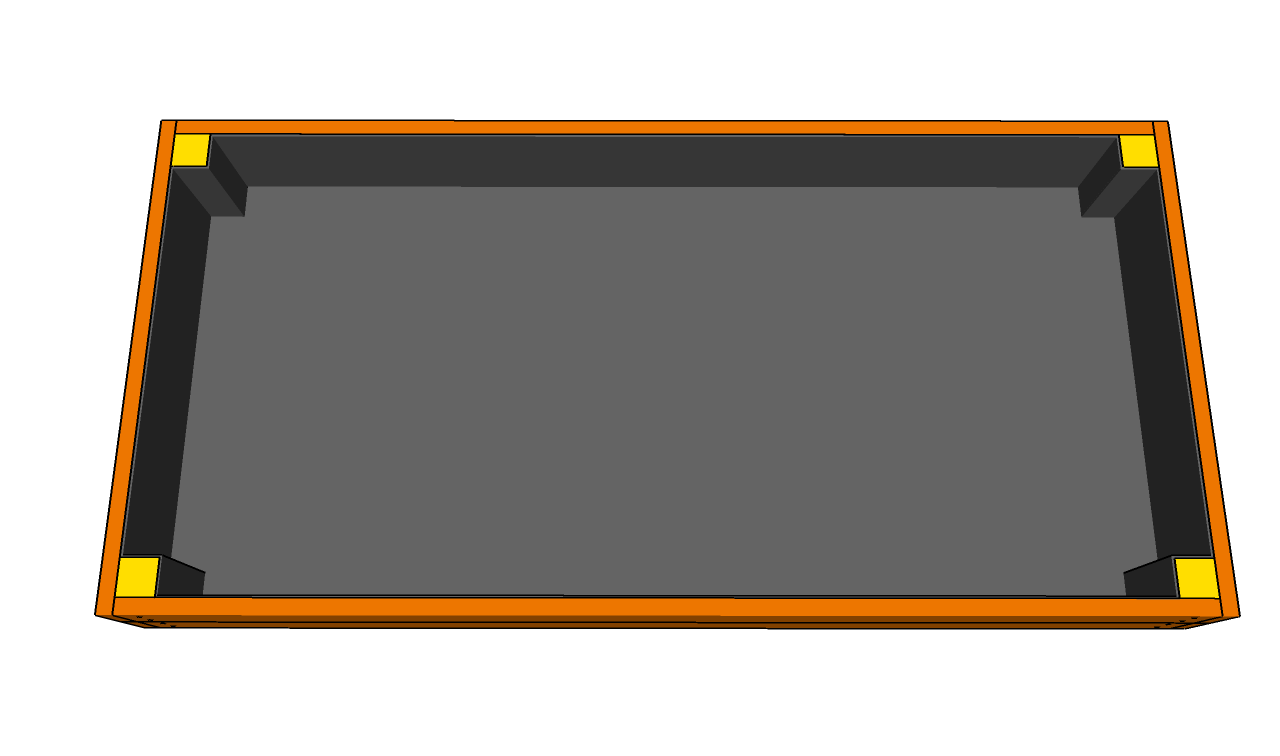
Installing the landscaping fabric
If you want to keep the weeds away from your plans and to save yourself from a lot of work, we strongly recommend you to install landscaping fabric on the inside of the raised garden bed. Don’t forget to fit the fabric on the slats, as it will also protect them from rot.
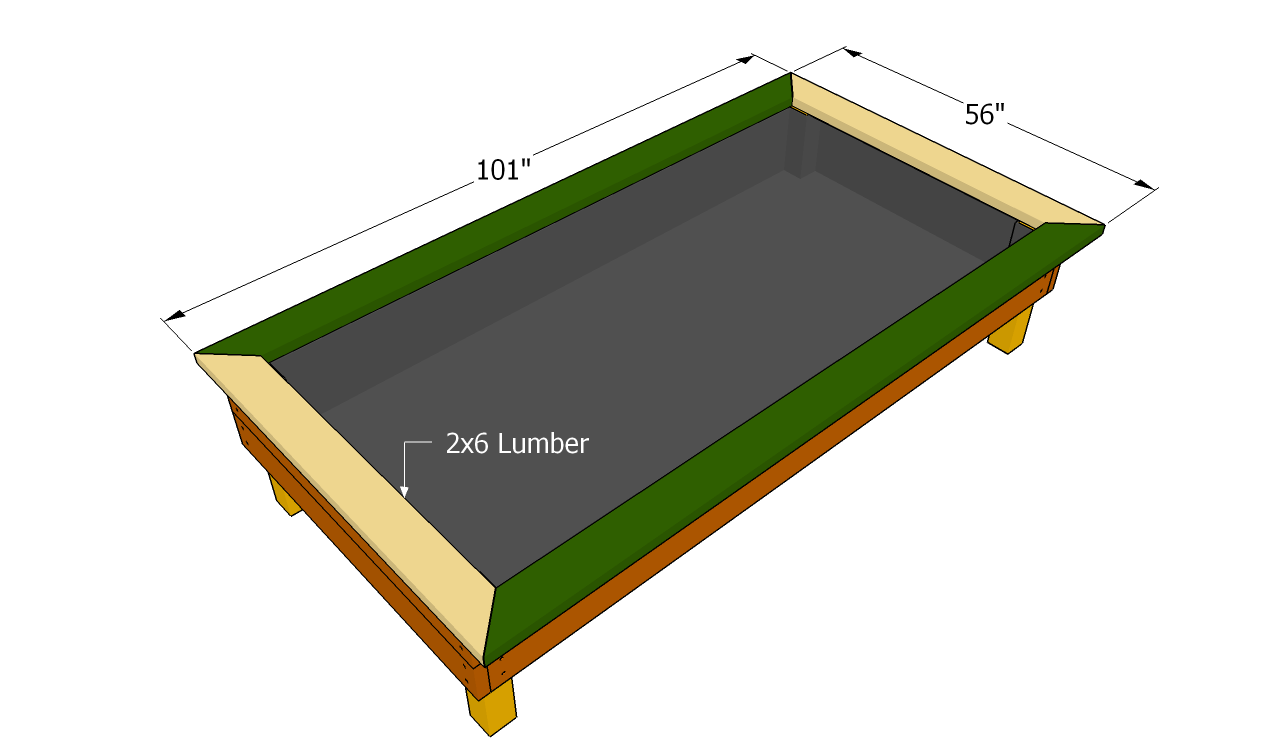
Fitting the trims
Attaching the trims on top of the garden bed is not compulsory, but it has several advantages. On one hand, the trims will enhance the look of your woodworking project, but on the other hand, it will also give you a support to sit on, when planting and taking care of your vegetables.
PRO TIP: Cut the ends of the trims at 45º to fit together properly. Secure the trims to the frame with 3” wood screws, making sure you countersink their heads.
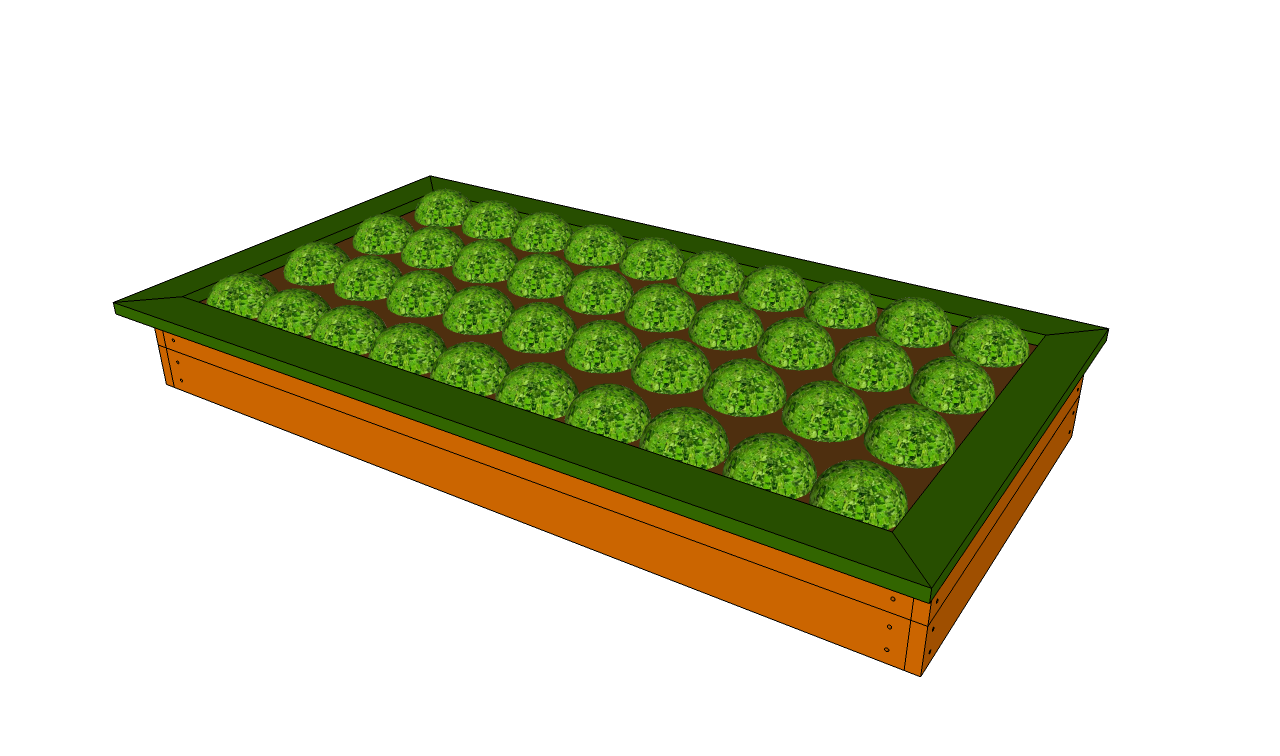
Raised garden bed plans
PRO TIP: After getting the job done, there are still a few finishing touches you have to take care of. Dig 12” deep holes to set the corner posts of the raised bed into place. If you want to provide extra support to your construction, we recommend you to fit 4×4 posts to the middle of the raised bed, on both sides.
This diy project was about raised garden bed plans free. If you have enjoyed the free project, we recommend you to LIKE and SHARE it with your friends, by using the social media widgets.
