
There’s something magical about growing lavender. The scent alone is enough to make you stop in your tracks, and the plants themselves are a visual treat—soft green foliage topped with blooms in that unmistakable shade of purple. But lavender is more than a pretty face. It’s drought-tolerant, attracts pollinators like bees and butterflies, and can even be harvested for homemade oils, sachets, soaps, or tea. It brings a calm, Mediterranean vibe to any backyard and has been cherished for centuries for both its ornamental and practical value.
Still, despite its reputation as a tough, low-maintenance plant, lavender has some very specific likes and dislikes. It loves heat and sun, but it hates wet feet. It thrives in lean soil but sulks in heavy, nutrient-rich beds. It can live for years, but only if it’s pruned and spaced correctly. The good news is that once you understand what lavender truly needs, it’s one of the most rewarding and resilient perennials you can add to your garden.
Whether you’re working with a sprawling landscape, a small raised bed, or even a collection of containers on a sunny balcony, lavender is a flexible and forgiving plant—as long as you give it the basics. It’s also one of the few herbs that can go from purely decorative to totally functional with ease. From border edging to pollinator gardens to homemade gifts and crafts, lavender offers both beauty and utility in one neat package.
So if you’re ready to grow the kind of lavender that stops passersby, fills your yard with fragrance, and keeps coming back better each year, let’s dig into seven proven, practical tips that will help you get it right from day one.

1. Choose a Sunny Spot
Lavender loves the sun. This plant absolutely thrives on full exposure, needing at least 6 to 8 hours of direct sunlight every single day to reach its full potential. The more sun it gets, the stronger and more fragrant the blooms will be. That consistent sun exposure fuels the production of essential oils, which are responsible for both the scent and the flower’s vibrant color. If your goal is to harvest lavender for crafts, oils, or drying, sunlight isn’t optional—it’s essential.
Morning sun is especially valuable because it helps dry dew off the foliage early in the day. This natural drying time is one of the best ways to prevent fungal diseases, which can creep in when leaves stay damp for too long. Plants that sit in moisture or partial shade are more likely to suffer from mildew, root rot, or leaf spot—problems that are easy to avoid just by choosing the right location from the start.
If you plant lavender in a shady or partially shaded spot, it might survive, but it won’t thrive. Expect fewer flowers, weaker stems, and stretched-out, leggy growth as the plant reaches for light. It’ll look scraggly instead of full, and your harvest (if you get one) will be minimal. In shady areas, the plant may also become more susceptible to pests and disease simply because it’s under stress.
So when you’re planning where to put your lavender—whether it’s in the ground or in a pot—look for the brightest, sunniest spot you’ve got. South-facing garden beds, open areas along pathways, and even reflective spaces near light-colored walls or fences are great options. Lavender rewards those who treat it like the sun-loving plant it truly is. Give it the full exposure it craves, and it will light up your garden in return.
2. Focus on Fast-Draining Soil
Lavender won’t tolerate soggy roots—not even a little. In fact, poor drainage is one of the fastest ways to kill a lavender plant. In its native Mediterranean environment, lavender grows in dry, rocky hillsides where rainwater runs off quickly and the soil never stays wet for long. This means it’s adapted to thrive in low-moisture, fast-draining soils, not the heavy, water-retentive dirt you’ll find in many backyard gardens.
If your soil is clay-heavy, compacted, or slow to drain after rain, you’ll need to make some changes before planting lavender. Left unaddressed, that kind of soil holds water around the roots for too long, which can lead to root rot, a common and often fatal problem for lavender. To fix this, amend the soil with coarse sand, small gravel, pumice, or crushed stone—anything that creates pockets of air and channels for water to move through quickly. You want your soil to drain like a sieve, not hold water like a sponge.
Another great option is to grow lavender in raised beds or mounded rows, especially if your native soil is less than ideal. Raised beds allow you to completely control the soil mix and elevation, ensuring excess moisture drains away from the root zone. Even a mound of 8–12 inches above grade can make a big difference in drainage and air flow, helping you avoid the overly wet conditions that lavender hates.
It’s also worth noting that lavender prefers lean, slightly alkaline soil. Unlike most vegetables and flowers, which thrive in rich, organic soils, lavender actually performs better in soil that’s not heavily fertilized. Too much organic matter—like compost or manure—can retain unwanted moisture and promote lush green growth at the expense of flowers. That means skip the high-nitrogen fertilizers and compost-heavy mixes and instead aim for a gritty blend with neutral to alkaline pH (ideally between 6.5 and 7.5). You can even add a handful of crushed limestone or garden lime to raise the pH if your soil is naturally acidic.
If you’re growing in containers, make sure to choose pots with multiple drainage holes and use a light, well-draining mix that mimics lavender’s native soil. A great homemade blend would include potting soil, coarse sand, and perlite or small gravel in equal parts. Always avoid moisture-control potting mixes, which retain too much water for lavender’s liking.
Getting the soil right may take a little extra work at the beginning, but it’s one of the most important things you can do to ensure your lavender not only survives—but thrives and blooms beautifully for years to come. Once your drainage is dialed in, the rest of your lavender care becomes a whole lot easier.
3. Water Deeply, But Infrequently
Lavender doesn’t like wet feet—at all. In fact, keeping the soil too moist is one of the quickest ways to stress or kill a lavender plant. Once it’s settled into the garden, lavender becomes extremely drought-tolerant, thanks to its deep roots and origins in dry, rocky Mediterranean terrain. That means it prefers periods of dryness over constantly damp soil. Many beginner gardeners make the mistake of treating lavender like a thirsty flower bed or a vegetable patch, watering it every time the topsoil looks dry. But with lavender, less is more.
During the first growing season, your job is to help the plant establish a solid root system. That means you’ll need to water more frequently—about once or twice a week, depending on heat and drainage. However, even during this early phase, it’s important to let the top inch or two of soil dry out before you water again. Lavender roots need oxygen just as much as water, and overly wet soil suffocates them, leading to root rot, fungal disease, and yellowing foliage.
Once lavender is established—usually after the first full season—it can go for long stretches without any supplemental water, especially if you’ve mulched properly and planted in the right soil. In fact, overwatering established lavender is far more dangerous than letting it dry out a bit too much. A deeply rooted, mature plant can survive on rainwater alone in many climates, or just the occasional deep soak during extended dry spells.
When you do water, water deeply and infrequently. A slow, deep soak encourages roots to grow downward rather than clustering near the surface, which helps the plant tolerate future droughts. If you’re unsure whether your lavender really needs water, do the finger test: stick your finger about two inches into the soil near the base of the plant. If it’s dry at that depth, go ahead and water. If it’s still cool and moist, wait another day or two. And when in doubt, don’t water. It’s better for lavender to dry out a bit than sit in soggy soil.
In containers, lavender requires even more careful attention. Pots tend to dry out faster than garden beds, but they can also retain water at the base if they don’t drain well. Always use a pot with ample drainage holes and a fast-draining soil mix. You may need to water container-grown lavender once or twice a week during peak summer heat, but make sure the container has fully dried out between waterings.
In short, think like lavender—tough, sun-loving, and not a fan of wet socks. Once you adjust your watering habits to fit its needs, lavender becomes one of the lowest-maintenance plants in your garden, rewarding you with stunning blooms and that unforgettable fragrance without constantly demanding your attention.
4. Give It Room to Breathe
Lavender needs airflow just as much as it needs sunlight—and that’s not just a preference, it’s a survival strategy. Good air circulation is essential for keeping this plant healthy and productive, especially in warm or humid climates where fungal diseases can creep in fast. When lavender is planted too close to its neighbors, the moisture from dew, rain, or overhead watering gets trapped between the leaves and stems, creating the perfect environment for problems like powdery mildew, root rot, or gray mold (Botrytis).
Spacing your lavender properly from the start helps prevent these issues. Most lavender varieties, depending on the cultivar and expected mature size, should be spaced 18 to 36 inches apart. Compact types like Lavandula angustifolia (English lavender) can be planted closer together, while larger varieties such as Lavandula x intermedia (lavandin) need more room to stretch out. Give them enough breathing room not only for airflow but to avoid having to dig up and move crowded plants later down the road.
This spacing also allows for stronger, bushier growth. When a lavender plant has open space around it, sunlight can reach all sides evenly, which reduces legginess and encourages fuller, more balanced shapes. That even light distribution means more flowers—not just on the top, but all around the plant. And better flowering means more pollinators like bees and butterflies visiting your garden.
Beyond the health benefits, spacing lavender correctly makes your seasonal maintenance much easier. Whether you’re pruning to shape the plant in spring, cutting back after flowering, or harvesting those gorgeous purple stalks for bundles and sachets, being able to walk around or reach between plants without bending and stretching is a game changer. It keeps your work efficient and keeps the plants looking neat.
If you’re planting in a row, such as along a path or garden edge, you can also stagger the placement slightly to encourage airflow without sacrificing visual fullness. In containers, the same principles apply—don’t crowd multiple plants into one pot unless the container is very large. Even a single plant in a wide container will benefit from airflow across its leaves.
One more tip: avoid planting lavender too close to fences, walls, or structures that block air movement. These areas often stay more humid and shaded, which can stress the plant and reduce bloom quality. Give your lavender open space, just like it would find on a breezy hillside in southern France, and you’ll be rewarded with healthier growth, fewer disease issues, and a much more enjoyable gardening experience.
5. Prune for Shape and Strength
Pruning is essential if you want full, bushy lavender that doesn’t turn into a leggy, woody mess over time. While lavender is a hardy perennial, it needs annual maintenance to stay healthy and productive. Left unpruned, lavender tends to grow long, spindly stems with fewer blooms, and the base of the plant becomes woody and brittle, reducing its lifespan and overall appearance. But with the right pruning routine, you can keep your lavender looking lush, full, and flower-packed year after year.
The most important time to prune lavender is after it finishes blooming, which is typically in late summer or early fall, depending on your climate and the variety. This post-bloom pruning is your main shaping opportunity. Trim back about one-third of the plant’s height, being careful not to cut into the old, brown woody base. Lavender doesn’t regenerate well from that hardened wood—if you cut too low, it may not bounce back. Instead, aim to remove the soft, green growth that flowered during the current season. This encourages the plant to send out new, healthy shoots from the base, which will grow into next season’s flowers.
A second, lighter pruning can be done in early spring, just as new growth begins to appear. This isn’t a deep cut—think of it more like a cleanup. Trim away any dead or winter-damaged tips and reshape the plant to keep it compact and tidy. This also gives the plant a little head start on the growing season by redirecting energy to the healthiest stems.
Pruning also plays a big role in preventing disease and improving airflow. Dense, tangled growth can trap moisture and create conditions ripe for mildew and fungal problems. By keeping the plant compact and thinned out, you allow for better air circulation through the foliage, especially in humid or rainy environments.
If you’re growing lavender from seed or a small transplant, it’s a good idea to pinch or lightly prune the top once it reaches about 4–6 inches tall. This encourages branching and helps create a more rounded, bushy plant from the beginning.
Don’t be afraid of pruning—lavender actually responds very well to regular trimming. With just a little practice, you’ll find that it not only keeps your plant looking great, but also leads to stronger growth, more flowers, and a longer plant life overall. Think of it as giving your lavender a reset button every year, so it can come back fresh, vibrant, and better than ever.
6. Pick the Right Variety for Your Zone
Not all lavender is created equal—and choosing the right variety for your climate is one of the most important decisions you’ll make if you want to grow lavender that actually thrives. Lavender may have a reputation as a tough, drought-tolerant plant, but it’s not one-size-fits-all. There are several different species and hybrids, each with its own preferences for temperature, humidity, and soil conditions. If you plant a variety that isn’t suited to your local growing zone, you may end up with a plant that struggles, blooms poorly, or doesn’t survive the winter.
English lavender (Lavandula angustifolia) is the go-to choice for gardeners in cooler climates, especially USDA hardiness zones 5 through 8. It’s prized not only for its cold hardiness but also for its classic, sweet lavender scent and beautiful deep purple flowers. English lavender typically blooms once in mid to late summer, though some cultivars will offer a second, smaller flush of flowers in early fall if pruned properly. Popular varieties like ‘Hidcote’ and ‘Munstead’ are widely available and known for their compact size and reliable performance. This type of lavender also has higher oil content, making it ideal for crafting, drying, and aromatherapy.
If you live in a warmer climate, particularly zones 8 through 11, you may have better success with French lavender (Lavandula dentata) or Spanish lavender (Lavandula stoechas). These varieties are less tolerant of cold but thrive in heat and humidity. French lavender has finely toothed leaves and a slightly lighter, camphor-like fragrance, while Spanish lavender is instantly recognizable by its unique “rabbit ear” bracts on top of the flower spikes. Both types tend to bloom repeatedly through the growing season with proper care and deadheading, making them great choices for long stretches of color and pollinator activity.
In very hot or humid regions, lavandin (Lavandula x intermedia) hybrids are another option worth considering. These are crosses between English and Portuguese lavender and combine the cold tolerance of one parent with the size and repeated blooming habit of the other. They’re generally more vigorous growers, often reaching 2 to 3 feet tall and wide, and are commonly used in commercial lavender fields because of their heavy flower production and strong fragrance.
Before buying lavender, it’s essential to check your USDA hardiness zone and select a variety that’s proven to do well in your region. Plant tags or seed packets usually list hardiness information, but your local extension service or nursery can also help steer you toward the best types for your area. Don’t forget to factor in not just temperature but also humidity, rainfall, and soil drainage, as some varieties are more susceptible to fungal problems in wetter climates.
Matching the right lavender to your conditions not only improves your chances of success, it means less maintenance, fewer pests and diseases, and more beautiful blooms. Whether you’re planting a formal hedge, filling containers, or simply tucking a few fragrant sprigs into your herb garden, choosing a variety that fits your zone is the foundation for growing lavender that lasts and flourishes.
7. Harvest and Deadhead Regularly
Timing your harvest is key when it comes to getting the most out of your lavender—whether you’re after its rich fragrance, essential oils, or simply a beautiful bundle of fresh or dried blooms. Lavender is at its peak in terms of oil content and aroma right before the flowers fully open, when the buds are still tight and just beginning to show color. This is when the essential oils that give lavender its unmistakable scent are the most concentrated. Harvesting at this stage ensures that the fragrance is intense and long-lasting, whether you’re making sachets, oils, wreaths, or bouquets.
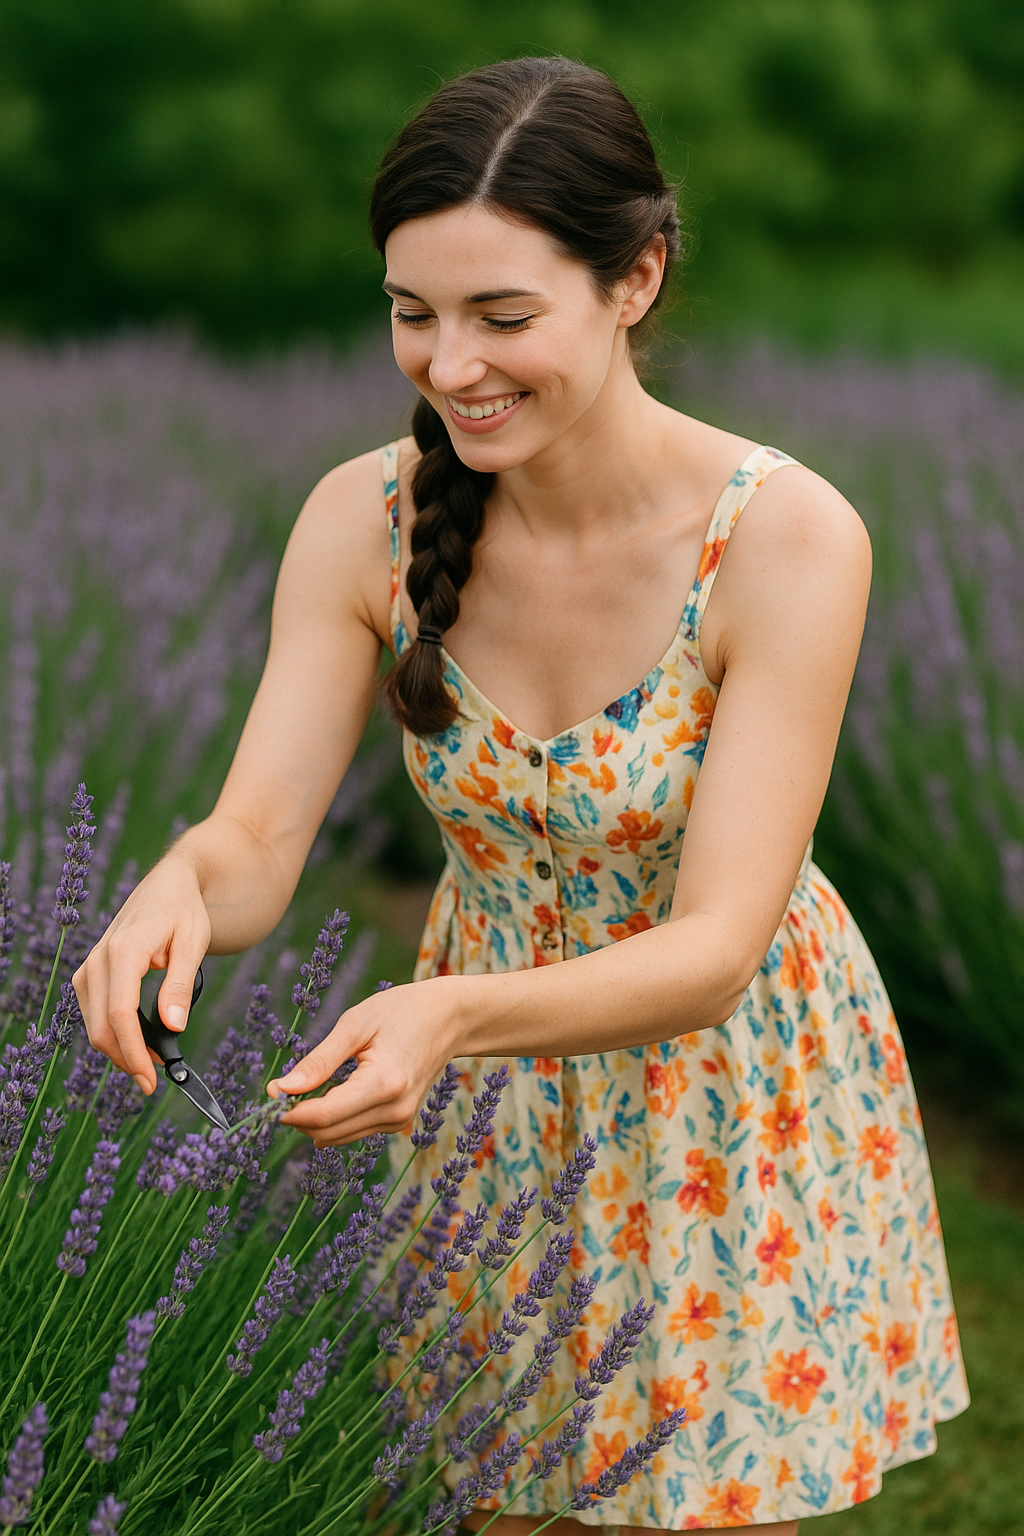
To harvest properly, use a pair of clean, sharp garden shears or scissors. Dull blades can crush the stems, leading to unnecessary stress or damage. Always make your cut just above a set of leaves (called a node) on the stem. This encourages the plant to push out new growth from that node, keeping the lavender bushy and promoting more flowering later in the season. Avoid cutting into the old, woody base—lavender doesn’t regenerate well from that older growth, and pruning too far down can leave you with sparse regrowth or even dead sections.
If you’re not harvesting for use but simply want to keep your plant looking fresh and vibrant, deadheading is still a must. Once the flowers begin to fade and turn brown, trim off the spent flower spikes. This not only tidies up the plant’s appearance, but it also redirects energy back into the plant’s roots and foliage rather than into seed production. In many cases, this will encourage a second, smaller flush of blooms later in the season, especially in warmer climates or with reblooming varieties like French or Spanish lavender.
The idea that “the more you cut, the more you get” absolutely applies to lavender. Regular harvesting and deadheading stimulate new growth, promote denser flowering, and help maintain the compact shape that makes lavender such a garden favorite. It also reduces the risk of disease by improving airflow and preventing the buildup of damp, decaying flower heads.
If your goal is to dry lavender for long-term use, bunch the freshly cut stems together with a rubber band and hang them upside down in a dark, dry, well-ventilated space. Keeping the bundles out of direct sunlight preserves their color and scent. Once fully dried, the flowers can be stored in airtight containers for months of aromatic delight.
So whether you’re trimming for aesthetics, harvesting for use, or both, proper timing and technique make a big difference. By being strategic with your cuts, you’ll end up with healthier plants, more blooms, and better-quality lavender to enjoy all year long.
Final Thoughts
Lavender is one of the most rewarding plants you can grow. With just a bit of planning and a few easy adjustments to your soil, sun exposure, and watering habits, you can grow lavender that not only survives—but thrives. Whether you’re planting a few along a walkway, filling up a raised bed, or popping one into a container on the patio, these tips will help you grow lavender that’s beautiful, productive, and a joy to care for.
Let lavender do what it does best—bring beauty, fragrance, and calm to your garden space—all while attracting bees and butterflies and asking for very little in return. Since you are here, you should also check out my article on how to grow roses as a beginner.