Ever imagined plucking fresh, juicy strawberries with no soil under your fingernails? Growing strawberries with no soil is not only possible – it’s a game-changer for home gardeners. Hydroponic strawberry cultivation lets you raise plump, delicious berries in water-based nutrient solutions instead of dirt. The appeal is huge: no weeding, no muddy mess, and far fewer pests to spoil your crop. Plus, you can grow strawberries year-round, even if you don’t have a big yard. It’s like bringing a bit of summer into your kitchen or garage! In this article, we’ll walk through how hydroponic strawberries work and why they’re worth a try for DIYers and gardeners with beginner to intermediate experience. By the end, you’ll see how growing strawberries with no soil can be fun, approachable, and incredibly rewarding.
Hydroponics might sound high-tech, but don’t let that scare you off. Think of it as gardening meets tinkering – a perfect project for those who love to DIY. I’ll share the pros and cons, different hydroponic methods you can use at home, what tools and materials you’ll need (no fancy branded stuff required), how much it might cost, and plenty of tips to keep your berry plants happy. Whether you’re tight on space or just curious about soilless growing, this guide will help you build confidence to grow your own strawberries without soil. Let’s dive in and get those berries growing!
Why Grow Strawberries Hydroponically?
Growing strawberries hydroponically means cultivating them without soil. Instead, the plants get their water and nutrients from a carefully mixed solution. The roots either sit in or dangle into this oxygenated, nutrient-rich water, often supported by an inert medium like clay pebbles or coco coir. But why go to the trouble of setting up a hydroponic system when strawberries grow in the ground just fine? Here are some compelling reasons:
- No Soil, Fewer Problems: No soil means no soil-borne diseases or pests attacking your strawberries. Common enemies like soil fungus, nematodes, or slugs are largely eliminated. You also won’t be constantly battling weeds or wondering if your garden soil is fertile enough. Hydroponic strawberries often stay healthier because they’re not exposed to the microbes and insects that live in dirt. One home grower lamented that in her outdoor patch, “of all the strawberries we grew we only ever got a handful of good ones to eat. The rest were either eaten by bugs or birds”. Moving the strawberries into a protected hydroponic setup solved that problem – no more critters stealing the goods! Plus, without soil you’ll have minimal cleanup. Forget about tilling or mulching; your biggest mess might be a few spilled clay pebbles.
- Year-Round Berries & Climate Control: In a hydroponic system, you’re the boss of the environment. You can grow strawberries virtually any time of year because you’re not limited by outdoor seasons. By keeping plants in a controlled space (indoors, in a greenhouse, or even on a sheltered porch), you never have to worry about drought, frost, heatwaves, or heavy rain ruining your crop. Want fresh strawberries at Christmas? With hydroponics, it’s feasible. Many hydroponic growers use everbearing or day-neutral strawberry varieties that fruit continuously, so you could be harvesting sweet berries 12 months a year. Just imagine – a reliable supply of homegrown strawberries long after your neighbors’ soil-grown plants have gone dormant.
- Space Efficiency – Go Vertical: Hydroponics allows you to stack plants vertically, so it’s perfect for gardeners short on space. Instead of a sprawling strawberry patch, you can have a tower or wall of strawberry plants. This vertical gardening can give you 3 to 6 times more strawberry plants per square foot than traditional methods. Even in a tiny apartment or a small backyard, you can enjoy a sizable harvest by growing upward. It also makes harvesting a breeze – no more hunching over to pick berries at ground level. You’ll simply pluck ripe fruit at eye-level from your strawberry towers or shelves. It’s like having a strawberry farm on a bookshelf!
- Water Savings: Surprisingly, growing strawberries hydroponically can use much less water than growing in soil. How is that possible when the plants sit in water? The key is recirculation. In most hydroponic systems, unused water drains back into a reservoir and gets reused, rather than just draining away into the ground. This closed-loop approach can cut water usage by up to 90% compared to soil gardening. Instead of pouring water on the garden and losing much of it to evaporation or runoff, hydroponics delivers moisture straight to the roots and then recycles the excess. As Epic Gardening notes, hydro systems are very water-efficient because “you recirculate the water as opposed to constantly feeding fresh water to the plants.” In an age where conserving water matters, hydroponics is an eco-friendly choice.
- Faster Growth & Potential for Higher Yields: Many gardeners report faster plant growth and equal or even higher yields with hydroponic strawberries, thanks to the optimized delivery of nutrients and water. In a well-tuned system, plants don’t waste energy searching for nutrients – everything they need is right at their roots, in the perfect balance. Strawberries can put more energy into producing fruit rather than extending roots through soil. This can mean you start harvesting earlier and potentially get more berries overall. For instance, one study found hydroponically grown strawberries produced larger total yields than soil-grown ones under the same conditions. And because you can crowd more plants into a given area (via vertical stacking), your yield per square foot can be much higher, even if individual soil-grown plants might produce slightly more berries each. Essentially, hydroponics lets you maximize productivity in a small area, making up for any minor per-plant yield differences.
- Less Backbreaking Work: No digging, no hoeing, and no lugging heavy bags of soil. A hydroponic setup, once built, is generally easier on the back and knees. Many home hydroponic strawberry systems are built at table-height or higher. As a result, tending plants and picking fruit can be done standing up or with minimal bending. If traditional gardening has been tough on your body, a waist-high hydroponic garden can be a relief. Maintenance tends to involve checking water levels and pruning plants rather than constant physical weeding or tilling.
- Cleaner, Tastier Berries: Hydroponic strawberries often come out clean. There’s no soil splashing onto the fruit when it rains or when you water. Berries stay dirt-free, which means less washing and a longer shelf life post-harvest (excess moisture and mud can hasten rot). And since you’re controlling the nutrients, many growers swear that hydroponic strawberries have excellent flavor – equal to soil-grown ones. The key is to let them ripen fully on the vine, and hydroponics makes that easier. Indoors or in a greenhouse, you won’t have birds and slugs forcing you to pick berries early. You can wait until each strawberry is perfectly red and sweet before harvesting. As one DIY grower put it, “the great part of growing strawberries indoors is there are no bugs or birds, meaning you can leave your strawberries on the vine to get nice and ripe… The result is a super sweet strawberry with no rot or bugs or pesticides on it”. Vine-ripened strawberries at their peak are a whole different level of delicious – and you get to enjoy that full flavor with hydroponics.
With all these advantages, it’s clear why so many home gardeners are excited about growing strawberries hydroponically. But before you toss out your trowel, let’s balance the picture by looking at some pros and cons in a bit more detail.
Pros and Cons of Hydroponic Strawberry Growing
Like any gardening method, hydroponics has its pros and cons. It’s important to know both sides so you can prepare for the challenges and appreciate the benefits. Let’s break it down:
Pros of Growing Strawberries Without Soil:
- No Soil-Borne Pests or Diseases: Without soil, you eliminate threats like soil fungi, mold, and many insects that lurk in dirt. Problems such as root rot from overwatering in soil are far less likely in a well-managed hydro system. You also avoid snails, slugs, and other critters that normally hide in soil and munch on roots or fruits. This makes your job much easier since there’s less need for pesticides or pest control measures in general.
- No Weeds and Less Mess: Say goodbye to weeding! Weeds can’t sprout if there’s no soil for their seeds. This frees up your time and keeps your strawberry area tidy. Also, harvesting is cleaner – no muddy berries or soil on your hands. Hydroponics is a neat operation; you might feel more like you’re running a cool science project than doing yard work.
- Year-Round Growing: You’re not at the mercy of the seasons. By using indoor grow lights or a controlled environment like a greenhouse, you can grow strawberries any time of year. Hydroponics makes it easier to maintain the perfect conditions for fruiting, regardless of the weather outside. Winter, spring, summer, fall – every season can be strawberry season if you set it up right.
- Space Efficiency: Hydroponic setups can be designed vertically or in stacked layers, allowing you to grow more plants in less space. This is ideal for urban gardeners or anyone with limited room. For example, a small vertical tower on a balcony can host dozens of strawberry plants in just a few square feet. More plants = potentially more fruit, even in a tiny footprint.
- Water Efficiency: Hydroponic systems recirculate water, using significantly less water than soil gardening. In traditional gardens, a lot of the water you apply never gets used by the plant – it drains away or evaporates. In hydroponics, excess water goes back into the system to be used again. This efficient use of water can reduce your overall water consumption by 70-90%, which is both eco-friendly and cost-effective.
- Faster Growth and High Yields: In a well-run hydroponic system, strawberries can grow faster because they have constant access to nutrients and oxygen. No energy is wasted searching through soil for food or water – it’s delivered right to the roots. This often leads to quicker flower and fruit development. Some growers also report higher yields overall, since plants can invest energy into fruiting rather than extending roots. Additionally, because you can fit more plants in the same area and potentially run multiple growing cycles per year (thanks to that year-round production), your annual harvest can be very impressive.
- Easier Harvesting and Maintenance: Many home hydro systems position plants at waist- or shoulder-height (for example, in vertical tubes or table-top reservoirs). This ergonomic design means less bending or kneeling. Harvesting ripe berries and pruning runners can often be done while standing comfortably. Maintenance tasks like checking nutrient levels or trimming plants are generally cleaner and easier than hauling soil or pulling weeds. Hydroponics can be a great choice for gardeners who want a lower-impact, accessible way to grow – even folks with mobility challenges can find it more manageable than traditional gardening.
Cons of Hydroponic Strawberry Growing:
- Higher Initial Setup Cost: Let’s address the elephant in the room – setting up a hydroponic system does require an upfront investment. You’ll need materials like pumps, containers, piping, and nutrient solutions, whereas planting in the ground might only require some compost and fertilizer. A DIY hydroponic rig can be built on a budget (later we’ll discuss typical costs), but it’s generally pricier than sticking plants in soil at the outset. The initial setup is expensive and can deter some gardeners. The good news is that after the initial purchase, ongoing costs are not too bad (mostly just nutrients, electricity for pumps/lights, and replacing parts occasionally). Many gardeners feel the systems pay for themselves over time with increased efficiency and yields – especially if you’re growing a lot of berries that you’d otherwise buy at the store.
- Steeper Learning Curve: Hydroponics is not “set it and forget it.” There’s a learning curve to mastering nutrient levels, monitoring pH, and keeping the system running smoothly. In soil, plants have a buffer – the soil itself helps regulate nutrients and pH to some extent. In hydroponics, you are Mother Nature. If the nutrient mix is off or the pH drifts out of range, the plants feel it quickly. New hydroponic gardeners need to educate themselves on topics like mixing nutrients, testing water, and preventing algae or bacterial growth. It’s definitely more complex at first than watering a pot of soil. The flip side: many people enjoy this technical, hands-on aspect of hydroponics once they get the hang of it. It can feel very rewarding to dial in the perfect conditions. But be prepared to spend time learning and troubleshooting in the beginning.
- Dependent on Equipment (and Power): Hydroponic systems usually rely on pumps, timers, and possibly lights – which means electricity. If the power goes out or a pump fails, your plants’ lives are at stake. In soil, if you forget to water for a day, the strawberries might wilt but the earth stays moist for a bit. In a hydro system like NFT (nutrient film technique), if the pump stops, roots can dry out rapidly since they’re not in a big mass of soil. There’s less forgiveness for equipment failure. You should have contingency plans (backup power for critical pumps if you’re in an outage-prone area, or at least be ready to manually water in a pinch). This also means hydroponics ties you to an ongoing energy cost for those pumps and lights. It’s small for a basic system (often just a few dollars a month), but it’s there.
- Monitoring and Maintenance: While there are fewer routine chores like weeding, hydroponics adds new types of maintenance. You’ll need to regularly check and adjust the nutrient solution – testing pH levels, adding water, and replenishing nutrients as plants use them up. The water reservoir might need a complete change periodically to prevent imbalances. You’ll also clean components like tanks, tubes, and pumps to prevent algae or mineral buildup. Ignoring maintenance can lead to system clogs, algae overgrowth, or disease outbreaks in the water. In short, hydroponics isn’t “maintenance-free” – it just trades physical labor for a more analytical kind of care.
- Potential for Lower Yield per Plant: While overall yield can be great, it’s worth noting that some sources have observed slightly fewer berries per individual plant in hydroponic systems compared to soil. This can be due to varieties not perfectly adapted to hydroponics or slight differences in growing conditions. However, because you can grow more plants in a given space (and potentially multiple cycles year-round), the total output can still exceed that of soil growing. Regardless, if you measure success by “berries per plant,” hydroponics might not always win. You’re optimizing for “berries per square foot” or “berries per year” with hydroponics. For most home growers, that trade-off is fine, but it’s good to have realistic expectations that each plant might give a bit less, especially in the first try or if not fully optimized.
- Needs Pollination Assistance: This is a minor con, but worth mentioning: if you’re growing indoors or in an enclosed greenhouse, you won’t have bees and other insects to pollinate your strawberry flowers. Strawberries have both male and female parts in each flower (they are self-fertile), but without a breeze or bugs, the pollen still needs to be moved from the anthers to the pistil. Outdoors, wind or bees do this; indoors, you’ll likely need to hand-pollinate or provide a small fan. Gently shaking the plants or dabbing the center of each flower with a soft brush can do the trick. It’s an extra step that soil gardeners in the open air might not worry about. However, many indoor hydro growers quickly get used to a daily or every-few-days routine of a quick pollination walk among their plants when flowers are blooming. It can actually be a pleasant, almost meditative task – like playing bee for a few minutes.
- System Vulnerability: In hydroponics, plants depend entirely on the nutrient solution you provide. If something goes wrong – say, a drastic pH swing, or a pump timer sticks and over-floods or starves the roots – things can go south quickly. Plants can show signs of stress in hours if nutrient flow stops. Also, while soil pests are gone, hydroponic systems can have issues like waterborne pathogens (for example, Pythium, which causes root rot in stagnant water). So you must remain vigilant. Keeping water aerated, at the right temperature, and occasionally sanitizing the system between crops is important to avoid disease outbreaks. In short, constant monitoring is the price for the precision of hydroponics.
Despite the cons, don’t be discouraged. The key is being prepared to address these challenges. Many home gardeners find that the pros far outweigh the cons once their system is up and running. Next, we’ll explore the different hydroponic techniques you can use to grow strawberries at home, so you can choose the one that fits your space and comfort level.
Hydroponic Methods for Growing Strawberries at Home
There are several hydroponic growing techniques suitable for strawberries, each with its own setup and merits. You might picture high-tech greenhouses, but many of these methods can be adapted for DIY home projects. We’ll cover four popular methods: Nutrient Film Technique (NFT), Deep Water Culture (DWC), Vertical Hydroponic Towers, and the Kratky method. (There are others too, like ebb-and-flow or drip irrigation systems, but we’ll focus on these common home-friendly options.) For each method, we’ll explain how it works and give a quick rundown of pros and cons to help you decide if it’s right for you.
Nutrient Film Technique (NFT)
How it works: NFT is a classic hydroponic method often used for strawberries in commercial farms and DIY setups alike. In NFT, plants sit in channels or tubes (often PVC pipes or gutters) and a thin film of nutrient solution flows through the bottom of the channel, passing over the roots. The roots are usually partially exposed to air above and touch the flowing water below, so they get a mix of nutrients and oxygen. The water then drains back into a reservoir, is pumped back to the top of the channel, and re-circulates in a loop. Strawberries do well in NFT because their roots aren’t extremely large, and they appreciate good oxygenation.
Typical NFT setup: Imagine a slight downward-angled PVC pipe with small holes on top where strawberry plants are inserted via net pots. A pump pushes water from a tank up to the high end of the pipe, it flows down by gravity as a shallow stream over the roots, then drains out the low end back into the tank. You can have multiple channels side by side, and even stack channels in tiers to form a vertical NFT system if desired.
Pros of NFT for strawberries:
- Excellent oxygen and nutrient access: The thin film ensures roots get plenty of oxygen (since they’re not fully submerged) while still receiving constant nutrients and moisture. This can lead to vigorous growth.
- Efficient use of water and nutrients: It’s a recirculating system, so very little is wasted. The constant flow also helps prevent salt buildup around roots.
- Scalable and space-efficient: NFT channels can be built in vertical racks or A-frame shapes, letting you grow many plants in a compact area. It’s easy to extend – add another pipe – as long as your pump can handle it.
- Common for strawberries: Many guides and kits are available for NFT, and a lot of strawberry-specific research has been done on NFT systems. So, there’s plenty of community knowledge and support if you choose this method.
Cons of NFT for strawberries:
- Pump dependent: If the flow stops (pump failure or power outage), roots can dry out quickly because they aren’t sitting in water. There’s little water reserve in the channel. Even a short interruption on a hot day could stress plants.
- Needs careful setup: You must maintain the right slope and flow rate. Too much flow can flood roots; too little and they might dry. Channels must be kept clean to prevent clogging (roots or debris can sometimes slow the flow).
- Initial building effort: DIYing an NFT system means cutting holes in pipes, setting up a frame, and installing plumbing. It’s not terribly hard (lots of tutorials exist), but it’s a bit more involved than, say, sticking a plant in a bucket.
- Potential temperature issues: The thin nutrient stream can heat up quickly if your environment is warm, because it’s spread out in the channel. Warm water holds less oxygen and can promote disease. You may need to keep an eye on solution temperature or provide cooling in hot climates (placing the reservoir in shade, etc.).
NFT is a fantastic choice if you want a tried-and-true method and don’t mind a little construction. Many successful home strawberry operations use NFT channels to grow dozens of plants with great results.
Deep Water Culture (DWC)
How it works: Deep Water Culture is one of the simplest hydroponic methods. In DWC, plant roots are suspended in a deep reservoir of nutrient solution. Typically, strawberries would be placed in net pots fitted into the lid of a bucket or tub, so the roots hang down into the water below. An air pump with an airstone (like those used in aquariums) bubbles in the tank to oxygenate the water and prevent the roots from suffocating. The plants essentially live on a “floating” garden – constant access to water and nutrients, with air bubbles providing oxygen.
Typical DWC setup: Picture a 5-gallon bucket with a lid. On the lid, you cut a hole to insert a 3-inch net pot. You fill the bucket with water mixed with nutrients, up to the base of that net pot. A small aquarium air pump pumps air through a tube to an airstone sitting at the bottom of the bucket, making bubbles. You place a strawberry plant (usually started in a small cube of rockwool or similar) into the net pot with some clay pebble media to hold it. The roots will grow down into the oxygen-rich water. For multiple plants, people use larger plastic totes with multiple net pot holes in the lid (often called a “bubbleponics” tub when several plants share one air-bubbled container).
Pros of DWC for strawberries:
- Simplicity and low cost: DWC has very few components – basically a container, an air pump, and the nutrient solution. It’s straightforward to set up and great for beginners to learn hydroponics. Many DWC systems can be built for a low cost (using repurposed buckets or storage bins).
- No risk of drying out from pump failure: Since the roots are always submerged, a short power outage or air pump failure isn’t immediately fatal. The plants have a reserve of water. (However, extended loss of aeration can still drown roots after a while, so the air pump is important long-term.)
- Less frequent maintenance: Because you have a larger volume of water, the pH and nutrient levels change more slowly than in a small NFT channel. You might top up the water or adjust nutrients every few days, rather than constantly – it’s a bit more “buffered”.
- DIY scalable: You can start with one bucket and easily expand to a few buckets. Each bucket could hold one or two strawberry plants. Some people connect multiple DWC buckets to one central reservoir with tubing (this is called a RDWC – Recirculating Deep Water Culture) to make changing nutrients easier across many plants.
Cons of DWC for strawberries:
- Limited root oxygen if not aerated well: Strawberries, like most plants, don’t like “wet feet” with no oxygen. The air pump is absolutely critical; if it stops or if you under-aerate, roots can suffocate in still water. You need a good diffuser (airstone) and continuous pumping.
- Water temperature and disease: Large reservoirs can heat up, and warm, stagnant water can breed pathogens like pythium (root rot). It’s important to keep DWC water relatively cool (60–75 °F is a safe range). In hot climates or under powerful grow lights, this can be a challenge – you may need strategies like insulating the bucket or using frozen water bottles to cool the water. Also, you should completely change out the nutrient solution every couple of weeks to prevent any nasty microbial buildup.
- Space usage: A bucket for each plant (or few plants) can take up more floor space than an equivalent NFT or vertical system. If you want dozens of strawberry plants, DWC might not be the most space-efficient unless you have a big area for many buckets/tubs.
- Plant support: Strawberries in DWC might need some support to hold them upright, since the net pots in a flat lid don’t provide much anchoring. Often a trellis or stakes might be needed if plants get large or start running. By contrast, in NFT or towers the plants are snug in holes which give some support.
In summary, DWC is great for a small number of plants and for ease of use. If you’re just starting out or want a cheap experimental setup for a few strawberry plants, you can’t go wrong with a classic “bubble bucket” approach.
Vertical Hydroponic Towers
How it works: Vertical hydroponic towers are eye-catching systems where strawberries grow in vertically stacked layers or within tall upright pipes. There are a few design variations, but a common one is a tower with multiple plant sites – for example, a 6-inch wide PVC pipe standing vertically with holes cut for plants at different heights. Nutrient solution is pumped to the top of the tower and then trickles down through an internal column (sometimes through a medium like perlite or coconut coir, or sometimes just as a film on the inner walls), wetting all the roots on its way down. The surplus collects at the bottom and recirculates. Another design uses stackable planters (tiered like a wedding cake) that you flood with nutrient solution and let drain, or even aeroponic misters inside a tower. The core idea is vertical stacking of many plants fed by a central circulating system.
Typical tower setup: One popular DIY approach is using a large PVC fence post or pipe. Holes are cut in staggered positions around it for net cups holding strawberry plants. Inside, the pipe might be filled with an inert medium (to distribute water) or left mostly hollow. A small fountain pump sends water up through tubing to a drip manifold at the top; water drips or sprays down inside, keeping roots moist, and then drains out the bottom back into a bucket reservoir. There are also ready-made tower products (often pricey) that use similar principles. A homemade tower might hold 20–40 strawberry plants in just a 1 square foot area by going vertical.
Pros of vertical towers:
- Maximizes vertical space: This is arguably the most space-efficient method. You can grow a lot of strawberries in a footprint as small as a large flower pot. Great for patios, balconies, or greenhouses where floor space is limited but height can be used.
- High yield per area: Because of stacking, you can potentially produce a large harvest from a small tower. One DIYer reported a tower costing about $75–$150 in materials could yield a “bumper crop” if placed in good sun. Commercial vertical farms also use tower concepts to massively increase planting density.
- Ergonomic and attractive: Towers put plants at all heights – you can pick lower berries and upper berries easily by walking around it. Many people also find towers visually appealing; a column of leafy green and red strawberries can be a garden centerpiece. It’s both functional and decorative.
- Scalable with modules: You can run multiple towers off one reservoir and pump if designed well, making it modular. Start with one tower, and if you love it, add another!
Cons of vertical towers:
- Uneven light (indoors): If you’re using a tower indoors under grow lights, the plants on one side might get more light unless you have multiple lights or a way to rotate the tower. Outdoors in natural sun this is less of an issue (the sun moves, hitting all sides).
- Water distribution challenges: Ensuring the nutrient solution reaches all plants evenly can be tricky. The top plants might get drenched while those at the bottom get a lighter trickle (or vice versa). You have to fine-tune the pump flow or use a drip ring that spreads water to all sides. Clogging can also happen – e.g., a piece of debris blocking a drip emitter at the top could starve the whole tower below it.
- Construction complexity: Building a sturdy, upright tower with many holes requires more engineering than horizontal NFT or a simple bucket. You need to prevent it from tipping, leaking, or degrading in sunlight. That said, many DIY tutorials exist. A common tip is to use a 4-inch or 6-inch PVC fence post (the kind used for decking) which is UV-resistant and has a square shape that’s easier to cut and cap. Tools like hole saws are needed to cut neat openings for the plants.
- Maintenance and access: If something goes wrong in the middle of the tower (say a plant dies and roots clog inside, or algae build up), it can be harder to clean or fix compared to systems where everything’s open and spread out. End-of-season cleanup might involve taking apart the tower, flushing it, etc. It’s doable but a bit of work.
- Lighting and pump needs: As with NFT, towers rely on a pump. If the pump fails, all plants in the tower are in jeopardy since they depend on that trickle of water. Also, if indoors, as mentioned, you might need multiple grow lights or one very strong light to cover the height of the tower. Outdoor towers rely on sun, which is great – but you have to ensure the tower doesn’t shade itself too much. Many growers will occasionally rotate outdoor towers to even out sunlight exposure on all sides.
Vertical towers are a creative and fun way to grow hydroponic strawberries, especially if you’re aiming for a lot of plants in a small area. They might require a bit more DIY skill to assemble, but the result is like a living strawberry fountain that can be very rewarding.
Kratky Method (Passive Hydroponics)
How it works: The Kratky method is the simplest hydroponic method possible – no pumps, no electricity, truly passive. It’s sometimes called “set-and-forget hydroponics” (though you shouldn’t totally forget it). In Kratky, plants grow in a stationary nutrient solution without circulation. The key is that as the plant consumes water, the solution level drops, creating an air gap that allows roots to get oxygen. Essentially, you start with a container of nutrient solution, and the plant’s roots grow down into it. You don’t refill the solution to the top; you let it gradually lower, so part of the roots are always in air. This method is famously used for lettuce and herbs, but can be applied to strawberries with some caveats.
Typical Kratky setup: Imagine a mason jar or a plastic tote filled with nutrient solution. A strawberry plant (likely a small one or a rooted runner) is placed in a net pot in the lid, such that only the very bottom of the net pot touches the water. Initially, the young plant’s roots can reach the water to drink, and there’s plenty of oxygen in the air space above. As weeks go by, the strawberry drinks water and the level in the jar falls, exposing more root to the air. Meanwhile, the roots keep growing longer, following the receding water down. In an ideal Kratky scenario, the plant finds a balance: lower roots stay in the liquid and upper roots get air, so it remains healthy without any bubbling or pumping. You can also use a large storage bin to grow multiple strawberries – just change the dimensions, but the concept is the same.
Pros of the Kratky method:
- Ultra simple and low cost: No pumps, no moving parts – just a container, lid, net pot, and nutrient solution. It’s the cheapest introduction to hydroponics and perfect for experimenters or those not ready to invest in gear. If you have a clean plastic bucket or even a series of large jars, you can do Kratky.
- No electricity needed: This can be placed anywhere (balcony, greenhouse corner, etc.) without needing a power source. It’s silent and doesn’t contribute to electricity bills. Also, nothing to fail in terms of mechanical parts.
- Low maintenance (for a while): In a correctly sized Kratky container, you might not need to add water for weeks. The idea is that the initial volume carries the plant to near maturity. For a short-cycle crop like lettuce, you literally set it and harvest in 4-6 weeks without touching it. Strawberries are longer-lived, so you’ll likely have to intervene (see cons), but still, it can go many days with no attention.
- Good learning tool: Kratky can teach the basics of hydroponic nutrient balancing and how plant roots behave, without the complexity of pumps and so on. It’s a great science project with kids – for instance, growing a strawberry plant in a clear jar to watch the roots and water level change.
Cons of the Kratky method:
- Not ideal for long-term or large plants: Strawberries are perennials that keep producing, and they have a higher nutrient and oxygen demand than, say, a quick lettuce. The Kratky method can struggle to support a fruiting strawberry through a long period without some intervention. Often, you’ll need to top off the water/nutrient solution periodically (which breaks the “no work” rule, though it’s still simple). If you fill too high when refilling, you might accidentally submerge too much of the root (causing oxygen starvation).
- Risk of stagnation: Without a pump or aeration, the water can become stagnant over time. This is a breeding ground for mosquitoes (if open) or algae if light gets in. You must keep the container covered (block sunlight to the solution) to avoid algae, and maybe use mosquito dunk if outdoors. Also, without circulation, the nutrient levels could stratify or become uneven as the plant uses some nutrients faster than others.
- Limited oxygen for heavy feeders: As the plant’s roots fill the container, they might take up so much oxygen that the passive air gap isn’t enough, especially in warm conditions (warm water holds less dissolved oxygen). Strawberries heavily laden with fruit might experience stress if oxygen or nutrients dip too low. Some growers solve this by converting a Kratky into a semi-DWC (adding an airstone if needed), but then it’s no longer passive.
- Yield might be lower: Generally, Kratky-grown plants might not yield as much as those in active systems because conditions are not as optimized. For a strawberry, you might get some berries, but the plant could hit a wall if the solution gets depleted or pH drifts and you don’t catch it.
In practice, Kratky for strawberries is feasible but best for short-term growing or small-scale tries. For example, you could root some strawberry runners in Kratky jars as a fun display on a sunny windowsill and get a handful of berries. Or use Kratky to start strawberry plants before transferring them to a larger active hydro system. If you want a continuous, heavy yield, however, you’ll likely need to transition to a recirculating method. Still, for the curious or those who want a zero-energy system, Kratky is worth a shot and can absolutely grow strawberries – just manage expectations and keep an eye on the water level and plant health.
Choosing a method: There’s no one “right” method for everyone. If you’re a beginner looking for an easy intro, DWC or Kratky are great starts. If you want to maximize output and have the DIY spirit, NFT or vertical towers can give amazing results. Some growers even mix methods – perhaps NFT channels for the main production and a DWC bucket on the side for extra plants or experimentation. The next sections will cover what you need to get started and how to maintain whichever system you choose.
Tools and Materials You’ll Need
One great thing about DIY hydroponics is that you can often use repurposed or easy-to-find materials. You don’t need fancy branded equipment; basic hardware store and aquarium supplies will do the job. Here’s a rundown of the tools and materials needed to grow strawberries hydroponically at home:
- Growing Containers or Structure: Depending on the method, this could be PVC pipes or gutters (for NFT), buckets or tubs (for DWC and Kratky), or large PVC/vinyl pipes and supports (for vertical towers). Essentially, you need something to hold the nutrient solution and support the plants. Common choices:
- NFT Channels: 2–4 inch PVC pipes or vinyl rain gutters with end caps.
- DWC: 5-gallon plastic buckets with lids, or rectangular storage totes.
- Vertical Tower: A length of 4–6 inch PVC or a stackable planter system.
- Kratky: Wide-mouth jars, buckets, or tote bins (with covers to support net pots).
- Net Pots or Plant Holders: These are the little baskets that hold your strawberry plants and allow roots to dangle through. They come in various diameters (2”, 3”, 4” are common). Net pots are typically made of slotted plastic so water can flow in. If you’re improvising, you could even use plastic cups with holes cut in them. The net pots sit in holes in your container (holes can be cut with a hole saw or spade bit attached to a drill). Tip: Use a hole saw the size that matches your net pots for a snug fit (e.g., a 3” hole saw for 3” net pots).
- Growing Medium: Even though we say “no soil,” the plant needs something to hold it in place in that net pot. Inert media like clay pebbles (hydroton), coconut coir, perlite, or rockwool cubes are commonly used. For strawberries, many like to start them in rockwool or coco coir plugs (especially if starting from seed or bare-root runners) and then transfer that plug into clay pebbles in a net pot. The medium will keep the crown of the strawberry plant supported and upright. It also retains moisture between waterings in systems like drip or Kratky.
- Reservoir for Nutrient Solution: You’ll need a container to hold your nutrient solution (the water + fertilizer mix). In DWC and Kratky, the reservoir is the same as the growing container (bucket, etc.). In NFT and vertical systems, you usually have a separate reservoir (like a tank or bin at the base) that pumps water up to the channels/tower. The size of the reservoir depends on how many plants and how large; more volume helps keep things stable. Common choices: A 10–20 gallon tote bin (often the opaque plastic storage bins sold in stores) or a plastic trash can can serve as a reservoir for medium setups. Make sure it’s made of food-safe material if possible and opaque (light-proof) to discourage algae.
- Water Pump: For any active system (NFT, vertical, or an ebb-and-flow or drip system), you’ll need a submersible water pump. These are typically small fountain or aquarium pumps. The pump sits in the reservoir and pushes water through tubing up to your plant channels. When choosing a pump, consider the head height (the vertical distance it needs to pump upward) and get one that can comfortably lift water that high. They’re rated in gallons per hour (GPH) – something in the 120-400 GPH range is usually plenty for a home system, depending on scale. Many pumps come with adjustable flow or you can add a valve to fine-tune the flow rate.
- Air Pump and Air Stones: If you go with DWC or if you want to supplement oxygen in any reservoir, a simple aquarium air pump with tubing and an air stone diffuser is needed. Strawberries prefer well-oxygenated water, so bubbling air in the reservoir is beneficial even for NFT or drip systems (though not strictly required there if water is cascading and mixing with air). Air pumps are cheap and low-power. Get an air stone for each reservoir – these are the little porous stones that create fine bubbles.
- Tubing and Fittings: You’ll use plastic tubing (often vinyl tubing) to carry water from the pump to your grow channels or tower. Common sizes are 1/2” or 1/4” inner diameter tubing. Also, you might need fittings like elbows, tees, valves, and bulkhead fittings (for connecting pipes to reservoirs without leaks). For NFT, you need a way for water to drain from the channel back to the reservoir – often a hole with a barbed fitting or a piece of PVC that lets water flow out and drop back. Gather connectors appropriate for your design. It’s like playing with Tinkertoys – you’ll map out how water goes up and comes back down and ensure you have the right connectors.
- Timer (if needed): Some hydro systems run pumps continuously (NFT usually does, as does DWC’s air pump). But drip systems or aeroponic misters might be on a timer to cycle on/off. If you decide to do an ebb-and-flow (flood and drain) or drip, get a timer that can handle short on/off cycles. Basic mechanical outlet timers or digital timers work; some can be set in 15-minute increments which is usually fine.
- Hydroponic Nutrients: This is your “plant food.” You’ll need a hydroponic nutrient solution concentrate or powder, which you mix with water. Unlike plain fertilizers for soil, hydroponic nutrients contain a balance of macro and micronutrients and are designed to be completely water-soluble. For strawberries, look for a general fruiting crop nutrient or a specific hydroponic strawberry formula if available. They often come in two or three parts (to avoid chemical reactions in storage). Follow the instructions for mixing – typically you’ll measure out a certain number of teaspoons or milliliters per gallon of water. It’s wise to start with a slightly diluted concentration for young strawberry plants and then up the strength as they grow. Remember, no soil = no nutrients except what you provide, so don’t skimp on a quality nutrient solution. (We won’t list brand names here, but any reputable hydroponic nutrient mix for fruits/veggies will work.)
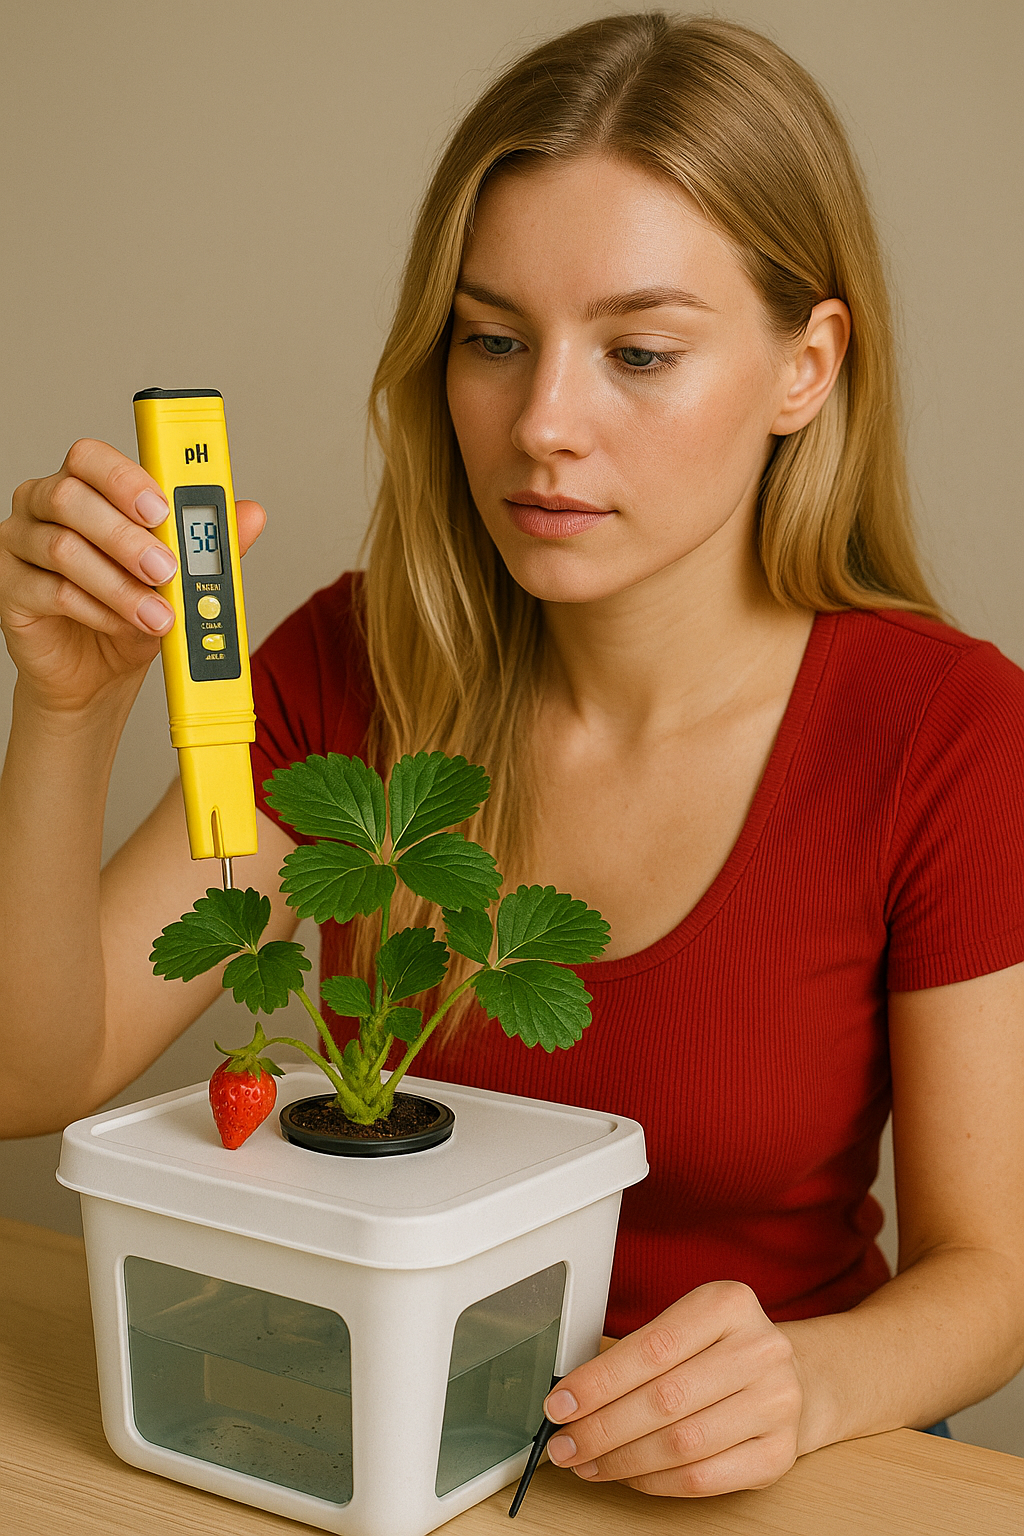
- pH Testing Kit and Adjusters: Maintaining pH is critical in hydroponics. Strawberries prefer a slightly acidic pH in the range of roughly 5.5 to 6.5. If the pH drifts too high or too low, the plants can’t absorb nutrients properly (for example, above pH 7, iron becomes unavailable and leaves will yellow). Get a pH test kit – this could be pH test strips, a liquid test solution, or a digital pH meter. Digital meters are very handy and not too expensive these days. Along with testing, you’ll need pH adjusters: commonly called pH Up (a base solution) and pH Down (an acid solution). These let you tweak the pH of your nutrient solution to keep it in the sweet spot for strawberries. A little goes a long way – add adjuster in small drops, test, and adjust gradually.
- EC or TDS Meter (optional but useful): EC stands for Electrical Conductivity, and TDS for Total Dissolved Solids – both relate to measuring the strength of your nutrient solution. An EC meter lets you know how concentrated your nutrients are (strawberries generally like a mild solution, around 1.0–1.2 EC, which is about 640–768 ppm in TDS). While you can manage without one by following mixing instructions, having a meter is great to double-check that you didn’t over- or under-feed when mixing, and to see if the plants are absorbing nutrients (EC will drop as plants feed, and rise if water evaporates). For a serious DIY grower, this tool becomes very handy.
- Thermometer and Hygrometer: You should monitor the temperature of both the air and the nutrient solution, and the humidity if growing indoors. A simple aquarium thermometer can stick to the side of your reservoir to ensure water isn’t too hot (aim for water temps below ~75°F to avoid root issues). An ambient thermometer/hygrometer will tell you if your strawberry environment is in the ideal range (approximately 65–75°F in the day for air temp, and humidity above 60% for best growth). If temps are outside the ideal range, you might need additional equipment (heater in winter, fans or AC in summer).
- Grow Lights (if growing indoors or in winter): Strawberries need lots of light – ideally 14 to 16 hours of light per day for strong growth and fruiting. If you don’t have a greenhouse or a sunny window that provides that, you’ll need artificial lights. LED grow lights are popular for being energy-efficient and low heat. Fluorescent tubes or compact fluorescents can also work for smaller setups. Aim for full-spectrum or a mix of red/blue spectrum suitable for fruiting plants. The wattage and number of lights should correspond to your growing area – for example, a single 100W LED panel might cover a 2×2 foot area effectively. Keep lights at appropriate distance (LEDs often 12–24 inches above plants, check manufacturer recommendations). If doing a vertical tower indoors, consider that you might need a couple of lights at different heights or one very strong light to cover the whole tower evenly. Lighting can be one of the more costly parts of indoor hydroponics, but if you want winter berries, it’s necessary.
- Basic Tools: For the DIY construction phase, have a drill (with hole saw bits for net pot holes), a utility knife, scissors, measuring tape, and perhaps a saw (to cut PVC or wood for frames). Also, silicone sealant or plumbing tape can be useful to seal any small leaks around fittings. Zip ties are great for securing tubes or holding things in place, and you might need a clamp or two for attaching tubing to fittings (though many use barbed fittings that don’t require clamps at low pressure).
- Plants (Strawberry Starts): Of course, you need the strawberry plants themselves! You can start from seeds, runners, or transplants:
- Seeds: Strawberries from seed take longer to establish and fruit (often not fruiting until the second year), but there are some everbearing varieties suitable for seed starting. This is the slow route.
- Bare-root runners: This is a common way to start hydroponic strawberries. You can buy dormant bare-root strawberry plants (often sold in bundles in early spring or via mail order). Varieties like Albion, Seascape, Evie-2, and Monterey (all day-neutral types) are popular for hydroponics. You’ll want to gently wash off any soil from the roots and then insert them into your system’s net pots/media.
- Potted nursery plants: You can also take a strawberry plant growing in soil, wash the soil off the roots (carefully, to not damage roots too much) and transfer it to hydroponics. Many have done this successfully. Just be aware that plants coming from soil might bring in pests or diseases, so inspect them and even consider a quick dip in mild hydrogen peroxide solution to clean the roots.
- Whichever you choose, day-neutral (everbearing) varieties are recommended for hydroponics, because they fruit continuously and don’t require specific day lengths to initiate flowering. That means you get a steady stream of berries in your controlled environment. Also, day-neutrals typically produce fewer runners, which is helpful – runners (baby plant offshoots) can be a nuisance in hydro systems, drawing energy away from fruit and cluttering your setup. You can always snip off runners as they appear to keep plants focused on fruiting.
- Trellis or Plant Support: As your strawberries grow, especially in a hydroponic system with vigorous growth, the leaves and fruits can sometimes flop. Having some support structure can help. For NFT channels, some people run strings or wires above the plants to clip the berry trusses to. In vertical towers, the tower itself often supports them somewhat. In any case, some soft plant ties, clips, or a light trellis might be useful to keep fruit off the ground (or off the floor, in an indoor scenario!) and to keep the plants oriented for maximum light exposure.
That covers the basic arsenal of materials. It looks like a long list, but many items you might already have (buckets, drill, etc.), and others are one-time purchases that enable many future harvests. Now, let’s talk about how much this might all cost to put together.
Typical Setup Costs for a Small Home Hydroponic System
You’re probably wondering, “What’s the price tag to grow strawberries without soil at home?” The answer can vary a lot based on how fancy or DIY you go. The good news is that a simple system can be built relatively inexpensively, especially if you’re resourceful. Let’s break down cost considerations for a small home hydroponic strawberry setup:
- DIY vs. Purchased Kit: Pre-made hydroponic kits for strawberries (like vertical tower kits or NFT systems sold online) can range from a couple of hundred to even thousands of dollars – often coming with all the bells and whistles, and a price to match. Building it yourself with generic parts is usually cheaper. In fact, one author demonstrated an entire DIY hydroponics system (for mixed plants including strawberries) for under $150 USD including everything (containers, pumps, lights, nutrients, etc.). If you already have some tools or materials, your cost can be even lower.
- Basic DWC Bucket System: For a single bucket DWC with 1-2 strawberry plants:
- 5-gallon bucket with lid: $5–$10 (often you can get food-safe buckets from bakery or deli for free or cheap).
- Air pump + air stone: $15–$25 (small aquarium pump).
- Net pots and media: $5.
- Nutrient solution (small bottle that will last a while): $15.
- Misc (pH test kit, etc.): $20.
- Estimated subtotal: around $60–$80 initially.
- This could be lower if you find items secondhand or repurpose containers. And expanding to a few buckets might only add the cost of each bucket and more net pots.
- NFT or Gutter System (5–10 plants): Suppose you build a simple NFT setup with two parallel 4-ft gutters or pipes, each with 5 plant sites (10 total plants), draining into a reservoir:
- PVC pipe or vinyl gutter + end caps: $20–$40.
- Small fountain pump: $20.
- Tubing and fittings: $15.
- Reservoir tub: $10.
- Net pots, media for 10 plants: $15.
- Air pump & stone (optional but recommended for reservoir): $20.
- Nutrients, pH kit, etc.: $30.
- Estimated subtotal: roughly $120–$150.
- This is an approximate DIY cost. A similar commercially sold NFT kit might cost double this or more, but you can save by doing it yourself.
- Vertical Tower (20–30 plants): A homemade tower will require a bit more material but still reasonable:
- Large PVC or fence post, 5–6 feet length: $20.
- Additional smaller PVC for internal structure or drip distribution: $10.
- Pump (a bit stronger to lift higher): $30.
- Reservoir bucket: $10.
- Net cups (lots of them, say 20): $10.
- Media (clay pebbles to fill net cups and maybe some perlite inside tower): $20.
- Misc. fittings and a support stand (maybe lumber or brackets to hold the tower): $15.
- Air pump (again optional): $20.
- Nutrients & pH kit: $30 (shared across systems).
- Estimated subtotal: maybe $150–$200.
- Garden Culture Magazine noted a DIY strawberry tower typically cost between $75 and $150 in materials, not counting lights. Our figure includes some extras; your mileage may vary. If you need to invest in strong grow lights for an indoor tower, factor in perhaps $50–$100+ per decent LED light panel. As they point out, outdoor towers are more economical since you use free sunlight.
- Miscellaneous Costs:
- Lights: If growing indoors, lights can be the single priciest component. A good quality full-spectrum LED for a small area might be $80–$150. If you need multiple lights for a larger setup, it adds up. On the flip side, if you have a sunny greenhouse or patio, you can save that cost entirely.
- Electricity: Hydroponic systems don’t consume a ton of power. A small water pump might be 15–40 watts, an air pump ~5 watts, which running 24/7 is just a few kilowatt-hours a month (just a couple dollars). Lights are the major energy draw – a 100W light running 16 hours a day is 1.6 kWh/day. Check your local rates, but maybe that’s around $0.20/day or $6 a month for one light. So not too bad for a hobby scale.
- Water and nutrients: Negligible water cost (especially since it’s recirculated). Nutrients might cost a few cents per gallon of solution. You might spend $10–$20 on nutrients over several months for a small system, depending on how much you mix.
- Seeds/Plants: Strawberry bare-root plants might cost around $1 each if bought in bundles, or a few dollars each if bought potted. You might invest $20–$30 in plant stock to get started, unless you have runners from existing plants.
In summary, you can get a basic hydroponic strawberry system going for under $100 if you keep it small and DIY, and around $200–$300 can set up a more extensive or vertical system with dozens of plants (not counting any fancy environmental controls). Compare this to the recurring cost of buying fresh strawberries at the store, especially out-of-season – over time, your homegrown setup can actually save money (and certainly gives you better flavor and fun). One thing is certain: the enjoyment and learning you get is well worth the initial investment. Many hydroponic DIYers find that building the system is half the fun!
Next, we’ll talk about how to maintain your system and troubleshoot issues, because even the best setup will need a bit of ongoing care.
Maintenance and Troubleshooting Tips
So you’ve got your hydroponic strawberry system up and running – great! Now, how do you keep it running smoothly and ensure your berry babies stay healthy? Maintenance really comes down to a few key routines and being observant. Here are some practical tips for maintaining your hydroponic strawberries and common troubleshooting advice:
- Check the pH and EC Regularly: Get into the habit of testing your nutrient solution’s pH maybe 2–3 times a week (or more often if you notice changes). Strawberries like pH ~5.5–6.5, with around 5.8–6.0 often cited as ideal. If you see pH creeping above 6.5, add a bit of pH Down to nudge it back. If it drops too low (below ~5), add pH Up. Large swings usually mean either the plants are uptaking unevenly or something in your system (like algae or bacteria) is altering the pH – so adjust and keep an eye out. Similarly, if you have an EC or TDS meter, check the nutrient strength weekly. A good range for strawberries is around EC 1.0 (which is roughly 640 ppm on a 500 scale). If your EC climbs significantly, it means water is evaporating or plants are drinking more water than nutrients – top off with fresh water to dilute back to target EC. If EC drops a lot, the plants have eaten the buffet – time to add nutrients or do a reservoir refresh.
- Top Off Water Between Changes: In a recirculating system, the water level will go down over time (plants drink, plus some evaporation). Don’t let your pump run dry or your DWC roots become exposed too much. Add plain water (with correct pH) to bring it back to the desired level every few days. This also helps keep nutrient concentrations stable (since plants usually drink more water proportionally). In a non-circulating (Kratky) setup, you might carefully add water if it gets very low, but usually try not to disturb it too often. Tip: If you need to top off often due to heat causing lots of evaporation, consider a bigger reservoir or covering it better to reduce evaporation.
- Regular Nutrient Solution Changes: It’s generally recommended to change out the nutrient solution completely every 1–2 weeks for active systems, and perhaps every 2–4 weeks for a Kratky or static system (or whenever it’s nearly used up). This prevents any imbalances (some nutrients being depleted, others building up). It also helps avoid the solution becoming a “soup” of plant waste and potential pathogens over time. When changing, dispose of the old solution responsibly (you can water outdoor plants with it – they’ll benefit from the dilute feed). Rinse out the reservoir if there’s sediment or slime. Mix a fresh batch and you’re good to go. Yes, it’s a bit of work, but your strawberries will thank you with better growth.
- Keep Things Clean and Light-Tight: Algae is the green menace in hydroponics – it grows wherever water + light + nutrients meet. It’s not directly harmful to your strawberries, but it steals nutrients and oxygen, and can clog systems. Prevent algae by blocking light from the nutrient solution: use opaque containers, cover any exposed water surfaces (even a piece of floating foam around plant stems can block light in net pot openings), and fix any light leaks. If you see algae buildup (green slime on surfaces or the water smells pondy), consider a thorough cleaning. Use a dilute bleach solution or hydrogen peroxide to wash the reservoir and channels (when plants aren’t in them, ideally). Just be sure to rinse well after and re-balance your system. Also, rinse your equipment (like pumps and tubing) between growing seasons. If a plant dies or you harvest it, clean out its net pot and roots promptly – decaying organic matter can fuel disease in the water.
- Watch Your Root Health: In hydroponics, roots are king. Healthy strawberry roots should be mostly white to cream-colored and smell clean or slightly “earthy”. If you notice roots turning brown, slimy, or foul-smelling, you might have a root rot issue (often from over-warm water or poor oxygenation). In DWC, this can happen if the water gets too warm or the air pump isn’t sufficient. In NFT, it can happen if the flow is too slow or there’s a pathogen introduced. To combat this:
- Ensure water temps are in a good range (ideally 18–24°C or 65–75°F).
- Add or increase oxygenation (bigger air pump, or add an air stone even to NFT reservoirs).
- You can use beneficial microbes (some products introduce good bacteria that outcompete the bad ones) – optional but some growers swear by them.
- If rot is advanced, you might need to trim off dead roots and possibly apply a mild hydrogen peroxide solution to the remaining roots to disinfect. This is a bit of a rescue operation – better to prevent it upfront with cool, oxygenated water.
- Pest Patrol: While soil pests are largely gone, hydroponic strawberries can still attract pests, especially on foliage. Common ones include aphids, spider mites, whiteflies, or thrips – basically any pest that affects houseplants or greenhouse plants could find its way to your berries. They often hitch a ride on new plants or come in through open windows. Check the undersides of leaves regularly for any tiny insects or speckling damage.
- If you find aphids or such, you can wash them off gently or use insecticidal soap (safe, mild soap sprays) to treat the leaves. Because you’re not dealing with soil, a strong water spray can sometimes dislodge pests effectively.
- For mites, which are tiny, look for fine webbing or speckled leaves. They thrive in dry conditions, so upping humidity and a soap or oil spray (like neem oil, used carefully) can help.
- Prevention: Quarantine any new plants before adding to your system, just to observe for pests. And keep your grow area clean – dead leaves or debris can attract fungus gnats, etc. If growing indoors, a small yellow sticky trap can catch flying pests early.
- Overall, you’ll likely have far fewer pest issues than in a dirt garden (no slugs munching your berries!), but don’t ignore any odd leaf damage.
- Pollination Duty: As mentioned earlier, if you’re not relying on outdoor insects, you are the pollinator. The maintenance routine during flowering should include gently shaking or tapping flower clusters every day or two, or using a soft paintbrush or even an electric toothbrush to vibrate the flowers (touch the flower’s center with the brush to help move pollen). Many hydroponic growers do this in the morning hours for best results. It’s a quick task – and it can significantly increase your fruit set and yield. If you skip it, you might get misshapen berries or fewer berries, as incomplete pollination yields small or deformed fruits.
- Train and Prune Your Plants: Strawberries will produce runners (long vine-like shoots with baby plantlets) especially when they’re healthy and during summer months. In a hydro system, runners can be a nuisance because they steal energy from fruit production and can tangle or take root where you don’t want them. Unless you want to propagate new strawberry plants, it’s best to prune off runners soon after they appear. Use clean scissors to snip them off at the base. This directs the mother plant’s energy back to fruiting. Also remove any dead or dying leaves you see – this keeps disease at bay and the plant’s energy focused.
- If plants get very bushy and cover each other, you might trim a few leaves to improve light penetration and airflow. Good airflow around plants helps prevent fungal issues like powdery mildew or gray mold (Botrytis) on the berries. Keep an oscillating fan running gently if you’re indoors – it simulates wind, strengthens the plants, and prevents stagnant moist air.
- Harvest Promptly and Properly: Ripe strawberries should be picked (twist or snip off the stem above the berry) as soon as they’re fully colored and slightly soft. In hydroponics, sometimes berries can ripen a bit faster than you expect, and they’re so clean and enticing. Check daily for ripe ones – this prevents overripe fruit from rotting on the plant which could attract pests or disease. Also, any berry that shows signs of mold or rot (it can happen if one is shaded and stays damp) should be removed immediately and discarded to stop spores from spreading to others.
- Keep an Eye on Growth and Adjust Nutrients: Strawberries have different needs at different stages. When they are mostly leafy and growing (vegetative stage), they consume a fair amount of nitrogen. When they are flowering and fruiting, they need more potassium and a steady supply of calcium (to prevent issues like tip burn or small fruit). Most hydroponic nutrients for fruit cover this balance. Just follow the dosage, but if you see pale leaves (yellowing uniformly – could mean nitrogen deficiency), you might need a tad more nutrients or a tweak in formula. If you see leaf edges burning or very dark green, you might be overfeeding. It’s a bit of a dance – small adjustments rather than big swings are key. Generally, if you use a quality nutrient and change solution regularly, deficiencies are rare. But keep an eye out for specific signs:
- Yellow young leaves with green veins: could indicate iron deficiency, often from pH being too high (iron locks out above pH ~6.5). Check pH.
- Leaf tip burn or weird leaf distortions: could be nutrient imbalance or EC too high – check EC, consider diluting.
- Very soft, lush growth but no flowers: possibly too much nitrogen or not enough light. Ensure you have the right nutrient formula and plenty of light hours.
- System Checks: Don’t forget to also maintain the hardware. Ensure pump intakes are not clogged with debris (little bits of perlite or roots can sometimes get sucked in – use a pre-filter sponge if possible). Check that drip emitters (if used) are not blocked. Make sure timers are correctly set and functioning (power outages can mess up settings – a timer with a backup battery is nice). Also, tighten any connections if you see drips or leaks forming. A quick look over the system each day or two can catch small issues before they become big (like a tube slipping out and draining your reservoir onto the floor – yikes!). Many people put their reservoir in a secondary basin or tray as a safety measure in case of overflow.
If issues do arise despite your best efforts, don’t be discouraged. Hydroponic problems often have a faster recovery than soil ones once you correct the cause, because the plants respond to changes in the solution within days. For example, if you had a pH issue causing nutrient lockout, within 1–2 days of correcting the pH you’ll often see the plants greening up and new healthy growth. When in doubt, a common troubleshooting step is to flush the system and refill with fresh pH-balanced nutrient solution. This resets the root environment.
Remember, each system is a learning experience. Keep notes if you can (like a garden journal for your hydro system: recording pH, EC, how the plants look, yields, etc.). Over time, you’ll become the master of your mini soilless strawberry farm.
Tips for Growing Strawberries Successfully in Hydroponics
Growing hydroponic strawberries combines gardening know-how with a dash of science. Here are some top growing tips to ensure sweet success, drawing on both best practices and a bit of hard-earned wisdom from DIY growers:
- Provide Plenty of Light: Strawberries are sun-loving plants. To get lots of big, sweet berries, they need abundant light. Aim for 14–16 hours of light per day if using artificial lights, or full sun if outdoors (at least 6+ hours of direct sun, though more is usually better). When using grow lights, position them at the correct height – too close and they can scorch leaves, too far and plants may get leggy. If you notice plants stretching (long internodes, pale color), they probably need more light. On the flip side, if leaves look bleached or have brown spots under intense light, give a little more distance or reduce hours slightly. A timer for lights is essential to maintain consistent day length. Strawberries don’t require dark period for flowering if they are day-neutral, but it’s still good to give at least 8 hours of dark for overall plant health (so 16 on, 8 off schedule).
- Maintain Ideal Temperature and Humidity: Strawberries grow best in moderate temperatures. Try to keep your growing area around 65–75 °F (18–24 °C) during the day, and a bit cooler at night (they can tolerate down to 55 °F at night easily, even benefit from it). Very high temperatures (above 85 °F) can stress the plants, cause flowers to drop, or lead to softer, less sweet fruit. If you’re in a hot climate, consider shading the system during peak heat or running a fan/vent to cool things down. Indoors, an AC or evaporative cooler might be needed if room temps climb too high. Humidity is also important; aim for relative humidity above 60%. Dry air (below 40%) can lead to issues like spider mites and cause the nutrient solution in the leaves to concentrate (leading to tip burn). If growing indoors in winter (which often has dry air), you can use a small humidifier or place water trays near the plants to raise humidity. Conversely, if humidity is extremely high (90%+), you might get fungal diseases on leaves/fruit, so ensure airflow and maybe a dehumidifier if in a closed space.
- Use the Right Nutrient Mix (and don’t overdo it): Strawberries have a particular appetite – they generally prefer a nutrient solution on the milder side compared to heavy-feeding plants like tomatoes. A good target is around EC 1.0–1.2, or about 600–800 ppm, in the solution. Higher concentrations can cause salt stress (edge browning on leaves). Use a fertilizer formulated for hydroponics that includes all essential nutrients: nitrogen (N), phosphorus (P), potassium (K), calcium (Ca), magnesium (Mg), and trace elements like iron, boron, zinc, etc. Many growers use a two-part nutrient (one part might be high in calcium nitrate, the other with the rest). Follow the label for mixing – it’s better to start slightly under strength and monitor plant response. Key nutrients for strawberries:
- Calcium: Important for strong cell walls and fruit development. Deficiency can cause leaf tip burn or berry issues. Ensure your nutrient provides enough Ca (often separate from the main NPK).
- Potassium: Needed in higher amounts when fruiting – it helps with fruit size and sweetness. Many “bloom” or fruit formulas have elevated K.
- Nitrogen: Needed for foliage, but excess N can lead to lots of leaves and few flowers. So don’t keep them on a high-nitrogen feed once they are mature and fruiting heavily; a balanced or slightly lower N ratio is fine at that stage.
- If using a single formula, that’s okay – just be attentive. Some people switch to a “bloom” nutrient formula when the plants start flowering to boost phosphorus and potassium.
- Always fully dissolve nutrients before adding to the system, and never mix concentrated nutrient parts together (dilute each in water first) to avoid precipitation of minerals.
- Keep the Nutrient Solution Oxygenated and Cool: We touched on this, but it’s so crucial it bears repeating. Warm, stagnant water is the enemy of hydroponics. Try to keep your nutrient solution in the 65–72 °F (18–22 °C) range if possible. If you notice your reservoir climbing into the high 70s, consider cooling methods: insulate the reservoir with reflective material, use frozen water bottles, or in extreme cases, an aquarium chiller. And make sure there’s some form of oxygenation – either falling water (in NFT the water flow naturally picks up oxygen, likewise in towers), or air bubbling. Cool, oxygen-rich water leads to explosive root growth, which translates to healthy plants and lots of fruit.
- Choose the Right Strawberry Varieties: Not all strawberry varieties perform equally in hydroponics. For best results, choose day-neutral (everbearing) varieties because they will fruit continuously under the stable conditions of hydroponics. Some proven performers in hydroponic systems include:
- Albion: A popular day-neutral with large, sweet berries. It’s known for consistent production and is used in many commercial hydro farms.
- Seascape: Another day-neutral variety, produces well and has good flavor.
- Monterey: Day-neutral with high yields (in one trial it yielded ~0.76 lbs per plant) and good flavor.
- San Andreas: Large fruit, good yields (~0.5 lbs per plant in the same trial).
- Evie-2: A vigorous day-neutral that some home growers like for hydro.
- Portola, Mara des Bois, Tribute/Tristar (some older everbearing types) – these can work too.
- If you start from runners of June-bearing types (which fruit mainly once a year), you can still grow them hydroponically, but you’ll get one big flush of berries rather than continuous cropping. Day-neutrals are generally easier for a steady supply.
- Also, consider varieties that don’t produce many runners. Day-neutrals naturally produce fewer, which is handy. Fewer runners = less pruning and more energy to fruit.
- Pollinate for Better Fruit: We already discussed hand pollination, but here’s a tip: when you pollinate by hand, try to be thorough. Each strawberry flower has many individual pistils (the yellow center is actually dozens of tiny pistils). To get a fully filled-out strawberry, each one needs to receive some pollen. So gently work your brush or finger around the center of the flower for a couple of seconds. You can even use an electric toothbrush by touching it to the flower stem – the vibration shakes pollen loose and around. Some people hold a small battery fan near the flowers to mimic wind. Do this when multiple flowers are open. If you see weird-shaped berries (like only one side filled out), that’s usually due to incomplete pollination – step up your bee impersonation game!
- Stagger Planting for Continuous Harvest (optional): If you have the space, consider planting your strawberries in batches a few weeks apart. This way, as one batch might slow down in production or get older, another batch is in peak production. Hydroponic strawberry plants can fruit heavily for a long time, but they won’t live forever – many commercial growers replace strawberry plants every 6–12 months for maximum yield, because older plants can get tired or diseased. At home, you might keep them longer, but yields can decline after a year or two. By staggering new plant starts, you ensure you always have some young vigorous plants coming into fruit as older ones wane. You can propagate your own new plants from runners or start new bare-roots each season to cycle in.
- Observe and Respond: Hydroponic gardening has a high “signal to noise” – plants will quickly show you if they’re happy or if something is off. Make it a routine to observe your strawberry plants daily, even just a quick glance. Perkiness of leaves, color, any spots or bugs – these are your indicators. If you catch an issue early (say, a single plant looking wilted), you can investigate: maybe its roots weren’t getting water due to a blocked dripper, or maybe it has root rot starting. You can then fix the problem before it affects the entire system. In a small home setup, problems are usually very fixable. Use the community, too – there are many hydroponic forums and groups where people troubleshoot with each other. Chances are, if you encounter a puzzling issue, someone else has seen it and solved it.
- Be Patient and Enjoy the Process: It’s worth noting – your first hydroponic strawberry harvest might not break any records. There is a learning curve and often a tuning period for a new system. Don’t be discouraged by a few hiccups. Strawberry plants might take a few weeks to acclimate and start vigorous growth, especially if started from bare-root. Once they settle in, though, watch out – they’ll take off! As the gardener, enjoy the journey. There’s something incredibly satisfying about seeing those first white strawberry blossoms turn into tiny green berries and then swell and ripen into red jewels, knowing you provided the perfect environment for that to happen.
With these tips in mind, you are well on your way to hydroponic success. Next, let’s talk about the reward for all this effort – the harvesting – and what kind of yields you can expect from your soilless strawberry garden.
Harvesting and Expected Yields
Harvest time is the sweetest part of growing strawberries, and hydroponic systems can provide a bountiful pickings if managed well. Here’s what to know about harvesting your hydroponic strawberries and how many berries you might get:
Ripe strawberries grown hydroponically – pick them when fully red for the best flavor and sweetness.
When to Harvest: Strawberries are at their best when they are fully colored (deep red, for red varieties) and have a slight softness to them. In hydroponics, berries often ripen quickly once they start to blush. Check your plants daily once fruits appear. Unlike some fruits, strawberries do not continue to ripen after picking, so refrain from pulling them too early. Let them reach that rich red – the flavor and sweetness increase dramatically in the last day or two of ripening on the plant. A ripe strawberry will usually have a nice fragrance as well. Harvest by pinching or snipping the stem just above the cap (calyx) of the berry; try not to pull the berry off by the fruit as this can bruise it.
Harvest Frequency: Day-neutral (everbearing) strawberries will flower and fruit in cycles continuously. You might find new flowers, green developing berries, and red ripe berries all on the plant at the same time. Typically, after an initial establishment period, a day-neutral plant can fruit on a roughly 6-week cycle from bloom to ripe fruit, with multiple waves of blooms through the season. In a hydroponic indoor setup, you could be harvesting berries weekly once things ramp up, picking whichever are ripe each week. Outdoors or in a greenhouse, you might get flushes corresponding to favorable conditions. Many everbearers produce heavier in spring and fall and slow a bit in the hottest part of summer, for example, but with a controlled indoor climate you can flatten those curves.
Yield Expectations: The big question – how much will you get? Yields depend on variety, plant age, and environment, but we can give ballpark figures. In traditional soil, a good strawberry plant might yield about 150–400 grams (~0.3–0.8 lbs) of fruit over a season. Hydroponically, some studies and growers have reported yields in that range or higher:
- In one observation, hydroponic day-neutral varieties yielded about 0.5 to 0.8 lbs of fruit per plant in a season, with the variety ‘Monterey’ producing at the high end around 0.76 lbs/plant in a trial.
- Some enthusiastic growers have claimed even more under optimal conditions – for instance, around 1 lb per plant is achievable with a well-tuned system over many months.
- Bear in mind these numbers might refer to a long growing season or year-round production. If you keep a plant going through multiple cycles (indoors or greenhouse), that cumulative yield can add up. Commercial vertical farms aiming for continuous output have projected yields like 2.5 lbs per plant in a year, but that’s in high-tech setups.
For a home system, a reasonable expectation is perhaps 8–15 berries per plant at a time during peak production, and a total of maybe 1–2 dozen berries per plant over several months (again, very rough – some could do more). Size of berries varies by variety and conditions: hydroponic berries can be large and juicy if well-pollinated and the plant isn’t stressed. You might get some whopping big berries (especially early in the season from the first flowers, which often produce the largest fruit), and then a bunch of medium-sized ones.
If you have, say, 20 plants in a system, and each gives you 0.5 lb over a season, that’s 10 lbs of strawberries – nothing to sneeze at! And because hydroponics can extend the fruiting season or allow off-season growing, you get fresh berries when they are expensive or unavailable in stores.
Flavor and Quality: Hydroponic strawberries can be just as sweet and flavorful as outdoor berries, often even better because you’re picking them fully ripe. Flavor is more about variety and ripeness than whether it’s soil or hydro. Some people wonder if hydro berries might be watery or bland – experience shows that if you give them the right nutrient balance (especially not too much nitrogen and plenty of light for sugar development), the berries come out excellent. In blind taste tests, many folks can’t distinguish hydroponic from soil-grown when both are harvested ripe. In fact, hydroponics can sometimes lead to cleaner and more uniform berries since you control everything. Plus, no dirt means you can pop them in your mouth straight from the plant – the “field heat” is still in them, which is a treat.
Harvest Handling: Use a shallow container to collect berries – piling too many on top of each other can squish the ones at the bottom. If you’re not eating them immediately (though we suspect many will get eaten during picking!), take them into the kitchen and store in the fridge without washing (wash right before eating). Hydroponic strawberries will already be pretty clean, so a quick rinse is all that’s needed. They generally keep for several days refrigerated, but the sooner you eat them, the better the taste.
One thing to note: hydroponic strawberries often have long stems and the berries might dangle away from the plant. This is actually nice because it reduces contact with any surface (less rot potential). You can trim long stems during harvest if desired. If you find any berry with even a speck of grey fuzz or mold starting (common name: botrytis), remove that berry and also check adjacent ones – botrytis can spread quickly. It usually hits overripe or damaged fruit, so timely picking prevents it.
Finally, after a flush of harvest, you might wonder if the plant is “done” or will it make more. Day-neutrals will generally keep cycling. You’ll notice new runners or new crowns forming – sometimes a single plant can split into multiple crowns that each produce fruit. As long as the plant looks healthy (green leaves, no major disease), you can keep it going. Many hydro growers keep plants for 1 to 2 years. Year 1 often gives the biggest yields, year 2 can still be decent, and by year 3 they might slow down or have more disease issues. So consider replanting with fresh stock after 1-2 years for peak production, or rotate in new plants as mentioned earlier.
Harvesting hydroponic strawberries is a joy – you’ve watched these berries develop from a tiny flower, and now you get to enjoy the literal fruits of your labor. There’s a certain pride in serving a bowl of bright red strawberries to your family knowing they were grown right there in water and not in soil. Savor that first bite – it’s often bursting with flavor and juiciness. And beware: once friends and neighbors hear you have a supply of homegrown strawberries, you may become very popular!
Fun and Creative Ways to Use Hydroponic Strawberries at Home
Growing strawberries hydroponically isn’t just about the fruit – it’s also an opportunity to get creative and integrate your system into your home or garden decor. Here are some fun and creative ideas for incorporating your hydroponic strawberries into your living space and life:
- Strawberry Wall or Green Wall: Turn your hydroponic strawberry setup into a living piece of art. For example, mount NFT channels or gutters on a vertical frame against a wall (indoors or on a balcony) to create a “strawberry wall.” The wall will be covered in green leaves and red berries – beautiful and delicious! Make sure to waterproof any indoor wall or use a freestanding frame with a catch basin. This could also act as a natural air filter in your home, like a green wall that also feeds you.
- Vertical Strawberry Tower Planter: If you’re into DIY, build a striking strawberry tower (like the PVC tower we described) and place it on your patio or porch. You can paint the exterior of the tower or decorate it to match your outdoor aesthetic. Perhaps give it a faux-stone finish or a bright color that complements the red berries. When it’s full of fruit, it resembles a strawberry Christmas tree! Guests will be impressed, and it’s a conversation starter: “Would you like to pick a strawberry from my tower?”
- Hanging Hydroponic Berries: Who says hanging baskets are just for flowers? Try a hydroponic hanging strawberry garden. You can adapt the Kratky method or a drip ring into a hanging bucket or use those stackable hanging planters with a wicking system. Hang them in a sunny window or under a porch. The runners can cascade down decoratively (though you might trim them to focus on fruit). It’s functional and adds a lovely ambiance – imagine sitting under hanging baskets of strawberries, plucking a berry now and then.
- In the Kitchen – Countertop Hydroponics: If you have a small countertop hydroponic unit (like those meant for herbs or an AeroGarden type device), try growing a dwarf strawberry variety in it. Some people have done this with success, treating strawberries like a “houseplant with benefits.” Having a couple of berry plants right in your kitchen means garnishing your breakfast cereal or yogurt with fresh picks in the morning. Look for alpine strawberries or smaller everbearing types that might fit well in compact systems.
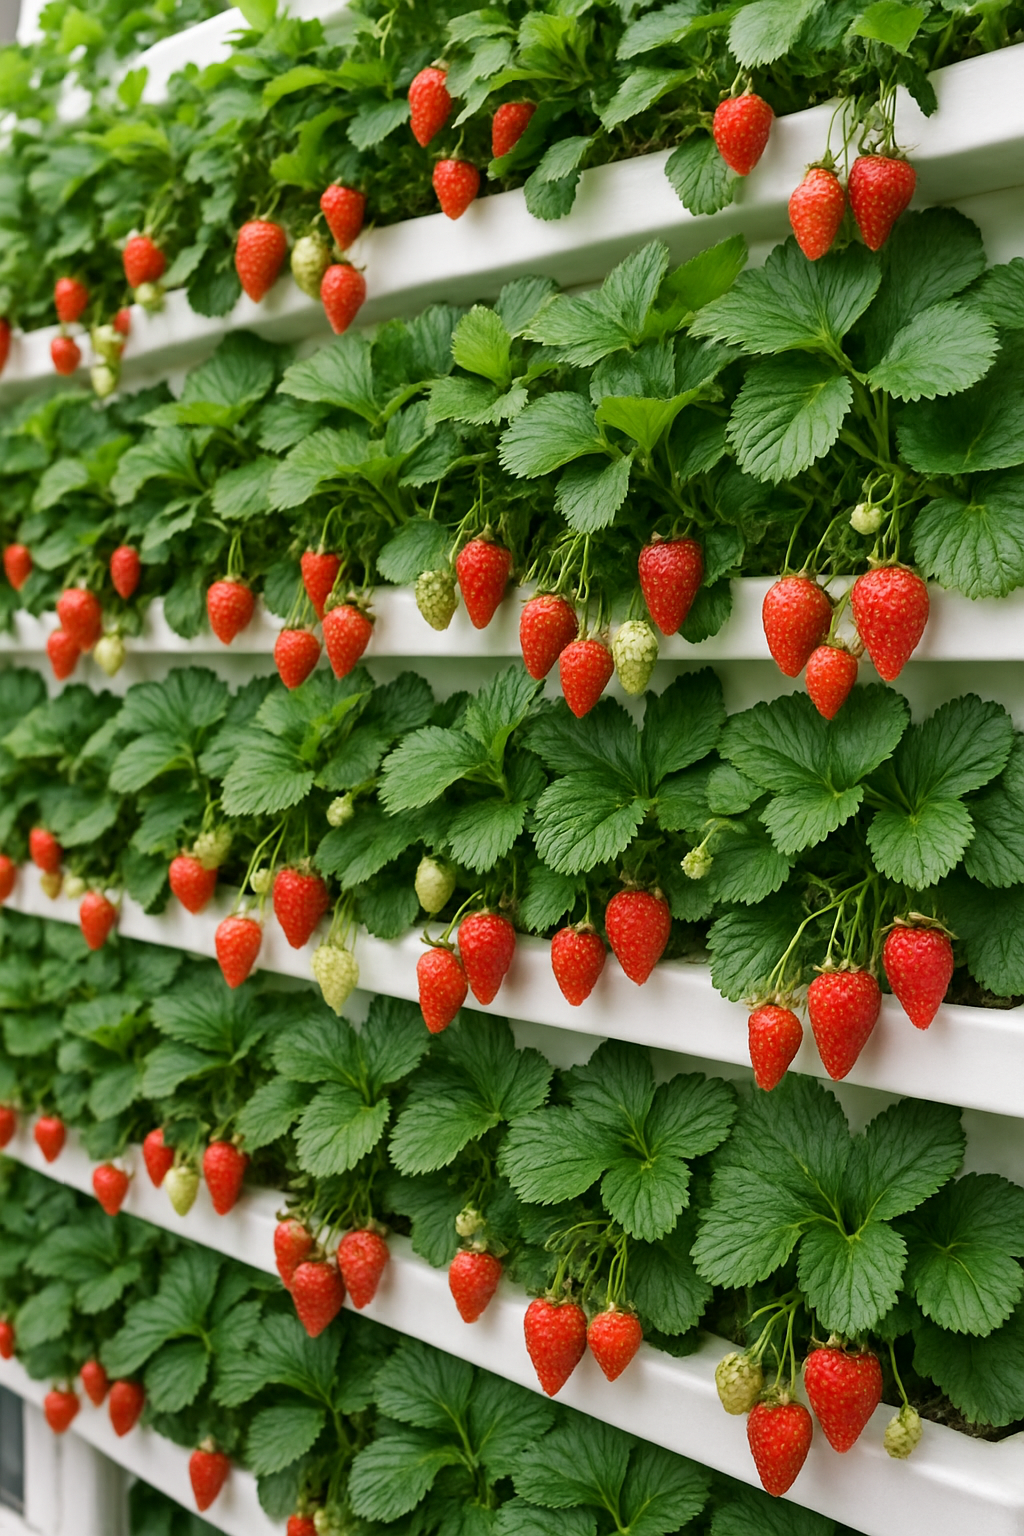
- Educational Family Project: Engage kids or curious adults by making your hydroponic strawberry garden a learning project. Keep a growth chart, measure how fast the plants grow, and have kids test pH or observe how changing a variable (light or nutrient) affects the plants. You could even incorporate some tech by adding sensors (there are Arduino or Raspberry Pi projects that monitor plant conditions) and make it a “smart garden” experiment. It’s a fantastic way to teach biology and environmental science concepts in a hands-on way. And at the end of the lessons, you eat the results – how fun is that?
- Hydroponic Strawberry Fountain: For a whimsical garden feature, consider pairing water and strawberries literally. One idea: create a small fountain or waterfall that also feeds an NFT channel or a series of cups holding strawberry plants. For instance, water could cascade down a series of stepped planters with strawberries in them. The water sound adds to the garden ambiance, and the strawberries benefit from the circulation. It’s like a strawberry waterfall. You’d need to ensure the flow is gentle on the roots (maybe diffused), but visually it could be stunning – like a tiered fountain with plants integrated.
- Mix and Match Crops: Integrate your strawberries with other hydroponic plants for a mini “food forest.” Strawberries can coexist with certain other plants in the same system if you manage the nutrients for all. Some creative combinations:
- Strawberries and lettuce or spinach (greens grow quickly and can fill spaces while strawberry plants are smaller).
- Strawberries and basil or mint – interestingly, some say strawberries and basil are companion plants in soil; in hydro, they both enjoy similar pH ranges. Plus, you can make strawberry-basil lemonade from the harvest!
- Just be mindful to pair plants with similar nutrient needs. Avoid putting strawberries with extremely nutrient-hungry plants like big tomatoes or with plants that prefer very different pH. But a mixed hydro garden adds variety and a visually lush environment.
- Year-Round Holiday Themes: Have fun with the timing and theming of your strawberry production. For example:
- Winter holidays: Aim for a December/January peak indoors, then decorate your hydro system with some holiday lights. Fresh strawberries at Christmas make a delightful red-and-green holiday vibe (maybe dip them in chocolate for a treat).
- Valentine’s strawberries: Force a lot of flowering in late January (maybe by slightly cooler nights and plenty of light) so that by Valentine’s Day you have an abundance of red berries – nothing says love like a homegrown strawberry dessert for your sweetheart.
- Summer smoothies parties: Plan your biggest harvests around when you’d host a summer party. Blend homegrown strawberry smoothies or make daiquiris – guests will be amazed when you say the berries came from that contraption in the corner of the yard.
- Community Sharing and Swapping: If you end up with more strawberry plants or runners than you need, use them as a bridge to community. You can trade strawberry runners with friends (maybe they have a different variety – you can try it in hydro). Or donate a small hydro setup to a local school or community center to spark interest in soilless gardening. Throw a “U-Pick Day” for neighborhood kids in your backyard – they might be tickled to pick berries from a hydroponic tower, which looks futuristic compared to a traditional garden.
- Culinary Adventures: Last but not least, consider growing hydroponic strawberries not just for straight eating but for creative kitchen projects:
- Try infusing them to make homemade strawberry soda or wine.
- Dehydrate some into strawberry chips or fruit leather.
- Use them in a farm-to-table style cooking where you highlight how they were grown. For instance, a fresh strawberry salad or a dessert with a story.
- Small alpine strawberries (if you grow those) make amazing decorative toppers for cakes and pastries, and they have a unique aroma – a hydroponic herb garden plus strawberry alpine plants could yield all you need for a fancy patisserie setup in your home kitchen.
Growing strawberries hydroponically opens up a world of possibilities far beyond what a traditional patch can offer. From aesthetic vertical gardens to high-tech indoor farms, you can tailor the experience to whatever excites you most. It’s the perfect blend of practical food production and creative hobby.
Conclusions
By now, you should have a solid grasp on what it takes to cultivate hydroponic strawberries successfully. We’ve covered everything from the initial attraction of growing “strawberries with no soil”, through the nuts and bolts of systems, to the delicious finale of harvest and ways to enjoy it. Hydroponic gardening, much like a DIY woodworking or crafting project, is a wonderful journey of learning and doing. It might seem a bit technical at first, but don’t let that intimidate you.
Hydroponic strawberries can transform your home gardening experience. You’ll enjoy cleaner, often bigger yields, and the convenience of picking fresh berries at your doorstep (or in your living room!) no matter the season. Plus, you’ll earn some bragging rights for growing strawberries without soil, which is still a pretty novel concept to most people. So grab those tools, gather your materials, and start planning your own soilless strawberry garden. Whether you build a simple bubbler bucket for a few plants or a vertical strawberry skyscraper, you’re in for a rewarding, fruitful adventure. Happy growing, and may your berry harvests be abundant and ever-sweet! Since you are here, you should also check my article on how to grow blueberries, the easy way!