Gardening is a lesson in patience, but when you’re just starting out it’s natural to crave quick results. Fast-growing vegetables offer nearly instant gratification and are perfect for eager beginner gardeners. Instead of waiting all summer for a harvest, you could be picking fresh produce in just a few weeks. Quick crops build confidence, teach you the basics, and let you enjoy the fruits (and veggies) of your labor sooner rather than later.
New gardeners in the USA and Europe will also appreciate that these speedy veggies tend to be easy-care greens and roots rather than fussy fruiting plants (no tomatoes here – those take their sweet time!). By focusing on vegetables that mature in around 30 days or less, you’ll get a feel for planting, watering, and harvesting without a long-term commitment. If something goes wrong, no worries – you can replant and try again in the very next month. It’s a great way to learn by doing.
Below, we introduce 4 fast-growing vegetables ideal for beginners. For each one, you’ll find a friendly rundown of what it is, how quickly you can harvest it, step-by-step planting and care instructions, general climate tips for both the USA and Europe, and some handy tips to get the best results (plus common mistakes to avoid). These veggies are all about quick wins and building your green thumb. Let’s dig in!
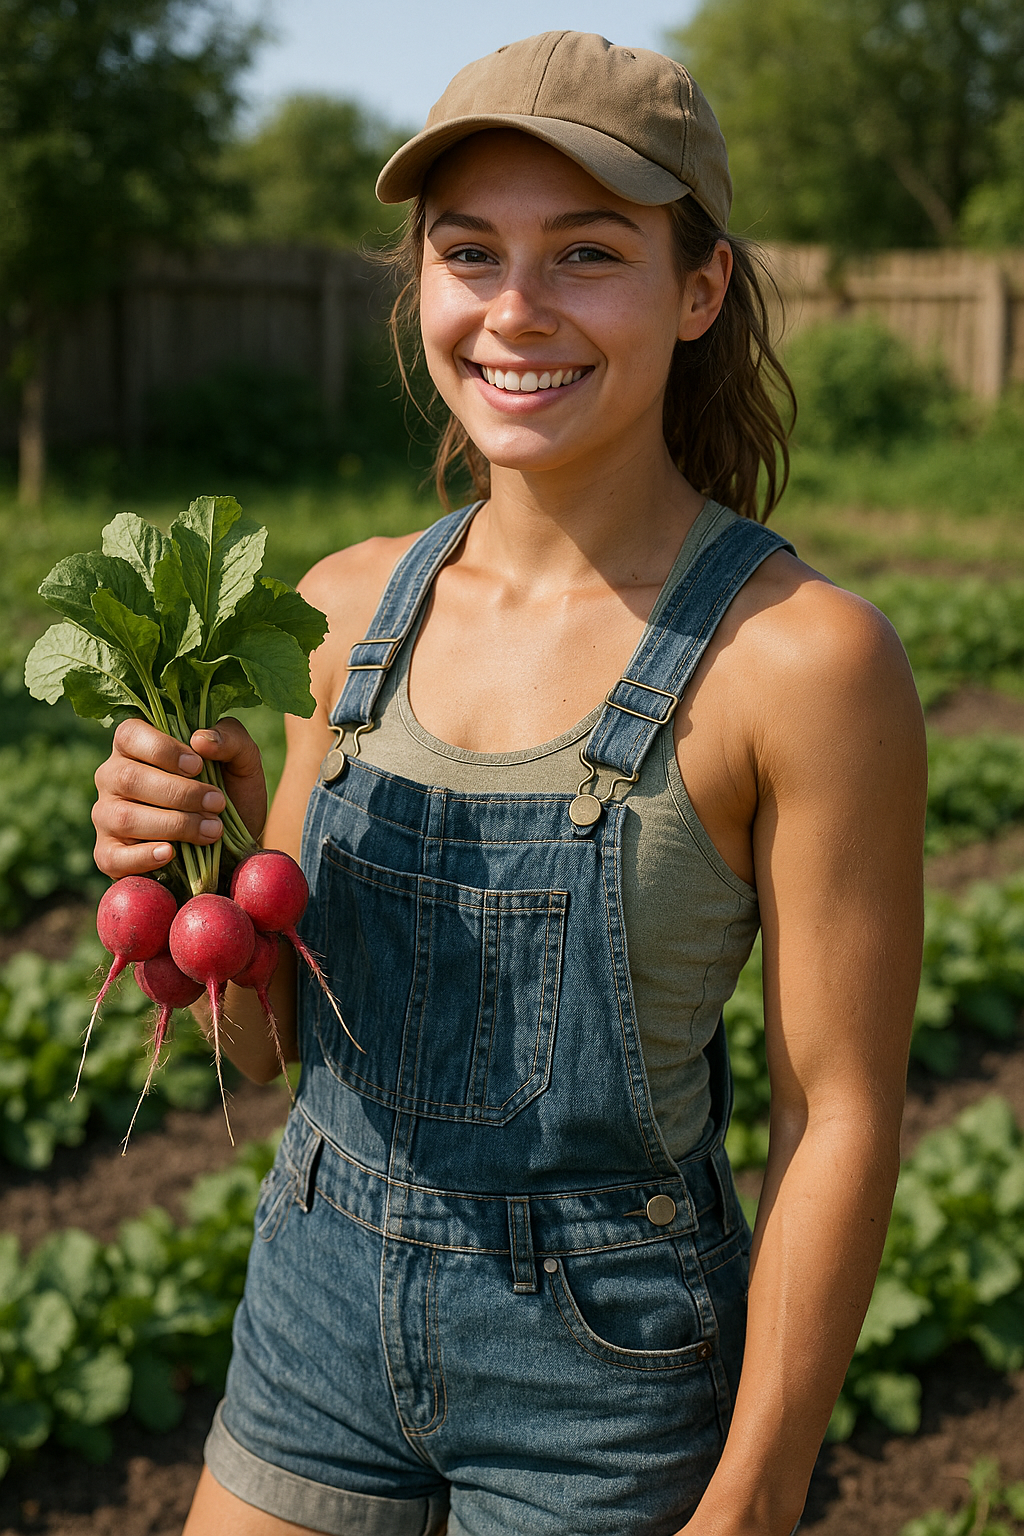
1. Radishes – Crunchy Roots in Record Time
Radishes (Raphanus sativus) are one of the quickest veggies you can grow, famous for going from seed to crunchy root in about 3–5 weeks. They’re small root vegetables that come in various colors (red, pink, white, purple) and add a peppery crunch to salads or snacks. Because they grow so fast and are relatively foolproof, radishes are often the first thing many gardeners (kids included!) ever plant. You’ll love the almost instant gratification of pulling up a plump radish only a few weeks after sowing.
Growing Time: Most common radish varieties mature in 20–30 days. Some, like French Breakfast or Cherry Belle, are ready in roughly 25 days, while special super-speedy varieties can be harvested in as little as 18 days. In general, plan on about a month or a little less from sowing to harvest for salad radishes.
Planting and Care – Step by Step:
- Timing and Location: Sow radish seeds outdoors in early spring or fall when the weather is cool. Radishes prefer cooler temperatures and can even handle chilly nights and light frosts. In most of the US and Europe, you can plant a spring crop as soon as the soil is workable (March or April for many regions) and a second crop in late summer for fall. Choose a sunny spot in the garden (6+ hours of sun) with loose, well-draining soil. A raised bed or container works great too, since radishes have fairly shallow roots.
- Soil Prep: Loosen the soil at least 6–8 inches deep to help the roots grow straight and fork-free. Remove rocks and clumps; radishes do best in fluffy soil. Mix in some compost to provide nutrients and retain moisture. Avoid fresh manure or high-nitrogen fertilizer – too much nitrogen makes radishes grow big leafy tops instead of roots.
- Sow the Seeds: Plant radish seeds about ¼–½ inch deep and roughly 1 inch apart. You can plant in rows (space the rows ~6–12 inches apart) or scatter seeds in a wide band. Cover the seeds lightly with soil and gently pat down. Water the area after sowing to settle the soil.
- Water and Thin: Keep the soil consistently moist during germination and growth. Radish seedlings usually sprout within a week (sometimes in just 3–5 days if conditions are warm). If the soil forms a crust from heavy rain, lightly water to soften it and help seedlings emerge. Once the little greens are up, thin the seedlings so that each radish plant is about 2 inches apart. This step is important – crowded radishes won’t plump up. Simply pluck or snip out extras, leaving the healthiest sprouts spaced out. (You can even eat the peppery thinnings in salad!)
- General Care: Radishes grow quickly, so they typically out-compete weeds – just pull any big weeds that do appear. Ensure they get about 1 inch of water per week (including rain). Water deeply so moisture reaches the developing roots; inconsistent watering can cause radishes to split or get overly spicy. These little roots don’t need much pampering. As long as the soil stays slightly damp and you keep them from baking in extreme heat, they’ll quietly swell into tasty bulbs in just a few weeks.
- Harvest Time: Begin checking your radishes about 3 weeks after planting. You’ll see the shoulders of the roots poking out of the soil when they’re nearly ready. Harvest once the roots are around 1 inch (2–3 cm) in diameter (about the size of a ping-pong ball). Don’t wait too long – radishes left in the ground past their prime will get pithy and overly pungent. To harvest, simply grasp the greens and pull the radish up. Brush off the soil, rinse, and enjoy that fresh crunch! You can harvest radishes one by one as they reach edible size, or pull the whole crop at once if they’re all mature.
Climate/Season Notes: Radishes thrive in cool weather. In the U.S. and European climates, that generally means planting in spring and fall. For example, you might sow in April/May for a spring crop and again in late August/September for a fall crop. In a mild winter climate (say, the southern U.S. or Mediterranean areas), you could even grow radishes through winter. High summer heat (>80 °F or 27 °C) is tough on radishes – they tend to bolt (flower) or develop a sharp, hot flavor. If you want to try them in summer, provide some afternoon shade and keep the soil moist to help keep them cool. Overall, radishes are very cold-tolerant (down to light frosts) and will germinate in soil as cool as ~45 °F (7 °C). This makes them one of the first seeds you can direct-sow in spring.
Tips for Success (and Avoiding Rookie Mistakes):
- Don’t Plant in the Heat: A common mistake is sowing radishes in mid-summer. In hot weather, radishes often fail to form good roots or become woody and bitter, disappointing many a beginner. Stick to cooler seasons for the best results – your radishes will be sweeter and crunchier.
- Thin Those Seedlings: It’s tempting to skip thinning, but crowded radishes will stay small. Give each plant a couple inches of space. Tip: If thinning feels wasteful, sow seeds a bit farther apart to begin with, or transplant the thinnings to another spot.
- Harvest Promptly: As soon as radishes reach a decent size, pull them. If left in the ground too long, they can get fibrous and overly spicy (and in worst cases, they might split or start rotting). Check your crop often around the 3-4 week mark – they mature quickly!
- Water Consistently: Inconsistent watering (dry spells followed by lots of water) can cause growth spurts that split the roots. Keep soil evenly moist. Drought-stressed radishes also develop a stronger, hotter taste, so regular watering yields a milder flavor.
By following these tips, you’ll be rewarded with crunchy, homegrown radishes in almost no time. They’re practically a speed-run crop – perfect for a new gardener’s first victory.
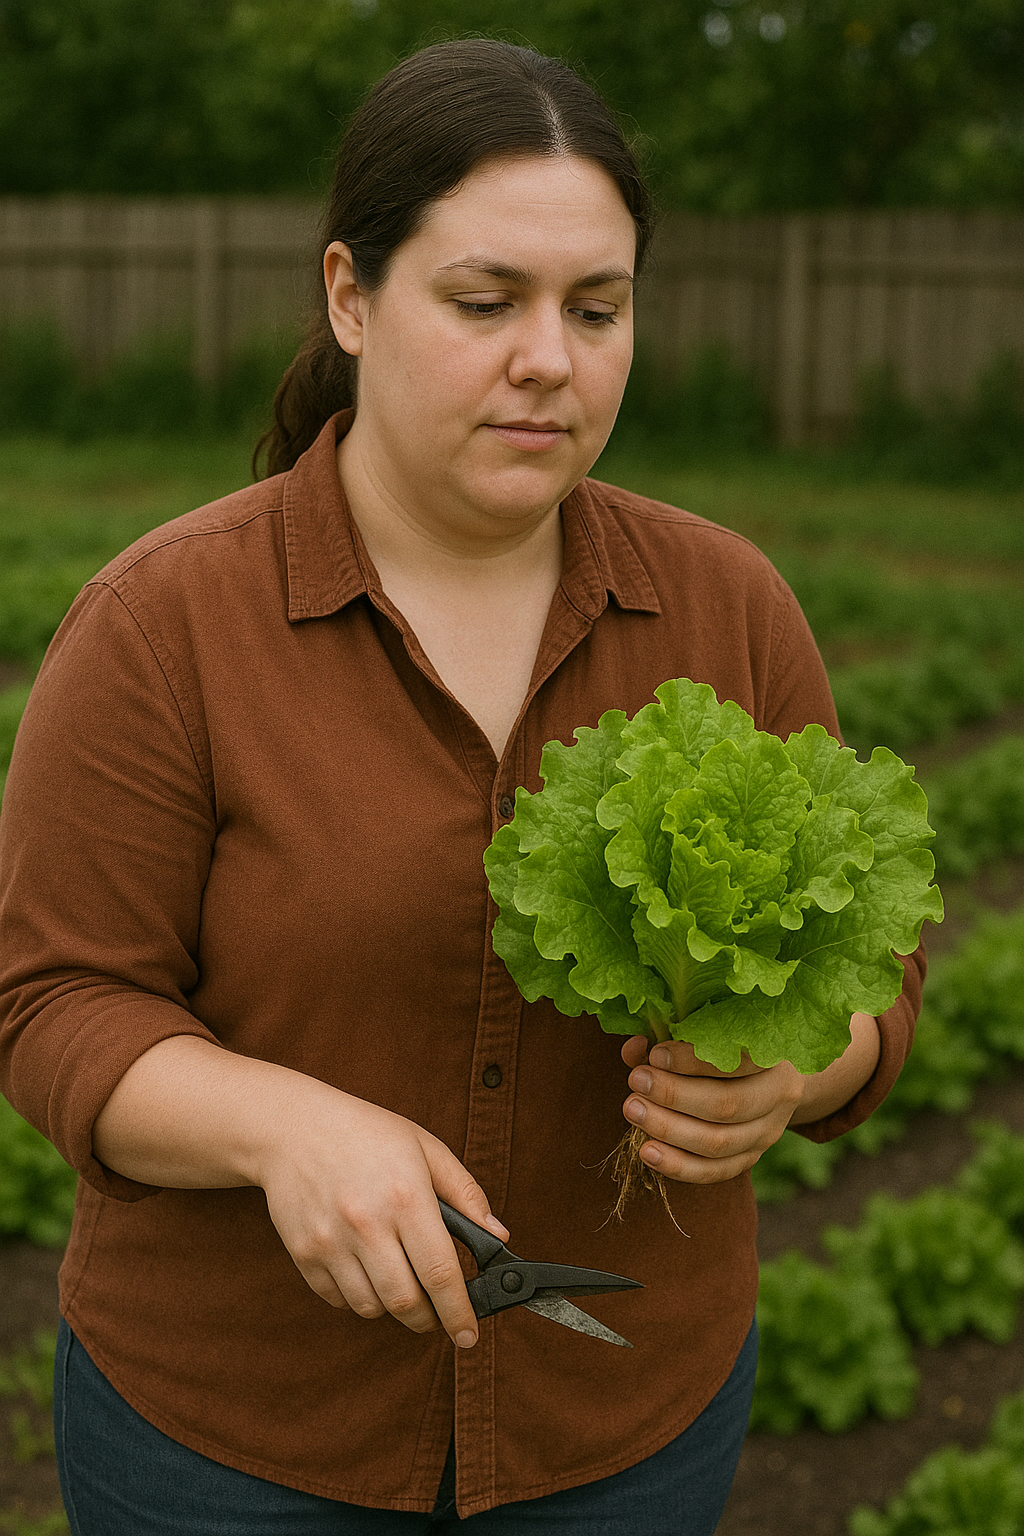
2. Leaf Lettuce – Fresh Salad Greens in 30 Days
Leaf lettuce is the ultimate quick salad crop for beginners – it grows fast, doesn’t take much space, and keeps on giving if you harvest it right. Unlike head lettuces (like iceberg) that form a single big head, leaf lettuces grow as loose, leafy plants. You can start picking baby leaves in just 3 to 4 weeks, which means you could be enjoying your own garden-fresh salads about a month from planting. There are many varieties of leaf lettuce, from bright green oakleaf types to frilly red lettuces, and all are relatively easy to grow. The taste is mild and slightly sweet when grown in cool weather – perfect for salads, sandwiches, and garnishes.
Growing Time: Leaf lettuce is typically ready to harvest in about 30 days from seed for a first picking. You don’t have to wait for a full-sized head; instead, you can harvest “baby greens” when the plants are only a few inches tall. If you let them grow longer, most leaf lettuce varieties will form larger bunches of leaves in 6–8 weeks, but as a beginner it’s best to start harvesting early and often for tender leaves.
Planting and Care – Step by Step:
- Timing and Location: Plant lettuce in the cooler parts of the growing season. In most regions of the US and Europe, that means sowing seeds in early spring (as soon as the threat of hard frost has passed) and/or late summer for a fall crop. Lettuce is fairly cold-tolerant – it can handle light frosts – but it suffers in extreme heat, often turning bitter or bolting (sending up a flower stalk) in hot weather. Aim for daytime temperatures between about 60–75 °F (15–24 °C) for the best growth. In warm climates, lettuce can be grown in winter. Choose a spot with full sun in spring/fall, or partial shade if you’re attempting a summer planting (a little afternoon shade can keep lettuce from overheating). Lettuce also does great in containers or window boxes, which can be moved to a cooler spot if needed.
- Sow the Seeds: Lettuce seeds are tiny and need light to germinate, so sow them shallowly. Make a shallow furrow or simply scatter the seeds on the soil surface and lightly press them down. You can sow in rows (around rows 8–12 inches apart) or broadcast them over a bed for a mixed salad patch. If sowing in rows, aim for a seed every 1–2 inches, knowing you’ll thin later. Cover with a very thin layer of fine soil or compost – barely ⅛ inch deep – or just scatter a bit of soil over the top. Water gently with a fine mist or shower setting to avoid washing the seeds away. Tip: Stagger your plantings by sowing a small batch of seeds each week for a few weeks. This succession planting will ensure you don’t get all your lettuce at once, and it extends your harvest period.
- Keep Soil Moist: Consistent moisture is key for lettuce. After sowing, keep the soil surface damp (but not waterlogged) until seeds sprout. Lettuce germinates quickly, usually in about 5–10 days. In warm weather, water twice a day if needed to prevent the topsoil from drying, since lettuce seeds are near the surface. Once seedlings appear, continue to water regularly. Lettuce has shallow roots, so it prefers frequent, lighter waterings to stay happy. Avoid soggy, waterlogged conditions, though, as that can lead to rot – good drainage is important.
- Thin and Space Plants: When your lettuce seedlings have a couple of true leaves and are ~2 inches tall, thin them out. If you want full-size lettuce plants, thin so each has about 4–6 inches of space (some vigorous varieties may need closer to 8–10 inches). If you’re going for baby greens, you can leave plants closer together (2–3 inches apart) or even skip thinning – you’ll be harvesting the whole plants young anyway. The easiest method is to snip out extras with scissors or pinch them at the soil line. Don’t toss those thinnings – they are essentially mini salad greens you can eat. Alternatively, transplant the thinned seedlings to another spot or container. Proper spacing ensures each lettuce has room to spread leaves and get enough sunlight and airflow.
- General Care: Lettuces are fairly low-maintenance. Keep an eye on moisture – they like steady watering but not oversaturation. Mulching around the base with a light layer of straw or compost can help keep roots cool and moist, especially if the weather warms up. Weed gently by hand if any weeds pop up; lettuce roots are shallow, so you don’t want to disturb them with aggressive weeding. In terms of feeding, if you prepared your soil with compost, additional fertilizer usually isn’t needed for this quick crop. If leaves look pale or growth is slow, you can water with a diluted fish emulsion or compost tea for a gentle nitrogen boost. Usually, though, lettuce grows fast on its own in good soil.
- Harvest Time: For the fastest results, practice “cut-and-come-again” harvesting. This means snipping a few outer leaves from each plant once they reach about 4 inches long, rather than waiting for a full head. You can begin harvesting baby leaves in about 3 to 4 weeks after planting. Simply use scissors or pinch with your fingers to cut the outer leaves about an inch above the base of the plant, and let the center continue growing. Leaf lettuce allows multiple harvests – each plant can often be picked 2–3 times if you don’t take all the leaves at once. The plant will regrow new leaves from the center. If you prefer to harvest whole plants, you can do that too: pull up an entire young plant for a tender salad, and reseed the spot. For full-size heads (if you thinned generously and let them grow ~6+ weeks), cut the whole plant at the stem base when it’s mature but before it bolts. Harvest in the cool of morning for crispest leaves. Rinse your lettuce in cold water and enjoy the literal fruits of your minimal labor!
Climate/Season Notes: Lettuce loves the spring and fall in temperate regions. In much of the U.S. and Europe, you can sow leaf lettuce from March until early summer, take a break during the hottest part of July/August, and then sow again in late summer through September for fall harvests. In cooler northern climates, summer planting is fine as long as you can provide water and maybe a little shade. In hot southern climates, lettuce is best grown in fall, winter, and early spring. For example, a beginner in the southern US might start lettuce in October and harvest through winter, whereas a northern European gardener might focus on April-June and then again in September. Keep in mind that extreme heat causes bolting (the lettuce quickly flowers and turns bitter). If you must grow in hot weather, choose heat-tolerant varieties and give shade cloth or a spot with only morning sun. Conversely, lettuce can survive near-freezing temperatures, especially if it’s hardened off – a light frost might nip the outer leaves, but often the plant will bounce back. Overall, plan your lettuce planting for the cooler parts of the year for a sweet, lush harvest.
Tips for Success:
- Use Succession Planting: Don’t plant all your lettuce seeds at once. Sow a small batch every 1–2 weeks (especially in spring). This way you’ll have a continuous supply of tender young lettuce rather than a glut all at one time. It also hedges against any early mistakes – if one batch fails, the next may thrive.
- Harvest Early and Often: A big mistake new gardeners make is waiting too long to start harvesting. For leaf lettuce, start picking as soon as you have usable leaves! Regular harvesting actually encourages the plants to produce more. Plus, young leaves are tastiest. If you wait 60 days thinking you need a full head, you might end up with bitter, bolted lettuce. When in doubt, taste a leaf – if it’s tender, go ahead and pick more.
- Don’t Let It Bolt: If you notice your lettuce is suddenly growing upright or you see a little flower bud forming, it’s starting to bolt. This often happens when weather gets hot or the plant gets too mature. Once bolting starts, leaves turn bitter. Act quickly – harvest all the usable leaves immediately. To avoid bolting, plant at the right time and pick often. In hot spells, consider using shade cloth or moving pots to a cooler spot.
- Water Consistently: Lettuce needs moisture to stay sweet and lush. Irregular watering can cause tip-burn or bitterness in the leaves. Try to keep the soil evenly moist. In containers, this might mean daily watering since pots dry out faster. Mulch can help in ground plantings. However, also ensure some drainage – roots sitting in water can lead to rot. Aim for the Goldilocks zone: not too dry, not too waterlogged.
Leaf lettuce is a beginner’s best friend – it’s forgiving, fast, and rewards you with bowlfuls of greens. There’s nothing quite like walking out to your garden and snipping a fresh salad for dinner just weeks after planting. It’s a fantastic way to get hooked on gardening!
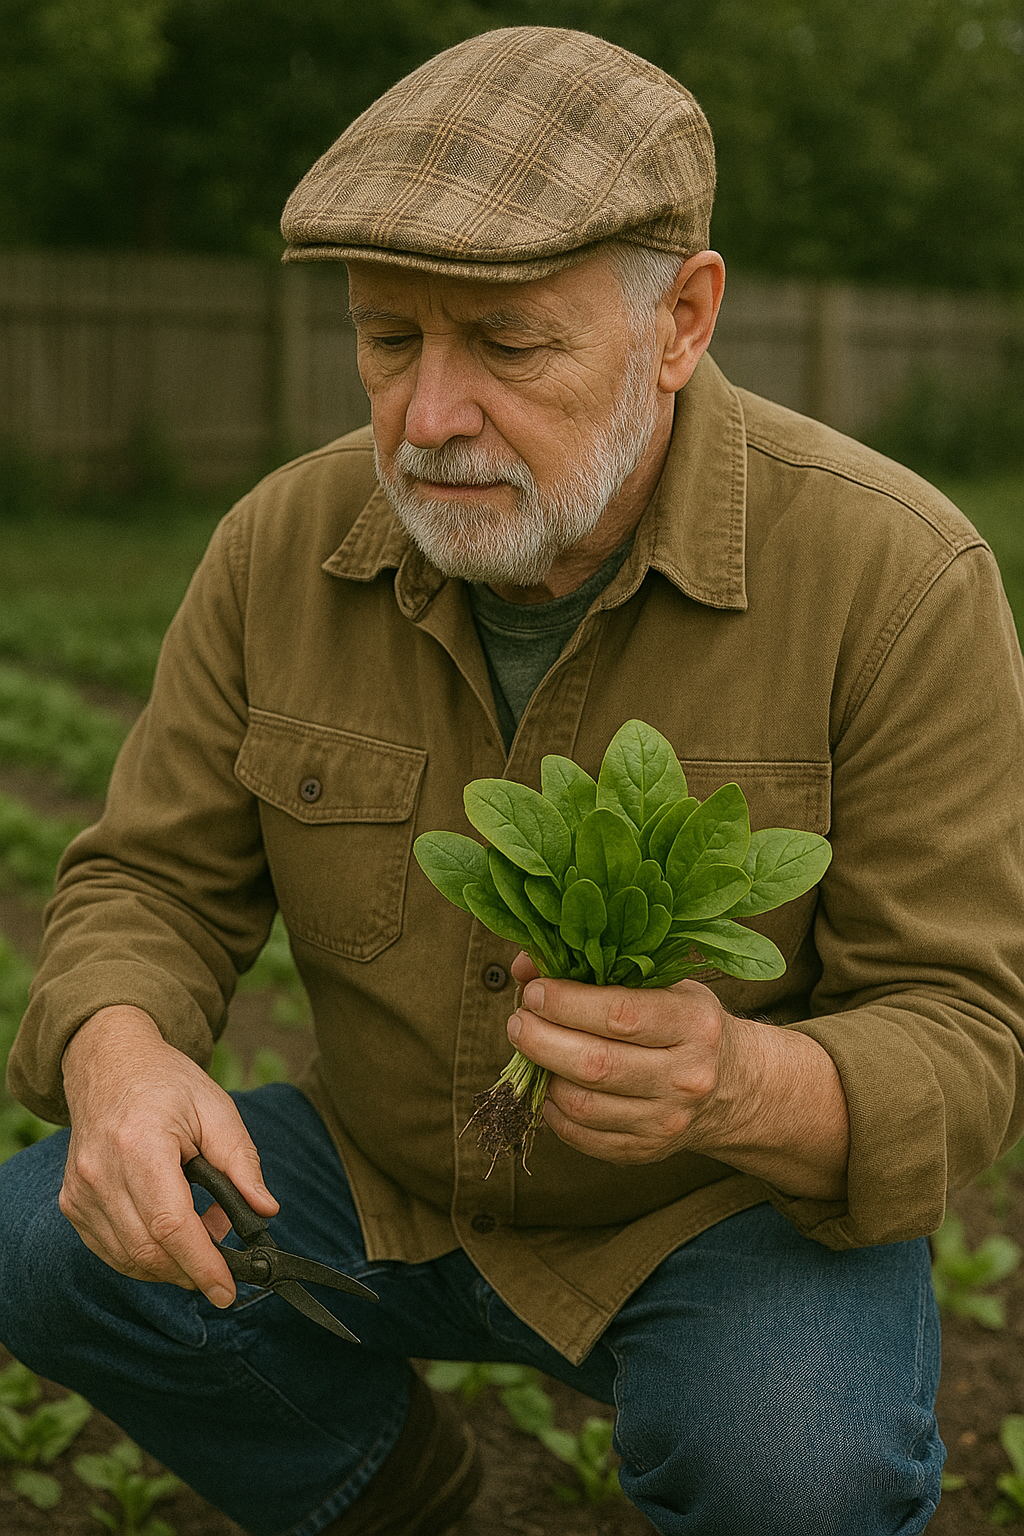
3. Spinach – Baby Leaves in a Month
Spinach (Spinacia oleracea) is a nutrient-packed leafy green that also happens to grow at top speed, especially if you’re harvesting it as “baby spinach.” While mature spinach leaves (the kind you cook) take a little longer, you can start picking baby spinach in about 20 to 30 days. For a beginner, growing spinach provides a quick win and a versatile crop: the young leaves are great raw in salads or smoothies, and slightly older leaves can be lightly sautéed or added to soups. Spinach thrives in cooler weather and can even handle some frost, making it a perfect spring or fall vegetable. Its deep green leaves will make you feel like a pro gardener when you harvest your first handful.
Growing Time: You can harvest baby spinach leaves roughly 4 weeks (30 days) after sowing. At this stage the leaves are tender, about 2–4 inches long, and perfect for salads. If you let the plants grow on, larger leaves (4–6+ inches) for cooking will be ready in 6–8 weeks. But as a beginner, focus on that quick baby-leaf harvest at around one month. Spinach is quite fast – you’ll often see seedlings poking up within 1–2 weeks of planting, and then they take off. Note: Spinach has a tendency to bolt (go to seed) when days get long and hot, so timing the planting is key to getting a good month’s worth of growth before it tries to flower.
Planting and Care – Step by Step:
- Timing and Season: Plan to grow spinach in the cool seasons. In temperate parts of the USA and Europe, sow seeds in early spring (as soon as the ground can be worked, often 4–6 weeks before your last frost date) or in late summer for a fall harvest. Spinach loves cool temperatures and can even survive freezes down to about 20 °F (–6 °C) once established. However, it hates heat – hot weather will cause it to bolt and turn bitter. If spring is short and summers get hot fast in your area, lean towards a late-summer planting for fall harvest, or try overwintering varieties. Gardeners in mild winter areas (zones 8-10 in the US, or southern Europe) can grow spinach through winter. Bottom line: aim for planting when highs are generally below 75 °F (24 °C). Also, spinach can handle part shade, which can keep it cooler – 4–6 hours of sun is sufficient, especially if afternoon sun is filtered.
- Soil Prep: Spinach has a reputation for appreciating fertile soil. Before planting, loosen the top 6–8 inches of soil and mix in some compost or well-rotted manure. This not only provides nutrients but also helps retain moisture (spinach likes consistent moisture). Ensure the soil drains well, as soggy conditions can lead to root rot, but also add organic matter because spinach likes moisture and organic matter helps soil hold water. Ideal soil pH is around 6.0–7.0 (neutralish). If your soil is very acidic, consider adding a bit of lime, as spinach doesn’t thrive in highly acidic conditions. In containers, use a good quality potting mix enriched with compost.
- Sow the Seeds: Plant spinach seeds about ½ inch deep and 2 inches apart. You can also simply sprinkle seeds over the area and then thin later, but spacing them a couple inches apart from the start saves thinning work. Cover seeds with soil and pat gently. Because spinach germinates best in cool soils, if you’re sowing in warm weather (above 80 °F/27 °C), you might germinate seeds indoors in a cool spot or shade the area until they sprout. Expect seedlings in about 5–10 days, though it can take up to 2 weeks in chilly soil. If planting in rows, space rows about 8–12 inches apart. For raised beds or pots, you can plant in a grid or broadcast fashion – spinach isn’t too picky as long as each plant has a bit of space.
- Water and Thinning: After sowing, water the bed well with a gentle sprinkle. Keep the soil evenly moist during germination. Once seedlings emerge, continue regular watering – spinach has relatively shallow roots and will bolt (flower) quickly if it dries out or heats up. Thin the seedlings to about 3–4 inches apart for baby-leaf harvesting. If you plan to let some grow larger, thin those to 6 inches apart. Thinning is important because overcrowded spinach will grow spindly and more prone to disease. Snip out extra seedlings with scissors to avoid disturbing the roots of the ones you keep. You can nibble on the thinnings as microgreens!
- Care as it Grows: Spinach grows swiftly in cool, moist conditions. Water consistently, aiming for about 1” of water per week (more if it’s warm or the plants look droopy). Mulch around the plants with a thin layer of compost or straw to keep the soil cool and damp. Spinach can be a heavy feeder; if the leaves look pale or growth is slow, you can side-dress with a bit of balanced fertilizer or fish emulsion. However, if your soil was rich to start, it usually isn’t necessary for such a short growth period. Watch for pests: slugs and snails love tender spinach, and leaf miners can tunnel into leaves. Handpick slugs in the evening or use organic bait if they’re an issue; for leaf miner, removing any leaves with white tunnels promptly can break their life cycle. Often, a quick spring crop doesn’t suffer too much pest damage. Spinach also prefers cooler temps, so if an unexpected heatwave hits, try to provide some shade (even temporarily with a cloth or board during the hottest part of the day).
- Harvesting: After about 20–30 days, your spinach will have a nice bunch of baby leaves ~2–4 inches long – time to harvest! For baby greens, you can harvest the whole plant by cutting it off about 1 inch above the soil (and often it will resprout a little for a second smaller harvest), or pick individual outer leaves and let the center grow. The “cut-and-come-again” method works well: use scissors to cut a bunch of leaves from each plant, but leave the growing crown intact so the plant can regrow. If you staggered your planting or have multiple rows, harvest one section at a time to extend your supply. For full-size spinach, wait until leaves are 4–6 inches long (around 40+ days) and harvest outer leaves continuously. Always cut leaves before they get too old or start yellowing. Important: keep an eye out for any sign of a central flower stalk forming (the plant will start to elongate upwards) – that means bolting is imminent. It’s best to harvest the entire plant at that point because the leaves will quickly turn bitter. Harvest spinach in the cool morning if possible; it will be crisp and hydrated. After picking, rinse the leaves in cool water to remove soil and chill them for best flavor and shelf life.
Climate/Season Notes: Spinach is very much a cool-weather crop. In fact, it thrives in conditions that are too chilly for many other veggies. In the USA, gardeners in the north can often sow spinach as soon as March or even late February (with protection like a cold frame), and again in September for a fall crop. In moderate climates, September/October sowings can yield through winter and into spring. In Europe, it’s similar: northern Europe grows spinach in spring and late summer/fall; southern Europe might grow it in winter. Spinach can withstand frost and actually produces its sweetest, best leaves in cool temperatures (frost can even sweeten it a bit). What it doesn’t tolerate is long days of heat. When days exceed ~14 hours of light and temperatures consistently hit the high 70s°F (25°C+), spinach quickly decides its life mission is complete and it bolts. Because of this, true summer plantings usually aren’t practical unless you live in a very cool summer area or are growing a New Zealand or Malabar “spinach” (which are actually different species that like heat). For most beginners: plant early, or plant late, but avoid the peak of summer for spinach. If you do get a weirdly warm spell in spring, you might see early bolting. Don’t be discouraged – try a fall crop when days are shortening. Also, some modern spinach varieties are bred to be slower to bolt (labeled “long standing” or heat-tolerant types), which can give you extra days or weeks in marginal weather.
Tips and Common Mistakes:
- Don’t Wait on Harvest: One of the best things about spinach is how fast you can enjoy it. Many new gardeners think they have to wait for big, store-sized leaves. Not so! Begin harvesting when leaves are a few inches long. The smaller leaves are super tender and delicious. If you wait too long, you risk the plant bolting in warm weather. Remember, you can pick and then come back for more a week later – the plant will keep growing for a while.
- Keep it Cool: Spinach will bolt if it’s too hot or dry. A beginner mistake is sowing spinach in late spring and then being surprised when it flowers quickly. Plan your planting to avoid hot periods. If an unexpected heat wave hits, give your spinach some temporary shade (even a cloth or cardboard shield during the hottest afternoon hours can help). Consistent moisture also keeps soil temps down and plants less stressed. Mulch is your friend for retaining soil moisture and temperature.
- Watch for Pests Early: Those little holes or squiggly trails on spinach leaves are usually caused by slugs/snails or leaf miner larvae. Check your spinach often. Slugs can be picked off at night or trapped with beer traps; keeping the area free of decaying mulch also helps since slugs hide there. Leaf miners (tiny larvae between leaf layers) can be managed by removing and destroying any affected leaves as soon as you see the telltale tunnels. Many beginners might ignore a few holes, which usually is fine – spinach grows fast enough to stay ahead of minor damage. Just be aware so a small pest issue doesn’t become a big infestation.
- Succession Plant for Long Harvest: If you love spinach, plant a second (or third) batch a couple weeks after the first. That way, as one planting is getting past its prime or starting to bolt, the next wave is ready to pick. This leapfrogging ensures a continuous supply of tender leaves. Succession planting is especially useful for fall crops: sow one batch in late August, another in early September, etc., to have baby spinach coming in over a longer period.
Spinach is a fantastic starter crop because it rewards you with superfood greens in no time. Whether you toss them in a salad, blend into a smoothie, or steam them lightly, you’ll taste the freshness. Plus, you might find your homegrown spinach has a sweetness and vibrancy that store-bought can’t match. Enjoy the process – from sprinkling those odd-looking triangular seeds to snipping off your first greens – it all happens pretty fast!
4. Arugula (Rocket) – Peppery Greens in Under a Month
Arugula, also known as rocket (particularly in Europe), is a fast-growing salad green with a bold, peppery flavor. If you’re looking for a zippy green to spice up your salads, arugula is an ideal choice – and lucky for impatient gardeners, it’s almost weed-like in how quickly it sprouts and grows. Arugula’s leaves are typically lobed (imagine an oak leaf shape, but softer) and are usually eaten young and tender. You can harvest arugula as a baby green or let it grow a bit larger for a stronger taste. Many beginners love arugula because it’s resilient: it tolerates cool and warm weather better than delicate lettuce, and it can bounce back from light frosts or a dry spell. In fact, some gardeners joke that arugula “grows itself” – give it a spot and it will happily produce snappy leaves for your kitchen in a matter of weeks.
Growing Time: Arugula is one of the quickest leafy greens – you can start harvesting in about 20 to 30 days from seeding. Often you’ll see germination just 3-5 days after planting, and within 2-3 weeks the plants have multiple true leaves ready to pick. For a mild flavor, harvest young (3-4 inch leaves at ~3 weeks). If you let arugula grow to full size (6-8 inch leaves), it might take 5-6 weeks, but the taste will be stronger, almost mustardy. Many people prefer it at the baby stage which is well under a month. Either way, it’s a speed demon. Do note: arugula doesn’t have a long shelf life in the garden – it grows fast and also bolts relatively quickly, especially in heat. So the window for harvest is a few weeks long before it flowers. The good news is you can succession-sow new seeds every few weeks to keep a steady supply.
Planting and Care – Step by Step:
- Timing: Arugula grows well in a wide range of temperatures, which is somewhat unique for a salad green. It prefers the cool of spring and fall (like most greens), but it can also handle summer heat better than lettuce, and it’s frost-hardy to boot. For USA and Europe gardeners: you can sow arugula starting in early spring (March/April) and continue planting batches through early summer. It will germinate in cool soil and is unfazed by chilly nights. In summer, arugula can still grow, though in very hot climates it might bolt faster – consider partial shade in July/August. Then, as fall arrives and temperatures moderate, you can plant another round (late August through October). In warm winter areas, arugula can even grow through winter. In short, arugula isn’t very picky about temperature – it’s more heat-tolerant than most salad greens and can even withstand light frosts. This makes it an almost year-round option depending on your climate. For beginners, try spring and fall first, then experiment with summer or winter plantings to see how it does in your locale.
- Sowing Seeds: Arugula seeds are small, round, and easy to sow. You can either sprinkle them broadly over a patch (for a dense harvest of baby leaves) or sow in shallow rows. Either way, plant the seeds about ¼ inch deep or simply scatter on the surface and lightly rake them in. They don’t need to be perfectly spaced – arugula is pretty forgiving. If doing rows, aim for a seed every inch or so, with rows 6–8 inches apart. If broadcasting, you’ll thin later by harvesting. After sowing, water gently. Because the seeds are tiny, keep that top layer of soil consistently moist until they sprout (which won’t take long, usually 3-7 days). You might even see germination in 48 hours in warm conditions – arugula is eager to grow!
- Thin (or Don’t): If you want nice individual arugula plants, thin the seedlings to about 3 inches apart once they’re a couple inches tall. However, if your goal is lots of baby greens, you can actually leave them fairly dense and just start harvesting by snipping out whole young plants to thin as you eat. Arugula doesn’t mind being a bit crowded when young; they will just be a tad taller and more tender (reaching for light). For larger leaves, spacing them out will give plants room to bush out. So, decide on your harvest style and thin accordingly. Many beginners enjoy doing an initial thinning harvest – pulling some baby plants whole at 2 weeks to taste, which automatically thins the row, and then letting the rest grow a bit more.
- Water and Care: Arugula, like most greens, appreciates regular moisture. Water the plants when the top inch of soil feels dry. In cool spring weather, this might be only once or twice a week; in hotter weather or containers, possibly every day. Thankfully, arugula’s relatively quick life cycle and semi-drought tolerance mean it doesn’t often get too fussy. Still, consistent watering will yield the best, least bitter leaves. Arugula has shallow roots, so it doesn’t dig deep for water. Mulching around the plants can help keep soil moisture even and also keep weeds down. As for fertilization, arugula isn’t a heavy feeder given its short growth period. If your soil has some compost or you previously grew a well-fertilized crop, arugula will likely be fine. Over-fertilizing (especially with nitrogen) can actually dilute the flavor and make it too lush (and more attractive to pests like aphids). Usually, no extra feeding is needed for this speedy crop. Pest watch: Flea beetles (tiny black jumping beetles) love nibbling arugula and can make pinholes in leaves. These are more prevalent in summer. Floating row cover (a light fabric) placed over the seedlings can prevent them, or you can mostly ignore them if damage is minor. Arugula grows so fast that it often outgrows the flea beetle damage. Other pests are minimal; its peppery taste actually deters many critters.
- Harvesting: You can start harvesting arugula when the leaves are about 3 inches long, which often is just 2½–3 weeks after planting in good conditions. For baby greens, you might harvest the whole plant or cut leaves using the cut-and-come-again approach. Snip outer leaves and let inner ones grow, or shear off a bunch of leaves leaving the base intact. Arugula will regrow a little after cutting, but it doesn’t regrow as robustly as lettuces do. Typically, you can get maybe two flushes of harvest from one planting: one initial cut, then a smaller second cut as a “bonus.” For continuous supply, it’s better to sow new seeds every 2-3 weeks rather than relying on one planting to keep producing. If you want larger arugula leaves (which have a stronger bite), let some plants continue growing to about 5–6 inches tall before picking. You can even harvest mature arugula by pulling the whole plant. Try to harvest before you see flower buds, unless you enjoy the extra-spicy kick (at flowering stage the leaves can get quite sharp). On that note, arugula’s white flowers are edible too, with a milder peppery flavor – nice as a salad garnish. So if a few plants bolt, don’t despair; taste the blossoms!

Climate/Season Notes: As mentioned, arugula is unusually adaptable. In spring, it’s one of the earliest greens you can sow (even a bit before last frost). In summer, especially in temperate climates, arugula will still produce (it might bolt faster but will give you something). In fall, it thrives in the cooling weather and can keep growing well into autumn. Gardeners in places like California or the Mediterranean often grow it all winter long. It has been noted that arugula can survive temperatures into the mid-20s°F (~-4 °C) without protection, and a frost can even impart a pleasant sweetness to the leaves. In hot weather, arugula will germinate and grow, but to get a full month of harvest you may need to employ some shade or just accept that you’ll re-sow more frequently. The flavor of summer-grown arugula can be spicier and leaves a bit tougher, whereas spring/fall arugula is usually milder and tender. Interestingly, many gardeners find arugula to be almost wild in nature – it might reseed itself in your garden if you let a plant flower and drop seeds. Don’t be surprised if next season you find volunteer arugula popping up! It’s the gift that keeps on giving.
Tips and Insights:
- Succession Sowing is Key: Because arugula can bolt fairly quickly, a common beginner mistake is planting it once and then being sad when it’s gone to seed in a month. The fix? Sow small patches every couple of weeks while the weather is favorable. This way, as one batch is flowering, the next is ready to pick. This continuous sowing approach will keep you in fresh arugula nearly indefinitely. Remember, arugula is fast – use that to your advantage by continuously replanning seeds.
- Harvest Young for Milder Taste: If you’ve only had store-bought arugula, you might be surprised how pungent homegrown can get if left to grow big. For a gentler flavor, pick leaves when they are 2–3 inches long. At this stage, arugula has a delightful peppery zip that’s not overwhelming. As leaves mature to 5–6 inches, the flavor intensifies to a mustard-like sharpness. Some folks love that; others find it too strong. So taste as you go, and decide when your arugula is just right. If you prefer it milder, young is best. If you adore spicy greens, let a portion get larger or even try a wild arugula type for extra kick.
- Don’t Fear the Flowers: Unlike many veggies where flowering signals the end, arugula’s flowers are actually a bonus edible. The plant’s energy will shift to seed production, so the leaves will dwindle, but you can enjoy the pretty cream-white flowers in your salads. They have a milder arugula flavor. Also, if you’re curious about saving seeds, arugula is a great plant to learn on – it will produce seed pods that you can dry and collect seeds from for next season. However, for eating purposes, once many plants are bolting, it’s time to pull them and reseed anew (or switch to another crop in that space). Arugula’s cycle is quick, so embrace the renewal.
- General Resilience: Arugula is quite forgiving. It doesn’t often get diseases, it can handle variable weather, and it grows like a weed (in a good way). One tip: because it’s so quick, arugula is fantastic to interplant with slower plants. For example, you can sprinkle arugula seeds in between your young broccoli or tomato plants. You’ll harvest the arugula before the other plants get big, effectively using the space twice. Beginners can experiment with such interplanting to maximize garden yield. Arugula will be your easygoing friend in these experiments – it’s not fussy about neighbors.
Arugula/rocket will likely become a staple in your garden once you see how easy and rewarding it is. The flavor elevates any salad or sandwich, and the fact that you grew it yourself (in mere weeks!) makes it taste even better. It’s a great conversation piece too – not everyone grows their own arugula, so you can proudly share your peppery harvest and maybe convert a friend into a new gardener as well.
Conclusion
Fast-growing vegetables are ideal for new gardeners because they offer instant gratification and a gentle learning curve. Instead of waiting all season to taste success, you can enjoy a homegrown harvest in under a month. Each of the four veggies above – radishes, leaf lettuce, spinach, and arugula – provides a tangible reward for your efforts in a very short time. They teach you the basics of gardening (planting, watering, dealing with a little pest or two, and harvesting) without overwhelming you or testing your patience.
The best part is, these quick crops are very forgiving. Miss a watering? The lettuce bounces back. Planted a bit too close? Thin the radishes and they’ll still produce. And if one batch totally fails, you haven’t lost much time – you can re-sow and try again, armed with new knowledge, and still get a harvest soon. Gardening is all about experimenting and learning, and these speedy veggies let you do that in real-time.
So go ahead – give one or two of these fast veggies a try as your first crop. Clear a little patch in the yard or even a big pot on your balcony, and sprinkle some seeds. Within days you’ll see green sprouts, and in just a few weeks you’ll be crunching on your own fresh produce. There’s a special joy in eating something minutes after you picked it, and an even greater joy knowing you grew it yourself. These quick wins will boost your confidence and enthusiasm to grow even more.
Remember, you don’t need a big garden or fancy tools. A container, some soil, seeds, and water – that’s it. Gardening can be as simple as that. As you taste your first peppery arugula leaf or pull up that bundle of radishes, you’ll realize that starting a garden isn’t scary at all. In fact, it’s fun and delicious! So roll up your sleeves, get your hands a little dirty, and enjoy the magic of growing food fast. Happy gardening – your first harvest is only a few weeks away!