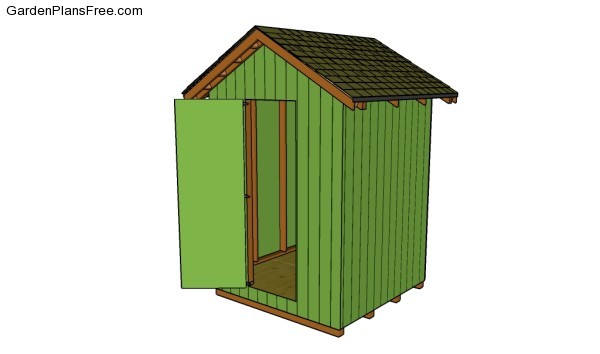
After building the frame of the shed, we recommend you to attach the siding into place. There are many things that you take into account, so make sure you pay attention to the instructions described in the article. Use T1-11 siding, as it has a nice look and it is also weather-resistant. From our own experience, investing in quality materials will pay off on the long run.
Ask a skilled friend to assist you when attaching the siding sheets to the frame of the shed, as you need someone to hold them into place while you insert the screws. Work with attention and invest in high quality materials, making sure they are in a good condition and perfectly straight. Apply a few coats of paint over the siding to protect them from decay and water damage.
TABLE OF CONTENTS:
Part 1: Small shed plans
Part 2: How to install shed siding
Part 3: Small shed roof plans
Part 4: Shed door plans
Installing Shed Siding

Building a small shed
Materials
- 7 – 10 pieces of 4’x8′ siding – T1-11 SIDING
Tools
- Hammer, Tape measure, Carpentry square
- Miter saw, Drill machinery, Screwdriver, Sander, Router
- Safety Gloves, Safety Glasses, Respiratory Mask
Time
- One day
Attaching the shed siding

Fitting the back wall
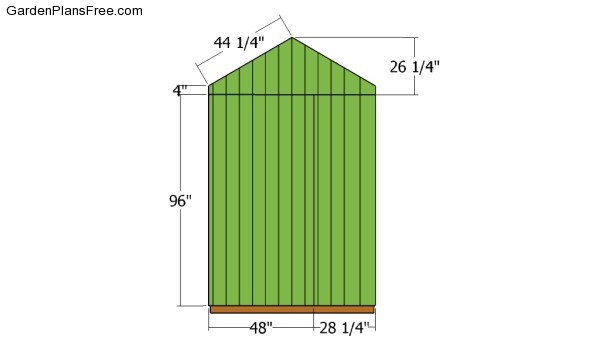
Attaching the siding to the shed is a straight forward process, but you need to pay attention to the right techniques, if you want to get the job done in a professional manner. Align the siding sheets to the top edge of the shed and secure it into place with finishing nails. Make sure the adjacent sheets join over the middle of a stud, otherwise the whole structure won’t be rigid.
Building the gable faces of the shed is a simple process, if you mark the cut lines with a pencil before adjusting their size with a circular saw. Use 1 1/4″ finishing nails to lock the siding into place, after aligning all the components at both ends.

Attaching the front face
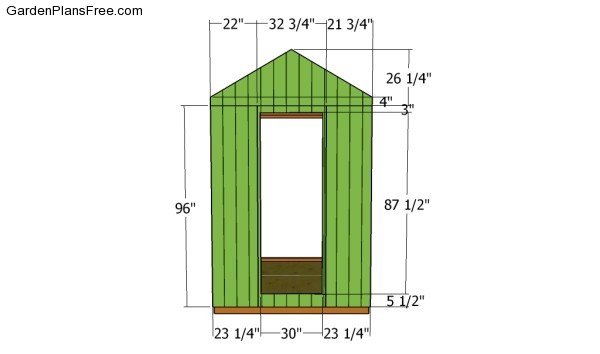
When fitting the siding to the front face of the shed, you need to pay attention to several aspects, otherwise the end result might not raise up to your expectations. Therefore, you need to cut the central sheet as shown in the plans. Drill a starting holes and use a jigsaw to cut out the door opening. Don’t throw away the scrap piece, as you will use it to build the door of the shed. Leave no gaps between the sheets of siding, if you want to get the job done in a professional manner.

Fitting the side walls
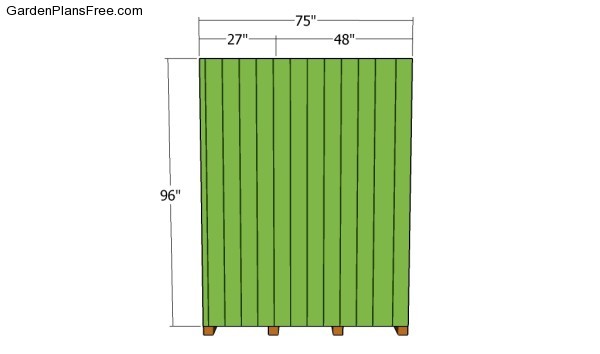
One of the last steps of the project is to fit the siding sheets to the sides of the shed. Adjust the sheets to the right size, attach them to the wall structure and lock them into place with finishing nails. Ask a friend to assist you when fitting the siding sheets, as you need someone to hold them into position, while you insert the finishing nails.

Small shed plans
Last but not least, you should take care of the finishing touches. Therefore, we recommend you to check if the components are locked into place properly and structure is rigid enough to support the firewood. Make sure there are no protruding screws or sharp edges.
PRO TIP: Fill the holes with a good wood filler and smooth the surface with medium-grit sandpaper. Apply several coats of paint or stain over the components, in order to protect them from decay. Don’t forget to check out the rest of the project, if you want to learn more about building this shed.
This diy project was about installing siding to a shed. If you have enjoyed the free project, we recommend you to share it with your friends, by using the social media widgets.
