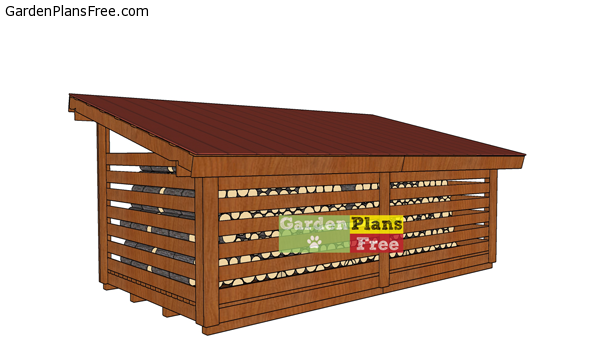
If you want to learn more about 8×16 firewood shed plans that can hold up to 6 cords, you have to take a close look over the free plans in the article. This large storage shed is built on a sturdy 2×6 floor frame with 4×4 pressure treated skids. In addition, the roof is built on 2×6 rafters, every 24″ on center. This wood storage shed features a sturdy but simple structure, so you can build this shed as a diy project. This rectangular wood shed is easy to make and friendly with the budget.
If you want to get the job done in a professional manner, we recommend you to plan everything with attention, as to prevent costly mistakes and to build a professional garden project. Invest in high quality materials, such as cedar, pine or redwood, as the bench will be exposed to all kinds of weather. Apply a few coats of paint over the components, to enhance their appearance and to protect them from bad weather.
8×16 Firewood Shed Plans – 6 Cord Wood Shed Plans

Building-a-6-cord-wood-storage-shed
Materials
Tools
- Hammer, Tape measure, Carpentry square
- Miter saw, Drill machinery, Screwdriver, Sander, Router
- Safety Gloves, Safety Glasses, Respiratory Mask
Time
- One week
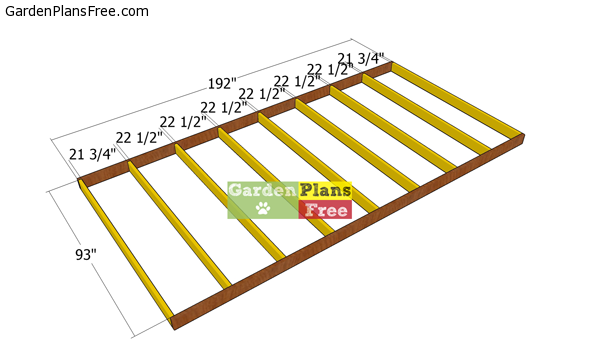
STEP 1: Building the shed floor
How-to-build-a-8×16-floor-frame
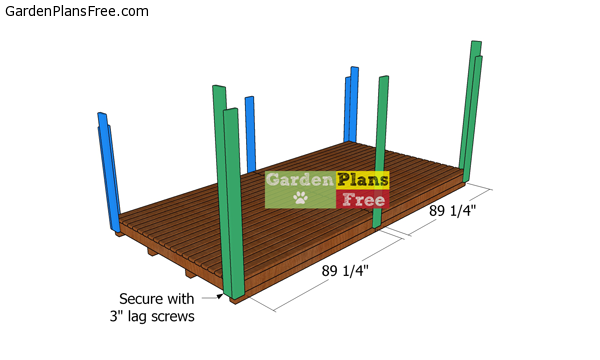
The first step of the project is to build the floor frame for the wood storage shed. As you can see in the diagram, you need to cut the joists from 2×6 lumber. The rim joists are 16 ft, while you need to cut the rest of the joists at 93″. Lay the components on a level surface and align the edges flush.
Drill pilot holes and insert 3 1/2″ screws to assemble the frame. Make sure the corners are square. Place the joists every 24″ on center, or if you have an extra budget, you can place them every 16″ OC. Measure the diagonals and make adjustments until they are equal.
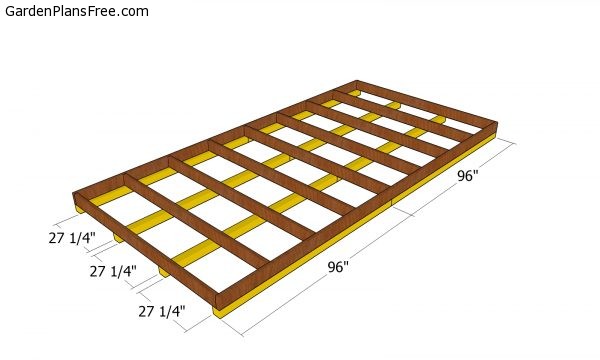
Fitting the skids to the shed floor
Select the location for wood shed and remove the vegetation layer. Spread a 2-3″ layer of gravel under the shed floor, so you can protect the floor from moisture. Next, lay the 4×4 skids under the floor frame and lock them together with rafter ties and 1 1/2″ structural screws. Use a spirit level to make sure the floor is horizontal.
The skids will lift the floor frame from the ground to protect the components from moisture. Use pressure treated lumber for the floor skids, at least, as they will be exposed to moisture.
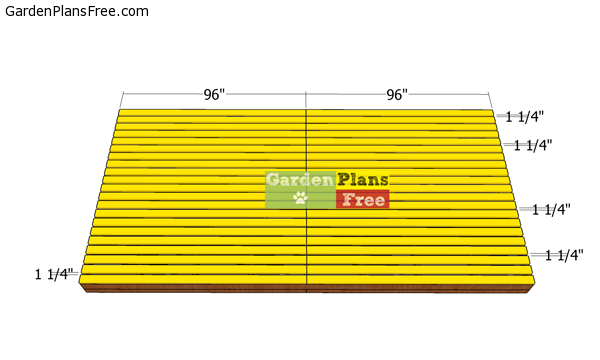
Fitting-the-floor-slats
Fit the 2×4 8 ft boards to the floor of the wood storage shed. Align the edges flush and fit 1 1/4″ pieces between the boards to create even gaps. Drill pilot holes through the slats and insert 2 1/2″ screws to lock the boards to the floor frame. The gaps between the boards will help with the drying out process, as the air flow will circulate from all directions.
STEP 2: Building the wood shed wall frames
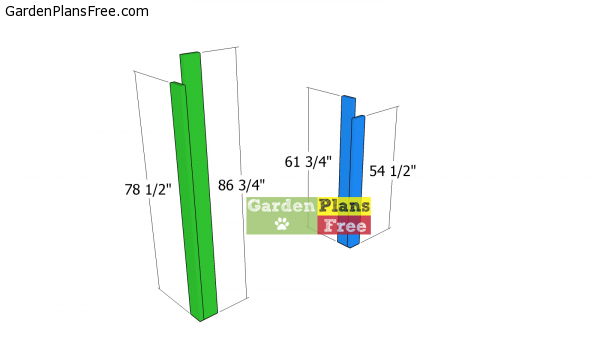
Posts-for-8×16-firewood-shed
Use 2×6 lumber for the vertical posts of the wood shed. Cut the posts at the right dimensions and then assemble them together tightly, as shown in the diagram. For the front posts, cut the 2×6 boards to 78 1/2″ and to 86 3/4″. For the back posts, cut the boards at 61 3/4″ and to 54 1/2″.
Leave no gaps between the boards and add glue to the joint. Drill pilot holes and insert 2 1/2″ screws to assemble the corner posts.
Fitting-the-slats
Attach the posts to the firewood shed floor. Plumb the posts with a spirit level. Drill pilot holes and insert 3″ lag screws to lock them to the floor frame. Insert the screws from both sides of the corner posts. In this manner, the posts will be secured tightly to the floor frame. Use at least 2 screws for each board.
Notice the extra 2×6 supports attached to the middle of the floor shed, to the front and to the back. Use a spirit level to plumb the posts. Drill pilot holes and insert 3″ lag screws to secure them to the floor joists.
Fitting-the-support-beams
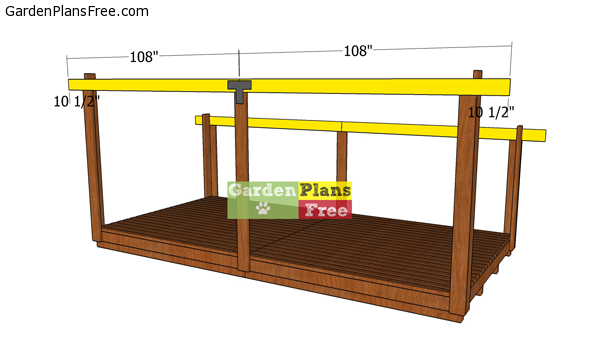
Use 2×6 lumber for the support beams. Fit the beams to the front and to the back of the shed. Drill pilot holes and insert 3″ lag screws into the posts. Use a spirit level to make sure the beams are perfectly horizontal.
Notice the T strong tie that joins the support beams to the middle of the vertical post. Use 1 1/2″ structural screws to secure the T ties into place.
Fitting the side wall slats
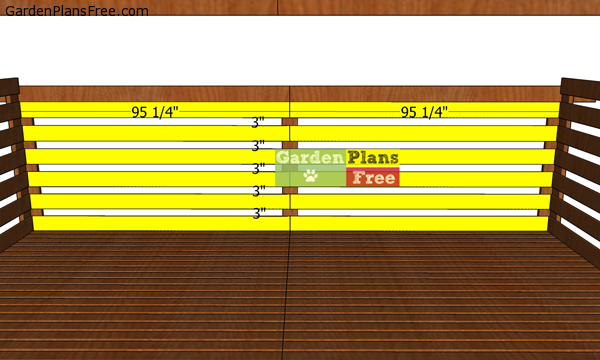
Use 1×6 slats for the side walls. Place 3″ spacers between the slats, to create even gaps. Drill pilot holes and insert 1 5/8″ screws to secure the slats to the posts.
Fitting-the-back-slats
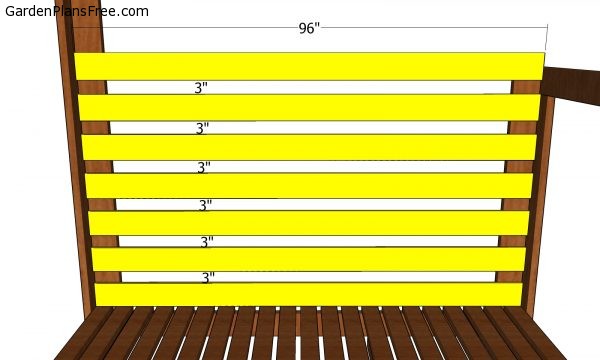
Attach the 1×6 slats to the back of the firewood shed. Place the 3″ spacers to create even gaps between the slats. Drill pilot holes and insert 1 5/8″ screws to lock the slats into place.
STEP 3: Building the lean to shed roof
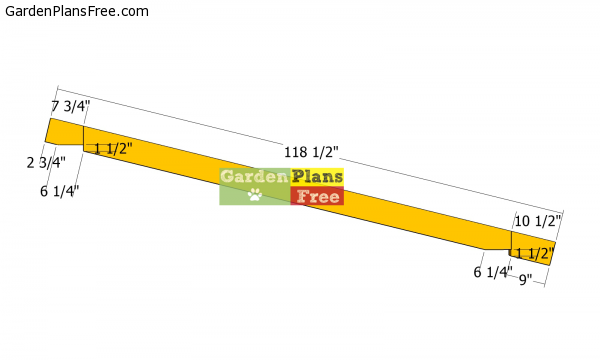
Rafters-for-8×8-firewood-shed
Next, build the rafters for the roof from 2×6 lumber. Mark the cut lines to the beams, as shown in the diagram. Use a circular saw for the birdsmouth cuts.
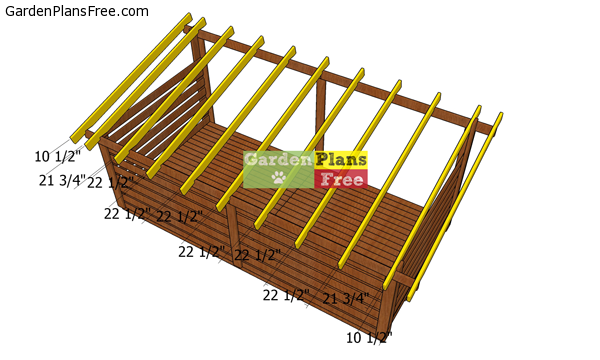
Fitting-the-rafters—6-cord-wood-shed
Fit the rafters to the support beams. Place the supports every 24″ on center. Use rafter ties to secure the rafters into place tightly. Use 1 1/2″ structural screws to secure the ties to the components.
Notice the extra rafter that goes to the middle of the roof. We need that rafter so we can install the purlins properly.
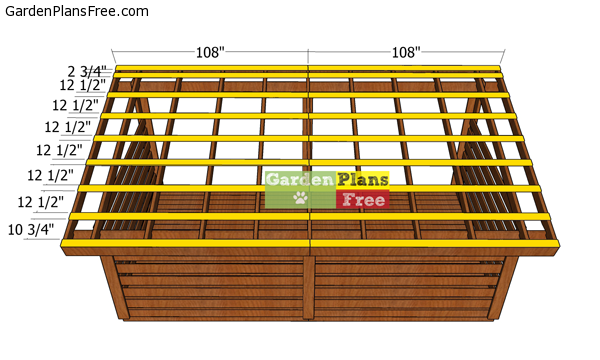
Fitting-the-purlins
Fit the 1×4 purlins to the top of the shed. Place the purlins every 16″ on center. Use 1 5/8″ screws to secure the slats to the rafters.
Roof trims
Attach the 1×8 trims to the front and to the back of the wood storage shed roof. Align the edges flush, drill pilot holes and insert 1 5/8″ screws, to lock them into place tightly.
8×16-Firewood-Shed-Plans—back-view
Next, attach the metal roof sheets to the top of the firewood shed. Align the edges and secure the sheets to the purlins with 3/4″ roofing screws.
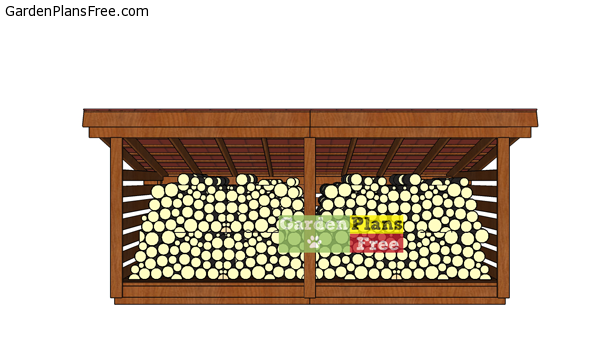
6-cord-firewood-shed-plans—front-view
Last but not least, you need to take care of the finishing touches. Fill the gaps with wood putty and smooth the surface with 120-220 grit sandpaper. Apply a few coats of paint or stain to protect the shed components from the elements and to enhance the look of the project.
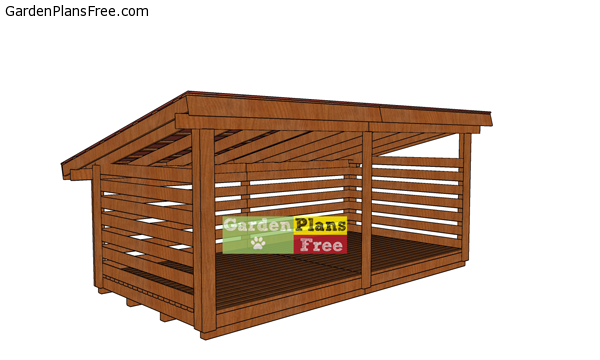
How-to-build-a-wood-storage-shed
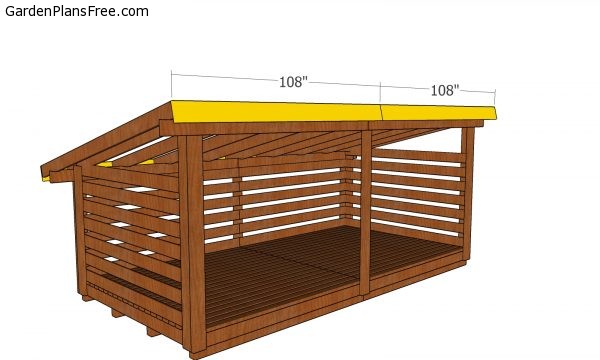
This 8×16 lean to shed can store up to 6 cords of firewood. The lean to shape of the roof makes for a straight forward process and keeps the costs down. In addition, you can save space in your backyard by building the shed next to the property line.
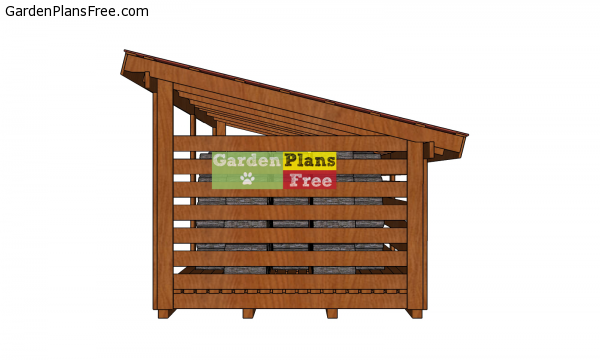
8×16-Firewood-Shed-Plans—side-view
You can see all my storage shed plans HERE. See plans for a 1 cord wood shed and plans for a 2 cord wood shed.

This diy project was about 6 cord 8×16 firewood shed plans. If you have enjoyed the free project, I recommend you to share it with your friends, by using the social media widgets. You can always save the plans as PDF or Print them using the floating widget on the left side of the screen (working only on PC or laptop).
2 comments
I have a question about the floor. Do the 2×4 ‘s on floor need screws at every joist ?
No