If you want to learn more about garden shed roof plans, we recommend you to pay attention to the instructions described in the article. There are many things that you should know about building a garden shed roof, so make sure you read the article and take a look over the rest of the shed project, as to get accustomed to the building techniques and materials required for the job.
A gable roof is one of the best choices when building a garden shed, as it has a very nice appearance and it adds value to your woodworking project. Don’t forget that you should also add front and back overhangs to the garden shed, if you want to protect the components from water-damage and to get the job done in a professional manner. Fit drip edges to drain the water properly.
TABLE OF CONTENTS:
Part 1: Small shed plans
Part 2: How to install shed siding
Part 3: Small shed roof plans
Part 4: Shed door plans
Garden Shed Roof Plans
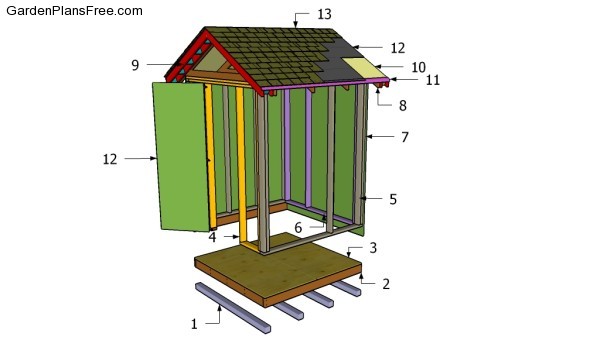
Building a small shed
Materials
- 8 – 10 pieces of 2×4 lumber – 57 1/4″, 5 pieces – 76 1/4″ TRUSSES
- 9 – 8 pieces of 2×4 lumber – 57 1/4″, OVERHANGS
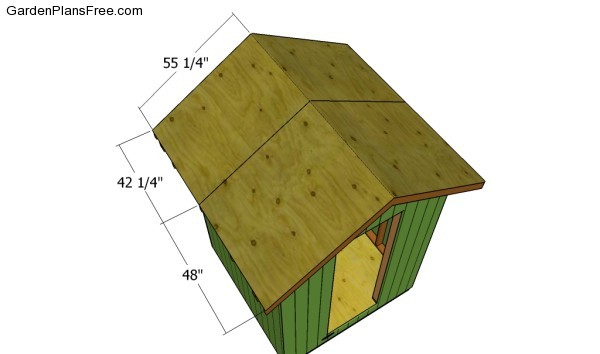
- 10 – 2 pieces of 3/4″ plywood – 48″ x 55 1/4, 2 pieces – 42 1/2″ x 55 1/4″ ROOFING
- 11 – PVC drip edges DRIP EDGES
- 12 – 100 sq ft roofing felt ROOFING FELT
- 13 – 100 sq ft of asphalt shingles ASPHALT SHINGLES
Tools
- Hammer, Tape measure, Carpentry square
- Miter saw, Drill machinery, Screwdriver, Sander, Router
- Safety Gloves, Safety Glasses, Respiratory Mask
Time
- One day
Building a garden shed roof
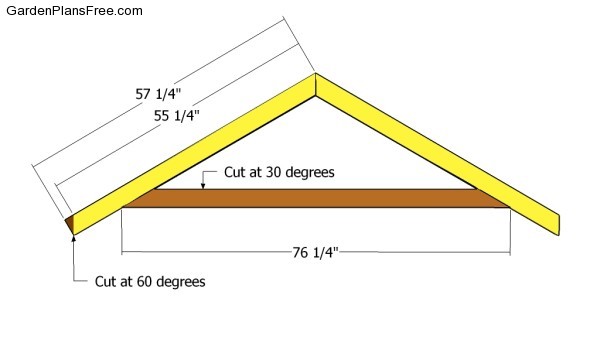
Building the roof trusses
The first step of the project is to build the rafters for the shed roof. As you can easily notice in the plans, we recommend you to take accurate measurements and to cut both ends of the components at the right angled, by using a miter saw. Work with attention and assemble the trusses on the ground before attaching them to the top plates.
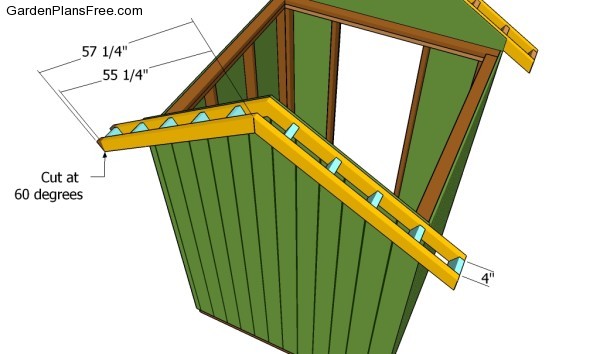
Building the overhangs
If you really want to make your garden shed stand out and to protect it from bad weather, we recommend you to build front and back overhangs. Assemble the overhangs on a level surface and attach them to the roof structure by using several screws and waterproof glue. Make sure you leave no gaps between the siding and the overhangs. In addition, align the components with attention, making sure they are rigid and sturdy.
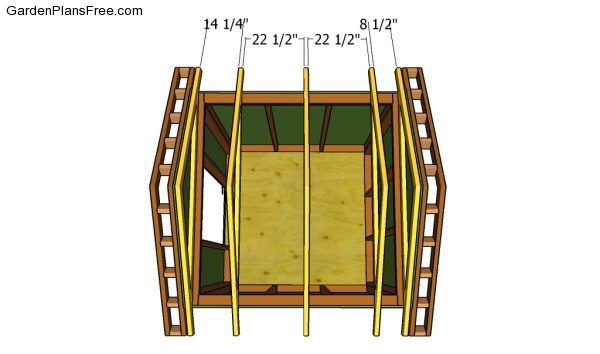
Building the trusses
Fit the trusses to the top plates and secure them into place, making sure they are equally-spaced. Plumb the trusses with a spirit level before attaching the plywood sheets into place. If you have followed the previous instructions, the surface should be perfectly plane.
Attaching the plywood sheets
Cut the 3/4″ tongue and groove sheets at the right size and attach them to the rafters with galvanized screws and finishing nails. Leave no gaps between the sheets and smooth the cut edges with fine-grit sandpaper.
Fitting the roofing felt
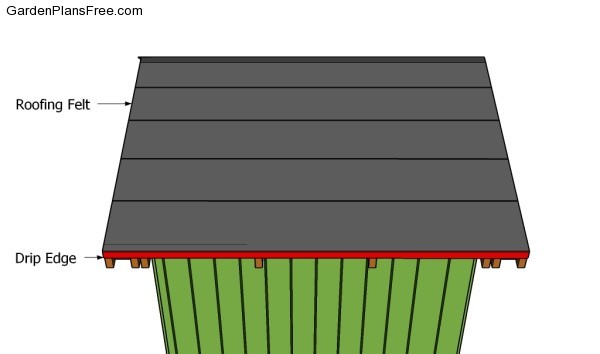
The next step of the project is to drip edges at the bottom of the roof, as shown in the image. Cover the surface with roofing felt, making sure the strips overlap at least 2″. Align the roofing felt at both ends and lock them into place with roofing staples.
Attaching the asphalt shingles
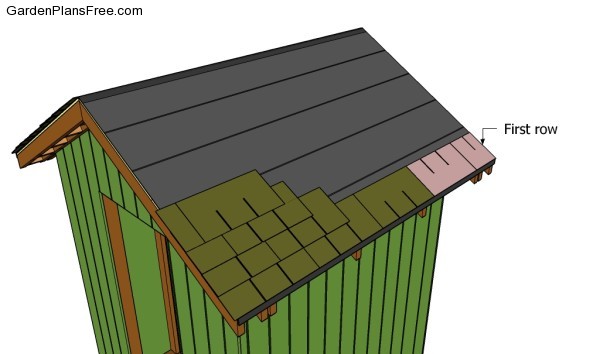
Install the shingles, starting with the bottom left of the roof. Read the manufacturer’s instructions with great care. Start the first course with a full tab, the second with 2 1/2 tabs, the third with 2 tabs, the forth with 1 1/2 tabs, the fifth with 1 tab, the sixth with half tab and the seventh with a 3 tabs. Secure the shingles into place with roofing tacks.
Attaching the shingles
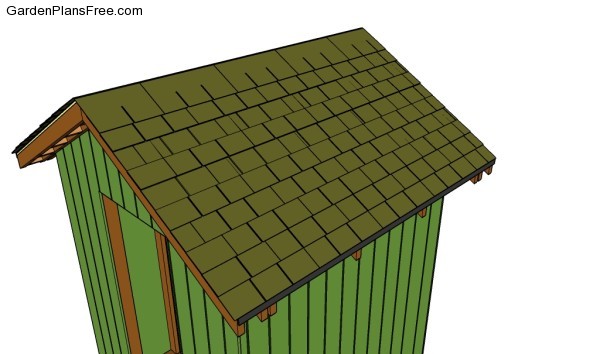
After attaching the 3-tab shingles into place, the roof should look similar to the one in the image. Make sure the next row of shingles cover the head of the roofing tacks.
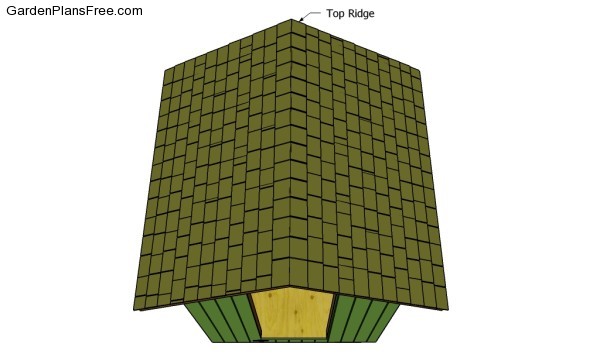
Fitting the top ridge
In order to cover the top ridge you should cut the 3 tab shingles into three equal pieces. Install them into place and insert roofing tacks. The next cap should overlap about 2” from the previous asphalt shingle. Work with great care and attention if you want to obtain a professional result.
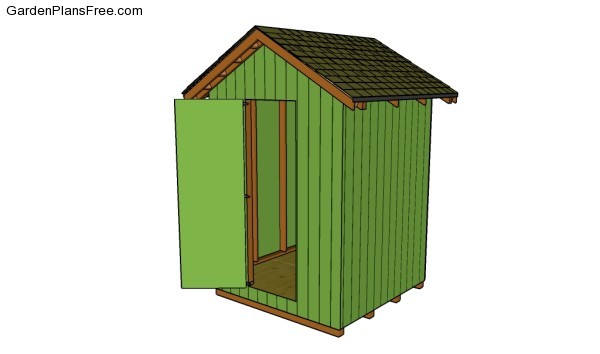
Small shed plans
Last but not least, you should take care of the finishing touches. Therefore, we recommend you to check if the components are locked into place properly and structure is rigid enough to support the firewood. Make sure there are no protruding screws or sharp edges.
PRO TIP: Fill the holes with a good wood filler and smooth the surface with medium-grit sandpaper. Apply several coats of paint or stain over the components, in order to protect them from decay. Don’t forget to check out the rest of the project, if you want to learn more about building this shed.
This diy project was about garden shed roof plans. If you have enjoyed the free project, we recommend you to share it with your friends, by using the social media widgets.
