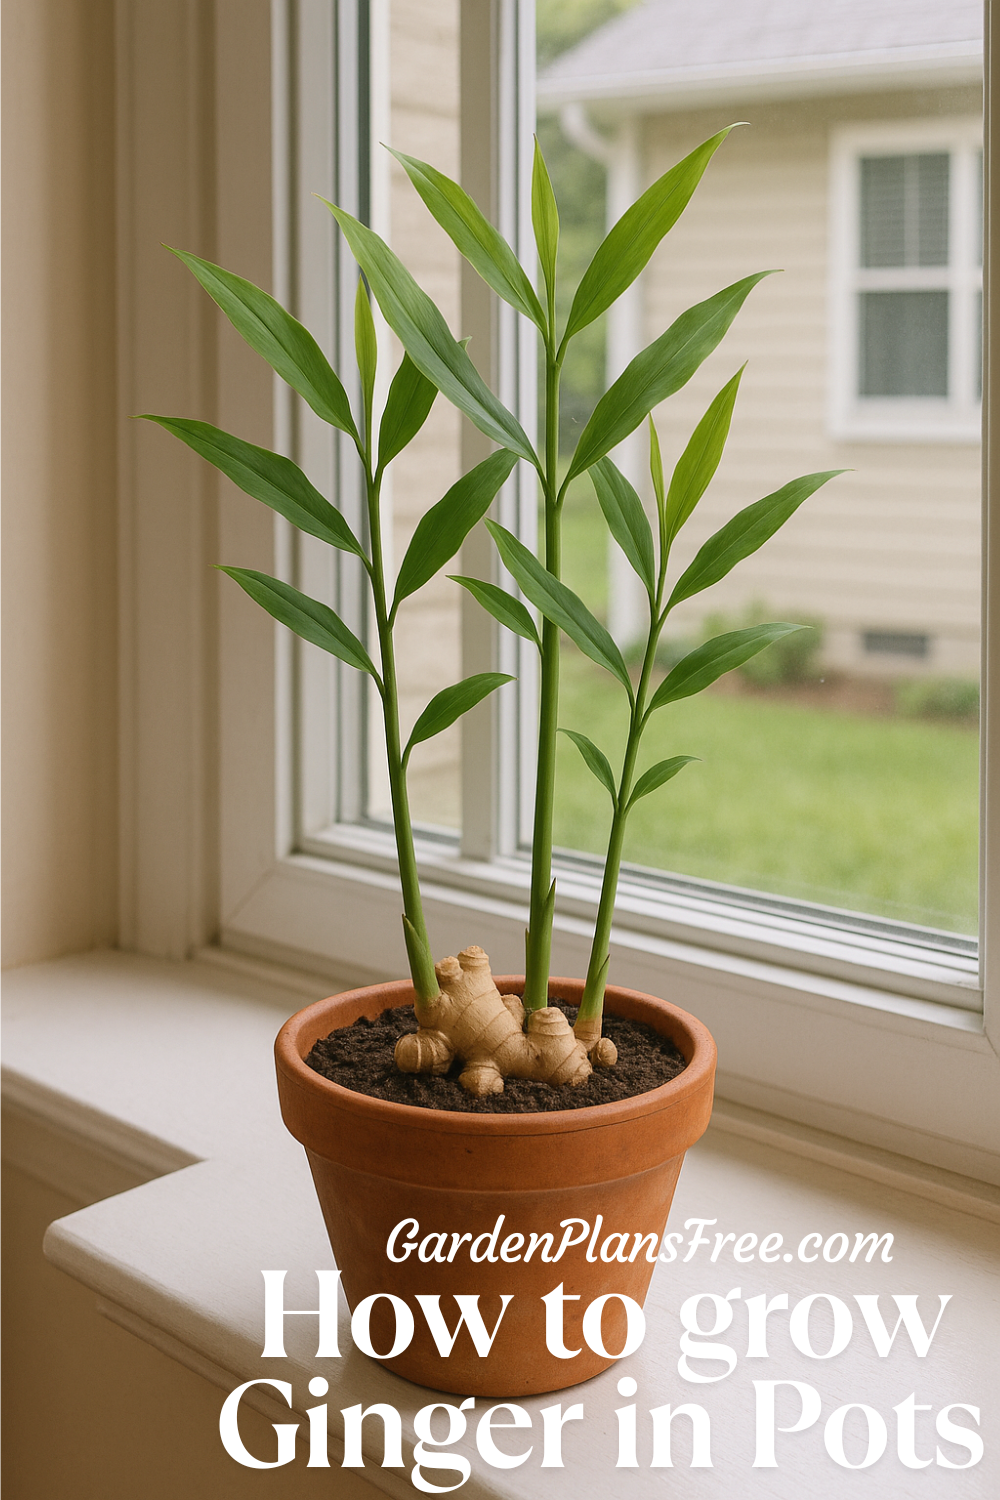
Growing your own ginger at home is easier than you might think — and honestly, it’s one of the most rewarding edible plants you can grow in a pot. Ginger (Zingiber officinale), the same spicy root you toss into tea or stir-fry, is a tropical plant loaded with flavor, fragrance, and powerful health benefits. It’s well-known for its anti-inflammatory properties, ability to soothe digestive issues, and even help fight off colds — making it a must-have in any kitchen and a smart addition to your home garden.
The best part? You don’t need a massive backyard or a greenhouse to grow it. Whether you’re gardening from a sunny windowsill in New York or a patio in the UK, growing ginger in containers is totally doable with just a bit of DIY spirit and a few clever techniques. In this step-by-step guide, we’ll walk you through the entire process of growing ginger in pots — from choosing the right container and making your own ideal soil mix, to sourcing healthy rhizomes on a budget and giving your ginger the TLC it needs to thrive.
No need for fancy tools or expensive supplies either — this is gardening made simple, affordable, and beginner-friendly. So if you’re ready to add a tropical touch to your home and harvest fresh, fragrant ginger from your very own container garden, let’s dig in and get those hands dirty (in the best way). You’re going to love how easy and satisfying this grow-it-yourself project can be!
Why Grow Ginger in Pots?
Fresh, Organic Ginger Anytime: If you love using ginger in recipes or tea, growing your own means you’ll have a fresh supply year-round. Homegrown ginger is free from pesticides and bursting with flavor. It’s a powerful superfood – many people value ginger for its antibiotic and anti-inflammatory properties, and its proven ability to soothe nausea and aid digestion. Plus, some studies even suggest ginger has anti-cancer benefits. By growing it yourself, you get these benefits straight from the source.
Suitable for Small Spaces: Ginger plants don’t need a big garden plot – a simple pot on your patio or a sunny windowsill will do. This makes container gardening ginger ideal for apartment dwellers or anyone short on garden space. The plant itself has attractive tropical foliage that can grow about 2–3 feet tall (around 60–90 cm), adding a nice green touch to your home or balcony.
DIY and Budget-Friendly: Ginger from the supermarket can be pricey, especially if you use it often. Growing your own is much more cost-effective, especially if you start with store-bought ginger rhizomes. As one gardening expert notes, ginger is “always expensive to buy,” but planting a few pieces yourself can yield a generous supply and save money. You don’t need fancy equipment or expensive materials – we’ll share plenty of cost-saving strategies (like using recycled containers and homemade soil mixes) to keep this project budget-friendly.
Climate Control: By growing ginger in pots, you gain control over its environment. Ginger is a tropical plant that thrives in warm, humid conditions and can’t tolerate frost. When you plant it in a container, you can move it indoors or to a sheltered spot if the weather gets too cold or too hot. This flexibility means even gardeners in cooler parts of the USA or Europe can successfully cultivate ginger.
With these benefits in mind, let’s get started on your ginger-growing journey!
Suitable Climates for Growing Ginger in Pots (USA & Europe)
Ginger (botanical name Zingiber officinale) originally hails from Southeast Asian tropical forests. It loves warmth and moisture. In the USA and Europe, our climates vary a lot, but don’t worry – growing ginger in pots lets you mimic the tropical conditions ginger prefers, regardless of your local weather.
Understanding Ginger’s Needs: In the warmest regions (think Florida, southern Texas, coastal Southern California, or the Mediterranean coast of Europe), ginger can grow outdoors year-round. In fact, ginger will grow year-round in USDA Hardiness Zone 9b and above, which includes much of Florida and parts of the Southwest U.S., as well as southern coastal areas of Spain, Italy, Greece, etc. In these areas, the climate stays warm enough that ginger can be a perennial plant, and you might even keep your potted ginger outdoors all year.
However, for most of us in cooler zones or temperate climates, we have to treat ginger as a seasonal plant or give it some extra care:
- USA (Cooler Regions): If you live in a zone 8 or lower (for example, the Midwest, Northeast, Pacific Northwest, or mountain regions), ginger won’t survive freezing winters outdoors. In these areas, plan to grow ginger during the warm months and bring your pots indoors before any frost. Ginger is hardy (able to survive winters) only in zones 8-12, but the trick in colder zones is to grow it in containers and move it indoors for winter. For instance, a gardener in zone 7 (like parts of the northern U.S. or southern Canada) might start ginger indoors in early spring, move it outside in late spring after the last frost, and then bring it back indoors by early fall.
- Europe: Similarly, in most of Europe, you’ll want to grow ginger in the warmer months and protect it from cold. In continental Europe (say Germany, France, Poland – which correspond roughly to USDA zones 6-8), ginger should be grown in a pot so it can be moved into a greenhouse, conservatory, or inside the house when temperatures drop. In the U.K. (around zone 8), gardeners have successfully grown ginger by keeping it in a warm, sheltered, frost-free spot like a greenhouse or conservatory. In hot Mediterranean parts of Europe (southern Spain, Italy, etc.), you can grow ginger outdoors; just provide some afternoon shade as those areas get very hot summers (more on that later). In cooler climates, ginger is usually grown as an annual (planted in spring, harvested in fall) because winter is too cold outside – unless you bring it indoors.
Temperature Requirements: Ginger thrives when the temperature is between about 70–90 °F (21–32 °C). To break dormancy and start growing, it prefers soil temperatures close to 70 °F (21 °C) or higher. If soil or air temps are below 50 °F (10 °C), ginger will suffer or go dormant. This means in cooler climates, you shouldn’t put your ginger plants outside too early. A good rule is to wait until after your last frost and the weather has truly warmed up. Many gardeners in temperate areas start ginger indoors in late winter or early spring (in a warm room or heating mat) to get a head start, then transplant it outside in late spring. If you plant ginger in cold soil, it will just sit there and possibly rot instead of growing. So, patience and warmth are key at the beginning.
Sunlight Considerations: We’ll talk more about light in a later section, but note that climate ties into how much sun ginger needs. In hot tropical or subtropical climates, ginger actually does best with some shade (morning sun and afternoon shade is ideal) because too much intense sun can scorch its leaves. But in cooler or cloudier climates, ginger can handle (and may need) more direct sun to stay warm and grow well. For example, under British or Pacific Northwest conditions (cooler, often cloudy), ginger can tolerate full sun because the overall temperature is lower. Always adjust based on your local climate.
Growing Season Length: To get a decent harvest, ginger typically needs about 8 to 10 months of growth before it’s mature enough to dig up. In a tropical climate, 8-10 months of suitable weather is no problem, but in a temperate climate, your outdoor growing season might be shorter. Don’t fret – you have a couple of options:
- Grow “Baby Ginger”: Baby ginger is young ginger harvested after about 5-6 months, before it fully matures. It’s milder in flavor and has a pinkish skin that doesn’t need peeling. Because it takes fewer months to grow, gardeners in cooler climates can harvest baby ginger by fall if they planted in spring. It’s a way to enjoy a harvest even if your season is a bit short.
- Extend the Season with Pots: Since your ginger is in a pot, you can start it indoors (to get those first few months of growth in a controlled warm environment) and end it indoors if needed. For example, start rhizomes in March inside, move them outside in June when it’s warm, then in October (as nights get chilly) bring the pots inside to let the ginger continue growing or at least to avoid frost. Many gardeners will bring potted ginger into a sunny indoor spot or greenhouse in the fall to let it reach the full 8-10 months before harvesting.
- Overwintering: If you have a large healthy plant by fall and you don’t need to harvest it all, you can try to overwinter the ginger. This means keeping it in its pot in a protected indoor spot over winter. The foliage may die back (ginger naturally goes dormant and leaves turn yellow when it’s done growing or if it gets too cool). You would stop watering and let it sit almost like a stored tuber. In spring, when warmth returns, it may sprout new growth again. This effectively gives it a head start for the second year and can yield an even bigger rhizome. Overwintering can be tricky if you don’t have a consistently warm spot, so many beginners opt to harvest and then start with a fresh piece next spring using part of their harvest (we’ll discuss storing rhizomes for replanting).
Bottom line: Growing ginger in pots allows you to cultivate this warm-climate plant in cooler areas by moving it as needed. If you’re in a hot region, you have the advantage of a long season (just provide some shade), and if you’re in a cool region, use your container mobility to your advantage. Now that you know ginger’s climate preferences, let’s move on to preparing the right home (pot and soil) for your ginger plant.
Selecting the Right Pot for Ginger
One of the best parts of growing ginger in pots is that you can use all sorts of containers – no fancy planters required. Ginger grows horizontally, which means the rhizomes spread outwards rather than drilling deep down like a carrot. So when choosing a pot, width is more important than depth. Here are some tips for picking and preparing your container:
- Size and Shape: Aim for a pot that’s at least 8 to 12 inches deep (20-30 cm), and nice and wide. A wider, shallow pot is better than a narrow, deep one. This gives your ginger rhizomes room to creep outward and form new “hands” of ginger. For example, a pot that’s 12 inches deep and 14-18 inches across would work great. If the pot is too deep, you might just be wasting soil at the bottom that the ginger roots won’t reach. About 2-3 gallons (8-12 liters) volume per rhizome chunk is a good guideline. Some gardeners use rectangular window boxes or tote bins so the ginger can really spread horizontally.
- Drainage is Crucial: Whatever container you choose, it must have drainage holes. Ginger will rot in waterlogged soil, so you need excess water to be able to escape. If you’re repurposing a container (like a plastic bucket or storage bin), be sure to drill several holes in the bottom. DIY Tip: You can turn a 5-gallon bucket into a ginger planter by drilling holes in the base – an inexpensive solution with plenty of space. Similarly, old washtubs, wooden crates, or half barrels can work as long as you can create drainage. Remember, healthy ginger roots = no “wet feet” (standing water).
- Material: Terracotta pots are attractive and breathable, but they can dry out faster (and they’re heavy). Plastic pots or grow bags work well for ginger because they retain moisture a bit more and are easy to move. Fabric grow bags (like those cheap felt-like gardening bags) are excellent since they’re breathable and can accommodate spreading roots; just ensure they’re wide enough. Use what you have – the ginger won’t mind if it’s in a plain bucket instead of a designer pot. If using a very large pot, you might place it on a plant caddy with wheels for easy moving.
- Stability: Ginger plants can get 3 feet tall with lots of foliage, so you don’t want a tiny pot that could tip over. A broader base will keep the plant stable as it grows top-heavy. If your container is lightweight, consider placing a couple of rocks in the bottom (above the drainage holes) to weigh it down – but don’t fill the whole bottom with rocks, as that reduces space for roots. (Contrary to some myths, you don’t need a layer of gravel for drainage; just good holes and well-draining soil, which we’ll cover next.)
- Cleaning and Prep: If reusing a pot, clean it with soapy water or a mild bleach solution to kill any pathogens from previous soil. This is a good practice to prevent diseases. Also, plan where you’ll place the pot. Early on, you’ll want it in a warm indoor spot (if it’s still chilly outside). Once it’s full of soil and a growing plant, a large pot can be heavy to lug around, so think about using a trolley or the aforementioned wheeled plant stand if you expect to move it frequently (like hauling it indoors on cold nights, then back out).
Budget-Friendly Pot Ideas: The theme here is use what you’ve got or can get cheaply:
- Large plastic storage tubs or bins (the kind used for tote boxes) can be converted into planters by drilling holes.
- Food-grade 5-gallon buckets (often free or cheap from bakeries or restaurants) make great deep pots – you can even cut the side to make it wider if you’re crafty.
- Even heavy-duty reusable grocery bags or rice sacks have been used as impromptu grow bags for ginger. Line them with a trash bag that has holes poked for drainage if they’re not thick enough.
- Check second-hand stores or online marketplaces for used planters on the cheap. As long as you ensure good drainage and enough volume, your ginger will be happy.
Now that we have a pot ready, let’s fill it with a home-crafted, ginger-friendly soil mix without breaking the bank.
Ideal Soil for Ginger and Affordable DIY Potting Mix
Ginger loves rich, loose soil. Think of the forest floor in the tropics: lots of composted leaves (organic matter), well-drained, but consistently moist. That’s what we’re aiming to mimic in a pot. The good news is you can often use basic ingredients to make an ideal mix. Here are the soil requirements and some DIY mix tips:
- Loose, Well-Draining Texture: The soil should be crumbly and airy so that the ginger rhizomes can easily expand. Avoid heavy clay soil that clumps – it will smother the ginger and hold too much water. A loose, loamy texture is best. When you water, the water should percolate through; if you see puddling on top for very long, your mix might be too dense.
- Rich in Organic Matter: Ginger is a moderately heavy feeder and appreciates lots of nutrients. Incorporating organic matter (like compost) will feed the plant slowly and retain moisture. Aim for soil that’s organically rich. You want a mix that is dark and fertile-looking, not sandy or pale.
- Slightly Acidic pH: If you love geeking out on soil pH, ginger prefers slightly acidic conditions, around pH 5.5 to 6.5. In practice, if you’re using compost and standard potting materials, you should be in that range. (Most bagged potting soils are slightly acidic.)
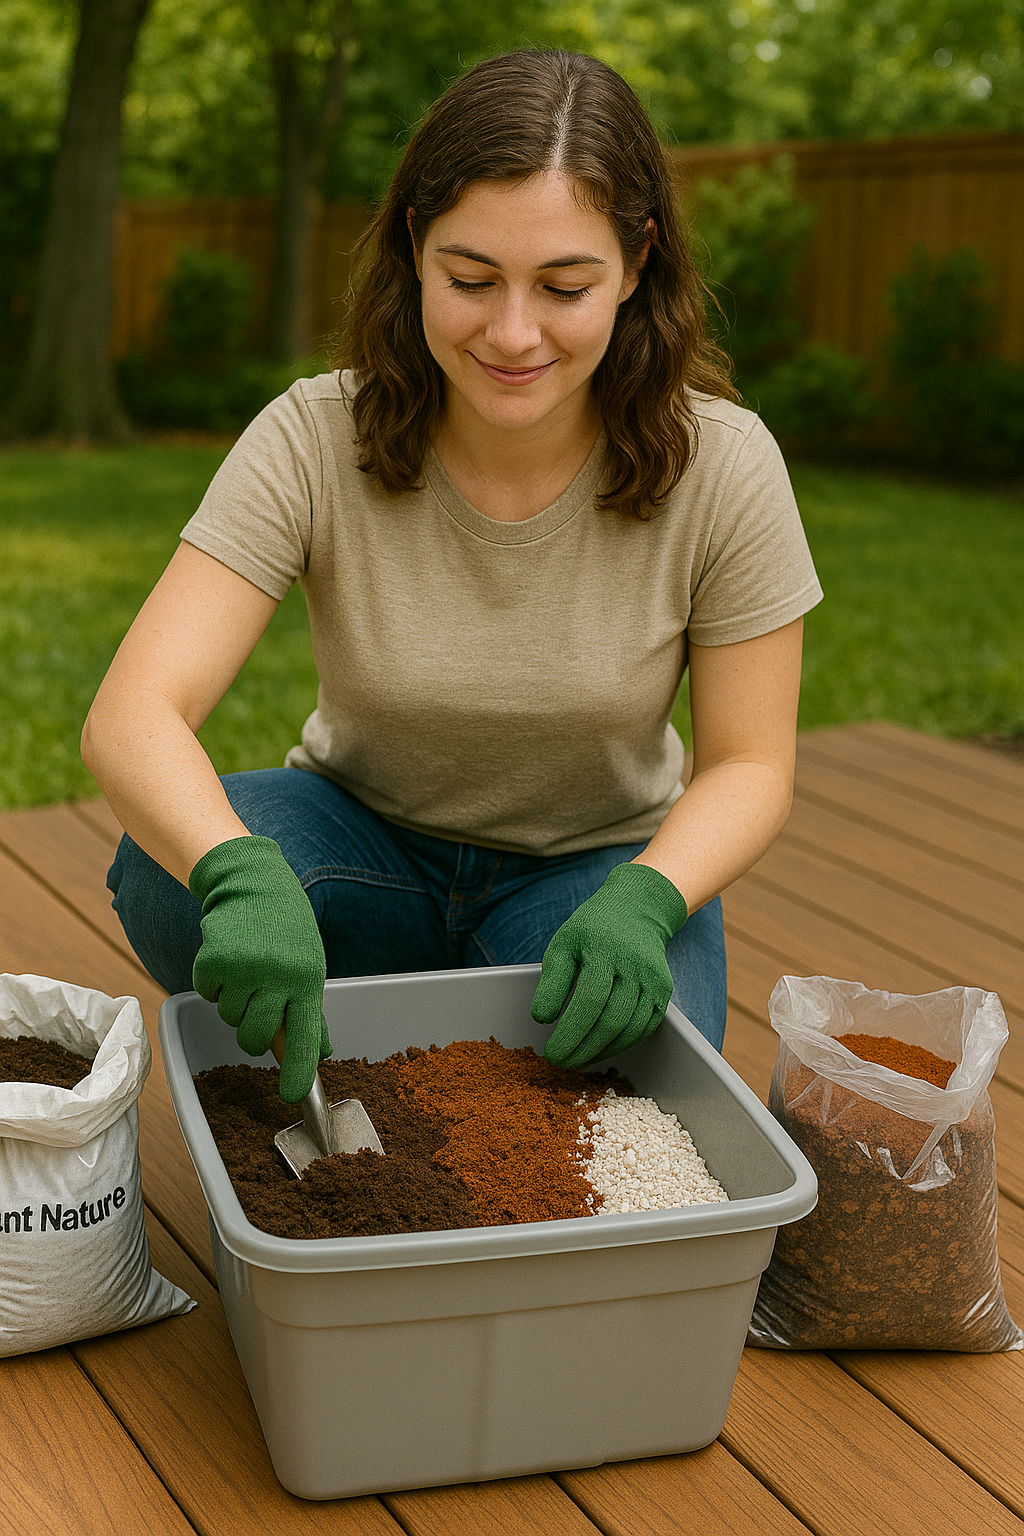
DIY Potting Mix Components: You can absolutely use a quality standard potting mix as the base for growing ginger – it already has a good balance. But to save money, you can extend or create your own mix using a few components:
- Potting soil or garden soil: If you have some general potting soil or even decent loose garden topsoil, this can be one ingredient. (If using garden soil, it’s wise to sterilize it or at least be aware it might carry insects or nematodes that can harm ginger. Better to lean on purchased potting mix or soil that has been composted well to avoid pests).
- Compost: Good compost (from your bin or purchased) adds nutrients and improves soil structure. Feel free to mix in compost, aged manure, or worm castings to build a nutritionally rich foundation. For instance, one guide suggests mixing standard potting mix half-and-half with compost for ginger. Worm castings (vermicompost) are like fertilizer power pellets – a few handfuls mixed in will give a gentle nutrient boost.
- Drainage material: To ensure drainage, incorporate perlite or coarse sand. Perlite is those little white volcanic pellets often found in potting soil; it helps create air pockets and drains water. Coarse sand (builder’s sand) can also help, but don’t use fine beach sand which can actually pack tight. Aim for maybe 10-20% of the mix as perlite/sand.
- Coconut coir or peat moss: These help retain moisture without waterlogging and keep the mix light. Coconut coir is a sustainable choice and often affordable in brick form. You can rehydrate a brick of coir and mix it in to fluff up your soil and hold moisture. Peat moss similarly lightens soil and holds water, but be aware peat is less sustainable. Either way, 10-20% of the mix can be coir/peat for moisture retention.
Easy Mix Recipe: A simple mix for ginger could be – 1 part potting soil, 1 part compost, 1 part coir or peat, 1/2 part perlite. This combo yields a loose, rich mix. Honestly, ginger isn’t overly fussy as long as it’s not planted in straight clay or something waterlogged. Standard potting mix alone works well too, so don’t overthink it if you have a bag of that.
Affordable Sourcing: To keep costs down, use what you have:
- If you compost at home, fantastic – that’s black gold for your ginger pot and free fertilizer.
- Soil from old planters can be refreshed by mixing in new compost and perlite (just ensure it wasn’t harboring any diseases).
- Many municipalities offer free or cheap compost to residents; check if your area has a compost facility.
- Coir bricks are often cheaper than buying ready potting mix and expand a lot.
- Perlite is inexpensive and a little goes a long way; one small bag can improve many pots.
- Avoid mixes that are heavy on chemical fertilizers; we prefer a slow-and-steady organic nutrition approach for edible plants like ginger.
Fertilizer Needs: Starting with a rich soil mix may carry your ginger for the first couple months. Over the long growing season, nutrients can get used up or washed out (especially since we’ll be watering often). A cost-effective feeding strategy is to use organic fertilizers sparingly. For instance, a diluted fish emulsion or seaweed extract every 6-8 weeks can keep your ginger well-fed. You can also bury some slow-release organic fertilizer in the soil at planting or occasionally top-dress with compost mid-season. We’ll cover more in the care section, but remember: a fertile soil means bigger, healthier ginger roots, so it’s worth the little effort up front to enrich your potting mix.
With your pot and soil ready, the next step is obtaining your ginger “seeds” – which in this case isn’t a packet, but actual ginger roots! Let’s talk about sourcing ginger to plant (without spending a fortune).
Where and How to Source Ginger Rhizomes
You might be wondering: do I need special seeds or a starter plant to grow ginger? The answer is happily no – you can grow ginger from the same kind of rhizomes (the knobby roots) you buy at the grocery store. This is one reason ginger is such a great DIY project; you can literally use kitchen scraps or supermarket produce as your planting material. Here’s how to source your ginger rhizomes:
- Grocery Store or Market: The cheapest and easiest source is often your local grocery store or farmers’ market. Look for fresh, plump ginger rhizomes in the produce section. Choose pieces that are firm (not dried or shriveled) and have visible “eyes” or buds – these look like small pointed bumps or horns on the ginger’s surface. Those eyes are growth points that can sprout into a new plant. Pieces about 2-3 inches long (5-7 cm) or larger are ideal. If you see any that have already begun to sprout (with little green nubs), that’s a great find. Regular grocery ginger is usually the common variety (Zingiber officinale), which is very flavorful and perfect for growing. And as one source notes, supermarkets and produce markets are probably the cheapest places to buy ginger for planting. Often, you can get a sizable chunk for a dollar or two.
- Organic vs Conventional: One catch – conventional (non-organic) ginger from stores is sometimes treated with a growth inhibitor to prevent it from sprouting on the shelf. This is why ginger in your pantry rarely sprouts the way potatoes do. It’s not guaranteed that all grocery ginger is treated, but to be safe, go for organic ginger if available, as it’s less likely to have been treated. Organic ginger might cost a bit more but usually still far cheaper than buying “seed ginger” online. If you can only get regular grocery ginger, don’t worry – you can still use it, but you should soak it in water for 24 hours to help leach out any inhibitors. Just fill a bowl with lukewarm water, drop the ginger pieces in, and let them sit overnight (no more than a day, or else they could get too soggy and risk rotting).
- Garden Centers/Online Seed Companies: These sometimes sell “seed ginger” or rhizomes specifically meant for planting. The pros: they might have special varieties or certified disease-free stock. The cons: they can be relatively expensive (often sold by the pound or per rhizome at a higher price than grocery ginger). Unless you’re after a unique ornamental or culinary variety, you likely don’t need to go this route. But it’s an option if, say, you want a particular type of ginger or you have no access to fresh ginger locally. (Just remember not to link or promote specific sellers as per our guidelines.)
- Friends or Local Gardeners: If you know someone who grows ginger, ask if they can spare a piece. Ginger naturally multiplies; if they have a big clump, they might be able to break off a chunk for you to start your own. Sharing plants is a great cost-saving strategy among gardeners.
- How Much to Get: For a beginner, you might start with about 1/4 to 1/2 pound of ginger (roughly 2-4 decent chunks). Each chunk can be planted to grow a new plant. If you only want one pot, one chunk is okay – but having a few pieces increases your chances and yield. Also, ginger doesn’t grow from seed, it grows from these rhizome pieces; each piece you plant will grow into a plant and produce more rhizome.
- Inspect Before Planting: Make sure the ginger you select is healthy. Avoid pieces that are moldy, soft, or rotten. A little dryness on the ends is fine (you can trim off any dried bits), but overall it should look like something you’d be willing to cook with. If there’s any sign of disease or a rotten smell, pick a different piece.
Once you have your ginger rhizomes, you’re almost ready to plant. But first, we need to do a little prep on those rhizomes to get them ready for planting:
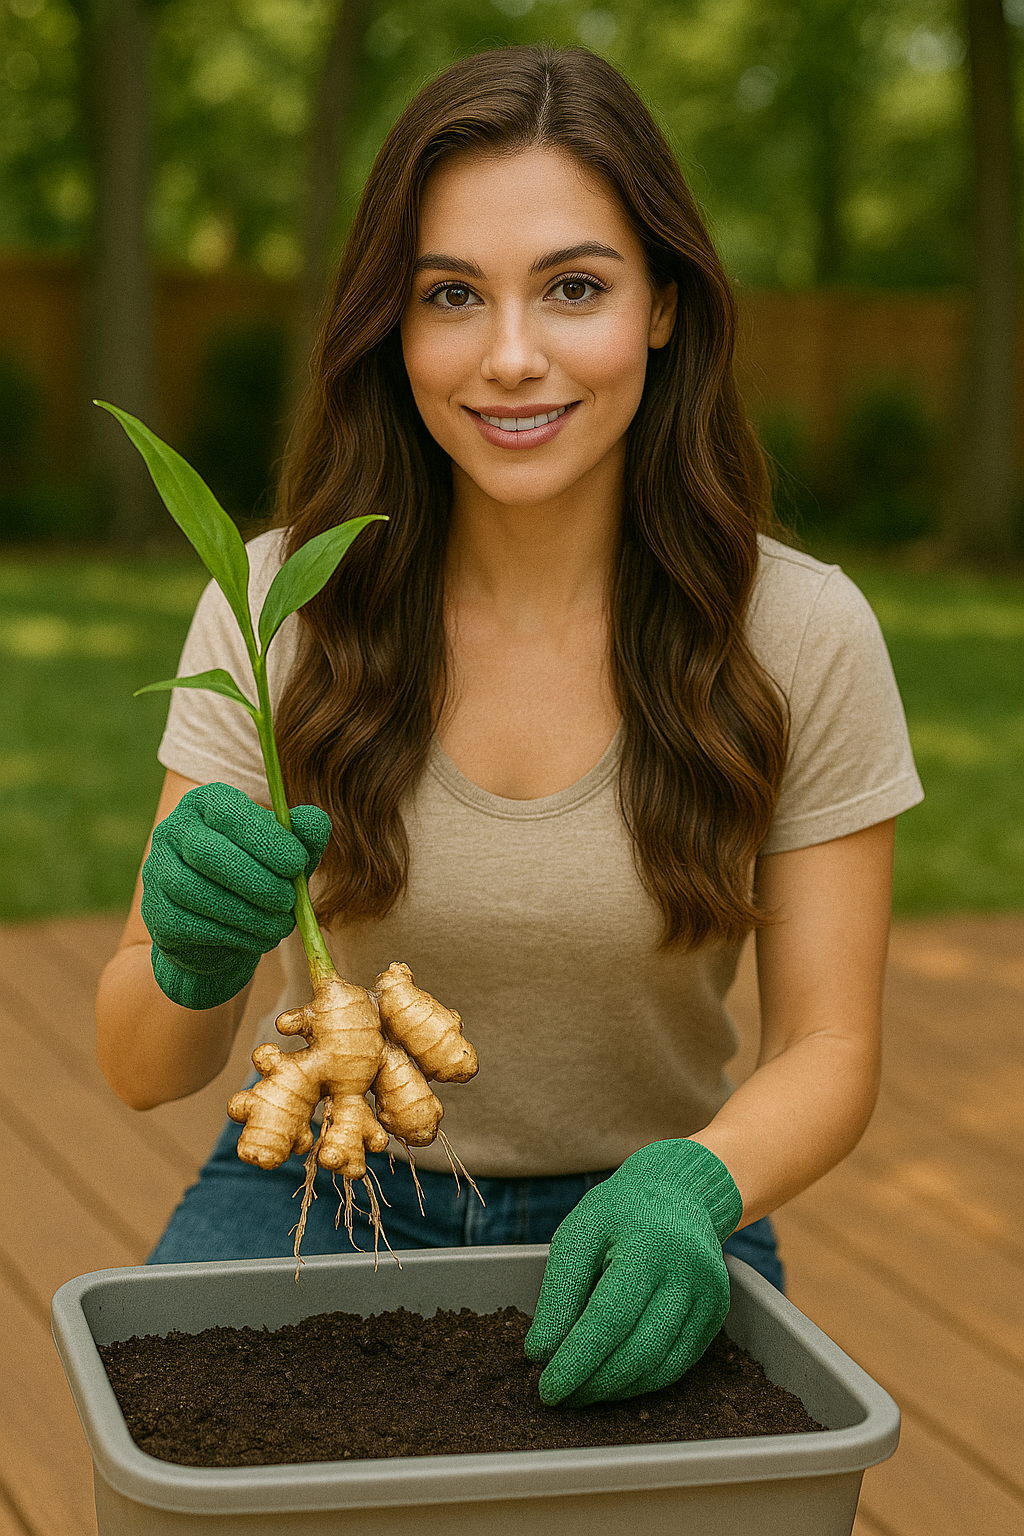
Preparing Ginger Rhizomes (Cutting and Curing): You can plant the whole piece as is, or divide it into smaller pieces to get multiple plants. Each viable piece should be at least 1-2 inches across and have at least one or two good “eyes” (buds). In fact, keeping pieces on the larger side (2+ inches) tends to give better success, as smaller cut pieces may dry out or rot more easily. If your ginger hand (that’s what a whole ginger root is sometimes called, a “hand”) has several eye buds in different sections, you can cut it into a few chunks. Use a clean knife or garden pruners to slice it, and try to minimize damage.
After cutting, let the pieces dry (heal) for a day or two in a warm, dry place out of direct sun. This allows the cut surfaces to callus over – essentially the cut will seal and be less prone to infection when planted. This step is like when you take cuttings from succulents or potatoes; a little air-drying goes a long way to prevent rot.
If you soaked the ginger to remove inhibitors, do the cutting after soaking (since soaking softens it and might make it harder to cut cleanly before). And after soaking, definitely let the ginger skin dry for a few hours so it’s not waterlogged going into soil.
Sprouting (Optional Step): Some gardeners like to pre-sprout ginger indoors before the weather outside is ideal. You have a couple of options:
- Sprout in a Tray: Place your ginger pieces in a shallow tray or pot with just a bit of moist potting mix (or even just damp peat/coir), half-buried, in a warm spot. Keep it lightly moist. After a few weeks, you might see it start to root and sprout. The BBC Gardeners’ World recommends initially placing ginger in shallow compost in a seed tray in a warm place until shoots develop, then potting it up. This is optional but can give you a head start.
- Sprout in a Bag or Water: Others wrap ginger in damp paper towel and keep it in a plastic bag in a warm spot until it sprouts, or even place it in a dish with a little water at the bottom to encourage buds to grow. These methods can work if you want to monitor sprouting closely, but usually simply planting in soil (next step) works fine.
Alright, you have a pot, good soil, and healthy ginger rhizomes ready to go. Let’s move on to the fun part – planting!
Step-by-Step Planting Guide for Ginger in Pots
Planting ginger is straightforward and a great beginner gardening project. We’ll break it down into steps, DIY-style:
1. Fill Your Pot with Soil
Make sure your chosen pot has drainage holes, then fill it with your prepared potting mix. Fill to about 2-3 inches below the rim of the pot. This space at the top makes watering easier (so it doesn’t spill over). Before planting, lightly water the soil so it’s uniformly moist but not soggy – like a wrung-out sponge.
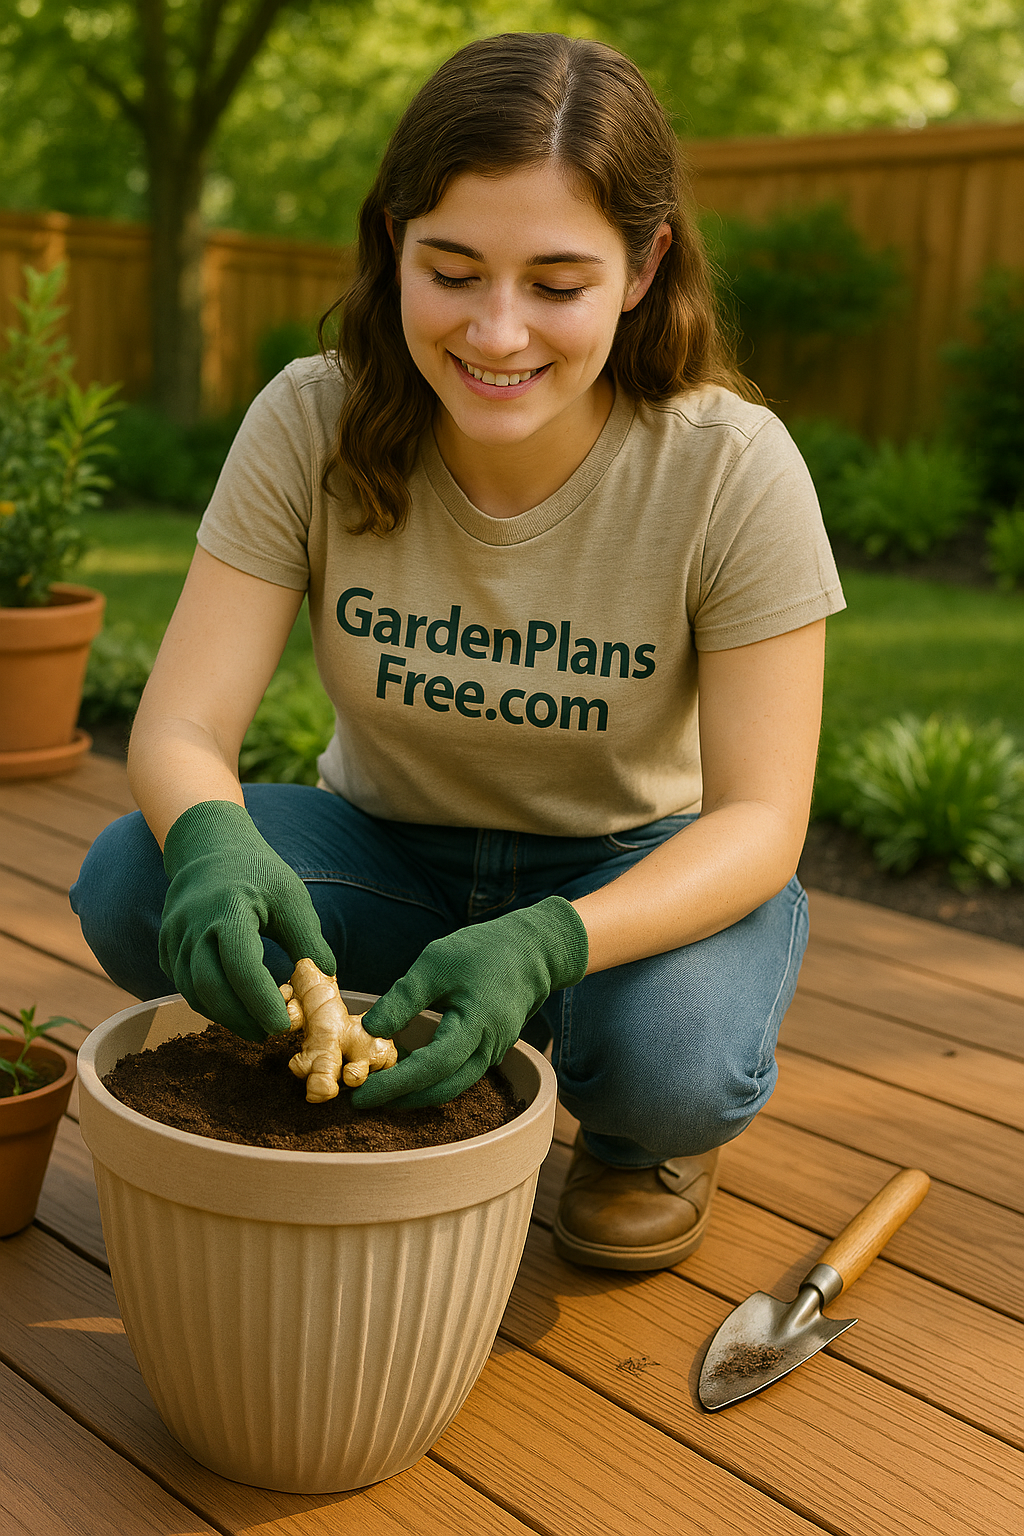
2. Position the Ginger Pieces
Take your ginger rhizome chunk (or chunks). Remember to plant with the buds (eyes) facing up toward the sky. Press each piece into the surface of the soil. If your pot is large enough for multiple pieces, give them some room apart. A good rule is to allow about 6-8 inches of space per piece so they have room to spread without immediately bumping into each other. (In a wide pot, you might plant 2-3 pieces spaced out. In a smaller pot, stick to one piece.)
3. Plant at the Right Depth
Unlike some deep-rooted veggies, ginger does not need to be planted deep. In fact, planting too deep can cause the rhizome to struggle or rot. Cover the ginger with about 1 inch (2.5 cm) of soil so it’s lightly buried. If a few tips of the eyes are peeking out, that’s okay, but generally cover the rhizome so it stays moist. Do not bury it several inches down – the ginger rhizome should be relatively close to the surface, just snug under a layer of soil. (One method, as mentioned earlier, even leaves the very tops of buds exposed, though covering by an inch of soil is standard.) The reason is ginger sends up shoots from those eyes and they shouldn’t have to work through tons of soil to emerge. Also, the new rhizomes will form right around the planted piece and often just below the soil surface.
4. Water Gently
After planting, give the soil a good drink of water, but do it gently so you don’t wash the ginger out of place. You can use a watering can with a rose attachment (sprinkle head) or just pour carefully. The goal is to settle the soil around the ginger and provide initial moisture. Water lightly but thoroughly – the soil should be moist, not a swamp. Since ginger hasn’t sprouted yet, it won’t drink much water; you just don’t want the piece to dry out. On the other hand, too much water with no roots to use it can encourage rot, so moderate is the key. After this initial watering, you might not need to water again for a week or so (depending on indoor conditions), because there’s no foliage yet to lose water.
5. Create a Warm, Humid Environment
Now it’s time to let nature (with your assistance) do its work. Place the pot in a warm spot with indirect light. Warmth is critical for sprouting. Ideally, you want temperatures around 70°F (21°C) or above consistently. For many, that means keeping the pot indoors or in a heated greenhouse to start. If you’re in a warm climate and it’s already say 80°F outside, you can place the pot outdoors in a shady, protected area for sprouting. Otherwise, a sunny windowsill inside can work, or near a heater (but not where it’ll dry out too fast). Some people cover the top of the pot with plastic wrap (with a few holes) or a plastic bag to create a mini-greenhouse effect and hold humidity until it sprouts – just be careful to ventilate occasionally to prevent mold. Humidity helps ginger sprout, since it’s a tropical plant used to moist air.
6. Be Patient – Sprouting Time
This is the part that tests your patience! Ginger is not a fast-sprouter. Depending on temperature and the freshness of your rhizome, it can take anywhere from two to eight weeks for shoots to appear. Often you’ll see roots growing out of the rhizome first (hidden in the soil), and then a green shoot will poke up. In ideal warm conditions, sprouts might emerge in about 2-3 weeks. But if it’s cooler, it could be a solid 6-8 weeks. Don’t panic if you don’t see anything for a month or more – as long as the rhizome is firm and not rotting, it’s likely working on growing roots before it sends up the top. During this time, keep the soil lightly moist. Check it maybe once a week; if the top inch is dry, give a bit of water. Remember not to overwater – with no leaves, the water needs are low. Tip: It’s often better to underwater than overwater at this stage. A rotting rhizome will get soft, slimy, or develop a bad smell – if that happens, it was likely too wet or too cold. If you maintain a warm (above 65°F) and moist (not soggy) environment, you’ll eventually be rewarded with a little green shoot peeking out.
7. Transition to Light
When you see one or more green shoots emerging, congratulations – your ginger is alive and growing! At this point, you’ll want to ensure the plant gets some light to photosynthesize and keep growing strong. Ginger shoots start pale and will green up. Move the pot to a spot with bright, indirect light initially. Direct sun can be a bit harsh on a tender new sprout, so if it was indoors in a dim area, move it near a window (east or west window is great, or a south window but not right in the window if it’s scorching hot). If you started indoors and your weather is now warm and frost-free, you can start acclimating the pot to the outdoors. Do this gradually: put it outside in shade for a few hours a day, increasing over a week, so it hardens off. Then find a good permanent spot for it (see next section on ideal light conditions). If it’s still cool outside, keep it growing indoors a bit longer.
By following these steps, you’ve successfully planted your ginger! The hard part (waiting) is mostly over once it’s sprouted. Next comes the care phase, which includes providing the right water, light, and nutrients as the ginger grows lush foliage and fat rhizomes beneath the soil. Let’s discuss how to care for your growing ginger plant.
Watering and Sunlight Requirements
Now that your ginger has sprouted and is growing, it’s important to give it the right amount of water and light. Tropical plants like ginger appreciate a balancing act: they love moisture and some sun, but they don’t want to be drowned or sunburnt. Here’s how to keep your ginger plant happy:
Sunlight: Finding the Sweet Spot
Partial Sun for Most Situations: Ginger naturally grows on the forest floor in partial shade. It prefers partial sun, such as morning sun and afternoon shade. If you’re in a hot climate (tropical or very warm summer), definitely avoid all-day intense sun. Too much direct sun, especially in the afternoon, can cause ginger’s leaves to scorch or wilt. An ideal outdoor spot might be one that gets a few hours of gentle morning sunlight, then bright shade or dappled light the rest of the day. Under a high tree canopy or on a porch that is shaded in the afternoon works well.
In a moderate or cooler climate, with milder sun, ginger can take more direct sunlight. For example, in the UK or northern U.S., the sunlight intensity is lower, so ginger could sit in sun for longer, even a good portion of the day, and be okay. Actually, in cooler climates, giving it more sun is beneficial to keep the plant warm. If your summer is cool, aim for as much sun as possible (at least 6 hours of direct sun) to encourage strong growth. But watch the plant – if you notice the leaves looking bleached or crispy at the edges, it might be getting too much intense sun or heat.
Indoor Light: If you’re growing ginger indoors (or moving it inside for winter), place it by the sunniest window you have. South or west-facing windows usually provide the most light. Ginger grown as a houseplant can handle a lot of indoor sun because window glass filters out some intensity. In fact, indoors you often want all the light it can get, since it won’t be as strong as outdoors. If your indoor space is dim, consider using a grow light a few hours a day to supplement, or move the plant outside when possible.
Watch for Signs: Ginger leaves will tell you if they’re getting the right light:
- Happy leaves: upright, green, and healthy looking.
- Wilting in afternoon: could mean too much direct sun heat – try more shade or water (check soil).
- Yellowing leaves (from the top down): if it’s not near end of season, this could indicate sun scorch or even a nutrient issue; but often bright yellow patches or tips mean too bright/hot sun.
- Leggy, thin growth: if stems are long and leaves are spaced out, the plant might be stretching for light – it needs a brighter spot.
Finding the right spot might take a little adjustment. The beauty of a pot is you can move it if you see it’s not thriving. Many gardeners sort of rotate their potted ginger – maybe outside under a tree in peak summer, then into more sun by late summer when the sun’s angle is less intense, etc.

Watering: Consistent Moisture without Drowning
Moist, Not Soggy: Ginger loves water but hates soggy feet. The goal is to keep the soil consistently moist like a damp sponge, but never let the plant sit in standing water or sopping-wet soil. Overwatering is a common mistake that leads to rhizome rot. Here’s how to strike the balance:
- Water the pot thoroughly when the top inch of soil feels slightly dry to the touch. Then let the excess drain out. Never let the pot sit in a water-filled saucer – always dump out standing water.
- A good rule of thumb from experienced growers: water when the surface of the soil is just starting to dry. Check the soil with your finger; if it still feels quite moist, hold off. If it feels just barely damp or drying, it’s time to water. This often ends up being once or twice a week, depending on weather, pot size, and plant size. In hot weather, you might be watering a bit more often, especially if the plant has grown large.
- In a very warm climate, some gardeners water ginger daily (especially in fast-draining soil) because the heat and the plant’s uptake dry the pot quickly. For instance, an experienced grower in a subtropical region noted watering every day in summer was needed, otherwise the ginger would suffer and even reabsorb moisture from its own rhizomes. So adjust to your conditions. In cooler or indoor conditions, daily watering would likely be too much.
Avoid Drought: While ginger doesn’t want to be waterlogged, letting it dry out completely is also a no-no. If the soil totally dries (and pulls away from the pot sides), the ginger can get stressed, wilt, and it may even start using up the starches in its rhizome to survive (that “cannibalizing its own rhizome” concept). If you accidentally let it go dry and the plant wilts, give it water promptly; ginger is fairly resilient and may perk back up if the rhizome is still healthy.
Overwatering Signs: Yellowing leaves starting from the lower part of the stem upward can be a sign of too much water and beginning rot. The plant might also just look generally limp and the soil may smell sour. If you catch it early, you can let the soil dry out more and cut back on watering. Ensure the drainage is working (if in doubt, poke a few holes or gently re-loosen soil). If a part of the plant is rotten (like one piece in a multi-piece pot), remove that piece to save the rest.
Underwatering Signs: Brown tips or edges on leaves, or overall drooping leaves that aren’t firm, usually mean it’s too dry. Ginger leaves might also fold in a bit and look lackluster when thirsty. As long as you give water before it’s severely dried, it should recover quickly.
Humidity: Here’s an often overlooked factor – ginger adores humidity. In fact, it loves humidity levels of 70-90%, which is like a steamy jungle. For outdoor growers in humid summer climates, this is great. But if you’re in a dry climate or growing indoors, consider raising the humidity around the plant:
- Indoors, you can place the pot on a pebble tray (a tray with gravel and water in it, so the pot sits on the gravel, not in the water – the evaporating water adds humidity).
- Misting the leaves occasionally can help, though the effect is brief.
- Grouping plants together creates a micro-humidity zone.
- In a really dry house, a small humidifier near the plant (or placing it in a well-lit bathroom) can make a difference. A kitchen or bathroom window where showers or boiling water add moisture to the air is a nice spot.
- That said, ginger will still grow in average humidity, it just might be a bit happier and less prone to drying tips in higher humidity. So think “tropical” and try to mimic that, especially if you see the plant struggling with dryness.
Rain and Overhead Watering: If your ginger is outdoors, normal rain is fine. Just be cautious in prolonged rainy periods – if the pot is getting flooded by heavy rain day after day, move it under shelter so it doesn’t stay too soaked. Because ginger is in a pot, you have the luxury of moving it if needed to avoid heavy downpours or hail, etc. Light overhead watering (sprinkling on the leaves) is not a problem – in fact, it can increase humidity around the plant. Just avoid doing it late in the evening; wet leaves overnight in cooler temps could encourage disease. Watering in the morning is generally best.
By keeping the soil moisture consistent and giving your ginger the right light exposure, you’ll create ideal conditions for robust growth. Now, with the plant happily growing, you should also be aware of feeding and common care tasks, as well as any issues that might crop up. In the next section, we’ll cover ongoing care, troubleshooting problems, and how to address common issues in your ginger-growing adventure.
Caring for Ginger: Common Issues and Troubleshooting
Every gardener faces a few hiccups now and then. Ginger is relatively low-maintenance when its basic needs are met, but let’s go over some common issues you might encounter and how to solve them. Remember, a lot of gardening is observing and responding – so stay attentive to your ginger plant, and you’ll catch most problems early.
Slow Growth or No Sprouting
- Issue: It’s been weeks and your ginger hasn’t sprouted, or it’s growing very slowly.
- Possible Causes: Temperature too low, or the rhizome was not viable (perhaps rotted or treated heavily with inhibitor).
- Solutions: Ginger needs warmth to sprout. If it’s below ~70°F where your pot is, try moving it to a warmer spot or use a seedling heat mat under the pot. Also, be patient up to 8+ weeks as noted – ginger often waits until conditions are just right. If you suspect the rhizome rotted (dig gently to feel if it’s mushy), you may have overwatered or it was diseased. In that case, you might have to start over with a fresh piece, adjusting your watering. Next time, ensure a really well-draining soil and maybe dust the cut pieces with cinnamon or sulfur powder (natural fungicides) before planting to prevent rot.
Yellowing Leaves
- Issue: The ginger’s leaves are turning yellow.
- Possible Causes: There are a few different types of yellowing, so check which fits:
- Lower leaves yellowing first, in mid-season: Could indicate overwatering leading to some root rot, or nutrient deficiency (nitrogen deficiency causes older leaves to yellow first, since ginger is a heavy feeder).
- Upper leaves or all leaves uniformly pale yellow-green: Possibly not enough fertilizer, or the plant is in too much sun intensity (light chlorosis from overexposure).
- Speckled yellow spots: Could be pest damage (like spider mites) or a fungal issue.
- End of season yellowing: If it’s been 8-10 months and the plant is naturally yellowing and dying back in late fall, that’s normal and a sign harvest time is near!
- Solutions: If you suspect overwatering/root rot, let the soil dry out more and ease up on watering. Ensure good drainage. If it’s nutrient deficiency and the plant is in active growth (not near natural dormancy), consider feeding with a balanced liquid fertilizer or adding some compost to the top of the soil. Fertilizing tip: Ginger appreciates feeding every few weeks during growth; using an organic fertilizer like fish emulsion or seaweed is effective. If it’s sun scorch, move the pot to a slightly shadier spot and see if new leaves emerge green. For pests or disease, see below.
Browning or Crispy Leaf Tips
- Issue: Tips of the leaves or edges are turning brown and dry.
- Possible Causes: This often points to low humidity or underwatering. It can also happen if there’s a salt build-up from over-fertilizing with chemical fertilizers (less likely if using organic sparingly).
- Solutions: Increase humidity around the plant (mist, pebble tray, etc.) and make sure it’s getting watered enough especially in hot weather. Trim off very brown, dead tips with scissors if you want (it’s cosmetic). If you suspect fertilizer burn, flush the pot with water (water heavily to drain out salts) and switch to a gentler feeding regimen.
Wilting or Drooping Leaves
- Issue: The plant looks limp, leaves droopy.
- Possible Causes: Either lack of water (drought stress) or heat stress. If soil is bone dry, it’s thirst. If soil is moist but it’s very hot or the plant is in harsh sun, it could be just heat wilting (the plant folds to conserve water).
- Solutions: For underwatering, water immediately and thoroughly – ginger often rebounds quickly. For heat stress, ensure the plant has some shade in the hottest part of the day. On extremely hot days, you might even move the pot into full shade or indoors for a bit. Keeping the soil moist also helps the plant regulate temperature (evaporative cooling through leaves). Mulching the top of the pot with straw or bark can help keep roots cooler and moist in heatwaves.
Pest Problems
- Issue: Leaves have holes, are chewed, or have tiny bugs visible. Perhaps leaves are sticky or distorted.
- Common Pests: Ginger can occasionally attract pests, especially in an indoor or greenhouse setting. Some pests to watch for:
- Slugs/Snails: If your pot is outdoors, these can nibble on leaves, leaving ragged holes.
- Aphids: Small green or black soft-bodied insects on leaves/stems, usually causing sticky residue (honeydew).
- Spider mites: Very tiny speck-like critters on undersides of leaves causing fine speckled yellowing and maybe tiny webs; they thrive in dry indoor air.
- Mealybugs or Scale: Little cottony or shell-like bugs attached to stems or leaf joints, sucking sap.
- Thrips: Tiny thin insects that can rasp at the leaves, causing silvery patches.
- Nematodes: In soil, certain nematodes can attack ginger roots, but if you used commercial or sterilized potting mix, risk is low. This is more an issue if using garden soil.
- Solutions: Most pests can be managed without harsh chemicals:
- For slugs/snails, hand-pick at night or use organic slug bait if they’re a big problem. Elevating the pot or using copper tape around it can also deter them.
- For aphids, mealybugs, scale, thrips, etc., start by washing them off with a gentle spray of water (outdoors) or wiping them off with a soapy water solution (like a few drops of dish soap in a quart of water). Neem oil is a great organic treatment for many of these pests – spray on the foliage to smother and repel pests. Insecticidal soap sprays also work.
- For spider mites, increase humidity (they hate moisture) by misting plants. Use neem oil or insecticidal soap on leaves (undersides especially) every few days for a couple of weeks to break their cycle. Quarantine the plant from others because mites spread easily.
- Always check new plants you bring home for pests so you don’t inadvertently introduce them. Ginger isn’t particularly pest-prone, but indoor plants can get infestations due to lack of natural predators.
- If an infestation is severe on a small plant, sometimes it’s best to discard that plant and start anew with clean soil and a fresh piece, especially if you have other plants to protect. But that’s worst-case. Usually, consistent gentle treatment will solve it.
Disease Issues
- Issue: Ginger plants can sometimes get fungal or bacterial diseases, though in pots it’s less common than in farm fields.
- Examples: Soft rot (bacterial rot) – rhizome turns mushy and foul-smelling, usually from overwatering; Leaf spot or blight – dark spots on leaves, often from fungal spores in overly wet conditions.
- Solutions: Prevention is key: don’t overwater, ensure good airflow around the plant (don’t crowd it among others without air circulation). If you do see a leaf fungus (spots), remove the affected leaves and treat the rest with a mild fungicide (like a copper-based one or neem, which has some antifungal properties). For rot, you usually have to remove and discard rotted sections. If caught early, you might save part of the rhizome. If the whole rhizome is gone, you’ll have to start over, unfortunately. Sterilize the pot with bleach solution before reusing in that case.
Weeds or Other Unexpected Plants
- Issue: Little weeds popping up in the pot.
- Cause: Weed seeds in your compost or potting mix.
- Solution: Simply pluck them out when small. Weeds compete with your ginger for nutrients and water, especially in the confined space of a pot. Regularly check under the ginger’s canopy for any intruders and remove them. A small mulch layer can also discourage weeds.
Ginger Not Forming Rhizomes (Small Harvest)
- Issue: The plant grew leaves, but when you harvest, the rhizomes are puny.
- Possible Causes: Not enough time (harvested too early), not enough sun/warmth, or insufficient nutrients.
- Solutions: Ginger really bulks up in the last few months of its growing cycle. If you cut it short, you’ll get less. Try to allow the full 8-10 months if possible. If you must harvest earlier (due to winter), accept that it might be a smaller “baby ginger” harvest (still usable!). Next time, consider starting earlier indoors or giving supplemental light/heat to extend the season. Nutrient-wise, ensure you fed the plant during growth – a hungry ginger might not produce big rhizomes. And sunlight = energy, so a plant in too much shade or constantly cool weather will yield less. If growing indoors, maybe add a grow light or choose a sunnier window to boost photosynthesis.
Throughout your ginger growing, keep notes of what works and what challenges you faced. Gardening is a learning process, and every season you’ll get better at it. Now, assuming things have gone well, let’s get to the exciting part: harvesting your ginger and how to store it for use (and for replanting).
Harvesting and Storage Tips
After months of watching your ginger plant thrive, it’s time to reap the rewards! Harvesting ginger from a pot is satisfying and simple. Here’s how to know when to harvest, how to do it, and ways to store and use your precious homegrown ginger:
When to Harvest
Ginger is usually ready to harvest in 8-10 months from planting for fully mature rhizomes. If you planted in spring, this means late fall or early winter is harvest time. A clear sign is when the plant starts to naturally die back: the leaves and stems will turn yellow and begin to dry out. This indicates the ginger is entering dormancy and the rhizomes have finished growing. At this point, you can harvest the whole plant.
You can also harvest earlier if you want “baby ginger.” At around 4-6 months, you can carefully dig up a portion of the rhizome. It will be smaller, with pinkish tender skin. Baby ginger has a milder flavor and is very juicy (great for candying or fresh use). It doesn’t have the papery skin of mature ginger, so it doesn’t store as long, but it’s a delicacy. If you go this route, try to leave some of the plant in place so it can continue growing. For the biggest yield, though, wait for the leaves to yellow.
Note: If your climate is warming up and your ginger hasn’t yellowed by late fall but frost is coming, you’ll need to harvest before frost regardless. Freezing will kill the rhizome. You can dig it all up or attempt to bring the pot indoors to see if it will finish, but often at that point it’s fine to harvest what’s there.
How to Harvest Ginger from a Pot
Harvesting from a pot is convenient – no heavy digging. Here’s what to do:
- Prep the Plant: Stop watering a couple of weeks before you plan to harvest, once you notice the plant yellowing. Letting the soil dry out helps cure the ginger a bit and makes harvest cleaner (less muddy). Some experts suggest cutting off the dry foliage a week or two before harvest. You can trim the stems down to an inch above soil and then let the pot sit dry.
- Remove the Ginger: The easiest method is to gently dump out the pot. Lay out a tarp or some newspaper, tip the pot over and carefully shake out the contents. You’ll see the ginger rhizomes mixed in the soil. Since we didn’t plant them too deep, they should be near the surface layer of the soil clump. Use your hands to brush off soil and reveal the ginger. Alternatively, you can dig with your hands or a small tool to pull out rhizomes, but dumping usually ensures you find all of them.
- Collect Rhizomes: Break off any large rhizomes from the stems. They may have many branches; you can break those into manageable pieces. Handle ginger gently; freshly harvested ginger can bruise or break (the skin is thin). Tip: If you plan to replant some, identify a few nice pieces with healthy buds to keep aside.
- Clean Up: Shake off or lightly brush off as much soil as possible. You can rinse the ginger roots in water to clean them, but if you do, make sure to let them air-dry afterwards to prevent mold in storage. For immediate kitchen use, washing is fine.
Saving Rhizomes for Replanting
One of the best cost-saving moves is to save some of your harvest to start next year’s ginger crop. Choose a few plump, healthy rhizome pieces with visible buds (eyes). These are essentially your “seed ginger” for next season. Let them cure (dry) for a day or two in a cool, dry spot out of direct sun – this healing helps them store without rotting. Then you can store them in slightly damp peat moss or coir in a breathable bag, somewhere around 50-60°F (10-15°C). Or, many people simply keep a piece in their pantry or fridge crisper if it’s not too cold or dry there. The key is to not let it completely dry out and shrivel, and also not let it get moldy. Check on stored pieces occasionally. Come spring, they’ll be ready to plant, saving you from buying new rhizomes.
Harvesting ginger from container
Using and Storing Harvested Ginger for Eating
Freshly harvested ginger is wonderfully aromatic and flavorful. Here’s how to store and preserve it for your kitchen:
- Refrigerator (Short Term): Fresh unpeeled ginger can be stored in the fridge for about one month. Keep it dry (wrap in a paper towel and place in a paper or plastic bag in the crisper). Only wash or peel it when you’re about to use it, as peeling shortens shelf life. If you’ve peeled some, that peeled ginger will only last 2-3 weeks refrigerated.
- Freezing (Long Term): Ginger freezes excellently and keeps its flavor. For long storage, freezing is one of the best methods. You should peel the ginger first (use a spoon to scrape off skin, or a peeler for tough parts), because peeling after freezing is tough. Then you have options:
- Freeze whole knobs in a freezer bag or container. You can grate or slice off what you need straight from frozen (a microplane grater works great on frozen ginger).
- Or, grate/chop the ginger now and freeze it in portions (for example, teaspoon-sized dollops on a tray, then transfer to a container once solid, so you can grab a bit at a time).
- Frozen ginger will easily last 5-6 months or more with quality.
- Drying: You can slice ginger thinly and dry it (using a dehydrator or oven on low). Once fully dried, grind it into powder for homemade ground ginger spice. Keep in mind, home-dried ginger might be a bit less pungent than store-bought powder (and it can lose potency after about a year), but it’s still great for baking and teas.
- Pickling: If you love sushi ginger, consider making pickled ginger. Young ginger (baby ginger) is especially tender and good for this, but mature works too. Slice it thin and pickle in vinegar+sugar brine. It can last up to 6 months in the refrigerator this way, and it’s a delicious palate cleanser or condiment.
- Candied Ginger & Syrup: You can boil ginger slices in sugar syrup to create candied ginger, which lasts a long time and is a tasty treat or baking ingredient. The leftover syrup itself becomes a ginger-infused syrup that’s great for drinks and can be stored in the fridge or freezer for a few months.
- Usage: Fresh ginger can be used in countless ways – stir-fries, curries, soups, ginger tea for colds, smoothies, you name it. Enjoy the fruits (or rhizomes) of your labor knowing they’re homegrown and full of goodness.
After you’ve harvested, you can either retire that pot for the season or, if in a warm climate and you left some pieces in, let it stay dormant until spring. Many people re-use the same pot and soil by amending with a bit more compost and then replanting saved rhizomes.
Budget-Friendly Tips and Final Thoughts
Before we wrap up, let’s highlight some cost-saving strategies that have been woven throughout this guide, and a few final friendly tips to ensure your ginger-growing venture is a success:
- Start with Store-Bought Ginger: As we emphasized, using grocery store ginger is the most economical way to get started. You avoid high prices of specialty seed stock and still get great results. Just remember to choose healthy pieces and soak if needed to remove growth inhibitors.
- Reuse and Improvise Containers: No need to buy fancy planters. Reuse buckets, old pots, or any large container you can find (with drainage holes added). This DIY approach saves money and gives items a second life. For instance, an old 10-gallon storage tote from your garage can become a mini raised bed for ginger with a few drilled holes.
- Make Your Own Potting Mix: Instead of buying many bags of expensive potting soil, extend what you have with homemade compost, sand, and coir. Compost adds free nutrition, and sand/coir are cheap additives to improve texture. By volume, homemade mixes can be far cheaper and just as effective for container gardening ginger.
- Conserve Water & Fertilizer: Use mulch on top of your pot (like straw or even leaves) to reduce evaporation, meaning you water a bit less. Collect rainwater for watering if possible – it’s free and rainwater is often better for plants (no chlorine). When it comes to feeding, organic options like compost, manure tea, or diluted fish emulsion can be cheaper and healthier for your soil life than synthetic fertilizers. Also, ginger doesn’t need tons of fertilizer if your soil is rich; a little boost every 6-8 weeks is enough.
- Propagate and Share: Once you grow one pot of ginger, you can expand your ginger garden without any further cost. Save some rhizomes to plant next year (free “seed”). If you end up with more than you can use, you can gift a chunk of your harvest to a friend or trade it for other plants. Maybe you’ll inspire others to start growing ginger at home too!
- Harvest Smart: Only harvest what you need when you need it, if possible. For example, ginger can be harvested piece by piece from a pot – gently dig out a small section of rhizome and leave the rest to continue growing. This way you have a living “ginger pantry” and reduce waste. In warm climates, some people keep a ginger pot going for multiple years, snipping off bits as required (just be cautious of rot if doing so in very wet conditions).
- Avoid Common Pitfalls: Save money and time by preventing problems: don’t overwater (saves on water bill and avoids having to replace rotted plants), keep pests away naturally (so you don’t spend on pesticides), and watch the weather (one cold snap can ruin your plant – better to bring it in a day before than lose your crop).
Growing ginger in pots is truly a rewarding DIY project. It’s the kind of gardening task that suits beginners – ginger doesn’t demand daily coddling, just a warm spot, regular moisture, and patience. And the payoff is fantastic: fragrant, homegrown ginger root that elevates your cooking and supports your health.
Final Thoughts: We hope this friendly guide has demystified the process of container gardening with ginger. By combining a bit of know-how with some DIY creativity, you’ve got everything you need to succeed. Remember, gardening is an experiment – don’t be afraid to try, even if not everything goes perfectly the first time. So go ahead, give growing ginger in pots a try. Soon you’ll be sipping ginger tea or spicing up dinner with ginger you grew yourself, all while impressing your friends with your gardening prowess and saving a few bucks on grocery bills.