
Growing tomatoes in containers is not just possible—it’s one of the most rewarding ways to enjoy homegrown produce, even if you don’t have a backyard. Whether you’re living in an apartment with a small balcony, working with a compact patio, or just looking to make the most of a sunny corner, potted tomatoes are the perfect solution for space-savvy gardeners. The best part? You don’t need a big garden or fancy tools to get started. With the right pot, plenty of sunlight, good soil, and a little guidance, you can grow plump, juicy tomatoes right outside your door.
This easy-to-follow, beginner-friendly guide is here to help you every step of the way. We’ll cover how to choose the right tomato varieties for container growing, what kind of pots and soil to use, how to plant and support your tomatoes, and how to keep them thriving all season long. We’ll even tackle the most common tomato-growing problems—like yellow leaves, blossom-end rot, and pests—so you’ll know exactly what to do if things go sideways. By the time you’re done reading, you’ll be ready to grow your own tomatoes in pots with confidence—no ground plot, raised bed, or green thumb required. Since you are here, you can also take a look over my article on how to grow peppers in your garden like a pro.
Why Grow Tomatoes in Pots – Even on your Balcony?
No Garden, No Problem: Perhaps the biggest advantage of container tomatoes is that you can grow them anywhere – on a balcony, doorstep, or even a sunny windowsill. Gardeners with limited or no yard space can still enjoy homegrown tomatoes by using pots. If your native soil is poor or you’re worried about contaminants, container growing lets you control the soil quality completely.
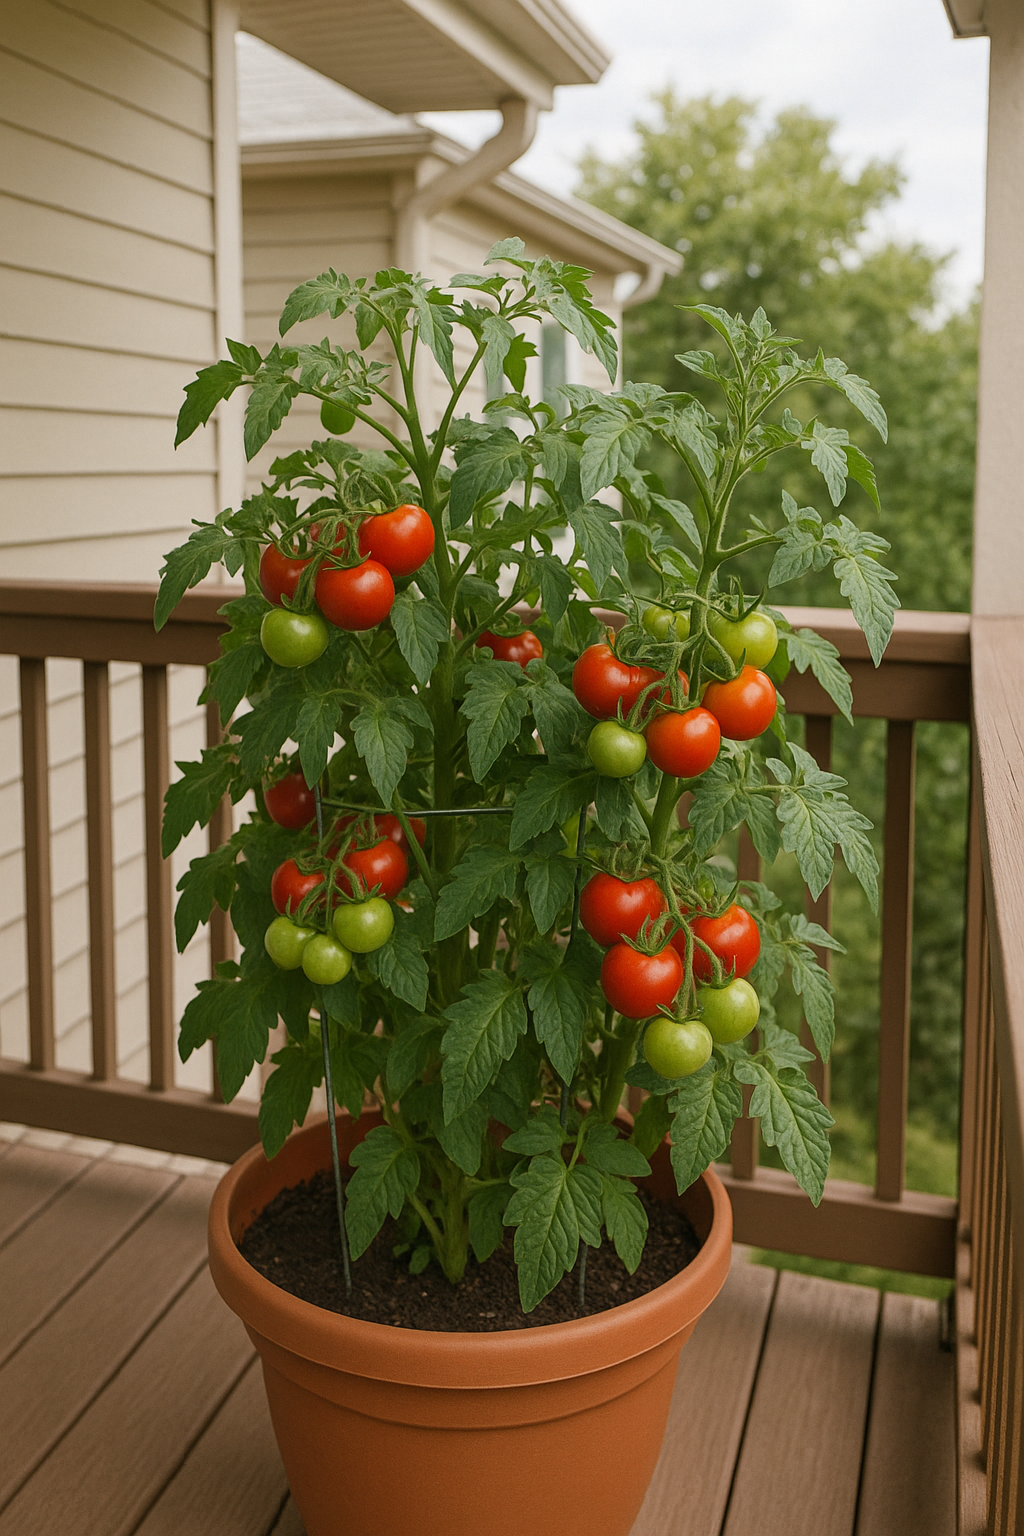
Mobility and Flexibility: Containers are portable. You can move your tomato plants to catch the best sunlight or shelter them from bad weather. For example, if a late frost threatens, you can bring pots indoors or into a garage overnight. This flexibility isn’t possible with in-ground plants. Growing in pots also helps avoid soil-borne diseases that might be lurking in garden beds.
High Yields in Small Spaces: Don’t underestimate how much fruit one potted tomato plant can produce. With the right care, a single tomato plant in a container can yield plenty of tomatoes for your summer salads and sauces. (Some extension studies report 8–10 pounds of tomatoes per plant in favorable conditions!) You’ll get the satisfaction of picking vine-ripened tomatoes that taste far superior to grocery store varieties – nothing beats that sweet, sun-warmed flavor of a homegrown tomato.
Easy and Fun for Beginners: Tomatoes are one of the most popular and easiest veggies to grow in containers. They’re fairly forgiving if you give them basic care. Plus, tending a patio tomato plant is a hands-on learning experience that’s perfect for new gardeners. It’s enjoyable to watch the plant grow, flower, and finally produce ripe tomatoes that you grew yourself. Talk about a confidence booster!
Quality and Convenience: While setting up containers (buying pots, potting mix, etc.) has some upfront cost, many gardeners find it’s well worth it. The convenience of plucking tomatoes right outside your door – and the superior taste of homegrown, vine-ripened fruit – make container gardening a rewarding hobby. And once you have the basic gear, you can reuse containers and some soil amendments each year, reducing costs over time.
Now that you know why growing tomatoes in pots is a great idea, let’s dive into how to do it. We’ll start with choosing the right kind of tomato for container success.
Choosing the Right Tomato Variety for Containers
Not all tomatoes are created equal when it comes to container gardening. To set yourself up for success, it’s important to choose varieties that thrive in pots. Here’s what to look for:
- Determinate or “Bush” Tomatoes: These types only grow to a certain height (usually 2–4 feet) and then stop, which keeps them smaller and more manageable in containers. Determinate tomatoes tend to produce a flush of fruit within a few weeks, rather than continuously all season. Their compact size and concentrated fruiting make them ideal for pots. Examples: Celebrity Hybrid, Bush Early Girl, Roma, and BushSteak Hybrid are popular determinate varieties – they stay fairly compact but still yield plenty of medium-sized tomatoes.
- Dwarf and Patio Varieties: Plant breeders have developed special dwarf tomatoes (often called “patio” or “compact” tomatoes) bred specifically for small spaces. These plants might only reach 1–2 feet tall but can be prolific. They are perfect for container culture – even a small 2-gallon pot can work for some dwarfs. Examples: Tumbling Tom Red/Yellow (a cascading cherry tomato great for hanging baskets), Tiny Tim (a micro dwarf cherry tomato), Patio Princess, and Window Box Red are all varieties known to do well in pots. Many of these produce cherry tomatoes or small slicers that ripen quickly.
- Cherry or Grape Tomatoes: In general, cherry tomatoes are a friendly choice for container growing. Even when the plant vines out, cherry tomatoes fruit abundantly on shorter vines and ripen faster than big beefsteak types. You can find determinate cherry varieties or even indeterminate cherries that stay relatively small. Examples: Sweet 100 and Sungold are indeterminate cherries (taller plants) that can grow in large pots if well-supported, while Maskotka or Tumbling Tom are determinate/bush cherries that stay compact. Hundreds and Thousands is another cascading cherry variety noted for pots. These little tomatoes are bite-sized and forgiving – great for beginners.
- Avoid Giant Indeterminates (or Be Prepared): Indeterminate tomatoes are the vining types that keep growing and producing all season until frost. Famous heirlooms like Brandywine or Big Boy fall in this category. While you can grow indeterminates in containers, they require very large containers (15+ gallons/60+ liters), strong staking, and more maintenance to keep them healthy in a confined space. If you’re a first-timer or have limited space, it’s best to skip the giant vines and stick with determinate, dwarf, or patio varieties that are labeled for containers. Save the sprawling heirlooms for when you have a big pot and a bit of experience under your belt.
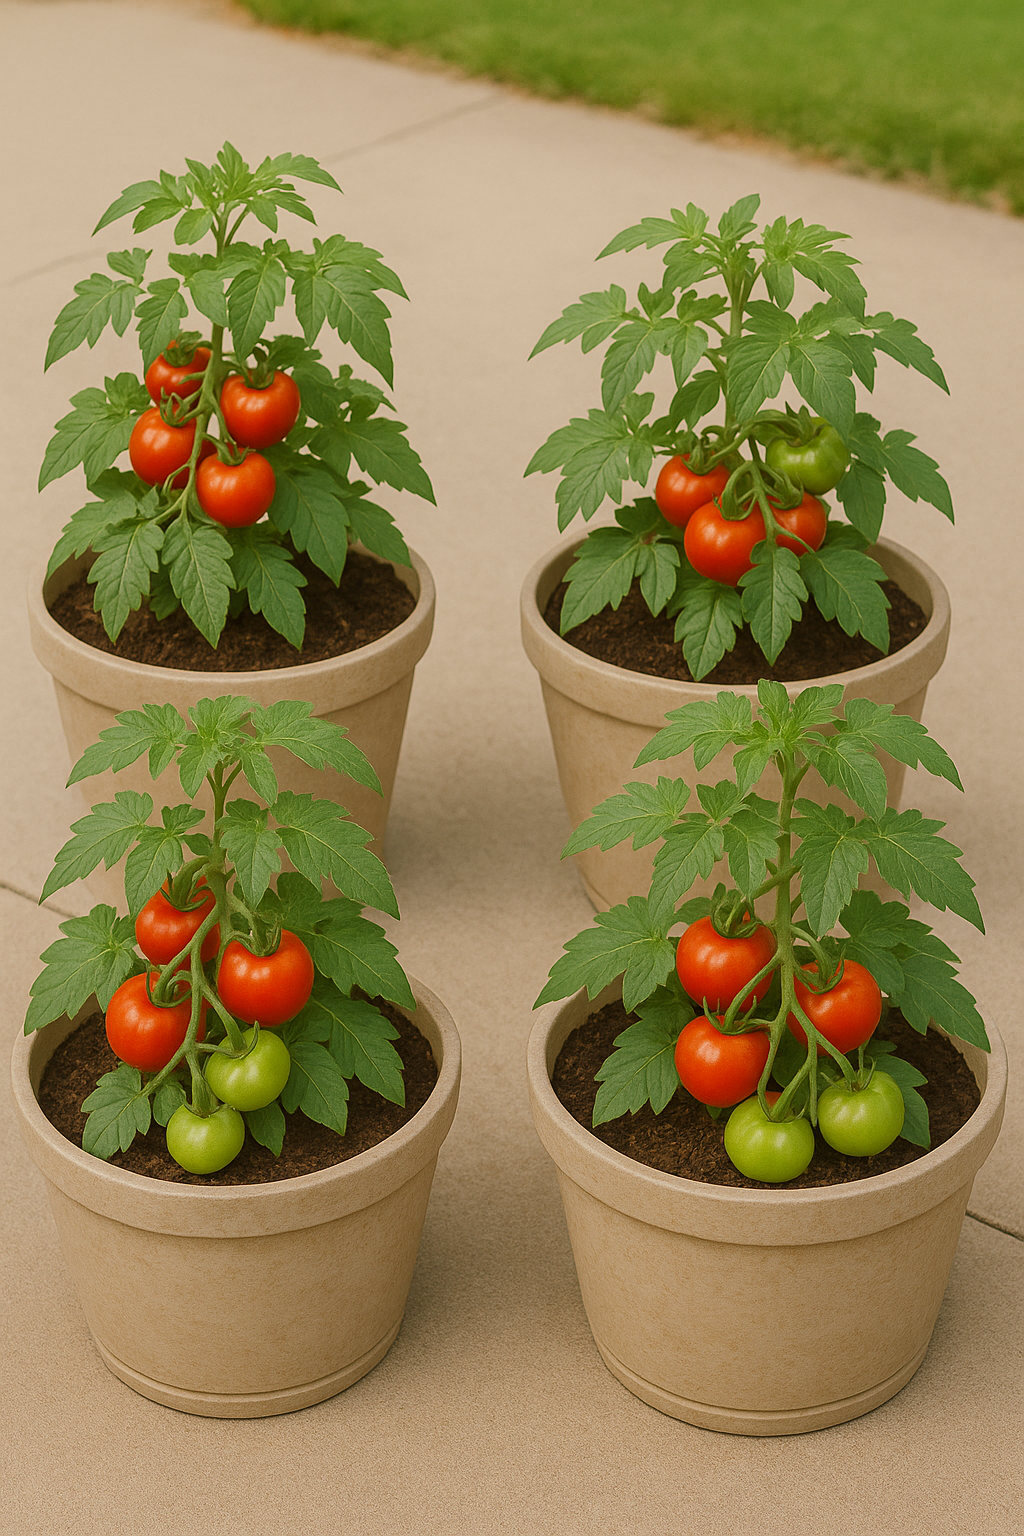
Tip: When shopping for seeds or seedlings, look for keywords like “patio,” “compact,” “bush,” or “container” in the variety name or description. Many catalogs and garden centers now highlight tomato varieties that are suitable for small spaces. And don’t hesitate to ask local nursery staff for recommendations – they might know which tomato varieties perform best in your region’s climate and in containers.
Picking the Right Container
Choosing a good container is the next big decision. Tomatoes have extensive root systems and hefty water needs, so the container size and type will impact your success. Here’s how to pick the right home for your tomato plant:
- Size Matters – Go Big: As a rule of thumb, use the largest container you can manage for each tomato plant. At minimum, a 5-gallon pot (about 12 inches deep and 12-14 inches wide, or ~30 cm by 30+ cm) is recommended per tomato plant. Smaller pots dry out too fast and restrict the roots, leading to smaller plants and lower yield. In fact, bigger is better – experienced growers often use 10 or even 20 gallon (40–75 L) containers for a single tomato to maximize growth. A larger volume of soil holds more water and nutrients, which helps keep the plant happy as it grows large and thirsty in midsummer.
- Depth and Width: The container should be at least 12 inches (30 cm) deep so the tomato’s root system has room to grow downward. A similar width (12–18 inches) provides stability and soil volume. Standard 5-gallon buckets are a popular, inexpensive choice that meet these dimensions (they’re roughly 14 inches tall by 12 inches diameter). Fabric grow bags of 5–10 gallons or large plastic pots/tubs all work well. If you want to grow two plants in one container, choose a very large trough or half-barrel so each plant still has ~5 gallons of space – crowding multiple tomatoes in one normal pot usually isn’t advisable for beginners.
- Drainage is Critical: Whatever container you choose, it must have drainage holes. Tomatoes will suffer if their roots sit in waterlogged soil. Many planters come with holes; if not, be ready to drill your own holes (a few 1/4-inch (6–12 mm) holes near the bottom) to ensure excess water can escape. A cheap bucket with holes drilled in the bottom sides can be an excellent tomato pot. Also, raising containers an inch or two off the ground (for example, putting the pot on bricks or pot feet) helps water drain out freely and prevents the pot from sitting in a puddle after watering.
Container Material: You can use plastic, ceramic, terra cotta, wood planters, fabric grow bags – tomatoes aren’t too picky about the material, as long as the size is sufficient and there’s good drainage. Each type has pros and cons:
- Plastic pots are lightweight, hold moisture longer, and are cheap; but they can heat up in direct sun (light-colored pots stay cooler than black ones).
- Terra cotta (clay) pots are prettier but porous, meaning they dry out faster – you’ll need to water more often. They’re also heavy.
- Glazed ceramic pots hold moisture better than unglazed clay but check that they have drainage holes.
- Wooden planters or barrels work well and insulate roots from heat, just ensure the wood is not treated with toxins. Line with plastic if it’s a porous wood to help retain moisture.
- Fabric grow bags are breathable and prevent roots from circling (air-prune the roots), but they also allow more air in, which can dry the soil quicker; you might need to water more frequently with grow bags.
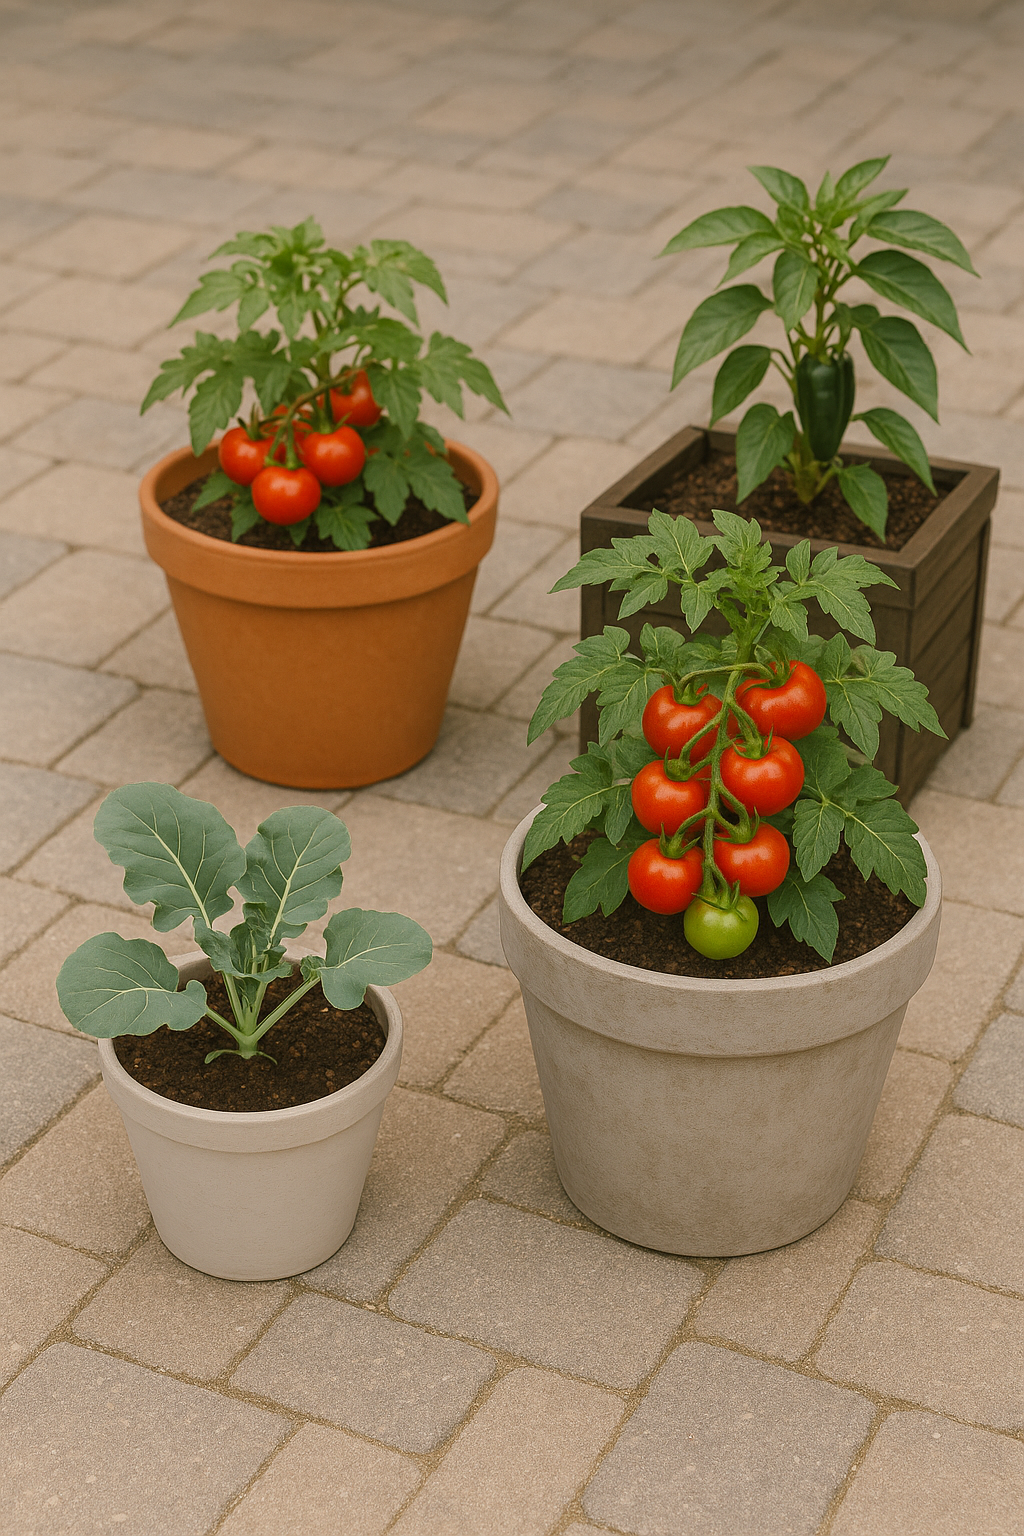
Bottom line: use what you have or like, but aim for big size and good drainage. If you’re reusing a container, clean it with soapy water and a mild bleach solution (then rinse well) to kill any lingering plant diseases from previous use.
- Color and Location Considerations: Dark-colored containers absorb more heat from the sun, which can warm the soil – great in cooler climates, but potentially too hot in very sunny, hot-summer climates (where roots could overheat). If you live in a scorching area, you might choose light-colored pots or provide a bit of afternoon shade to keep roots cool. Conversely, in a cooler climate or short summer, a black pot that soaks up sun can give your tomato a growth boost by warming the root zone. Also, consider the stability: if using a lightweight pot in a windy balcony, you may need to weight it down or tie it to something so it doesn’t tip once the tomato grows tall.
Tip: Place your containers in their intended spot before filling them with soil and planting – large pots get very heavy once filled (a 5-gallon pot of moist soil can weigh 30–40 lbs / 15–20 kg). Make sure the location gets plenty of sun (more on light requirements below) and is convenient for watering.
The Best Potting Mix for Tomatoes
Tomatoes grown in pots rely entirely on you for their soil and nutrients, so don’t skimp on the potting mix. Using the right soil in your containers is key to healthy plants. Here’s what to know:
- Use Quality Potting Mix, Not Garden Soil: Always fill containers with a quality “soilless” potting mix rather than dirt from your yard. Garden soil is usually too heavy – it compacts in pots, doesn’t drain well, can harbor diseases/pests, and will smother your tomato’s roots. Good potting mixes are light and fluffy, yet hold moisture. They typically contain peat moss or coconut coir (for water retention), mixed with perlite or vermiculite (for drainage and air pockets). This provides an optimal root environment: roots get water but also oxygen.
- Look for Pre-Fertilized Mix (Optional): Many commercial potting mixes come pre-fertilized with a small starter charge of nutrients (or even contain slow-release fertilizer pellets). These can feed the plant for the first couple of weeks. If your mix doesn’t have fertilizer, no problem – you’ll just begin feeding a bit earlier (we’ll cover fertilizing in a moment). Some mixes also include water-retaining crystals or compost. While not required, these features can help with moisture and nutrition in container gardening.
- DIY Potting Mix (Optional for the Enthusiastic): If you want to mix your own soil, a classic recipe from extension experts is: one part peat moss (or coir), one part vermiculite, plus added nutrients. For example, one university guide suggests combining one bushel of peat moss with one bushel of vermiculite, then adding about 1¼ cups garden lime (to counter peat’s acidity), ½ cup superphosphate, and 1 cup of balanced fertilizer (like 5-10-5), plus some compost for extra nutrition. This essentially creates a custom potting mix. However, if that sounds too complicated, buying a premium potting mix from the garden center is perfectly fine and much easier for most beginners.
- Fill the Container Properly: When filling your pot, add the mix until it’s about 2–3 inches (5–7 cm) below the rim of the container. This space at the top makes watering easier (so water won’t overflow). Ensure the mix is evenly moist – if it’s dry out of the bag, consider pre-wetting it slightly with some water in a wheelbarrow or large bucket before filling the pot. Slightly damp potting mix settles better around the plant roots than very dry mix.
- Improve Drainage if Needed: If you’re concerned about drainage (say, using a heavy mix or a very large pot), you can place a layer of coarse gravel or broken pottery at the bottom – but this isn’t strictly necessary and some experts argue it doesn’t help much. More important is that the potting mix itself drains well. One thing you should not do is put a layer of impermeable material (like plastic or a pot shard covering the holes) at the bottom, as this can actually impede drainage. Trust your drainage holes and a good mix to do the job.
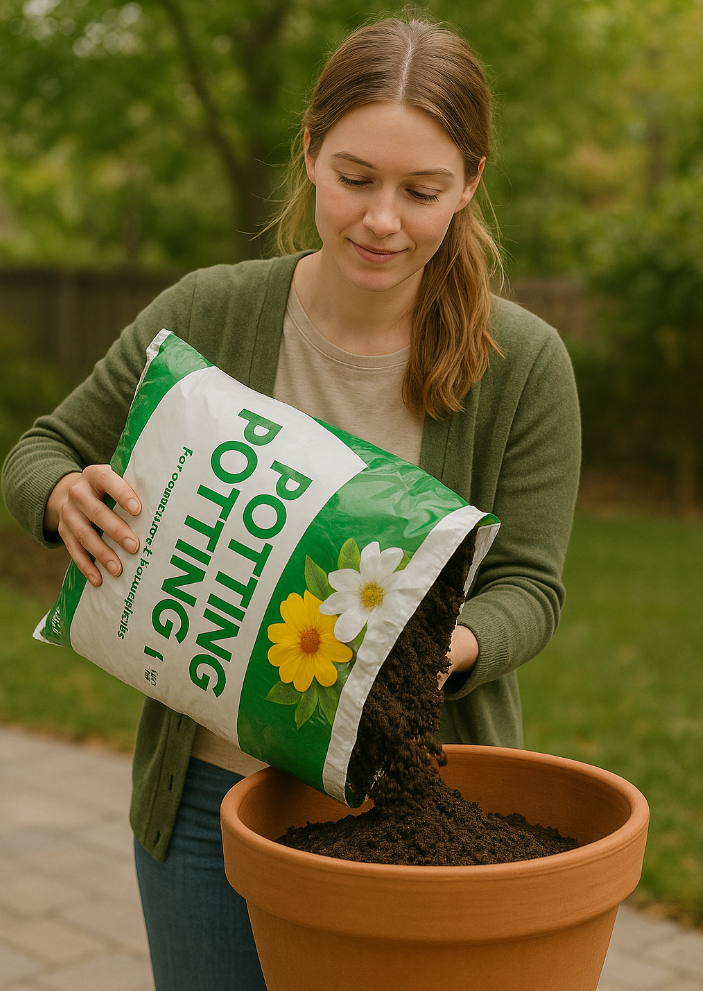
Quick Tip: Don’t pack the potting mix too tightly. Fill the pot and give it a gentle shake or tap to help it settle, then stop. The mix should be loose enough for roots to penetrate. If you press it down hard, you’ll force out air pockets and compact it, which we want to avoid.
Now that your container is prepared with good soil, it’s time for the fun part – planting your tomatoes!
Planting Tomatoes in Containers: Step-by-Step
Whether you started your own tomatoes from seed or bought a healthy young plant from a nursery, the planting process is similar. We’ll cover both scenarios (starting from seed and transplanting seedlings) below. By following these steps, you’ll give your tomato the best possible start in its new potted home.
Starting from Seed (Indoors)
If you want to grow your tomatoes from seed, you’ll need to start them indoors well before you plan to put them outside in pots. Here’s a quick guide:
- Timing for Seed Sowing: Tomato seeds are usually started indoors about 6–8 weeks before the last spring frost date in your area. Check your local frost date (extension websites or garden centers can provide this). For example, if your last frost is around May 10, start your seeds in mid to late March. This timing gives the seedlings enough time to grow sturdy before outdoor planting, but not so much time that they outgrow their starter pots.
- Seed-Starting Setup: Sow tomato seeds in small pots or seedling trays with sterile seed-starting mix (a fine, light soil mix). Plant the seeds about 1/4 inch (6 mm) deep. You can sow 2–3 seeds per cell or small pot, then thin to the strongest one later. Keep the soil lightly moist (a spray bottle works well to avoid dislodging seeds) and warm. Tomatoes germinate best at soil temperatures of around 70°F (21°C). Using a heat mat under the seed tray can speed germination, but a warm room works too.
- Light and Care: Seeds should sprout in 5–10 days. Once they emerge, place the seedlings under grow lights or in a very sunny window. They need lots of light to grow sturdy and prevent leggy, weak stems. If using a window, rotate pots daily so seedlings grow upright. Keep the room temperature around 65–75°F (18–24°C). Continue to keep the soil moist but not waterlogged – small seedlings can dry out quickly, so check them daily.
- Potting Up: When each seedling has a set of “true leaves” (the leaves that come after the initial two seed leaves), transplant them into slightly larger pots (around 3–4 inch diameter pots) so they have room to develop. Handle the delicate seedlings by the leaves or rootball, not the tender stem, when moving them. In their new pots, you can bury the stem a little deeper if they’ve gotten lanky – tomatoes will grow roots from the buried stem, which helps create a stronger root system.
- Fertilizing Seedlings: After transplanting into larger pots, you can begin feeding lightly. A diluted general-purpose fertilizer (at quarter strength) every week or so will help them grow. Alternatively, mix a slow-release fertilizer into the potting mix when you pot up the seedlings. Seedlings don’t need heavy feeding, just a little boost since the starter mix has limited nutrients.
- Hardening Off: Very important – before you move tomato seedlings outdoors permanently, harden them off for about a week. This means gradually acclimating them to outdoor conditions. Start by putting them outside in a sheltered, shady spot for just an hour or two, then bring them back in. Each day, increase their time outside and sun exposure a bit. By the end of the week, they should be spending all day outside and can handle direct sun and wind. Hardening off toughens them up, so the shock of moving outdoors is minimized. Skip this step and your seedlings might get sunburned or stressed when suddenly exposed to the elements.
Once your seedlings are hardened off and the weather is frost-free and warm (see Seasonal Timing below), you’re ready to plant them into their final containers, as described in the next section.
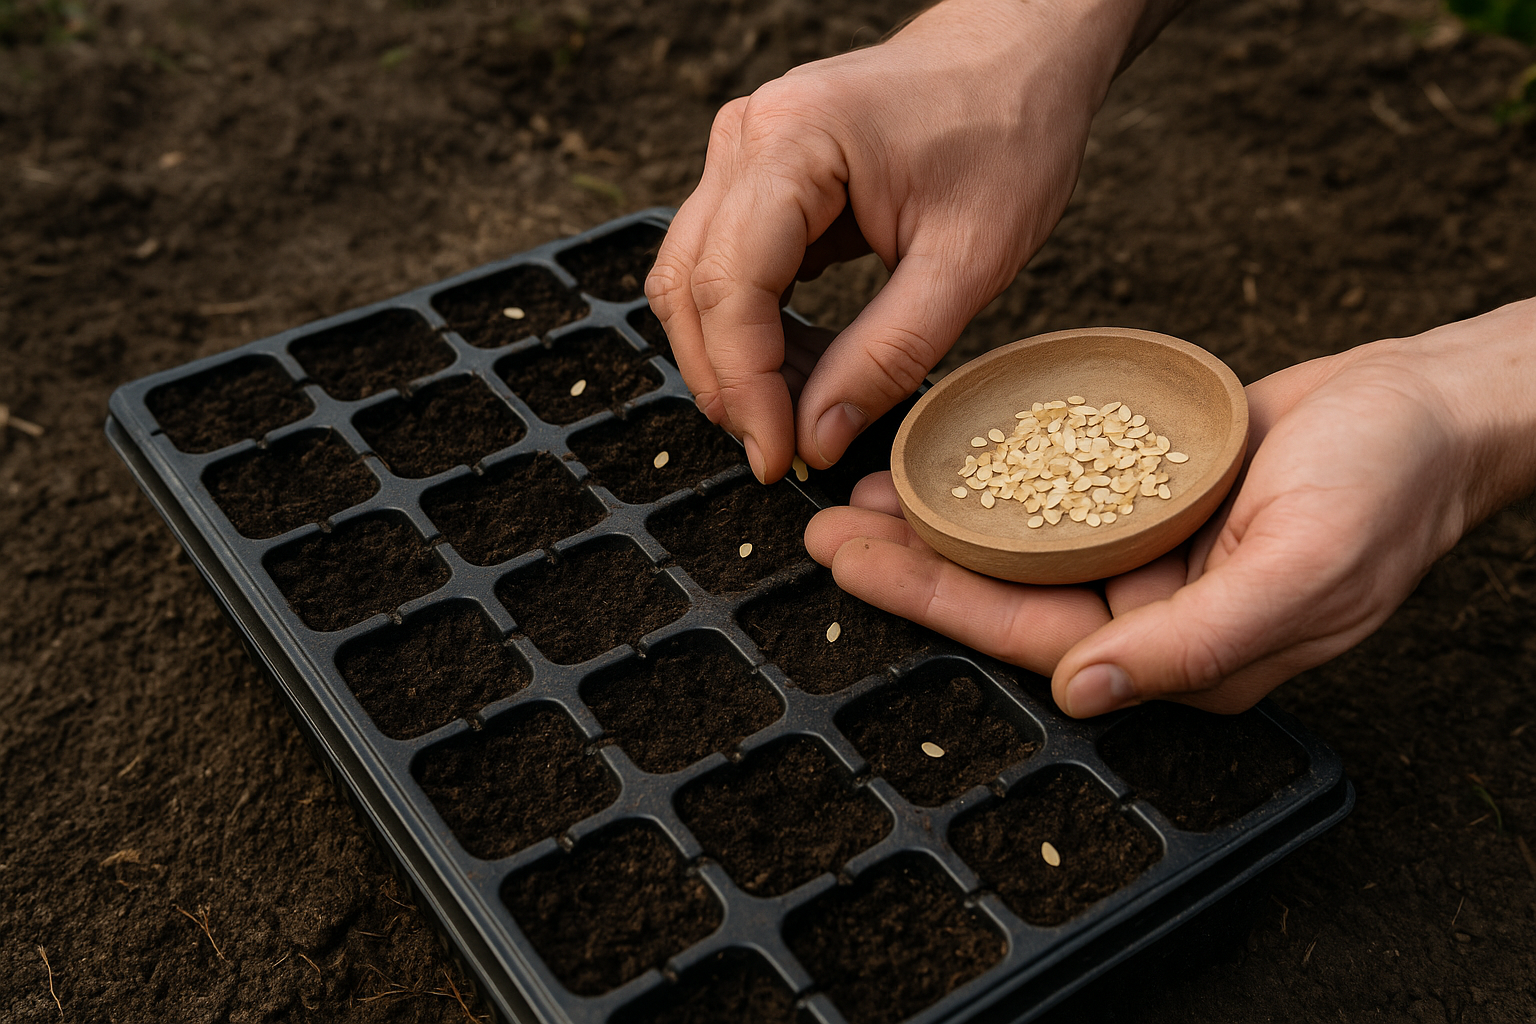
Planting Transplants into the Pot
Whether you have a nursery-bought tomato start or a homegrown seedling, the steps for planting it in a container are the same:
- Wait for the Right Weather: First, ensure outdoor conditions are suitable. All danger of frost should be past and the nights consistently above about 50°F (10°C) for best results. (We’ll talk more about timing for different regions in the next section, but in many areas this is mid-spring – late April or May). Tomatoes won’t thrive in cold soil or cold air, so don’t rush to plant too early. If you must plant and a cold night is forecast, be prepared to cover the plant with a blanket or bring the pot indoors overnight.
- Prepare the Seedling: Water your tomato seedling well a couple of hours before transplanting (moist soil holds together and reduces root damage). If it’s in a plastic pot, gently squeeze the sides to loosen the rootball. If it’s in a biodegradable peat pot, you can plant the whole pot if it will break down, but it’s often best to tear off the bottom of peat pots and any parts above the soil line (exposed peat can wick moisture away). Inspect the roots – if they are circling densely (root-bound), you can tease them apart slightly to encourage them to grow outward into the new container soil.
- Planting Depth – Bury the Stem: One tomato secret is planting it deep. Dig a hole in the container’s soil that is deeper than the seedling’s current rootball – you can bury the tomato plant up to its first set of true leaves (remove any little seed leaves or branches that would be underground). Burying the stem encourages the plant to sprout additional roots along that buried section, giving it a stronger root system. A deeper root system helps the plant take up more water and nutrients, leading to a healthier tomato. So don’t be afraid to plant your tomato deeply in its pot (tomatoes are unique in loving this treatment).
- Planting Technique: Place the seedling in the hole, ensuring that when you backfill, the soil will come up to just below the first true leaves. Gently fill in around the rootball with potting mix. Firm it in lightly with your fingers to eliminate big air pockets, but don’t compact it too much. Make sure the plant is centered and upright. In a very large container, you might plant two dwarf tomatoes together, but generally it’s one tomato per pot so they don’t compete too much.
- Water In: Right after planting, water the container thoroughly. Add water until you see it start to come out the drainage holes. This “settles” the plant in, helps the soil settle around the roots, and eliminates air gaps. It also gives the tomato a good drink to help recover from any transplant shock. If the soil level sinks a bit after watering, you can top it up with a little more mix. Just keep that 2–3 inch space at the top so you can water later without overflow.
- Add Support Now: It’s best to install any stakes or cages at the time of planting or soon after. Pushing a stake into a pot later can disturb the roots if they’ve spread out. So, decide how you will support the plant (see the Support & Pruning section) and put your stake or small tomato cage in place now. For example, stick a 3–4 foot stake into the pot near the plant’s stem, or fit a small wire tomato cage into the container. You can start tying the stem to the stake loosely as it grows. Doing this early means the roots will grow around the support, and you won’t have to damage them by forcing a stake in later on.
- Optional: Mulch the Top: A helpful trick is to add a layer of mulch on top of the soil after planting. You can use straw, shredded bark, or even dry leaves. A 1–2 inch layer of mulch will help keep the soil moisture even by reducing evaporation, and it also prevents soil from splashing up on the leaves when watering. (Soil splashing can sometimes spread disease.) Just keep the mulch a tiny bit away from the stem to avoid any risk of stem rot.
That’s it – your tomato plant is now potted up in its forever home for the season! Give yourself a pat on the back. The next step is to take good care of it through the growing season. Before we move on to care, let’s make sure we’re clear on when you should be doing all this planting, as timing will depend on your climate.
When to Plant: Seasonal Timing for U.S. and Europe
Timing is crucial for tomatoes, since they are warm-season plants. Plant too early and cold weather can stunt or kill them; plant too late and they may not have time to produce a good harvest. Here’s how to time your container tomato planting on both sides of the Atlantic:
- After the Last Frost: The golden rule is to wait until all danger of frost has passed in spring before putting tomato plants outdoors permanently. Tomatoes can’t tolerate frost; a cold night can wipe out your hard work. In much of the United States and Europe, the last frost occurs sometime between March and May, depending on your region. For example, in a mild climate like the southern UK or coastal Pacific Northwest (US), the last frost might be in mid to late April, with many gardeners planting tomatoes out by mid-May. In colder areas like northern Europe or the northern US (say New England or the upper Midwest), frost can linger into May, so planting often happens in late May or even early June. Always use your local last frost date as a guideline – you can find this date via local extension services or gardening resources.
- Soil and Night Temperatures: Beyond just frost, tomatoes prefer warm conditions. A common suggestion is to wait until nighttime temperatures are reliably 50–55°F (10–13°C) or above. Daytime temperatures should ideally be 70°F (21°C) or above for strong growth. If you plant when the soil is still chilly (below ~60°F / 15°C), tomatoes will just sulk and not grow much until it warms up. In practical terms, this means that even in areas where frost ends in April, you might still wait a couple more weeks for the soil and air to warm. Using a black pot (which warms soil) or covering the pot with plastic can help heat the soil faster if you’re eager.
- Regional Examples (U.S.):
- In the Southeastern U.S. or Mediterranean climates (zones 8–10), you might be able to plant tomatoes in pots outdoors by late March or early April, since frosts end early and spring warms up quickly.
- In the Mid-Atlantic and Midwest U.S. (zones 6–7), a safe planting time is often late April to mid-May.
- In the Northeast and Upper Midwest U.S. (zones 4–5), it’s usually mid-May to early June.
- On the West Coast, it varies: coastal Northern California/Oregon might be April, whereas interior or mountain regions wait till May.
- Always adjust for local microclimates – urban areas heat up faster, high elevations stay cooler longer, etc.
- Regional Examples (Europe):
- In Southern Europe (Spain, Italy, southern France, etc.), tomatoes in pots can often go out by April as well, since the climate is warm. In some cases, even March if it’s a particularly early spring and you can protect from the odd cold night.
- In Central Europe and the UK, May is typically tomato planting season. For instance, British gardeners often aim for planting around the time of the Chelsea Flower Show (late May) or when “Oak leaves are the size of a mouse’s ear” – traditional cues indicating frosts are past. The RHS notes that in mild parts of the UK, planting tomatoes outdoors in mid-May is common once nights are frost-free.
- In Northern Europe or Scandinavia, or very high elevations, you may need to wait until late May or June, and perhaps use varieties with shorter growing seasons due to the shorter summer.
- Starting Seeds Timing: If you plan to start tomatoes from seed (indoors) rather than buying transplants, count backwards ~6–8 weeks from your target outdoor planting date. For example, if you intend to transplant in mid-May, start seeds indoors in mid-March. This ensures your seedlings will be a healthy size (6–8 inches tall) and possibly starting to flower when it’s time to go outside. Don’t start them too early or you’ll end up with root-bound, leggy plants by planting time.
- Succession or Fall Plantings: This is more advanced, but worth a mention. In regions with long growing seasons or mild winters (say, the American South or Mediterranean areas), some gardeners plant a second round of tomatoes in mid-summer for a fall harvest. For a beginner, it’s usually best to focus on one main planting in spring. But keep in mind, container tomatoes can sometimes be moved indoors or to a sheltered spot in fall to extend the harvest a bit if it gets chilly – or you can try a late planting if your climate allows.
In short, patience pays off. Don’t be tempted by that one warm week in early spring to put your tomatoes out too soon. It’s hard to wait when you’re excited, but your tomatoes will reward you for planting them at the right time. Once the weather is consistently warm, they will take off.
Now that your tomato plant is safely in its pot and the weather is warm, the main tasks are watering, feeding, and a bit of training (support) as it grows. Let’s go over how to care for your potted tomato through the season.
Caring for Potted Tomato Plants
Tomatoes in containers need regular care, but it’s straightforward once you know the basics. Pay attention to sunlight, watering, fertilizing, and support/pruning, and you’ll keep your tomato happy and productive. We’ll also cover keeping an eye out for pests or problems. Here’s how to care for your tomato plant day-to-day and week-to-week:
Sunlight and Placement
Tomatoes are sun-lovers. Inadequate sun is one of the few things container tomatoes won’t tolerate well.
- Full Sun (6–8+ Hours): Make sure your tomato gets at least 6 to 8 hours of direct sunlight each day. More is generally better. A south-facing location typically provides the strongest sun. If you’re in the Northern Hemisphere, an east or west exposure can work too, but south is ideal. Without enough sun, tomato plants become leggy (stretching for light) and will produce fewer fruits.
- Avoid Too Much Shade: If you only have a partial sun spot (say 4 hours of sun), you might still get some tomatoes, but yields will be lower and the plant may not thrive. In such cases, prioritize morning sun and early afternoon sun if possible. If you’re growing on a balcony that only gets sun part of the day, choose the sunniest part of it. Sometimes you can enhance light by using reflective surfaces (foil or white walls) to bounce light onto the plant, but there’s no real substitute for direct rays.
- Hot Climates: In very hot regions, tomatoes appreciate sun but may benefit from a little break in extreme afternoon heat (the plants can get heat-stressed or the pollen can become unviable above ~95°F/35°C). If you notice blossoms dropping in a heat wave, it might help to have the pot where it gets shade after 3 pm, or use a shade cloth during peak heat. But generally, aim for maximum sun and only moderate relief in peak summer if needed.
- Airflow: Place your container where there’s decent air circulation around the plant (but not an extreme wind tunnel). Good airflow helps prevent diseases by drying the leaves after rain or watering, and it helps with pollination as gentle breezes shake the flowers. If you have multiple tomato pots, don’t crowd them all right up against each other – give them a bit of breathing room (at least a few inches apart) so each plant’s leaves aren’t smooshed against its neighbor. This spacing plus sun will help avoid a humid microclimate that diseases love.
- Accessibility: Also, consider ease of care: you’ll be watering this plant often, maybe daily in summer. Having it near a water source or where you can easily reach it will make maintenance less of a chore. If it’s on a balcony, protect surfaces from draining water if needed (a saucer under the pot, or elevate the pot slightly in a tray).
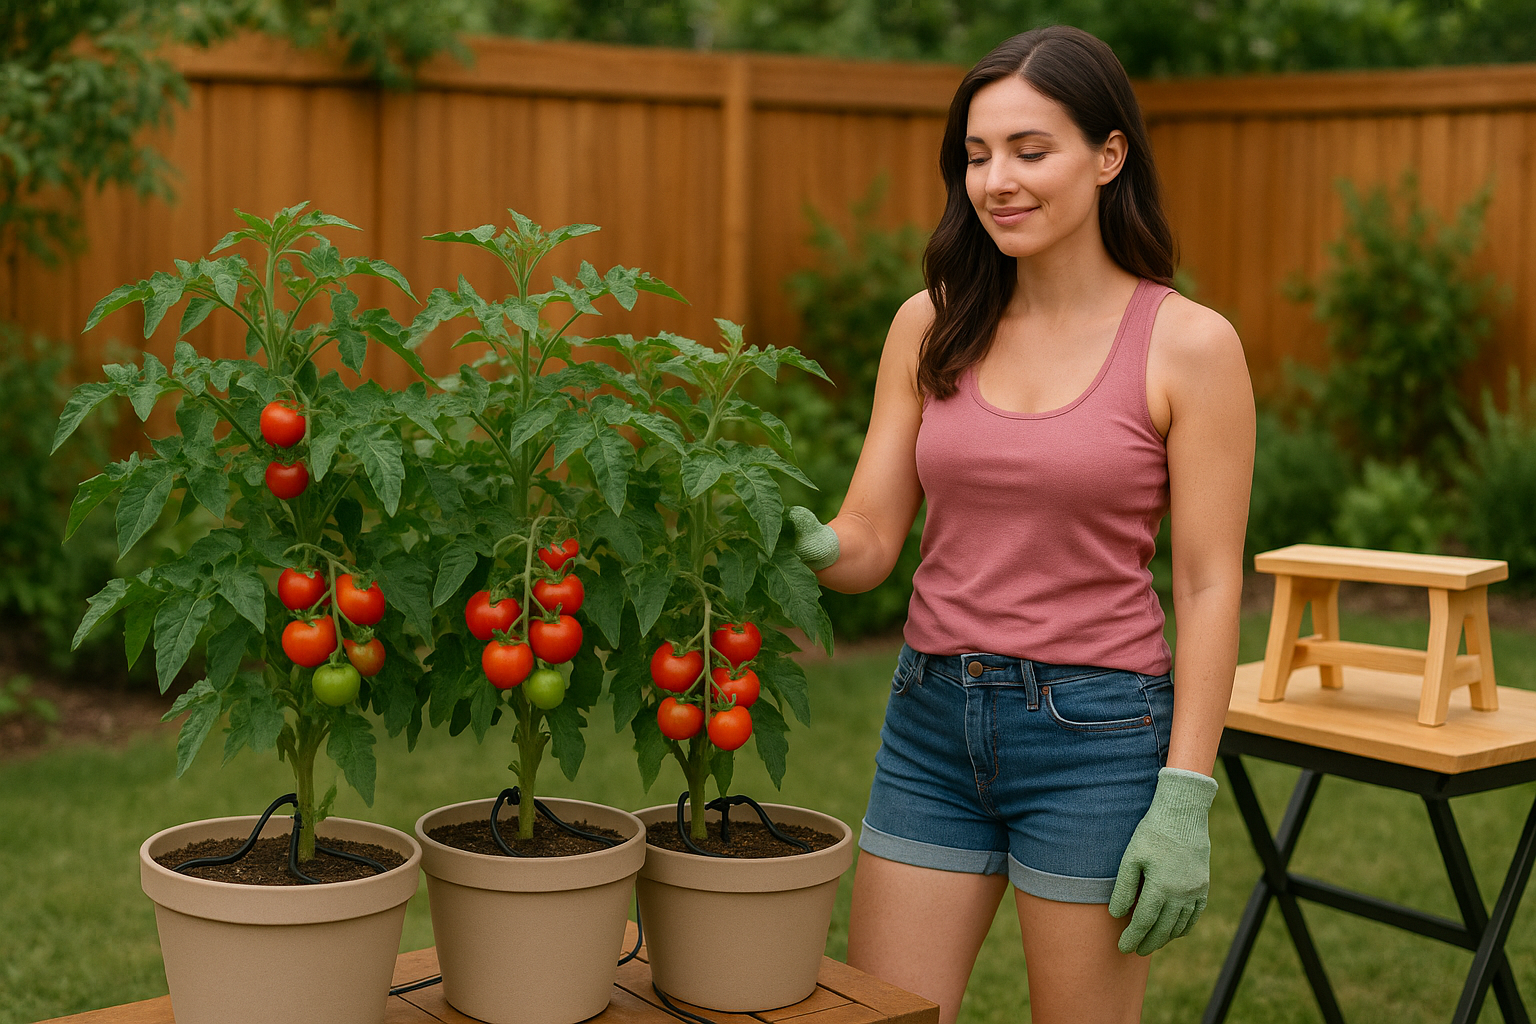
Watering Your Tomato
If there’s one thing potted tomatoes absolutely need on a regular basis, it’s water. Because containers can dry out quickly, watering is a crucial part of daily care. Here are the watering best practices:
- Consistency is Key: Try to keep the soil evenly moist, not soaking and not bone-dry. Inconsistent watering – letting the soil dry out completely then overwatering – can lead to issues like fruit cracking and blossom end rot (more on those later). Aim for a happy medium where the soil is moist like a wrung-out sponge.
- Check Daily: Especially once the plant is large and summer is in full swing, you’ll likely need to water at least once a day. In cooler spring weather or if you have a self-watering container, it might be every 2 days, but be prepared for daily duty in hot weather. A good habit is to check the soil every morning by sticking your finger about 2 inches (5 cm) into the soil. If it feels dry at that depth, it’s time to water. Some gardeners also learn to judge by the weight of the pot – a light pot means dry soil, a heavy pot means it’s still got water.
- Water Thoroughly: When you water, water deeply. This means adding water until it begins to run out the drainage holes at the bottom of the pot. Deep watering ensures the bottom roots get moisture and encourages the roots to grow downward. Shallow, frequent sprinkles often only wet the topsoil, leading to weak root systems. So don’t be shy – water until you see excess draining, then stop. If using a saucer, be sure to dump out any water that remains in the saucer after 30 minutes, so the plant isn’t sitting in stagnant water.
- Timing of Watering: Watering in the morning is often recommended. This way, the plant is well-hydrated before the heat of the day, and any water that splashed on leaves can dry off, reducing risk of disease. Watering in the evening is less ideal because the plant then sits in cool dampness overnight, which can promote fungal diseases. However, if your plant is wilted in the afternoon, don’t wait until the next morning – give it a drink to relieve stress, even if it’s 4 pm. Just try not to soak the leaves if evening watering is necessary.
- Water the Soil, Not the Leaves: Always try to water at the base of the plant, directing water to the soil surface and avoiding the foliage. Tomatoes can get leaf diseases (like blights and molds) when leaves stay wet. Using a watering can with a long spout, a hose with a watering wand, or drip irrigation will help target the soil. If you only have a cup or something, just pour gently right at the stem area. Avoid overhead sprinklers for containers if possible.
- Mulch Helps Moisture: As mentioned, a layer of mulch on top of the soil can drastically reduce evaporation. This means your watering schedule will be a bit more forgiving – the pot won’t dry out quite as fast. Mulch also keeps the soil temperature more stable.
- Self-Watering Containers: If you’re someone who might forget a watering or you’re often away, consider using self-watering containers or adding a drip irrigation system on a timer. Self-watering planters have a water reservoir that the soil wicks moisture from, extending the time between waterings. They can be great for tomatoes, just check the reservoir regularly. A simple drip line on a timer can automate daily watering as well – it’s a bit of setup, but many DIY kits are available.
Remember, a wilting tomato plant usually means it’s too dry (though in rare cases, wilting can also mean overwatered roots struggling – but generally if you see drooping and the soil is dry, water immediately). On hot 90°F+ (32°C) days, don’t be surprised if even a well-watered tomato wilts a tad in late afternoon – that can be heat stress. It should perk up in the evening if the soil is moist. If it doesn’t, you likely need to water more.
Fertilizing (Feeding Your Tomato)
Tomatoes are heavy feeders, especially in containers where they can’t search out nutrients beyond the pot’s confines. Regular feeding will keep them growing and producing. Here’s how to fertilize your potted tomato:
- Start with Slow-Release: At planting time, mix in a timed-release granular fertilizer into the potting mix (if your soil didn’t already contain some). Follow the package instructions for the amount, based on pot size. Typically a couple of tablespoons of a balanced granular fertilizer (like an all-purpose 10-10-10 or a tomato-specific formula) mixed into the top layer of soil will slowly feed the plant over several weeks. This provides a baseline of nutrition.
- Liquid Feed for Boosts: About two weeks after planting, begin a regimen of weekly feeding with a soluble fertilizer. This could be a liquid fertilizer you mix with water or a water-soluble powder. Many gardeners use a general-purpose plant food or a tomato-specific fertilizer (often labeled for tomatoes). When choosing a fertilizer, check the N-P-K ratio (Nitrogen-Phosphorus-Potassium):
- In early growth, a balanced or slightly higher nitrogen fertilizer helps get leafy growth started (something like 10-10-10 or 20-20-20 is fine before flowering).
- Once the plant starts flowering and setting fruit, it’s often recommended to switch to a formula with a higher middle number (P) or generally lower nitrogen relative to phosphorus and potassium. The rationale is that too much nitrogen can produce tons of leafy growth at the expense of flowers and fruit, whereas phosphorus supports blossoms and potassium supports overall fruit development. Many tomato fertilizers are formulated as something like 5-10-10 (N-P-K) which is lower in nitrogen. For example, the University of New Hampshire Extension suggests using fertilizers where the phosphorus is higher than nitrogen for tomatoes, or a typical tomato fertilizer product.
- In practical terms, an all-purpose soluble feed (like 10-10-10) every week until you see flowers, then switching to a “bloom” or “fruit” fertilizer (like 5-10-5, 5-10-10 or even 9-15-30 as used in some trials) works well.
- Organic Options: If you prefer organic fertilizers, you can absolutely grow great tomatoes organically. Mix compost into the potting mix, and use organic fertilizer sources. For instance, a combination of fish emulsion, kelp meal, bone meal, and greensand can supply a range of nutrients for tomatoes. You might do fish emulsion feeds every 1–2 weeks (as your liquid feed), and sprinkle some bone meal (for phosphorus) and kelp or greensand (for potassium and micronutrients) in the soil at planting or mid-season. There are also organic pre-made tomato fertilizers (often derived from those ingredients) that work great. Just know that organics may release nutrients a bit more slowly or require microbial activity, so ensure your potting mix has some compost or healthy biology.
- Frequency and Quantity: Fertilize about once a week with liquids if using the frequent-feeding approach. If that’s too much to remember, you could do every two weeks at a slightly higher dose. Always follow the product label for dilution and don’t overdo it. It’s tempting to add extra fertilizer to boost growth, but too much can burn the roots or cause an imbalance. Consistent moderate feeding is better than dumping a ton of fertilizer at once. Remember, the plant’s roots are confined – excess salts from over-fertilizing can build up and harm the plant if not careful.
- Signs of Nutrient Needs: If your tomato’s older leaves start looking yellow (and it’s not a watering issue), it could be nitrogen deficiency – time to feed. Pale new growth might indicate iron or other nutrient deficiencies. A healthy, well-fed tomato plant should have robust green foliage (deep green but not weirdly lush and dark which could mean too much nitrogen) and should keep growing and flowering throughout the season. If the plant seems to stall out or is very light green, that’s a cue to up your feeding frequency a bit.
- Mid-Season Top-Up: Those slow-release pellets you added at planting? They generally last 2–3 months. By mid-season (say midsummer), consider adding a second dose of slow-release fertilizer, gently worked into the top inch of soil. This coincides with when plants are typically fruiting heavily and can use the extra sustenance. Alternatively, keep up the weekly liquid feeds until season’s end.
In summary, feed your potted tomatoes like you’d feed a teenager – regularly and with plenty of good stuff – because they’re growing fast and will reward you with more fruit when well-nourished!
Supporting and Pruning the Plant
Tomato plants, even compact ones, often need some support to keep them upright and prevent branches from breaking under the weight of fruit. They may also benefit from a little pruning or training to stay tidy in a pot. Here’s what to do:
- Why Support is Needed: As your tomato grows, it will sprout new branches and hopefully lots of tomatoes. A single stem might end up carrying a cluster of heavy fruits. Without support, branches can sag or snap. Also, leaves and fruit touching the ground (or hanging over the pot edge to the point of breaking) can invite rot or pest problems. So, we stake or cage tomatoes to lift them up.
- Stakes, Cages, or Trellises: The support method can be simple. For determinate or dwarf varieties (2–3 feet tall), often a small tomato cage (the kind with 2 or 3 rings) is enough. You can also use a wooden stake or bamboo cane, tying the main stem to it with soft ties as the plant grows. Conical wire cages that fit in containers are convenient and common. For larger indeterminate tomatoes in pots, you might need a taller stake (4–6 feet) or a larger square cage. Some creative gardeners even tie the plant to a porch railing or let it climb a string up to a balcony above. Use whatever works for your setup, as long as the plant is supported.
- Install Early: As mentioned, put the support in place when the plant is small. Press stakes deep into the pot (all the way to the bottom if possible) so they are sturdy. If using a cage, anchor it well; sometimes you can tie the cage to the pot handles or weight the pot so a top-heavy cage doesn’t tip. Early installation prevents root damage later and allows the plant to grow through the support structure naturally.
- Tying In: As the tomato grows, use soft ties (garden velcro strips, twine, strips of old pantyhose – anything soft and flexible) to tie the stems to stakes or to the cage for guidance. Tie loosely; you don’t want to choke the stem as it thickens. Check ties periodically and adjust if they get tight.
- Pruning (Optional but Helpful): Unlike tomatoes in the ground which can become wild jungles, in a container you might want to do a bit of pruning to manage the plant’s size and promote airflow:
- Remove Suckers? Suckers are the little shoots that appear in the leaf crotches (the angle between a branch and the main stem). For indeterminate varieties, gardeners often pinch out some suckers to keep the plant to a few main stems. In a container, if you have an indeterminate, you could let 2–3 suckers grow into branches (so you have, say, 3 main stems total) and pinch out the rest. This will limit the overall bushiness and make it easier to support and allow air through. For determinate/bush types, you typically do not need to remove suckers – determinates naturally stop growing after a point and over-pruning them can reduce yield. So, for bush types, mainly just prune if something is getting unruly or diseased.
- Lower Leaves: As the plant gets taller, it’s a good idea to remove the lowest leaves that might touch the soil or are looking yellow. Keeping the lowest 6 inches or so of stem mostly leaf-free can reduce the chance of soil-borne diseases splashing up. As RHS suggests, you can also remove some old leaves later on to let more light and air in.
- Topping (Advanced): Toward the end of the season, some people “top” indeterminate tomatoes (cut off the growing tip) so the plant stops making new flowers and puts energy into ripening existing fruit. This is usually done about a month before your expected first frost in fall. For a beginner, this might not be necessary, but it’s something to be aware of if you have a huge vining tomato that you want to reign in at season’s close.
- Keep It Clean: Throughout the season, watch for any leaves that show disease (spots, blight, etc.) and remove them promptly. Also pick off any dead, brown leaves. Discard these in the trash (don’t compost diseased tomato leaves if you can avoid it). Regular grooming of the plant helps it stay healthy.
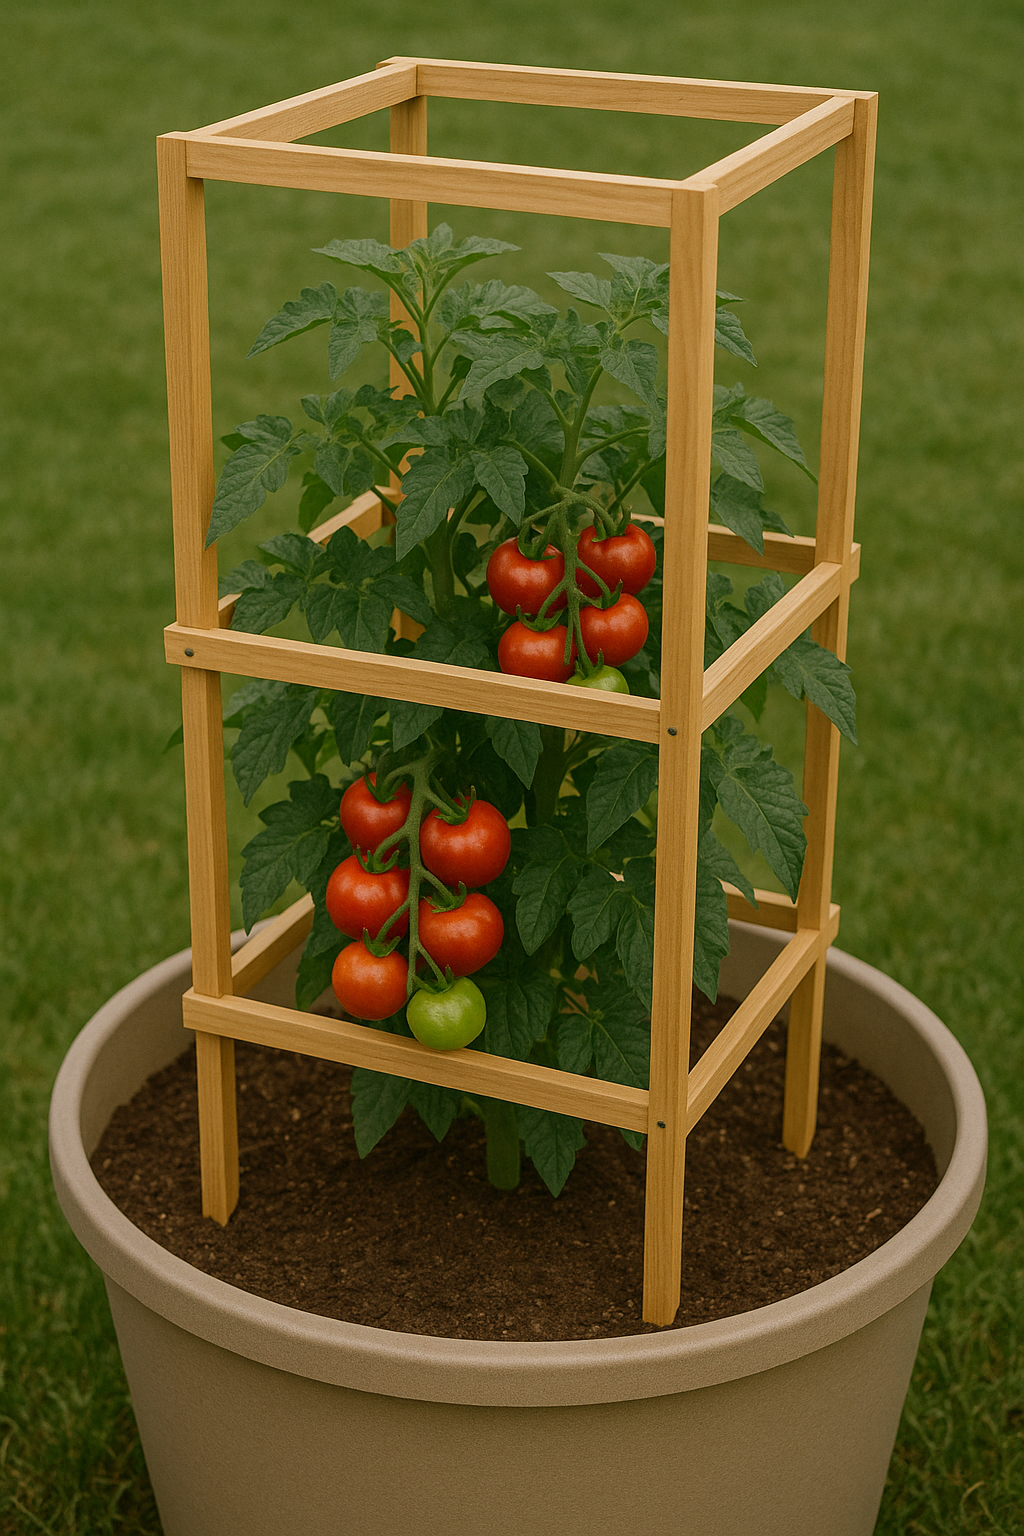
This kind of DIY stake teepee or a circular cage works well for most container tomatoes.Spacing your potted tomatoes apart a bit (as in the photo) also ensures good airflow around each plant, helping to prevent fungal diseases that thrive in cramped, humid conditions.
Watching for Problems (Pests & Diseases)
Even with great care, you might encounter some pests or problems on your tomato plant. Don’t worry – with quick action you can usually keep issues under control. Here are some common container tomato problems, how to spot them, and what to do:
- Blossom End Rot (BER): This is a very common issue for tomato growers. It appears as a black/brown sunken patch on the bottom (blossom end) of the tomato fruit – essentially the end of the tomato starts rotting. It’s not a bug or fungus, but a physiological disorder caused by calcium imbalance in the fruit, often triggered by irregular watering (the plant can’t take up enough calcium when water is inconsistent). To prevent BER: water consistently, as discussed, and avoid letting the soil completely dry out. Using a calcium-rich fertilizer or adding a bit of garden lime to your potting mix can help if your mix was low in calcium. If you do get some tomatoes with BER, just remove those fruits and adjust your watering – new tomatoes on the same plant often come out fine once the watering issue is fixed. Consistency is the cure.
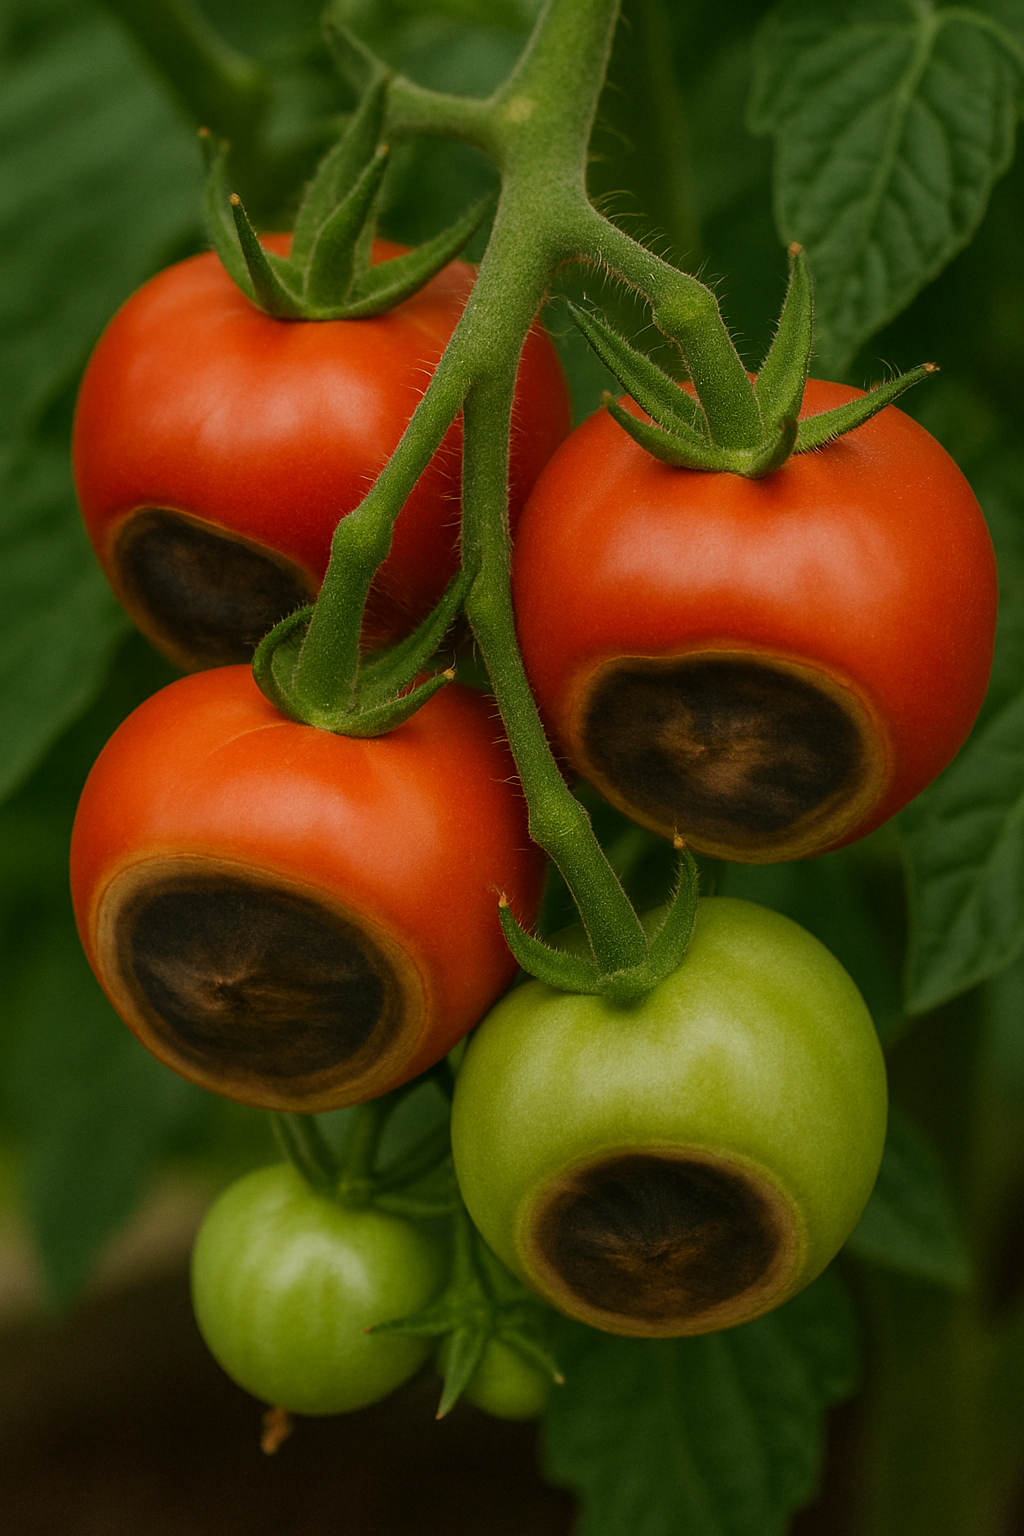
A green tomato showing blossom end rot on its bottom end. Blossom end rot is caused by calcium deficiency in the fruit, often brought on by uneven watering. Keeping the soil moisture steady (not too dry or too wet) is the best prevention.
- Cracked Tomatoes: Sometimes you’ll see your tomatoes split or crack, usually radial cracks from the top. This often happens when a dry spell is followed by heavy rain or watering – the tomatoes swell quickly and split their skins. In containers, this can occur if you forget to water for a day or two and then overwater. The solution is, again, consistent watering. Minor cracks are okay (you can cut them out), but badly cracked tomatoes can rot or invite pests, so try to avoid the swings in moisture. Pick fruits that have cracked ASAP and use them (cut out damaged parts).
- Yellow Leaves or Nutrient Deficiency: If lower leaves turn yellow uniformly, it could be normal aging (some lower leaf drop is fine) or a sign the plant is hungry for nitrogen. If many leaves are yellow or pale, consider upping your feeding frequency a bit. Pale young leaves might indicate iron or other nutrient issues, sometimes caused by the soil pH being off (if you added a lot of lime, etc.). Typically, regular balanced fertilizer prevents serious deficiencies. Also ensure you’re not over-watering to the point of leaching out all nutrients too fast.
- Leaf Spots or Blight: Several fungal diseases can afflict tomatoes, especially in humid or rainy conditions. Common ones include Septoria leaf spot and Early blight (which causes bullseye-pattern brown spots). Leaves may get brown spots and eventually yellow and die. In the UK and Europe, Late blight (the dreaded potato blight that also hits tomatoes) can arrive in wet summers, causing brown-black patches on leaves and fruit. To manage these:
- Remove any spotted leaves as soon as you notice them. Don’t compost them; throw them out.
- Keep the plant pruned for airflow and avoid wetting the leaves when watering.
- If blight is common in your area, you can use preventive sprays. A copper-based fungicide is allowed in organic gardening and can help prevent the spread if applied at first sign of disease. There are also synthetic fungicides (like chlorothalonil) that are effective – these are options if you’re not opposed to chemicals and are facing a severe blight outbreak. Always follow label directions for any treatment.
- Some modern tomato varieties have resistance to certain diseases (denoted by letters like V, F, N, T in seed catalogs – for Verticillium, Fusarium wilts, Nematodes, Tobacco mosaic, etc.). If you had disease issues, consider planting resistant varieties next time.
- Late Blight note: This one is weather-dependent and can devastate plants quickly. If you hear of late blight in your region (through garden alerts or news), you might take extra care to keep leaves dry and consider a preventive copper spray. Container tomatoes can sometimes escape it if under cover during rain.
- Pests (Insects): Common tomato pests include aphids (tiny green or black soft-bodied insects on stems), whiteflies (little white flying bugs that flutter up when you disturb the plant), spider mites (very tiny speck-like mites that cause a speckled look on leaves and fine webbing), and tomato hornworms (big green caterpillars that can chomp leaves).
- For aphids or whiteflies: You can often just wash them off with a strong spray of water or wipe them off. Insecticidal soap spray or neem oil are effective organic controls if they persist – spray the undersides of leaves where they cluster.
- For spider mites: They love hot, dry conditions. If you see stippled leaves and suspect mites, spraying the foliage (undersides especially) with water every so often can deter them (they like it dry). Insecticidal soap or specific miticide products can be used if needed.
- For hornworms: These are large caterpillars (up to 4 inches long) that can defoliate a tomato plant surprisingly fast. The best control is handpicking – inspect your plant if you see foliage missing or droppings, and pluck the camouflaged caterpillars off (they won’t sting or bite). They can be relocated away from your garden or disposed of. Typically, you won’t get many hornworms on container tomatoes, but it’s possible if moths find your plant.
- Snails/Slugs: If your pots are on the ground, sometimes slugs or snails will climb up and chew on low leaves or fruits (especially ripe fruits). You can use copper tape around the pot or set out slug bait (iron phosphate baits are pet-safe and work well) if this becomes an issue.
- Sunscald: If a plant that grew in lower light suddenly is exposed to intense sun, the fruits or leaves might get sunscald – a white or yellowish leathery patch, usually on the side of the fruit that faced the sun intensely. Consistent sun exposure from the start usually toughens them up. This can also happen if you heavily prune leaves that were shading fruits during a heat wave. It’s not a major disease, just a cosmetic issue. To avoid it, don’t suddenly expose fruit clusters that developed in shade to midday sun – leave some foliage as a natural sunscreen.
- Wilting Despite Water – Root Issues: If your plant is wilting even though the soil is moist, check a couple of things. First, on a very hot day, as mentioned, plants can wilt from heat stress even if they have water – they should recover when it cools down. But if wilting persists, it could be root-related. Overwatering and poor drainage can lead to root rot (roots suffocate and the plant can’t take up water). Make sure your drainage is good and you’re not keeping the soil waterlogged. Another possibility is a disease like bacterial wilt or fusarium wilt, which are pathogens that cause sudden wilt (common more in in-ground tomatoes than containers with fresh potting mix). If you suspect a wilt disease (plant keeps wilting, leaves yellowing, and watering doesn’t help), unfortunately that plant may be done for – those diseases plug up the stems. The best you can do is remove the plant and not reuse that soil. But again, in containers with clean potting mix, these wilts are uncommon. It’s usually either dry or too wet or just heat.
- Edema (Water Blisters): Sometimes, over-watered tomato plants get little bumps or blisters on the lower leaves – this is edema, from the plant taking up more water than it can transpire. It’s a minor issue; simply water a bit less or improve air circulation.
The good news is that tomatoes often survive a few hiccups. If you lose a few leaves to disease or a few tomatoes to cracks or rot, it’s usually not game over. Keep the plant healthy overall and it will keep producing new leaves and fruits. A little vigilance goes a long way – catching problems early means you can correct course (water more, fertilize more, prune off diseased bits, etc.) and your plant will continue to thrive.
Harvest Time – Enjoying Your Tomatoes
All your care and patience will pay off when those tomatoes finally ripen. Harvesting tomatoes from your potted plants is one of the most satisfying parts of gardening. Here are some tips for harvesting and using your homegrown tomatoes:
- When to Pick: The simplest answer – pick the tomato when it’s fully colored and slightly soft to the touch. For red varieties, that means a rich red (no green left on the shoulders if possible). For yellow or orange varieties, fully yellow or orange. For green-when-ripe types, they might soften a bit and develop a slight color hue or striping to signal ripeness. A ripe tomato will usually come off the vine with a gentle tug. If it resists, it might need another day or two. Vine-ripening is the goal for best flavor.
- Flavor vs. Shelf-life: Tomatoes destined for supermarkets are often picked at the “breaker” stage (just starting to color) so they ship well. Yours don’t have to suffer that fate – leave them on the plant until they are almost fully ripe for peak flavor and sweetness. That said, you don’t have to wait until it’s mushy. As soon as it’s uniformly colored, you can pick. It will continue to ripen a bit on your counter. If a rainstorm is coming and you worry about splitting, or if pests are nibbling ripe fruit, you can pick slightly early (like when mostly ripe) and let it finish on the counter. It will still beat store-bought.
- Harvest Regularly: During peak season, check your plants every day or two for ripe tomatoes. Picking them promptly not only rewards you with fresh tomatoes at their best, but it also lightens the load on the plant (remember, these fruit are heavy – too many at once can strain branches). For indeterminate varieties, picking ripe ones encourages the plant to put energy into the remaining and new fruits. Cherry tomatoes especially can go from just right to split or overly soft if left too long, so keep on top of them (though some may also drop to the ground when overripe).
- How to Harvest: Use one hand to hold the stem or vine, and the other hand to gently pull or twist the tomato off. Some tomatoes have an “easy-pick” joint in the stem that breaks when the fruit is ripe. Others might need scissors or pruners to cut the stem. If in doubt, snip the stem a little above the tomato to harvest, especially for larger tomatoes, to avoid yanking the plant.
- After Harvest – Storage: For best taste, do not refrigerate your tomatoes. Cold temperatures can make the flesh mealy and dampen the flavor. Keep them at room temperature on the counter. If you have a big batch and need them to last, a cool (~55°F/13°C) location like a basement or cool pantry is better than a fridge for short-term storage. Only very ripe tomatoes about to go bad should go in the fridge, and even then, try to use them soon. But honestly, homegrown tomatoes usually don’t last long – you’ll be eager to eat them!
- Enjoying the Fruits: Freshly picked tomatoes are incredibly versatile. Slice them for sandwiches and caprese salad, chop them into salsa, toss cherry tomatoes into salads or pasta, or just eat them straight with a sprinkle of salt. If you end up with too many at once, you can cook up a quick sauce or freeze tomatoes for later use. Cherry tomatoes can be roasted and frozen in bags, and larger tomatoes can be blanched, peeled, and frozen or canned as diced tomatoes or sauce. Share the bounty with friends and neighbors – a bowl of homegrown cherry tomatoes makes a great gift and might even inspire others to try container gardening.
- Late Season and Green Tomatoes: As the season winds down (late summer into fall), you might have some tomatoes that are full size but not turning red yet, and cooler weather is approaching. If frost is coming, you have a couple of options:
- Move the container indoors or into a protected spot to try to let them continue ripening.
- Pick any mature green tomatoes before a frost – those that have begun the first hint of color (called the breaker stage, even if just a pale blush) will often ripen indoors on a counter or paper bag. Truly green, immature ones won’t ripen well (but you can use those for fried green tomatoes or pickling).
- You can also uproot the whole plant and hang it upside down indoors in a garage, and some of the green fruits will ripen slowly from the vine that way.
- In any case, don’t let a frost hit the fruit on the plant, as that will ruin them.
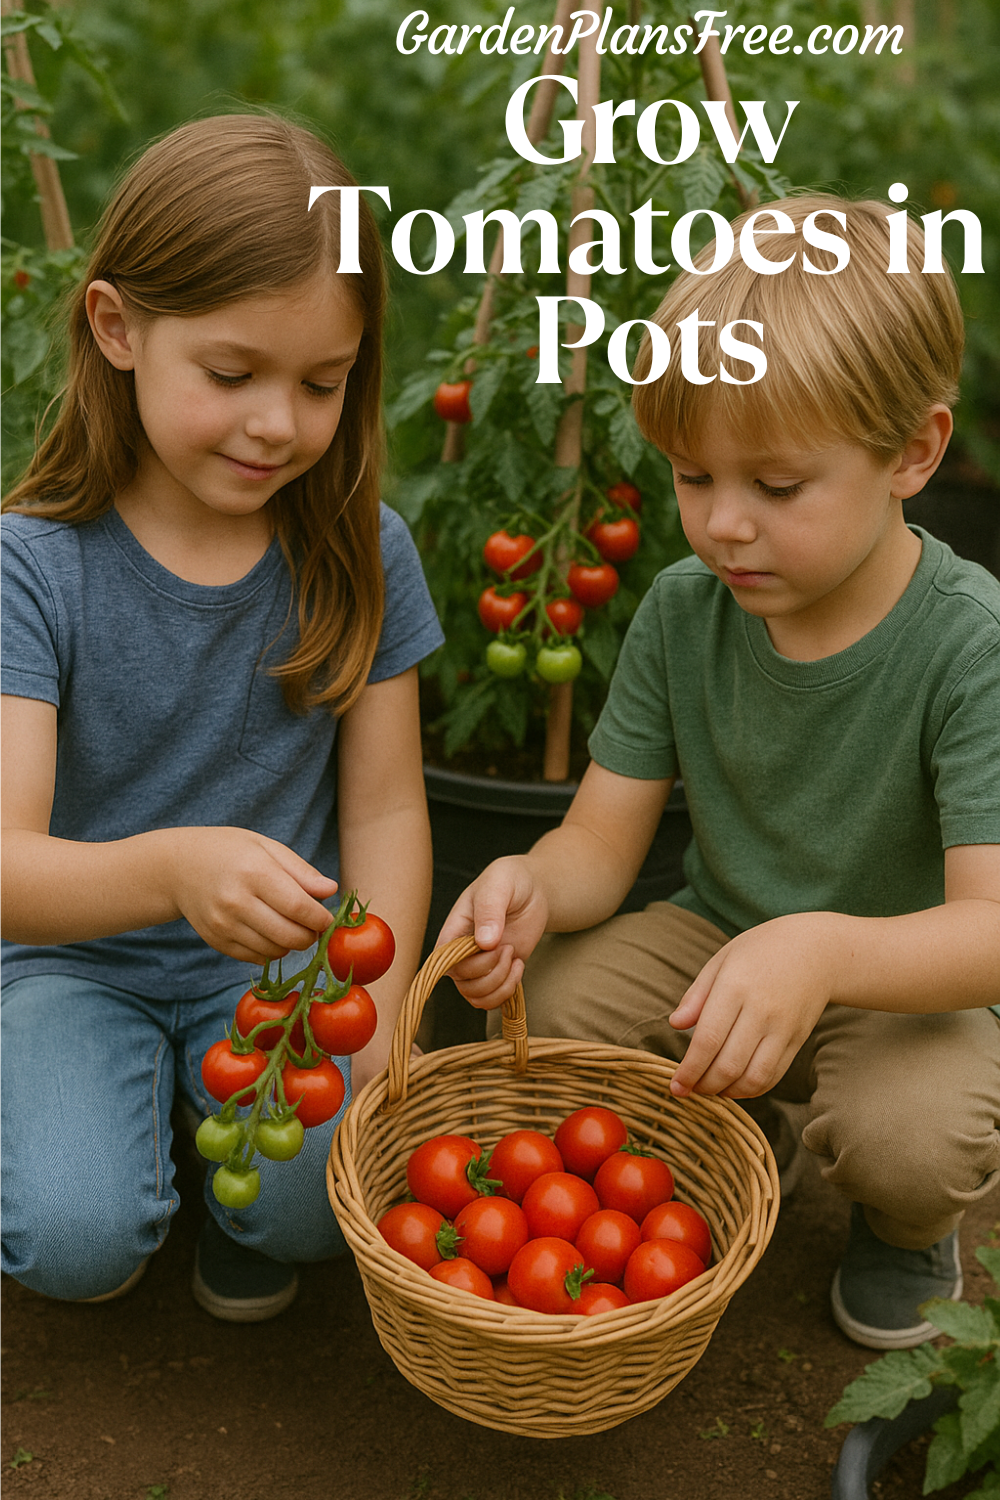
Conclusion: From Tiny Seeds to Tasty Tomatoes
Growing tomatoes in pots is a fantastic way to bring the joy of gardening to any home, no matter how much (or how little) outdoor space you have. With a sunny spot, a properly sized container, good soil, and regular care, your potted tomato plant will thrive and reward you with delicious fresh tomatoes all summer long. We’ve covered the journey step-by-step – from choosing the right compact varieties, planting and staking them, to keeping them watered, fed, and problem-free.
For beginners, container tomatoes are a gentle introduction to vegetable gardening. They’re hands-on and forgiving enough that even if you make a mistake (miss a watering or two, or encounter a pest), you can often correct it and the plant will bounce back. And few gardening moments compare to the first time you spot a ripe red tomato dangling from a plant you’ve nurtured, or the first bite into that sun-ripened sweetness.
So go ahead – give it a try! Set up a pot or two with your favorite tomato varieties, follow the tips in this guide, and enjoy the process. Soon you’ll be harvesting bowls of homegrown tomatoes from your porch or balcony, amazing your friends and proving that you truly don’t need a traditional garden to get garden-fresh produce. Happy planting, and may your tomato harvest be abundant! 🍅