If you need a place where to store different items used in the garden, you should pay attention to this project. As small wooden storage box could be built by any person with average woodworking skills, if the right materials are used. The first step of the project is to choose the right garden storage box plans for your needs. Next, buy weather-resistant materials, such as cedar, pine or redwood.
If you want to get a neat appearance, we recommend you to build the frame using a pocket hole system. In addition, add glue to the edges of the components, in order to increase the rigidity of the joints. Moreover, you could round the exposed edges of the components, if you want to add character to your woodworking project. Apply several coats of exterior paint to prevent the components from decay.
Building a storage box
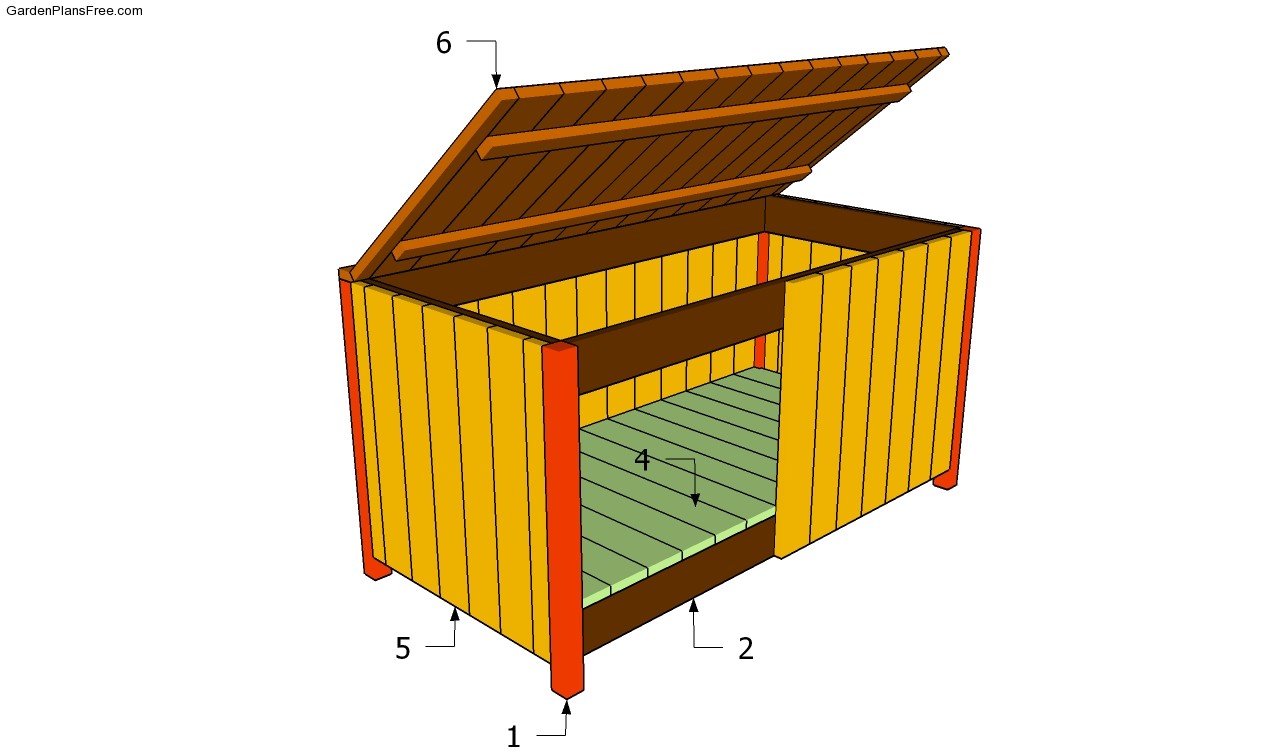
Building a garden storage box
Materials
- 1 – 4 pieces of 2×2 – 24” long LEGS
- 2 – 4 pieces of 1×4 – 45” long FRAME
- 3 – 4 pieces of 1×4 lumber – 21″ long FRAME
- 4 – 13 piece of 1×4 – 22 1/5″ long BOTTOM
- 5 – 38 pieces of 1×4 – 22” long SLATS
- 6 – 14 pieces of 1×4 – 22 1/2″, 2 piece of 1×2 – 45″, 1 piece of1x2 – 48″ LID
Tools
- Hammer, Tape measure, Carpentry square
- Miter saw, Drill machinery, Screwdriver, Sander, Router
- Safety Gloves, Safety Glasses, Respiratory Mask
Time
- One day
Garden Storage Box Plans
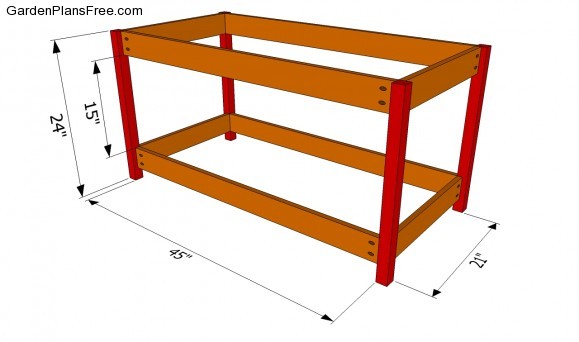
Building the frame of the box
The first step of the project is to build the frame of the garden storage box. As you can see in the image, you should build the legs from 2×2 lumber and the braces from 1×4 lumber. Align the components with great care, making sure the supports are set-off about 3/4″. In addition, check if the corners are right-angled using a good carpentry square.
PRO TIP: Drill pocket holes at both ends of the supports and lock them to the screws with 1 1/4″wood screws. Measure the diagonals of the frame and make adjustments until they are perfectly equal.
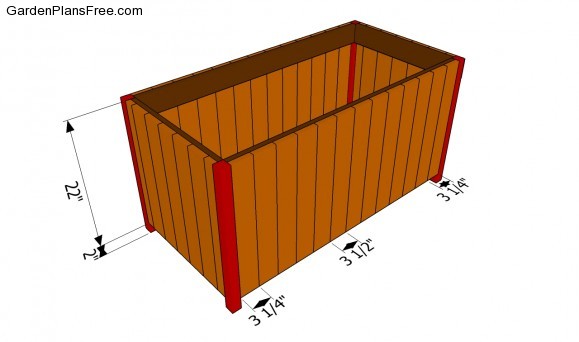
Installing the side walls
Continue the project by attaching the side slats. If you want to get a professional and a symmetrical result, you should start the installation of the slats with the middle of the panel. At both ends of the walls you should adjust the size of the slats, as to fit into place.
PRO TIP: Drill pilot holes trough the supports and drive in 1 1/4″ screws to secure the slats, from the inside of the storage box. Add wood glue to the joints, in order to enhance their rigidity.
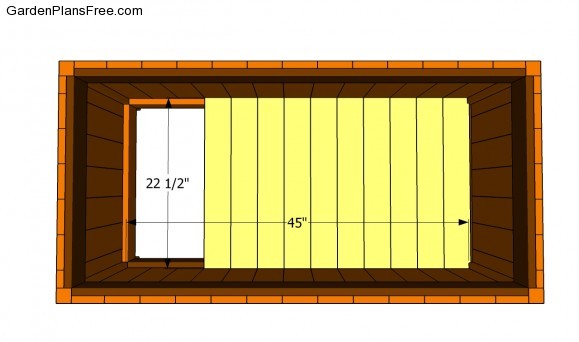
Installing the bottom
The next step of the woodworking project is to fit the floor of the box. As you can easily notice in the plans, you should fit 1×4 slats to the side cleats and secure them into place with 1 1/4″ screws. Don’t forget to countersink the head of the screws, if you want to get a professional result.
Installing the lid
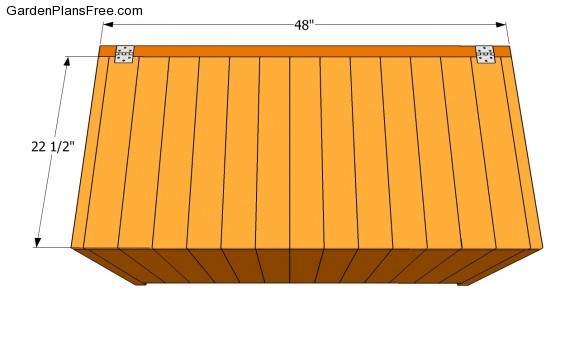
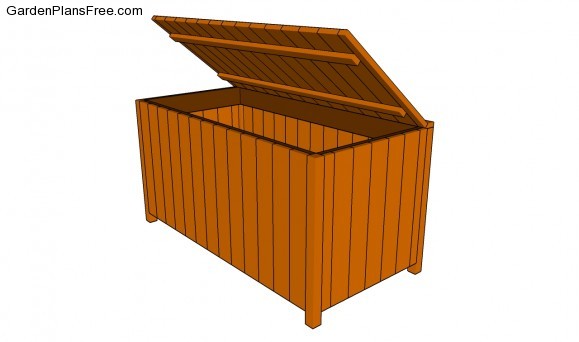
Building the lid of the box is a straight-forward project. Assemble the lid on a level surface by securing the slats with two 1×2 pieces of wood. Drill pilot holes trough the supports and secure the slats by driving 1 1/4″ galvanized screws. Attach a 1×2 slats to the back of the box and attach the lid into place with several metal hinges. Use a spirit level to check if the lid is perfectly level.
Garden storage box plans
Last but not least, you should take care of the finishing touches. Therefore, we recommend you to check if the components are locked into place properly and if the frame is rigid. Make sure there are no protruding screws or sharp edges. Moreover, the components should be installed properly, making sure there are no gaps between the slats.
PRO TIP: Fill the holes with a good wood filler and smooth the surface with 120-grit sandpaper. Apply several coats of paint or stain over the components, in order to protect them from decay.
This diy project was about picnic table plans free. If you have enjoyed the free project, we recommend you to share it with your friends, by using the social media widgets.
