This step by step diy project is about deck box plans. If you want to learn how to build a simple deck box we recommend you to pay attention to the instructions described in the article. Moreover, we recommend you to check out the rest of the projects featured on this site, as to get an idea about what you could build to enhance the look of your backyard. Adjust the size and the design of the wooden box to suit your needs.
If you are going to place the deck box directly in your garden, we recommend you to invest in high quality lumber that is weather-resistant. Plan every aspect of the woodworking project from the very beginning, in order to prevent mistakes and to get the job done in just a weekend. Plumb the legs with a spirit level and check if the framing components are perfectly horizontal, before inserting the screws.
Deck box plans
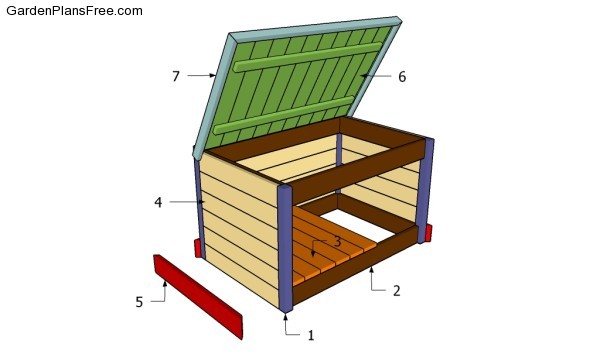
Building a deck box
Materials
- 1 – 4 pieces of 2×2 lumber – 21″ LEGS
- 2 – 4 piece of 1×4 lumber – 33”, 4 pieces – 21″ FRME
- 3 – 10 piece of 1×4 lumber – 22 1/2″ FLOOR
- 4 – 12 pieces of 1×4 lumber – 21″, 12 pieces – 33″ WALLS
- 5 – 2 pieces of 1×4 lumber – 25 1/2″, 2 pieces – 37 1/2″ TRIMS
- 6 – 2 pieces of 1×2 – 33″, 11 pieces of 1×3 – 22 1/2″ LID
- 7 – 2 pieces of 1×2 lumber – 24 3/4″, 1 piece – 37 1/2″ TRIMS
Tools
- Hammer, Tape measure, Carpentry square
- Miter saw, Drill machinery, Screwdriver, Sander, Router
- Safety Gloves, Safety Glasses, Respiratory Mask
Time
- One day
Building a deck box

Building the frame of the deck box
The first step of the project is to build the frame of the deck box. As you can easily notice in the plans, we recommend you to build the legs from 2×2 lumber and the frame out of 1×4 slats. As you can easily notice in the image, you should check if the corners are right angled before locking the components together with screws.
PRO TIP: Drill pocket holes at both ends of the horizontal components to prevent them from splitting.
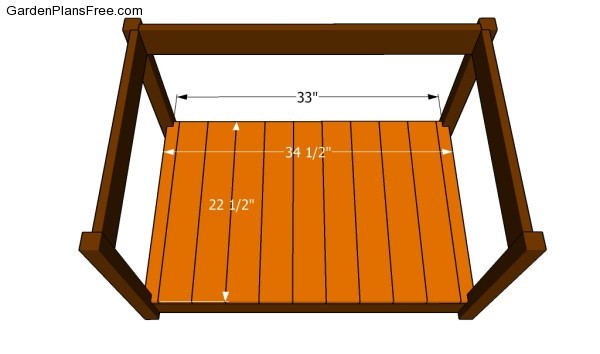
Attaching the floor
The next step of the project is to attach the slats to the bottom of the deck box. Make sure you adjust the width of the slats placed at the ends of the row, otherwise they won’t fit into place. Apply waterproof glue between the slats in order to lock them properly.
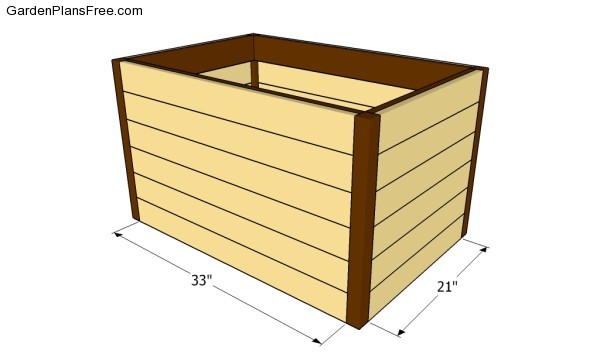
Attaching the slats to the box
Continue the project by attaching the 1×4 slats to sides of the deck box, as shown in the image. Drill pocket holes at both sides of the 1×4 slats and lock them to the legs with 1 1/4″ galvanized screws. Make sure you leave no gaps between the slats and align them at both ends.
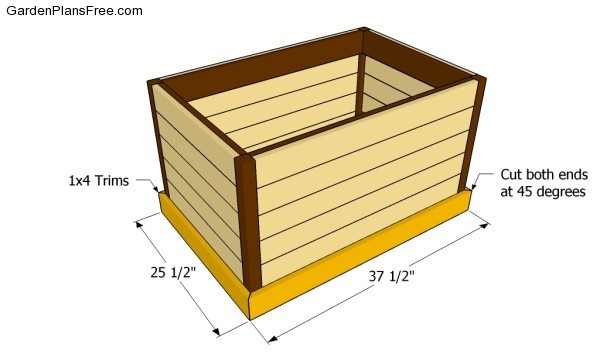
Attaching the trims to the deck box
If you want to enhance the look of the deck box we recommend you to attach 1×4 trims to the bottom of the structure. Cut both ends of the trims at 45 degrees if you want to get accurate joints.
Building the lid
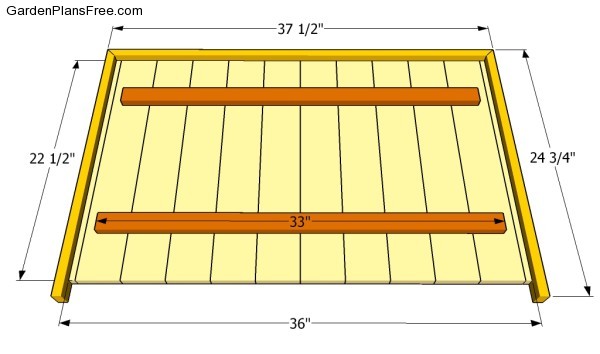
Building the lid of the deck box is a straight-forward project, as it doesn’t require complex tools nor expensive materials. Lay the 1×4 slats on a level surface and lock them together with a couple of 1×3 cleats. Attach nice 1×2 trims to the edges of the lid in order to enhance its look.
Attaching the lid
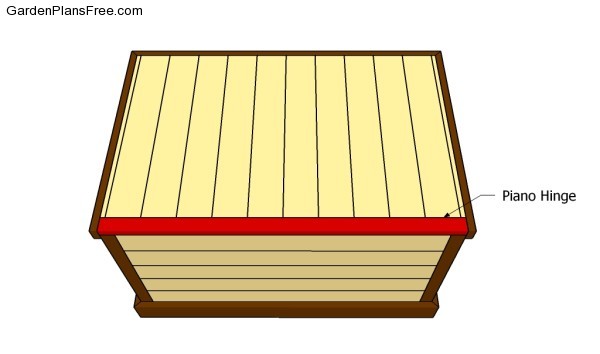
Attach the lid over the deck box and lock it to a 1×2 slat placed at the back of the box. Use piano hinges to lock the lid into place in a professional manner.
Deck box plans
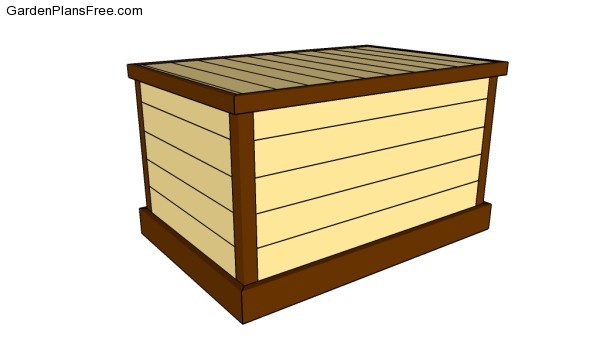
Last but not least, you should take care of the finishing touches. Check if the components are secured into place properly and if the frame is rigid. Make sure there are no protruding screws or sharp edges that could injure you.
PRO TIP: Fill the holes with a good wood filler and smooth the surface with 120-grit sandpaper. Apply several coats of paint or stain over the components, in order to protect them from decay.
This diy project was about deck box plans free. If you have enjoyed the free project, we recommend you to share it with your friends, by using the social media widgets. LIKE us on facebook if you want to be the first that gets our latest projects.
