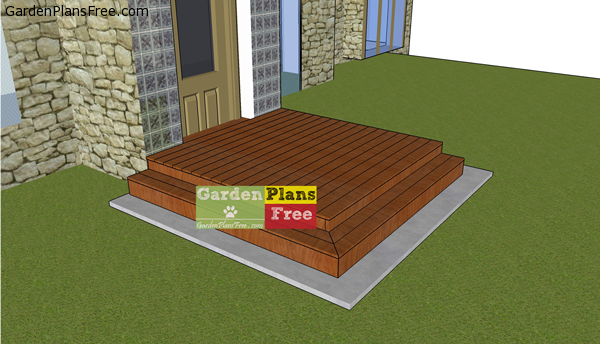
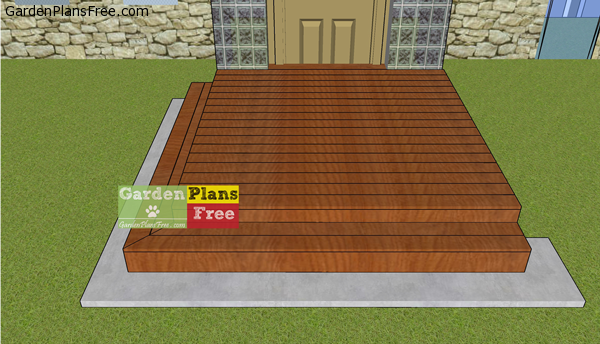
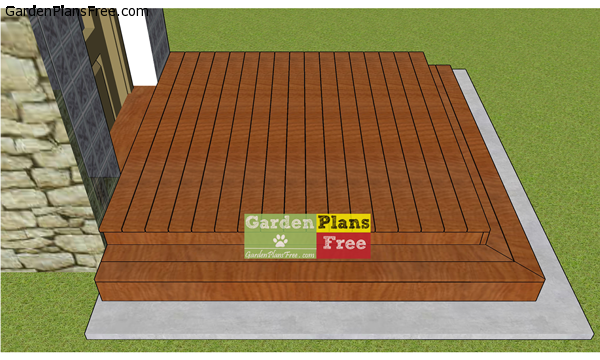
This step by step woodworking project about 8×8 entrance deck plans free. This is a basic deck with a step, that would make for a cool addition to your front entrance. If you need to freshen up the look of your house, this would make for an awesome project. You need to take a look over the building codes, so you learn the correct materials and techniques required for your project specifically. See a list with all my DIY projects, so you can select easily the one that suits your needs best!
This project is ideal for any small backyards, as it has compact dimensions and it doesn’t have a massive look. Make sure you invest in high quality lumber that is weather-resistant, as the components will be exposed to moisture and sunlight. Adjust the size and the design of the deck to suit your needs and to match the design of your garden. Check out the rest of the projects for more ideas for your backyard.
Building a 8×8 garden deck
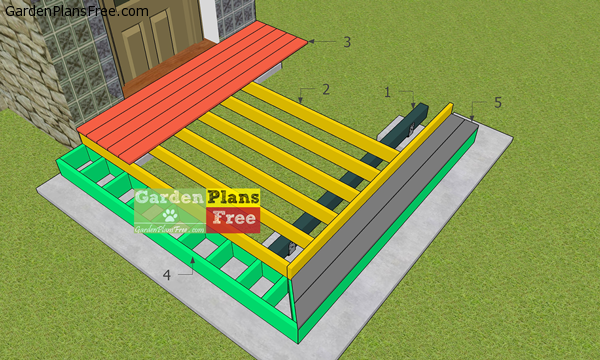
Building-a-8×8-deck
Materials
- 1 – 2 pieces of 4×6 lumber – 8 ft SUPPORT BEAMS
- 2 – 9 pieces of 2×6 lumber – 94 1/2″, 1 piece – 8 ft RIM JOISTS
- 3 – 17 pieces of 1×6 lumber – 8 ft DECK BOARDS
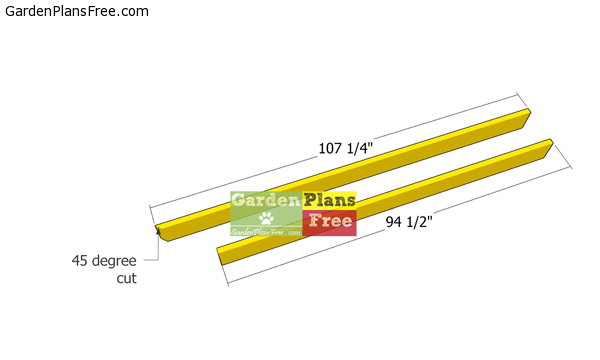
- 4 – 2 pieces of 2×6 lumber – 94 1/2″, 2 pieces – 107 1/4″, 18 pieces – 9 3/4″, 1 piece – 15 7/8″ STEP FRAME
- 5 – 2 pieces of 1×6 lumber – 101 1/2″, 2 pieces – 107 1/4″ STEP BOARDS
- 2 pieces of 4×6 lumber – 8 ft
- 15 pieces of 2×6 lumber – 8 ft
- 2 pieces of 2×6 lumber – 10 ft
- 17 pieces of 1×6 lumber – 8 ft
- 4 pieces of 1×6 lumber – 10 ft
- 4 post anchors
- 3 1/2″ screws
- 1 5/8″ screws
- wood stain
- joist hanger
- 1 1/2″ structural screws
- 2 1/2″ structural screws
Tools
- Hammer, Tape measure, Carpentry square
- Miter saw, Drill machinery, Screwdriver, Sander, Router
- Safety Gloves, Safety Glasses, Respiratory Mask
Time
- One day
Step 1: Deck Plans Free
Laying-out-the-footings
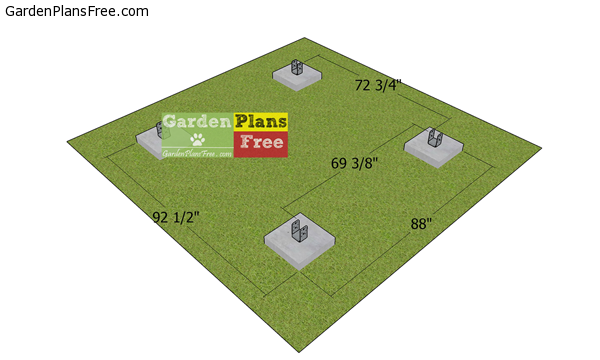
The first step of the project is to layout the footings for the deck. You can pour footings and use post anchors for the support beams. Align the post anchors one to another and apply the 3-4-5 rule to the corners. Make sure the anchors are level one to another.

Fitting-the-support-beams
Fit the beams to the footings, making sure you align them one to another. Align the beams and check if the corners are square. Measure the diagonals and make sure they are equal. Use a spirit level to check if they are horizontal. Insert 2 1/2″ structural screws to secure beams into place tightly.
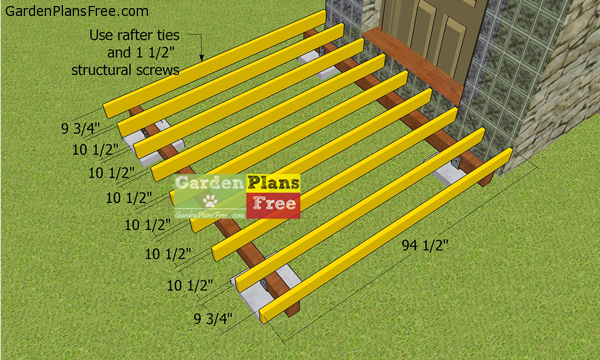
Fitting-the-deck-joists
Fit the joists to the support beams and place them equally spaced, every 12″. Use rafter ties and 1 1/2″ structural screws to lock joists into place. Cut the ends of the joists, to make sure they are perfectly aligned.
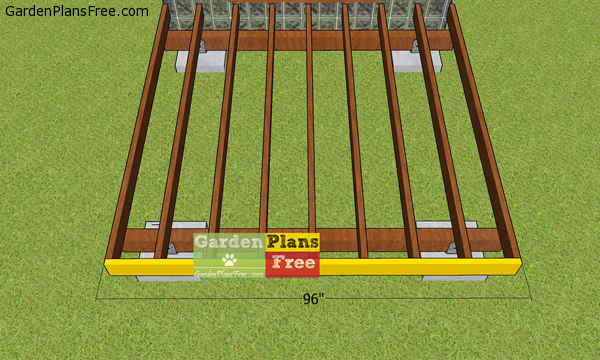
Fitting-the-end-joist
Fit a 2×6 joists to the end of the deck frame. Align the edges flush, drill pilot holes and insert 3 1/2″ screws to lock them into place tightly.
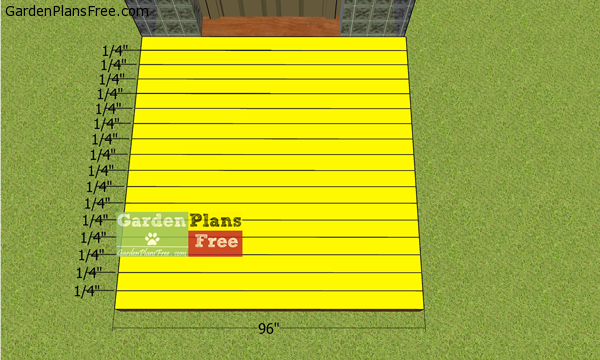
Fitting-the-deck-boards
Fit the 1×6 decking boards to the top of the pergola frame. Place a nail between the boards to create small gaps for water drainage. You can play with the gaps to suit your needs. Drill pilot holes though the boards and secure them to the joists with 1 5/8″ screws.
Step 2: Building the step
Joists-for-step-frame
Next, we need to build the joists for the steps. Make a 45 degree cut to one end of the long joist.
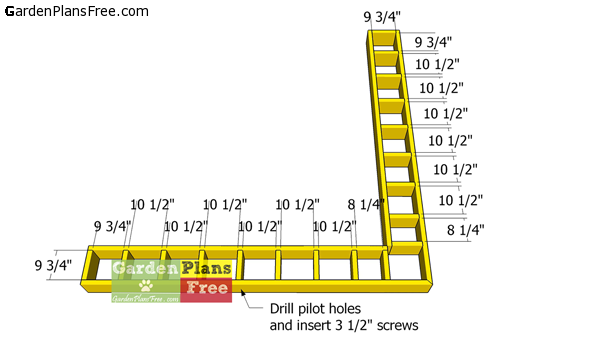
Assembling-the-frame-of-the-steps
Assemble the frame of the step, as shown in the diagram. Drill pilot holes through the joists and insert 3 1/2″ screws into the perpendicular components.

Diagonal-joist
Build the diagonal joist for the step. Use a saw to make double 45 degree cuts, to both ends of the joist.
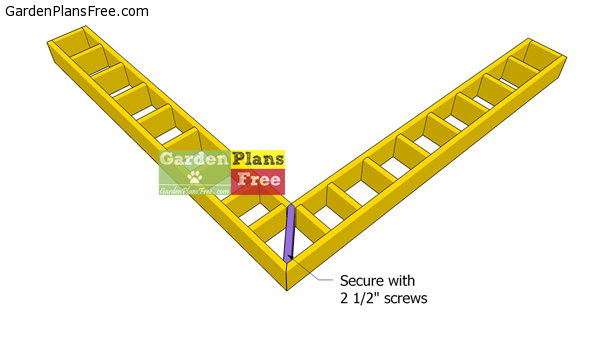
Fitting-the-diagonal-step-support
Fit the joist to the frame of the step. Drill pilot holes and insert 3 1/2″ screws to lock it into place.

Fitting-the-step-frame
Fit the frame to the deck. Make sure you connect the frame to the deck with screws. In addition, use a spirit level to check if the frame is horizontal. Pour a concrete slab under the step or at least compact gravel to help with water drainage,
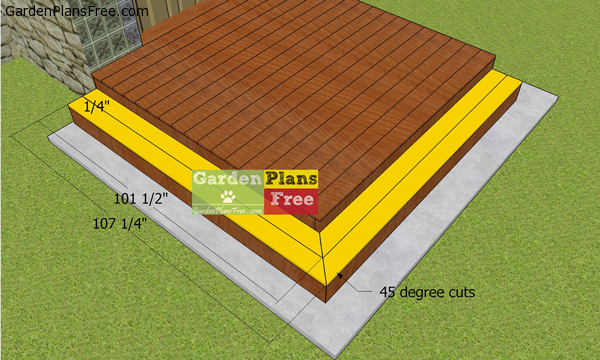
Fitting-the-boards-for-steps
Attach the 1×6 boards to the step. Notice the 45 degree cuts to one end of the boards. Align the edges flush, drill pilot holes and insert 1 5/8″ screws to lock them into place tightly.
Build-a-8×8-deck
Fill the holes with wood putty and smooth the surface with 120-220 grit sandpaper. Apply a few coats of stain / paint over the components to enhance the look of the deck and to protect the components from decay.
8×8-deck-plans—how-to-build
Front-entrance-deck-plans
You should also check free plans for a free standing deck HERE.

This diy project was about 8×8 entrance deck plans free. If you have enjoyed the free project, we recommend you to share it with your friends, by using the social media widgets. LIKE us on facebook in order to be the first that gets our latest projects.