If you want to learn more about how to build a portable workbench, you have to take a close look over the free plans in the article. If you are a DIY-er or just a homeowner, having a 2×4 workbench is not an option but a necessity. In this article, we show you how to build a basic workbench from 2×4 lumber and 3/4″ plywood. The caster wheels make it an obvious choice if you want to move it throughout the shop.
If you want to get the job done in a professional manner, we recommend you to plan everything with attention, as to prevent costly mistakes and to build a professional garden bench. Invest in high quality materials, such as cedar, pine or redwood, as the bench will be exposed to all kinds of weather. Apply a few coats of paint over the components, to enhance their appearance and to protect them from bad weather.
2×4 Workbench Plans
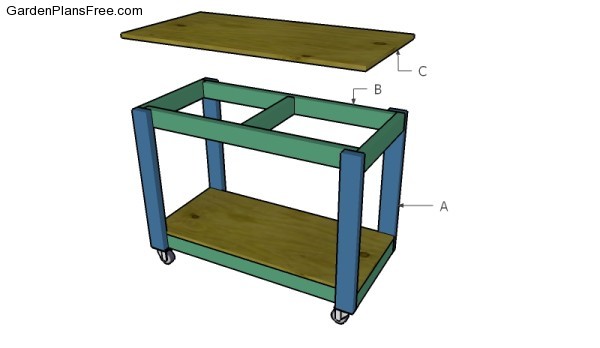
Building a 2×4 workbench
Materials
- A – 4 pieces of 2×4 lumber – 32″ long LEGS
- B – 2 pieces of 2×4 lumber – 45″ long, 2 pieces – 21″ long, 1 piece – 18″ long 2xFRAME
- C – 1 piece of 3/4″ plywood – 24″x48″ long, 1 piece – 21″x48″ long SHELVES
- 6 pieces of 2×4 lumber – 8′
- 1 piece of 3/4″ plywood – 4’x8′
- 100 pieces of 2 1/2″ screws
- 100 pieces of 1 1/4″ screws
- 4 pieces of 3″ caster wheels
- wood glue, stain/paint
Tools
- Hammer, Tape measure, Carpentry square
- Miter saw, Drill machinery, Screwdriver, Sander, Router
- Safety Gloves, Safety Glasses, Respiratory Mask
Time
- One day
How to build a basic workbench
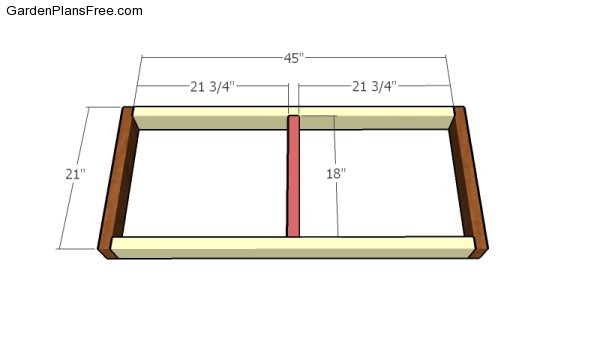
Building the frames
The first step of the project is to build the frames for the workbench. Drill pilot holes through the side beams and insert 2 1/2″ screws into the perpendicular components. Fit the middle support to the frames. Align the edges and make sure the corners are right-angled. Drill pilot holes and insert 2 1/2″ screws.
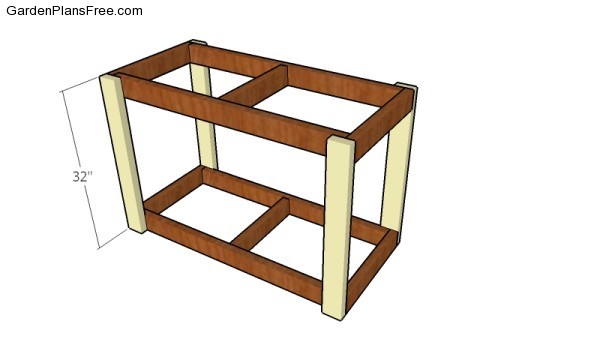
Assembling the workbench
After assembling the lower and the top frames, you need to lock them together by attaching the 2×4 legs. Make sure the corners are square, drill pilot holes through the legs and insert 2 1/2″ screws into the frames. Add glue to the joints. Insert 4 screws for every square. Use a spirit level to make sure the frames are horizontal.

Fitting the shelves
Use 3/4″ plywood for the shelves. Mark the cut lines on the sheets and get the job done with a circular saw. Fit the shelves to the frames and secure them into place with 1 1/4″ galvanized screws. Insert the screws just under the surface for a professional look. Alternatively, you can use 2″ brad nails and glue to secure the shelves to the frames.
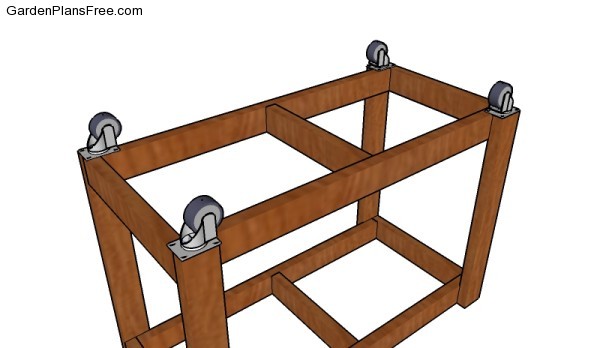
Fitting the caster wheels
Attach 3″ caster wheels to the bottom frame. Align the casters to the corners and secure them into place with 1 1/4″ screws. The casters will allow you to move the 2×4 workbench easily.
After assembling the bench you need to take care of the finishing touches. This portable bench is ideal for any shed, workshop or garage. Even if you have a tight space you can easily move the workbench to the driveway and work on your woodworking projects. Building this workbench is a smart investment, as it will ease your future work.
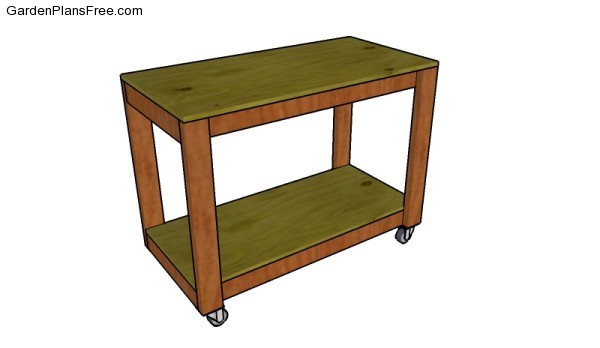
2×4 Workbench Plans
We recommend you to check if the components are locked into place properly and structure is rigid enough for your garden. Make sure there are no protruding screws or sharp edges. Check out free plans for another workbench design.
PRO TIP: Apply several coats of paint or stain over the components, in order to protect them from decay. Check out the rest of the project to learn more about building garden projects.
This diy project was about 2×4 workbench plans. If you have enjoyed the free project, we recommend you to share it with your friends, by using the social media widgets.

