This garden project is about porch swing plans free. If you want to learn how to build a simple swing for your porch, we strongly recommend you to take a look over the following instructions and to study the diagrams. Nevertheless, you could also adjust the size and the design of the porch, as to suit your needs and to match the design of the rest of your property.
When building the porch swing we recommend you to use quality materials (cedar, pine or redwood). Therefore, use straight slats and make sure they have no cracks, knots or other visible flaws. Align the components at both ends and drill pilot holes before inserting the screws, if you want to prevent the wood from splitting. Reinforce the structure of the porch swing by adding glue to the joints.
Building a porch swing

Building a porch swing
Materials
- A – 2 pieces of 2×4 – 56 3/4″, 3 pieces – 18″ FRAME
- B – 14 pieces of 1×2 lumber – 56 3/4″ SLATS
- C – 2 pieces of 2×3 lumber – 24″, 2 pieces – 56 3/4″ BACKREST SUPPORT
- D – 27 pieces of 1×2″ lumber – 12″ SLATS
- E – 2 pieces of 2×3 lumber – 12 1/4″, 2 pieces – 24″ ARMRESTS
- F – 4 pieces of metal eye screws HANGERS
Tools
- Hammer, Tape measure, Carpentry square
- Miter saw, Drill machinery, Screwdriver, Sander, Router
- Safety Gloves, Safety Glasses, Respiratory Mask
Time
- One day
Porch Swing Plans Free
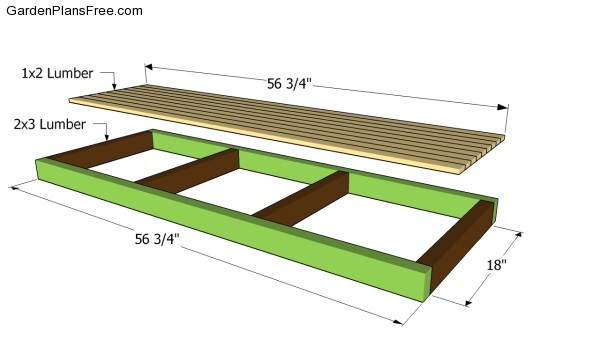
Building the frame
The first step of the project is to build the frame of the porch swing. As you can notice in the free plans, we recommend you to make the frame from 2×3 lumber. Check if the corners are right-angled, drill pilot holes and insert the 3 1/2″ galvanized screws into place. Add waterproof glue to the joints, if you want to get rigid joints.
PRO TIP: Attach 1×2 slats to the frame, making sure you leave a small gap between them to enhance the water drainage. Place a nail between the slats, in order to get consistent gaps.
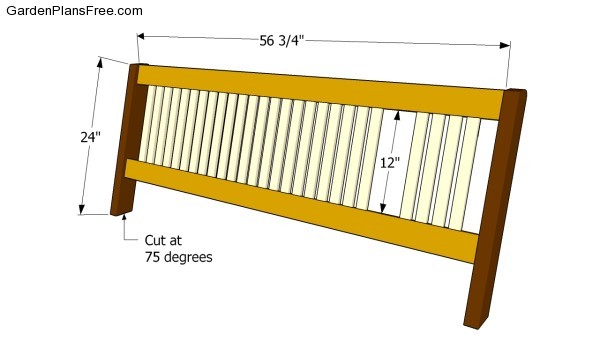
Building the back support
The next step of the project is to build the back support of the swing. Therefore, build the frame using 2×3 lumber, making sure you follow the instructions shown in this image. Cut both ends of the vertical supports at 75 degrees with a miter saw.
PRO TIP: After building the frame, we recommend you to insert the rest of the components (1×2 lumber) by using pocket screws. Drill pocket holes at both ends of the slats before inserting the screws, to prevent the wood from splitting.
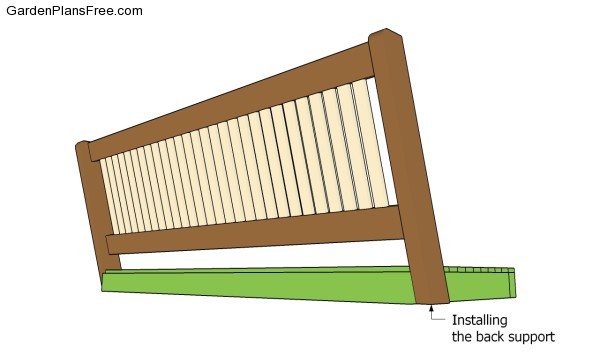
Installing the back support
Afterwards, drill pilot holes at the bottom of the supports and insert 2 1/2″ galvanized screws into the bench frame. Moreover, you could add waterproof glue to the joints, if you want to get a rigid structure.
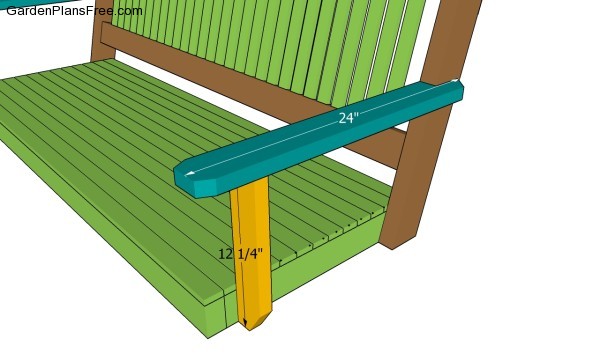
Fitting the arm rests
One of the last steps of the project is to build the armrests. As you can notice in the plans, we recommend you to build both the supports and the armrests from 1×3 lumber. Cut the ends of the components in a decorative manner and smooth the edges of the components with a sand block.
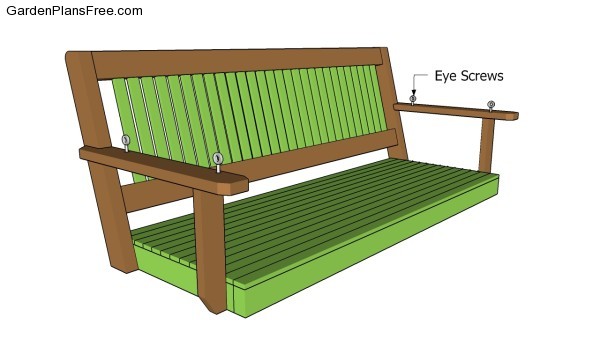
Inserting the eye screws
Use several eye screws into the armrests in order to hang the swing bench to the porch. Make sure you use heavy-duty eye screws and lock all the components tightly, before hanging the swing to the porch.
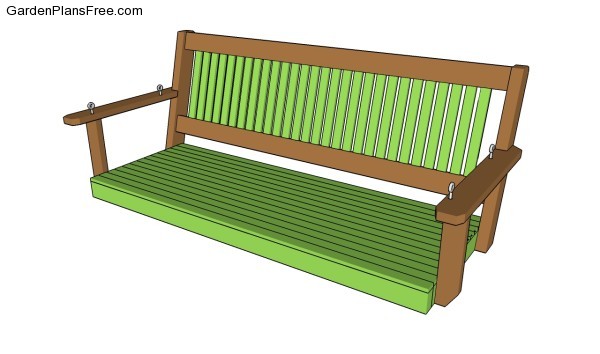
Porch swing plans free
Lastly, we recommend you to get the final touches done. Therefore, fill the holes and irregularities with putty and let it dry for several hours. Afterwards, sand the wooden surfaces with medium-grit sandpaper, along the wood grain, and clean the residues with a dry cloth.
PRO TIP: Apply several coats of paint or stain over the components, in order to protect them from decay. Check out the rest of the garden projects, as there are many garden plans that could suit your needs.
This diy project was about porch swing plans free. If you have enjoyed the free project, we recommend you to share it with your friends, by using the social media widgets.
