If you want to learn more about how to build vertical tiered planters you have to take a close look over the DIY plans in the article. I have designed this vertical tiered planters, so you can have nice flowers or other plants, even if you lack space in your backyard. You can easily add or remove planters from the vertical support, according to your needs.
If you want to get the job done in a professional manner, we recommend you to plan everything with attention, as to prevent costly mistakes and to build a professional garden bench. Invest in high quality materials, such as cedar, pine or redwood, as the bench will be exposed to all kinds of weather. Apply a few coats of paint over the components, to enhance their appearance and to protect them from bad weather. More planter projects HERE.
Vertical Tiered Planters – Free DIY Plans
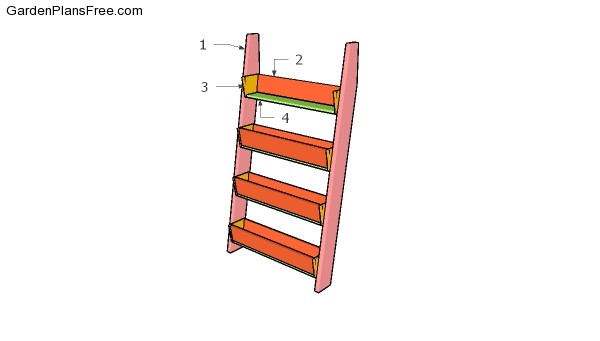
Building vertical tiered planters
Materials
- 1 – 2 pieces of 2×6 lumber – 71 3/4″ long SUPPORTS
- 2 – 8 pieces of 1×6 lumber – 34 1/2″ long SIDES
- 3 – 8 pieces of 1×8 lumber – 6 1/4″ long ENDS
- 4 – 4 pieces of 1×6 lumber – 34 1/2″ long BOTTOM
- 1 piece of 2×6 lumber – 12′
- 3 pieces of 1×6 lumber – 12′
- 1 piece of 1×8 lumber – 6′
- 100 pieces 1 5/8″ screws
- 100 pieces 2″ nails
- wood glue, stain/paint
- soil
- flower seeds
Tools
- Hammer, Tape measure, Carpentry square
- Miter saw, Drill machinery, Screwdriver, Sander, Router
- Safety Gloves, Safety Glasses, Respiratory Mask
Time
- One day
STEP 1:
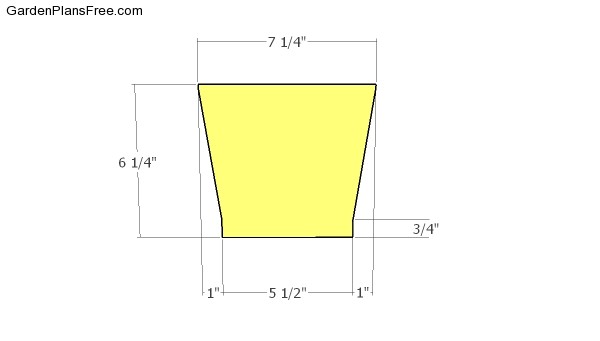
Building the sides
First cut the side boards for the planter. Mark the cut lines on the 1×8 boards and get the job done with a circular saw. Smooth the edges flush.
STEP 2:
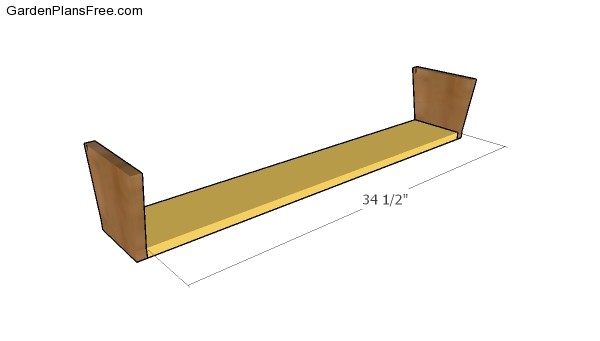
Attaching the bottom
Attach the sides to the 1×6 bottom piece. Align the edges flush, add glue to the joints and leave no gaps components. Drill pilot holes through the sides and insert 1 5/8″ screws into the base.
STEP 3:
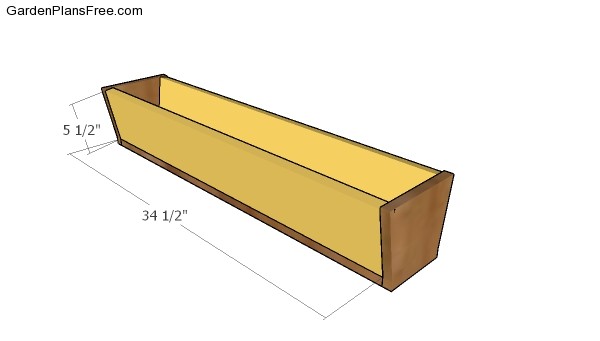
Assembling the planters
Fit the boards to the planters, as shown in the diagram. Add glue to the joints and insert 2″ nails though the sides into the front and back boards.
STEP 4:
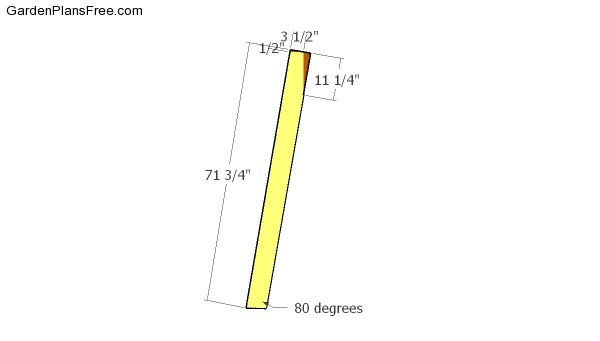
Building the side supports
Cut the vertical supports using 2×6 lumber. Mark the cut lines to the boards and get the job done with a circular saw.
STEP 5:
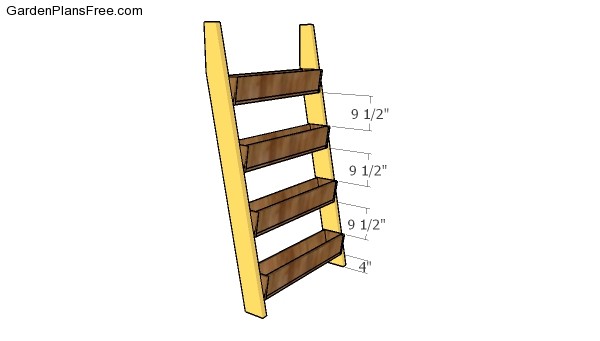
Fitting the planters
Clamp the vertical supports to the planters. You can space the planters evenly, or you can play with the distance between them. Drill pilot holes through the side boards of the planters and insert 1 5/8″ screws into the vertical supports. Use a spirit level to make sure the planters are perfectly horizontal.
STEP 6:
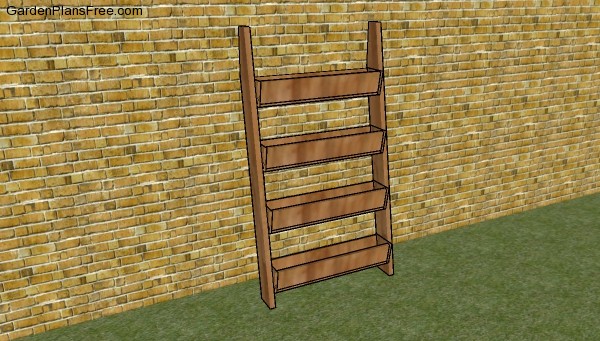
Vertical tiered planters plans
I recommend you to check if the components are locked into place properly and structure is rigid enough for your garden. Make sure there are no protruding screws or sharp edges. Fill the holes with wood putty and then smooth the surface with sandpaper. Apply a few coats of paint or stain to protect the components from decay.
PRO TIP: Apply several coats of paint or stain over the components, in order to protect them from decay. You can fit landscape fabric to the interior of the planter to extend their durability. Use staples to attach it to the wooden boards.
This diy project was about vertical tiered planters plans. If you have enjoyed the free project, we recommend you to share it with your friends, by using the social media widgets. Check out the rest of the project to learn more about building garden projects.


2 comments
FYI… Someone is selling these plans for profit on Etsy.
Thanks for the intention, but that person in me 🙂 That’s my etsy shop.