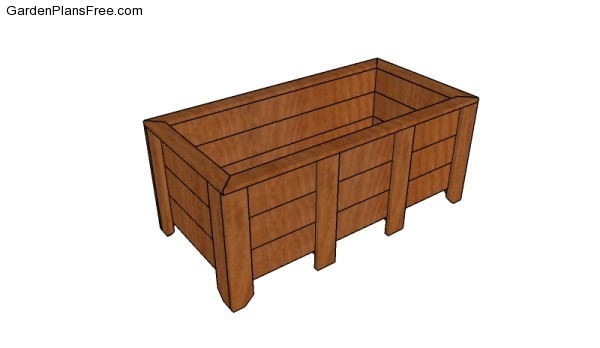
If you want to learn more about how to build a large planter box, you should check out my latest project. I have designed this planter so that you can build it with limited tools. All you need is a saw and a drill machinery. You can even adjust the size of the planter to suit your needs. This planter is ideal for any deck or patio and you can even use it to grow vegetables.
If you want to get the job done in a professional manner, we recommend you to plan everything with attention, as to prevent costly mistakes and to build a professional garden bench. Invest in high quality materials, such as cedar, pine or redwood, as the bench will be exposed to all kinds of weather. Apply a few coats of paint over the components, to enhance their appearance and to protect them from bad weather.
Large Planter Box Plans

Building a large planter box
Materials
- 1 – 12 pieces of 1×4 lumber – 20″ long LEGS
- 2 – 6 pieces of 1×6 lumber – 48″ long, 6 pieces – 22″ long PLANTER
- 3 – 4 pieces of 2×6 lumber – 46 1/2″ long BOTTOM
- 4 – 2 pieces of 1×4 lumber – 23 1/2″ long SUPPORTS
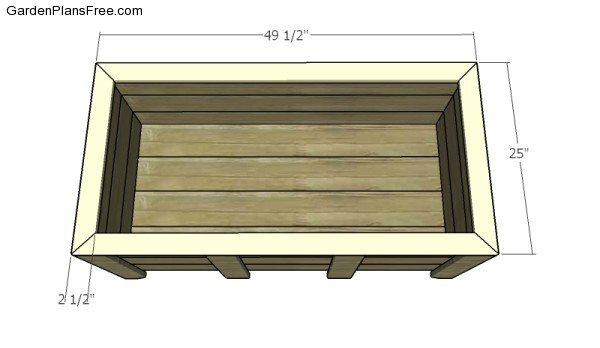
- 5 – 2 pieces of 1×3 lumber – 25″ long, 2 pieces – 49 1/2″ long TRIMS
- 4 pieces of 1×4 lumber – 8′
- 5 pieces of 1×6 lumber – 8′
- 2 pieces of 2×6 lumber – 8′
- 2 pieces of 1×3 lumber – 8′
- 100 pieces of 2 1/2″ screws
- 25 pieces 2″ brad nails
- wood glue, stain/paint
- 8 cubic ft of dirt
Tools
- Hammer, Tape measure, Carpentry square
- Miter saw, Drill machinery, Screwdriver, Sander, Router
- Safety Gloves, Safety Glasses, Respiratory Mask
Time
- One day
How to build a large planter
Building the frame of the large planter
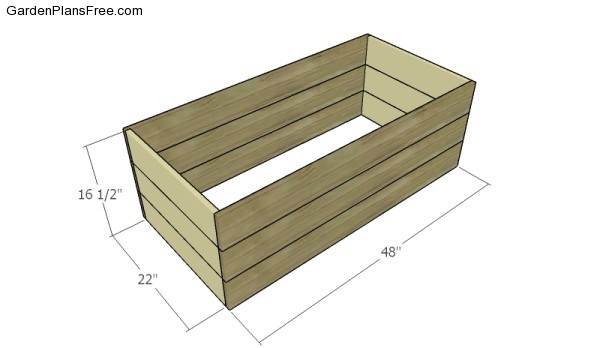
The first step of the project is to build the frame for the planter box. Cut the components from 1×6 lumber at the dimensions shown in the diagram. Smooth the edges with sandpaper. Drill pilot holes through the slats and insert 2 1/2″ screws to lock the slats together. Make sure the corners are right-angled using a carpentry square.
Attaching the bottom slats
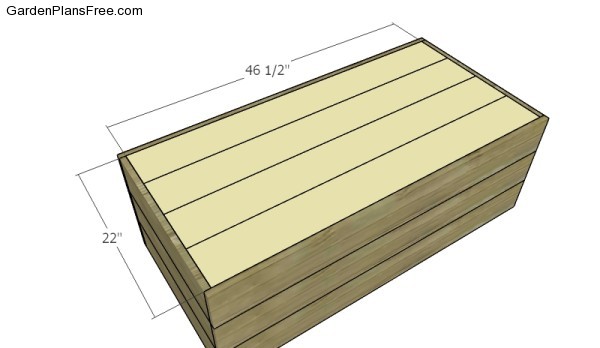
Attach the 2×6 slats to the bottom of the box. Drill pilot holes through the frame and insert 2 1/2″ screws into the bottom slats. Leave no gaps between the components for a professional result. In addition, drill a few holes to allow a proper drainage.
Attaching the legs
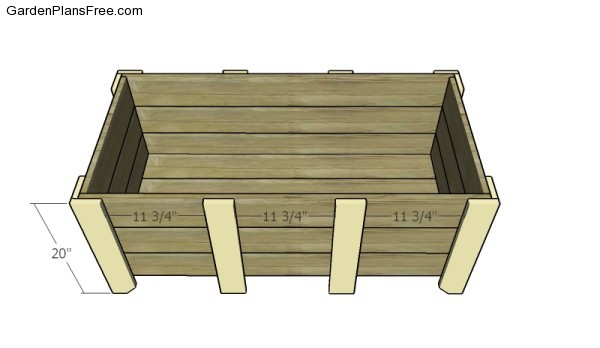
Build the legs from 1×4 lumber. Attach the legs to the planter box with 1 1/4″ screws. Add waterproof glue to the joints, if you want to enhance the bond of the components. Insert at least 2 screws into each slat.
Fitting the bottom supports
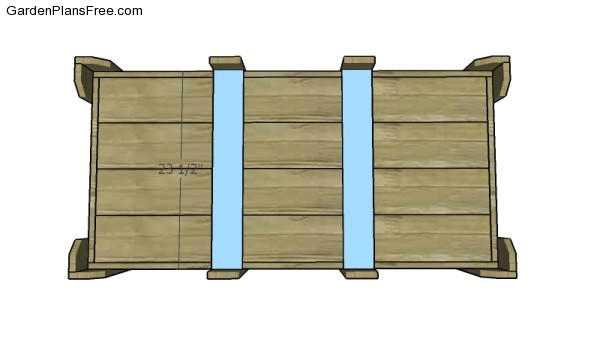
Fit 1×4 supports to the bottom of the planter, as shown in the diagram. Drill pilot holes through the supports and insert 2 1/2″ screws into the bottom slats. In addition, drill pilot holes through the legs and insert 2 1/2″ screws into the supports. These supports will enhance the rigidity of the planter and will hold the weight of the soil.
Fitting the top trims
Build the trims from 1×3 lumber. Cut both ends of the trims at 45 degrees and secure them to the top of the planter with 2″ brad nails. Leave no gaps between the trims and make sure the corners are square.
Large Planter Plans
We recommend you to check if the components are locked into place properly and structure is rigid enough for your garden. Make sure there are no protruding screws or sharp edges. Fill the holes with wood putty and smooth the surface with a random sander.
PRO TIP: Apply several coats of paint or stain over the components, in order to protect them from decay. Check out the rest of the project to learn more about building garden projects.

This diy project was about large planter box plans. If you have enjoyed the free project, we recommend you to share it with your friends, by using the social media widgets.
5 comments
Unable to download any of your plans. Wanting deerproof raised waist-high garden bed and other raised bed plans. Kinda needing to get started, so kindly pls respond .
Please read the FAQs: https://gardenplansfree.com/faqs/
How much dirt does it take to fill?
About 8 cubic ft of dirt.
I’m a 71yr old lady and I want to build a simple, not fancy raised garden planter, approx 4ft by 2ft, and tall enough so I don’t need to bend down much to work on the planting (probably waist high). I’m not mathematically gifted. I know how to use a circular saw and drill, a screw driver, hammer, carpentry square, a measuring tape and chalk string. I know how to check for square and plumb.
I need detailed, simple instructions and materials list to build this. Video tutorial would be very helpful. Keep in mind I’m a rookie but I have built a bookcase in the past. Thank you.