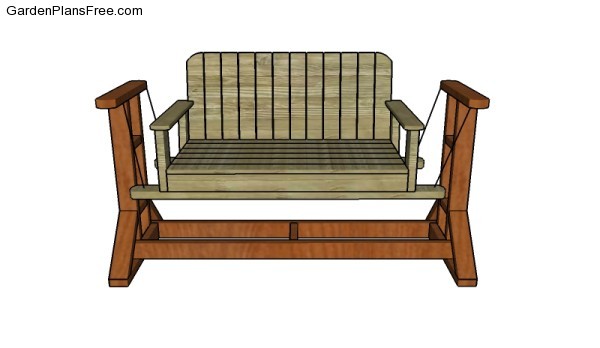
If you want to learn more about how to build a swing bench, make sure you take a look over this project. This article is Part 2 of a larger project, so don’t forget to take a look over Part 1 to learn how to build the glider stand. This bench can be built by any person with basic skills and common tools, as it only requires 2x4s and 1x4s. The swing bench features a nice design with beautiful armrests and with an angled backrest.
If you want to get the job done in a professional manner, we recommend you to plan everything with attention, as to prevent costly mistakes and to build a professional garden bench. Invest in high quality materials, such as cedar, pine or redwood, as the bench will be exposed to all kinds of weather. Apply a few coats of paint over the components, to enhance their appearance and to protect them from bad weather. See all furniture plans HERE.
Swing Bench Plans
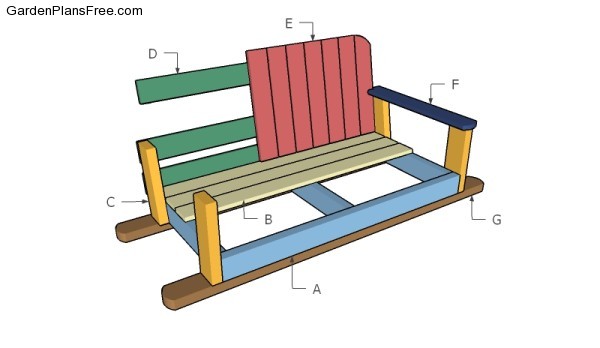
Building a swing bench
Materials
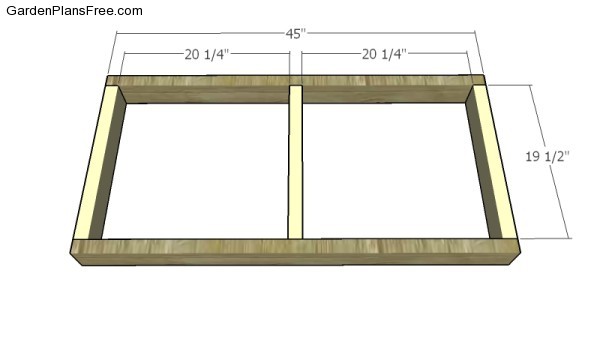
- A – 2 pieces of 2×4 lumber – 45″ long, 3 pieces – 19 1/2″ long FRAME
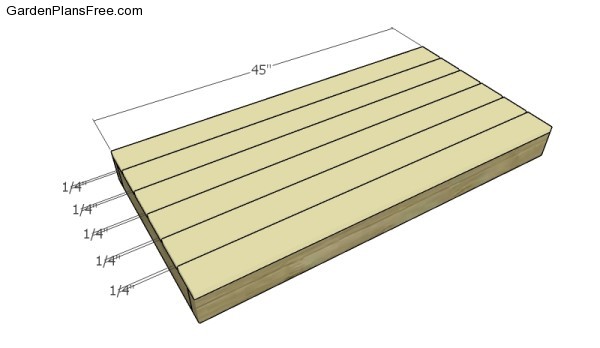
- B – 6 pieces of 1×4 lumber – 45″ long SEAT
- C – 2 pieces of 2×4 lumber – 12 3/4″ long, 2 pieces – 12″ long SIDES
- D – 2 pieces of 1×4 lumber – 48″ long, 1 piece – 45″ long SUPPORTS
- E – 12 pieces of 1×4 lumber – 19″ long BACKREST
- F – 2 pieces of 1×4 lumber – 24 3/4″ long ARMRESTS
- G – 2 pieces of 2×4 lumber – 60″ long BASE
Tools
- Hammer, Tape measure, Carpentry square
- Miter saw, Drill machinery, Screwdriver, Sander, Router
- Safety Gloves, Safety Glasses, Respiratory Mask
Time
- One day
How to build a bench swing
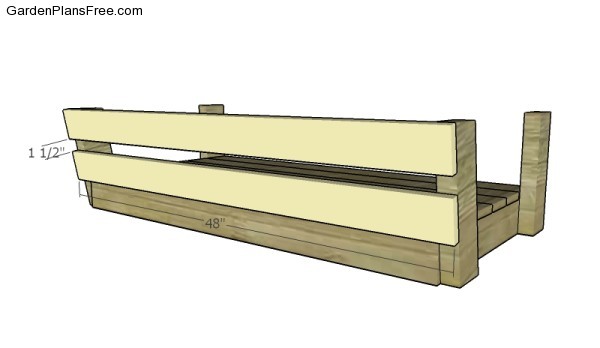
Building the seat frame
The first step of the project is to build the seat frame for the swing bench. Cut the components from 2×4 lumber. Drill pilot holes through the 45″ long beams and insert 2 1/2″ screws into the perpendicular supports. Make sure the corners are square and align the edges with attention. Add waterproof glue to the joints.
Fitting the seat slats
Attach the 1×4 slats to the seat frame. Place a piece of 1/4″ plywood between the slats to create even gaps between the slats. Drill pilot holes and insert 1 1/4″ screws into the frame.
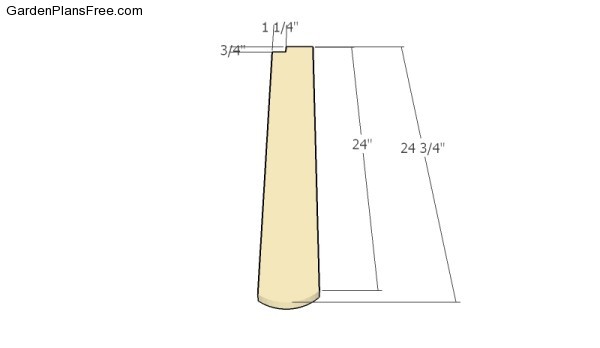
Build the side supports for the bench swing. Cut both ends of the supports at 80 degrees using a miter saw. Smooth the cut edges with sandpaper for a professional result.
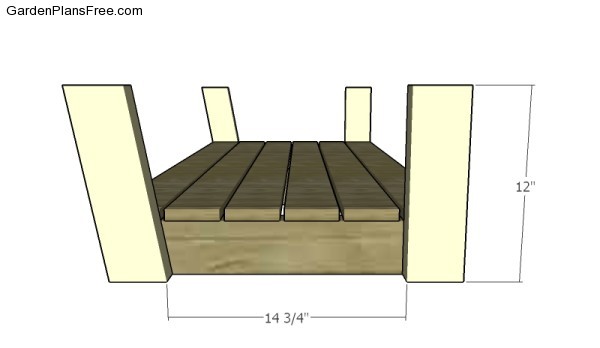
Side supports
Attach the supports to the sides of the swing bench. Drill pilot holes through the supports and insert 2 1/2″ screws into the frame. Add waterproof glue to the joints to enhance the bond of the components.
Backrest supports
Next, attach the 1×4 supports for the backrest. Drill pilot holes and insert 1 1/4″ screws into the supports. Add glue to the joints for a professional result.
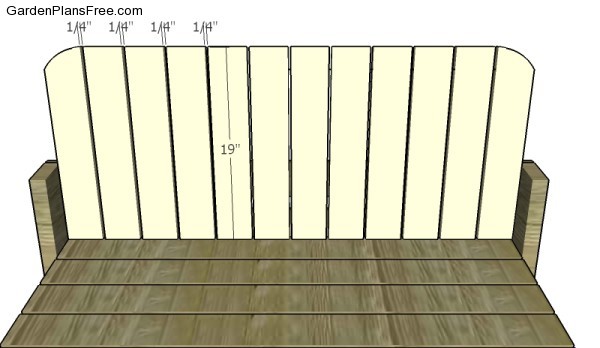
Fitting the backrest slats
Build the backrest from 1×4 slats. Place a piece of 1/4″ plywood between the slats for consistent gaps. Drill pilot holes and insert 1 1/4″ screws to secure the slats to the supports. Round the exposed corners for a professional result..
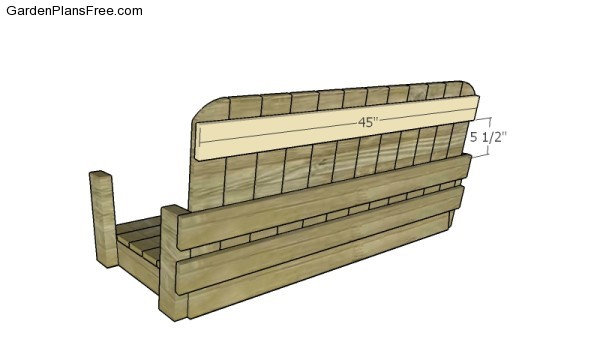
Back support
Attach a 1×4 support to the top of the backrest. Drill pilot holes and insert 1 1/4″ screws to lock the components together tightly.
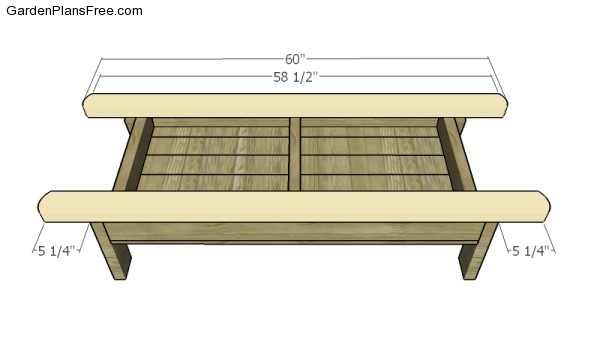
Fitting the bottom supports
Attach 2×4 supports to the frame of the bench, as shown in the diagram. Drill pilot holes through the supports and insert 2 1/2″ screws to the frame. Round the ends with a jigsaw, to enhance the look of the wooden bench.
Building the armrests
Build the armrests from 1×4 lumber. Make a notch to one end of the slats to fit around the backrest. In addition, round the opposite end with a jigsaw for a professional appearance.

Fitting the armrests
Fit the armrests to the supports, as shown in the diagram. Drill pilot holes and insert 1 1/4″ screws to secure the armrests into place.

Swing bench plans
Now that you have assembled the swing bench, all you are left to do is to take care of the finishing touches. Therefore, fill the holes with wood putty and let it dry out for several hours.
How to build a glider swing
Next, you need to secure the bench to the glider stand. Using a swing kit is the best idea, as it comes with all the components required for your project.
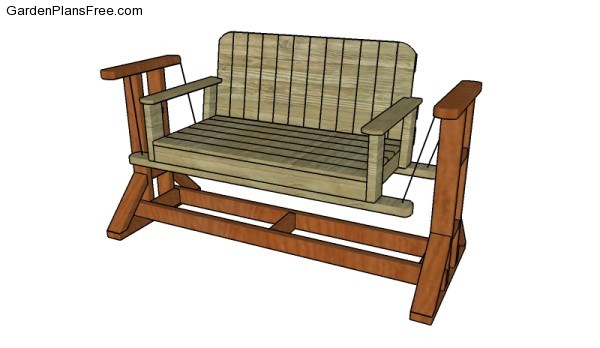
Glider swing plans
We recommend you to check if the components are locked into place properly and structure is rigid enough for your garden. Make sure there are no protruding screws or sharp edges.
PRO TIP: Apply several coats of paint or stain over the components, in order to protect them from decay. Check out the rest of the project to learn how to build the bench swing.

This diy project was about swing bench plans. If you have enjoyed the free project, we recommend you to share it with your friends, by using the social media widgets.
<<<< Previous | Next >>>>
2 comments
How do you attach the chain to the frame?
With something like hammock chair spring pin plug from Amazon. I would recommend using a short spring!