If you want to grow vegetables or flowers in a nice wooden container, but you haven’t found yet one that fits your needs and budget, you should take into account building one by yourself. If you choose proper garden planter plans for your needs and buy quality materials, you can get the job done in just a few hours. If you want to use the planter for many years, we strongly recommend you to buy weather resistant lumber (cedar, pine or redwood).
In order to get rigid joints and to hide the head of the screws, we recommend you to use pocket hole screws. Therefore use a jig to drill the holes, before inserting the 1 1/4” wood screws. Always align the slats at both ends and use a spirit level to check if the walls a plumb. In addition, fill the holes with compound and sand the wooden surfaces before applying the coats of stain or paint.
RELATED PLANS:
Building a garden planter
Building a garden planter
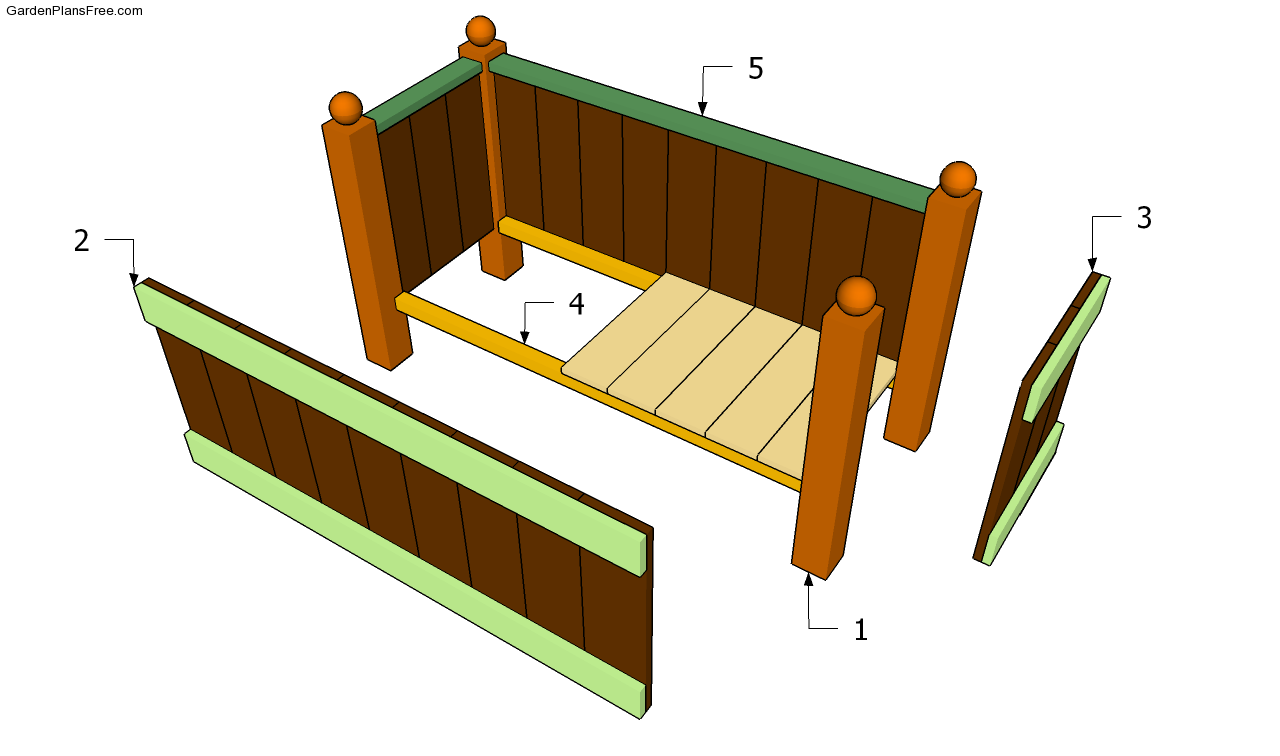
Materials
- 1 – 4 pieces of 4×4 lumber – 29” long LEGS
- 2 – 4 pieces of 1×4 lumber – 49 1/2″ long, 4 pieces of 1×4 lumber – 16 1/2″ long FRAME
- 3 – 24 pieces of 1×6 lumber – 20″ long SIDE SLATS
- 4 – 9 pieces of 1×6 lumber – 19″ long, 2 pieces of 2×2 lumber – 49 1/2” long BOTTOM
- 5 – 2 pieces of 1×3 lumber – 49 1/2”, 2 pieces of 1×3 lumber – 16 1/2″ lumber TRIMS
Tools
- Hammer, Tape measure, Carpentry square
- Miter saw, Drill machinery, Screwdriver, Sander
- Pocket Hole Jig. Router
- Safety Gloves, Safety Glasses, Respiratory Mask
Time
- One day
Made from this plan
Garden Planter Plans
Building the frame of the planter
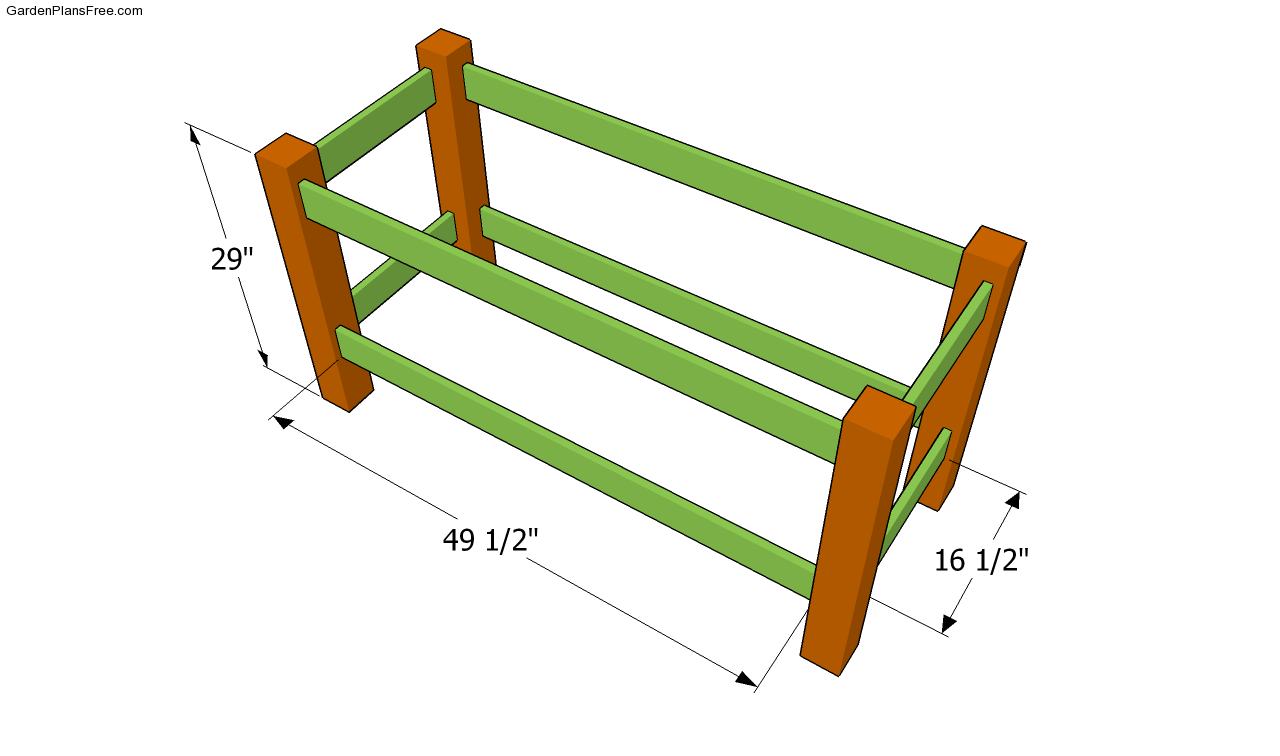
The first step of the woodworking project is to build the frame of the planter. As you can easily notice in the image, you should use 4×4 posts and 1×4 lumber to get the job done. From our own experience, we recommend you to drill pocket holes at both ends of the trims and drive 1 1/4” screws in the corner legs.
PRO TIP: Work on a level surface, if you want to get a professional result. Check if the corners are right-angled before inserting the screws.
Installing the side slats
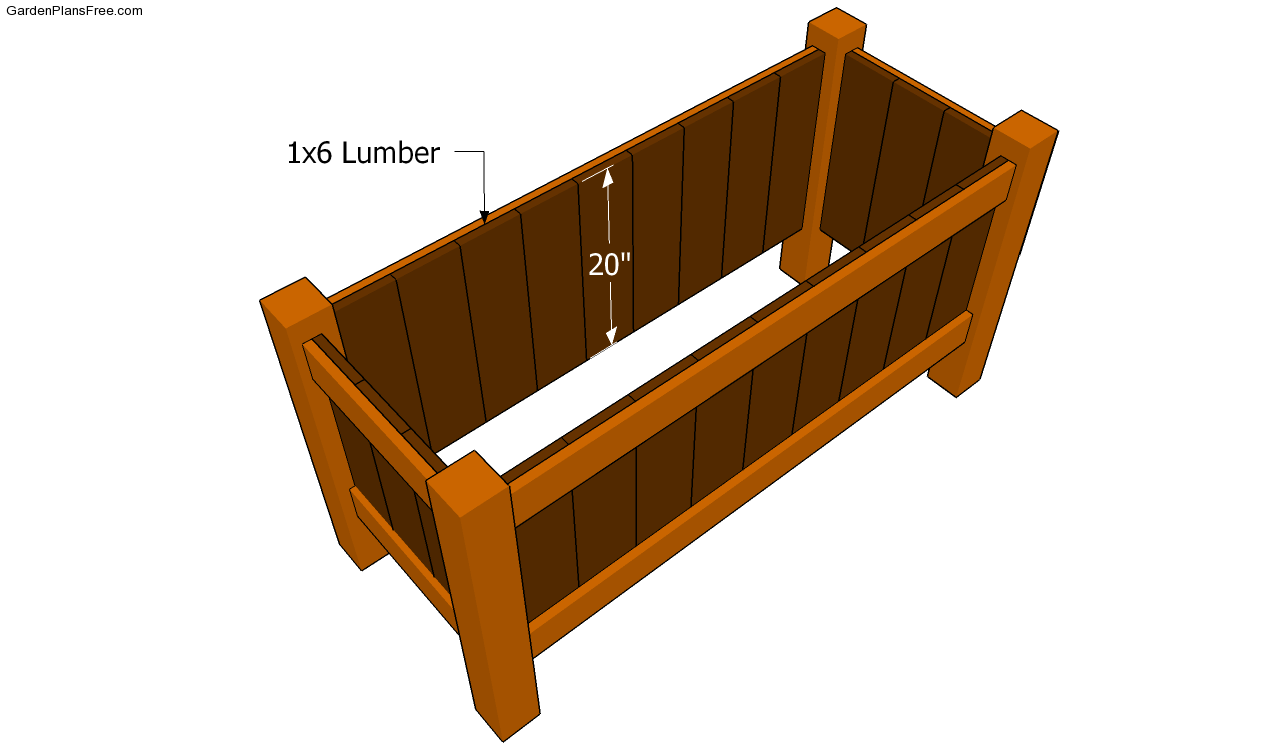
Continue the woodworking project by fitting the side slats into place. Use 1×6 cedar or pine slats to get the job done properly. Drill pilot holes at both ends of the slats before securing them to the interior of the frame, using 1 1/4” screws. Don’t forget to countersink the head of the screws, in order to get a neat look.
Fitting the bottom of the planter
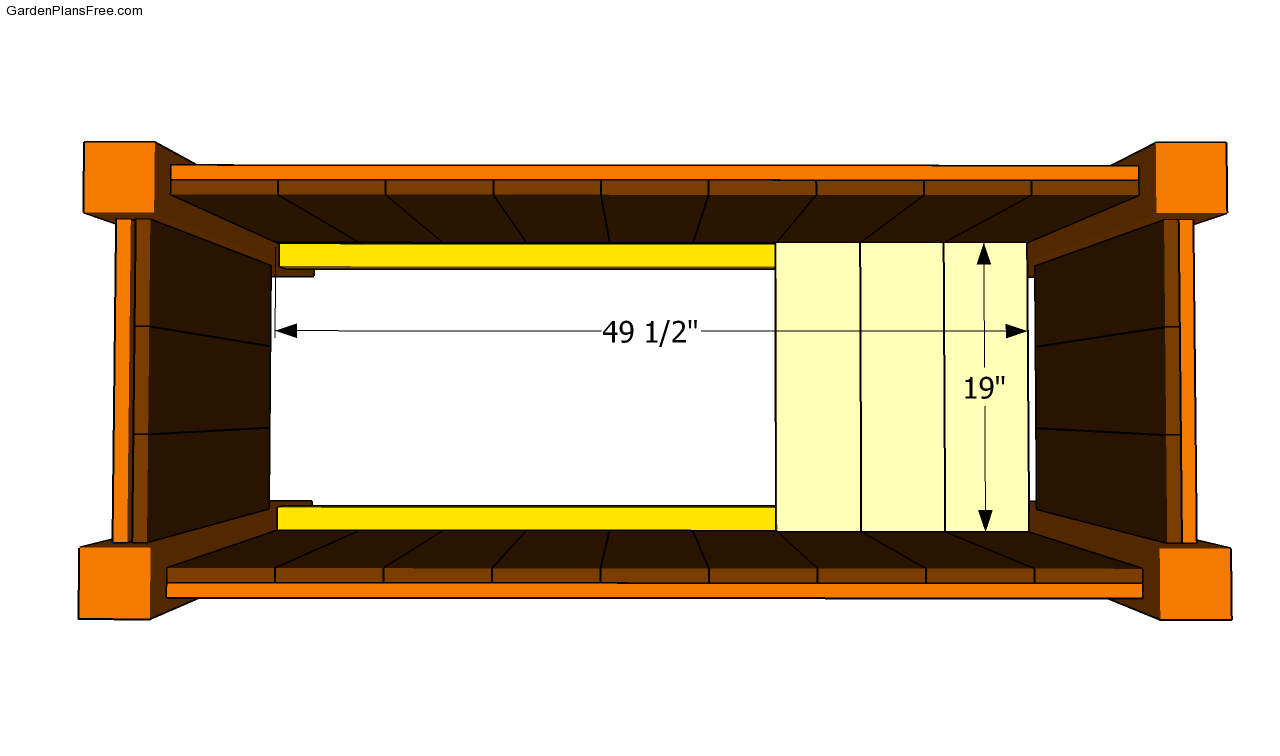
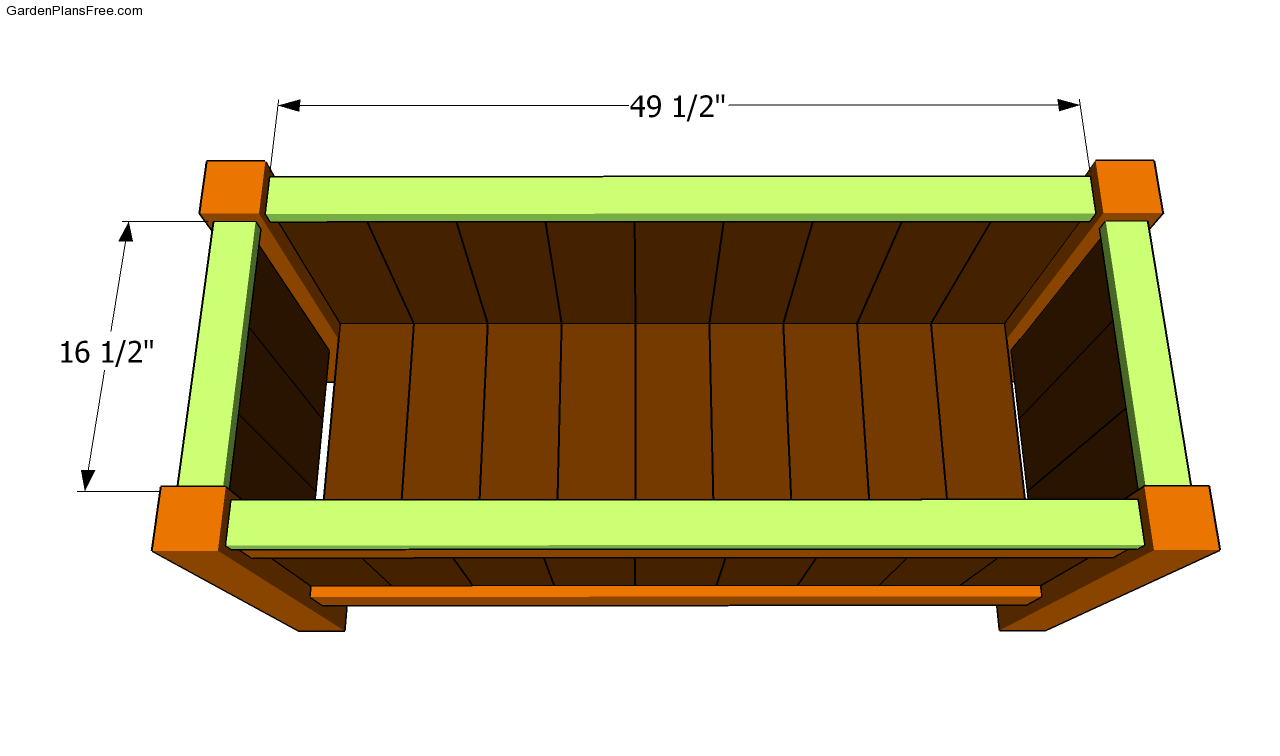
The next step of the project is to attach the bottom components. As you can easy notice in the free plans, you should attach two 2×2 cleats on both side of the garden planter and lock them into place by driving in 2” galvanized screws, every 8″. Afterwards, attach 1×6 slats and drive in 2” screws at both ends, directly into the cleats.
Installing the top trims
Although this step is not compulsory, we strongly recommend you to take into account fitting trims on top of the side slats. If you place the trims properly, offsetting them 1/2” on both sides, you garden planter would have a neat and clean look. Secure the 1×3 trims into place with wood glue and finishing nails.
Garden Planter Plans
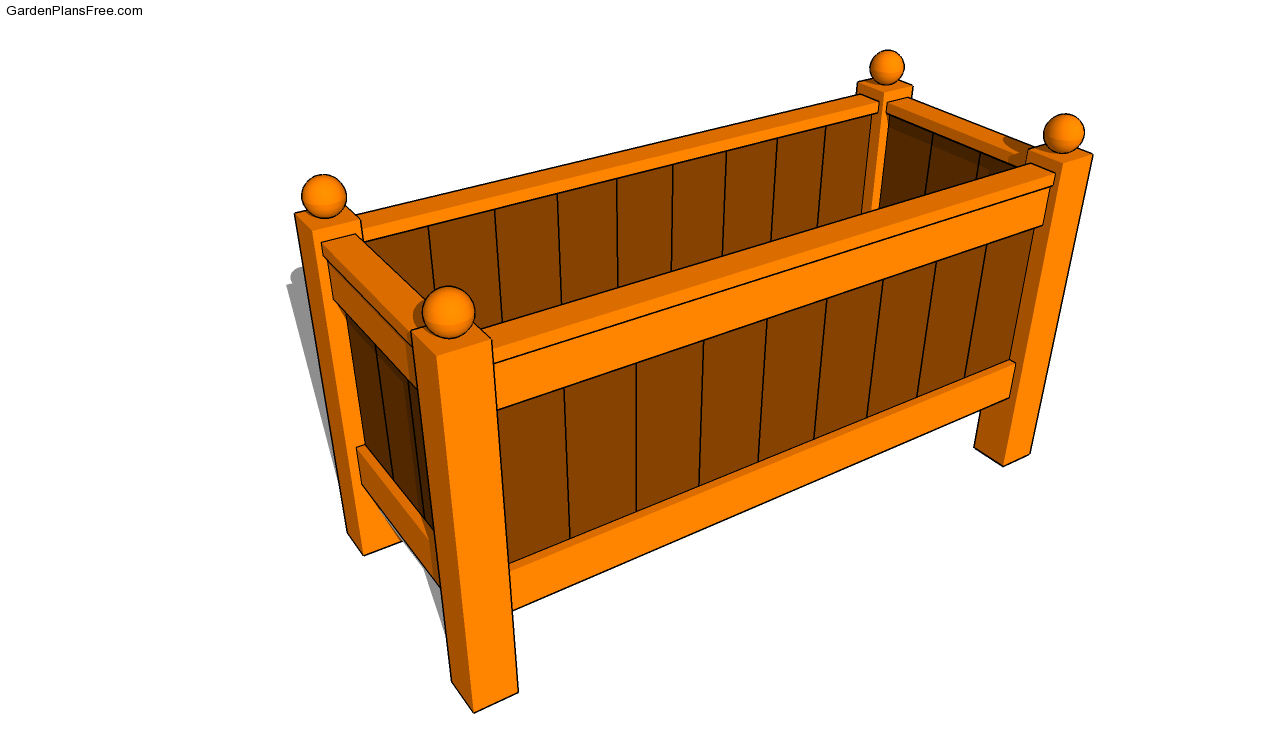
Last but not least, you should take care of the final touches. In order to build a durable planter for your garden with a neat design, we recommend you to fill the holes with wood filler and let it dry out for several hours. Next, smooth the surface along the wood grain, by using 120-grit sandpaper.
PRO TIP: Apply several coats of stain or paint to the wooden planter, in order to protect it from decay or rot. Chose a color that matches the style of your house and garden.
This diy project was about garden planter plans. If you have enjoyed the free project, we recommend you to LIKE and SHARE it with your friends, by using the social media widgets.
