If you want to supply your family with fresh vegetables and herbs every morning, we recommend you to build a garden box. Choose proper garden boxes plans for your needs, before starting the construction of the woodworking project. Invest in high quality lumber, such as pine, redwood, cedar or even pressure-treated lumber, as the components will be exposed to moisture and bad weather.
If you want to create a small vegetable garden with a diversified list of plants, we recommend you to group the garden boxes in different patterns, according to the configuration of your backyard. Fill the wooden boxes with soil and level it, before continuing the project. Apply several coats of paint or stain to the components, in order to protect them from decay and to enhance the look of the planters.
Building a garden box
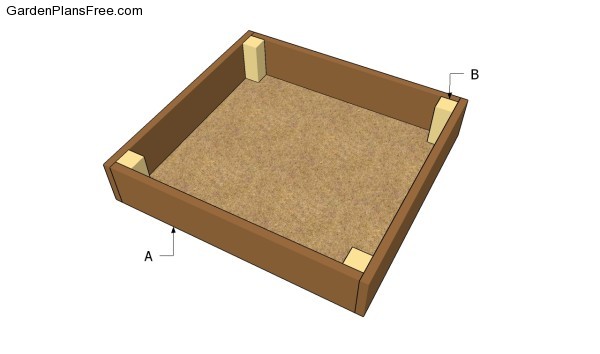
Building garden boxes
Materials
- A – 4 pieces of 4×4 lumber – 9 1/2″ POSTS
- B – 6 pieces of 2×10 lumber – 48” SLATS
Tools
- Hammer, Tape measure, Carpentry square
- Miter saw, Drill machinery, Screwdriver, Sander, Router
- Safety Gloves, Safety Glasses, Respiratory Mask
Time
- One day
Garden Boxes Plans
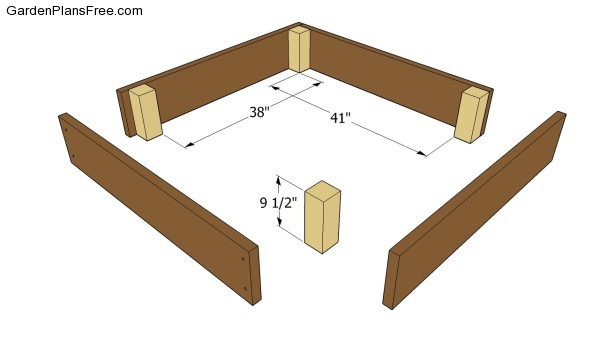
Building the frame
The first step of the project is to build the frame of the garden boxes. As you can see in the image, we recommend you to attach 2×10 lumber to the 4×4 corner posts. You can always adjust the size of the boxes to your needs before starting the construction.
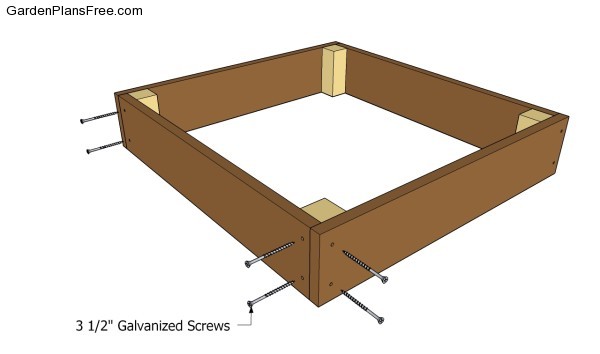
Inserting the screws
Drill pilot holes trough the slats before inserting the 3 1/2″ galvanized screws, to prevent the wood from splitting. Make sure you leave at least 1/2″ from the edges, if you want to get strong joints. In addition, the components should be aligned and flush, before driving the screws into the posts.
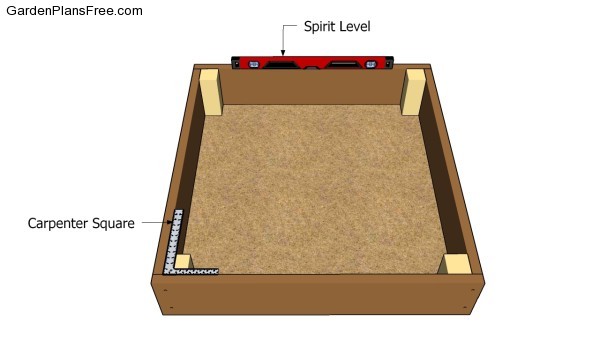
Building the garden boxes
Check if the corners are right-angled and make sure the top of the frame is perfectly horizontal, before placing the garden boxes into place. Choose a location that gets at least 8 hours of full light every day, otherwise the plants won’t develop properly. Add waterproof glue to the joints, if you want to get a strong structure.
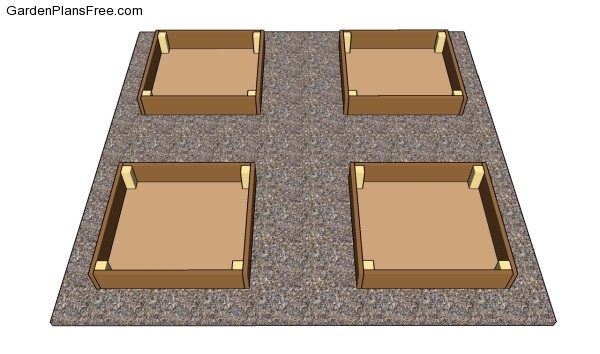
Garden boxes plans
Last but not least, you should take care of the finishing touches. Therefore, we recommend you to check if the components are locked into place properly and structure is rigid. Make sure there are no protruding screws or sharp edges.
PRO TIP: Fill the holes with a good wood filler and smooth the surface with medium-grit sandpaper. Round the exposed edges of the rails with a router and a 1/4″ bit. Apply several coats of paint or stain over the components, in order to protect them from decay. You could group several wooden boxes, if you want to create a diversified vegetable garden.
This diy project was about garden boxes plans. If you have enjoyed the free project, we recommend you to share it with your friends, by using the social media widgets.
