This step by step garden project about cucumber trellis plans. If you want to grow climbing vegetables, we recommend you to build simple trellis for your backyard. There are lots of designs and plans to choose from, even if this project is just about building simple trellis, so make sure you select something that matches the style and the size of your garden.
Although this woodworking project is fairly easy, there are still a few things that you should know before starting the actual work. Therefore, make sure you select the wood with great care, as the components will be exposed to water and sunlight. Using quality weather-resistant lumber is the best choice, especially if you are determined to use the trellis for many years in a row.
Building cucumber trellis
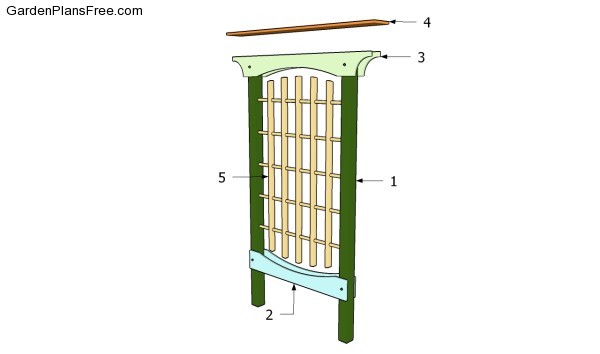
Building cucumber trellis
Materials
- 1 – 2 pieces of 4×4 lumber – 96″ LEGS
- 2 – 2 pices of 1×8 lumber – 48″ SUPPORTS
- 3 – 2 pieces of 1×8 lumber – 64″ SUPPORTS
- 4 – 1×8 lumber – 68″ TRIM
- 5 – 5 pieces of 2×2 lumber – 66″, 5 pieces of 1×1 lumber – 43″ TRELLIS
Tools
- Hammer, Tape measure, Carpentry square
- Miter saw, Drill machinery, Screwdriver, Sander, Router
- Safety Gloves, Safety Glasses, Respiratory Mask
Time
- One day
Made from this plan
Cucumber Trellis Plans
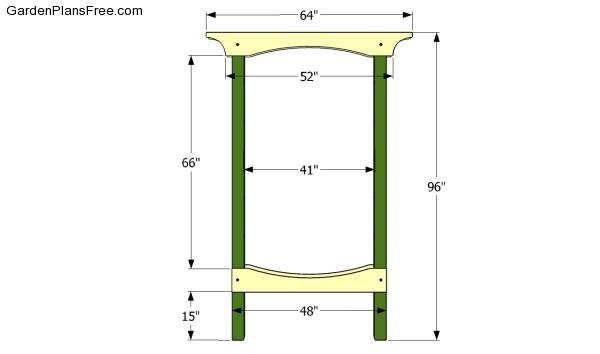
Building the frame
The first step of the project is to build the frame of the cucumber trellis. As you can see in the image, you need to build the legs from 4×4 lumber, while the supports should be made out of 1×8 lumber. In order to get a neat result, we recommend you to align the components at both ends and to pre-drill the lumber before inserting the nails.
PRO TIP: Make sure the legs will be set at least 12-24” in the ground, otherwise strong winds might move them from position. Moreover, check if the corners are right-angled before continuing the woodworking project.
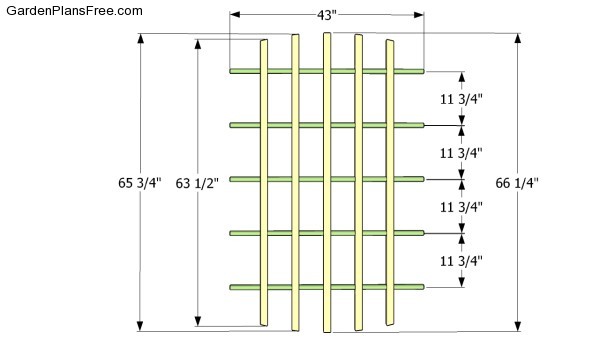
Building the trellis
Building the trellis is the most complex step of the project, as there are several complex carpentry techniques that you need to master. Therefore, use 2×2 lumber and 1×1 (round lumber) to build the trellis, as shown in the image.
PRO TIP: Use a drill machinery and a large drill bit to make circular holes through the 2×2 lumber, before inserting the perpendicular components. Add waterproof glue to enhance the bond of the joints.
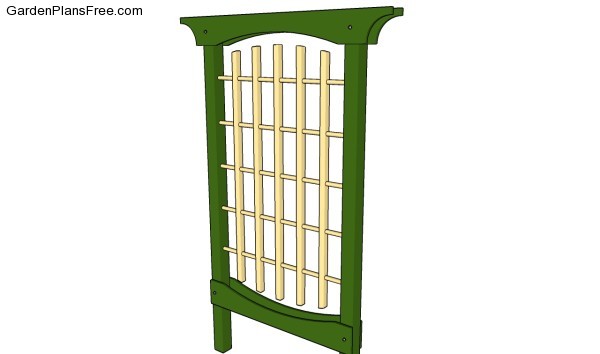
Attaching the trellis into place
Afterwards, fit the trellis between the legs of the structure and lock them to both sides with finishing nails. Make sure the trellis are aligned at both ends, if you want to get the job done in a professional manner.
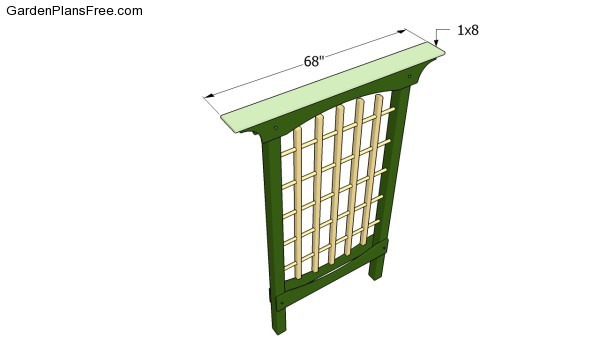
Attaching the top trim
The next step of the garden project is to attach the top trim to the trellis. As yo can see in the image, you need to cut the 1×8 slat at the right size and lock it to the structure with waterproof glue and finishing nails.

Cucumber trellis plans
Lastly, we recommend you to get the final touches done. Therefore, fill the holes with putty and sand the surface thoroughly, after it gets dry. Round the edges with sandpaper or by using a router and a drill bit.
PRO TIP: Applying a few coats of paint will not only enhance the look of the trellis, but it will also protect the wooden components from water damage.
This diy project was about cucumber trellis plans. If you have enjoyed the free project, we recommend you to share it with your friends, by using the social media widgets.
