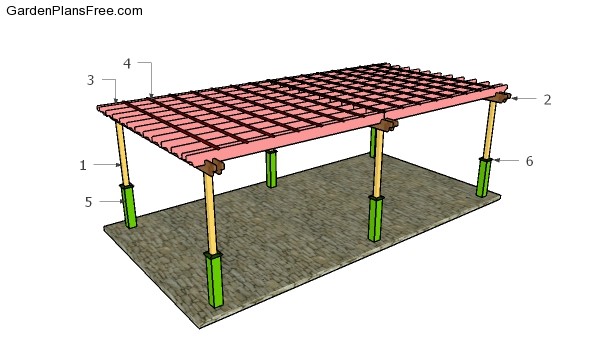
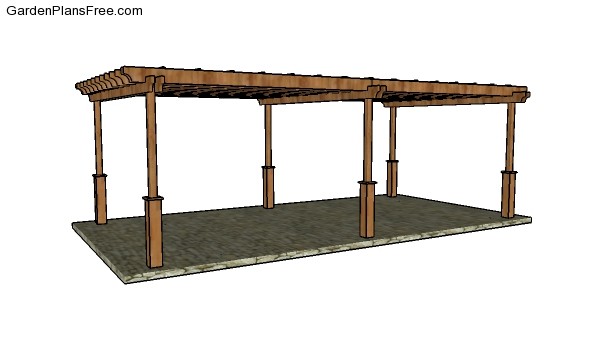
If you want to learn more about how to build a 12×24 pergola you have to take a close look over the free plans in the article. This large rectangular pergola is ideal for any backyard, if you want to create some shade and to fit a few chairs and a table. This pergola has a simple structure, so if you live in a windy area, you need to read the local codes and add braces. More garden projects HERE.
If you want to get the job done in a professional manner, we recommend you to plan everything with attention, as to prevent costly mistakes and to build a professional garden project. Invest in high quality materials, such as cedar, pine or redwood, as the structure will be exposed to all kinds of weather. Apply a few coats of paint over the components, to enhance their appearance and to protect them from bad weather.
12×24 Pegola – Free DIY Plans
Building a 12×24 pergola
Materials
- 1 – 6 pieces of 4×4 lumber – 96″ long POSTS
- 2 – 6 pieces of 2×8 lumber – 14′ long SUPPORT BEAMS
- 3 – 26 pieces of 2×8 lumber – 13′ long RAFTERS
- 4 – 16 pieces of 1×2 lumber – 147″ long SLATS
- 5 – 24 pieces of 1×8 lumber – 36″ long TRIMS
- 6 – 24 pieces of 1×3 lumber – 8 1/2″ long TRIMS
- 6 pieces of 4×4 lumber – 8′
- 32 pieces of 2×8 lumber – 14′
- 16 pieces of 1×2 lumber – 14′
- 12 pieces of 1×8 lumber – 6′
- 3 pieces of 1×3 lumber – 8′
- 200 pieces of 2 1/2″ screws, 200 pieces of 1 5/8″ screws
- 12 pieces 7″ carriage bolts
- wood glue, stain/paint (for base)
Tools
- Hammer, Tape measure, Carpentry square
- Miter saw, Drill machinery, Screwdriver, Sander, Router
- Safety Gloves, Safety Glasses, Respiratory Mask
Time
- One week
STEP 1:
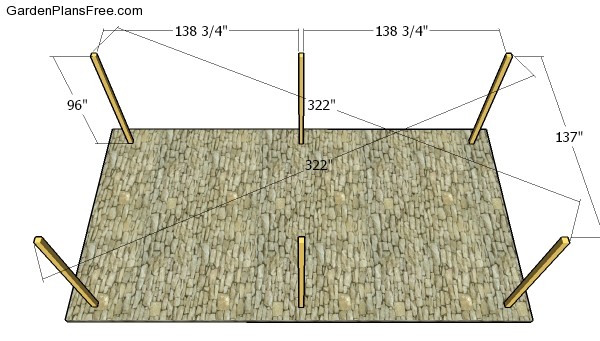
Fitting the posts
STEP 2:
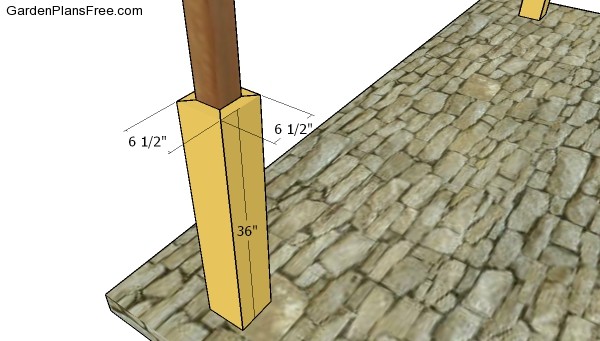
Base trims
STEP 3:
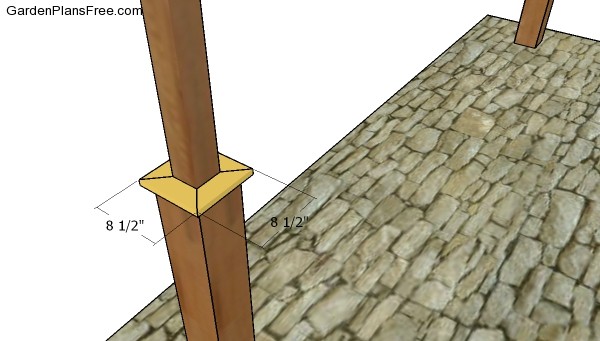
Fitting the top trims
STEP 4:
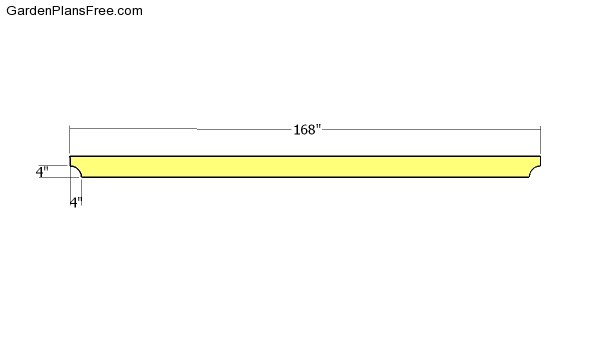
Support beams
STEP 5:
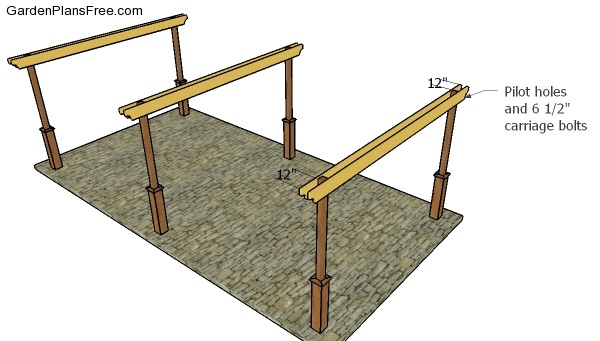
Fitting the support beams
STEP 6:
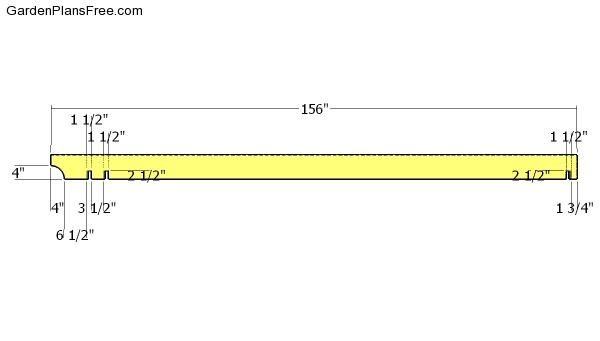
Building the rafters
STEP 7:
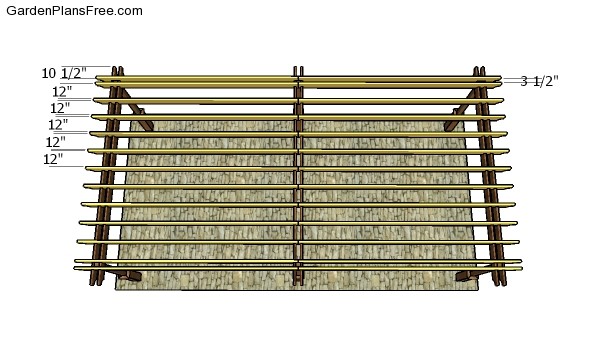
Fitting the shade elements
STEP 8:
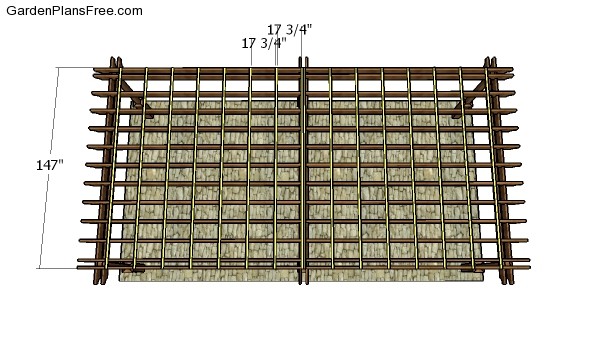
Fitting the top slats
STEP 9:
12×24 Free Pergola Plans Free
STEP 10:

How to build a 12×24 pergola
I recommend you to check if the components are locked into place properly and structure is rigid enough for your garden. Make sure there are no protruding screws or sharp edges. Fill the holes with wood putty and then smooth the surface with sandpaper. You can adjust the design of this pergola, by making decorative cuts to both ends of the rafters. Moreover, you could adjust the size of the pergola.
PRO TIP: Apply several coats of paint or stain over the components, in order to protect them from decay. Check out the rest of the project to learn more about building garden projects. Check out free plans for building a 12×16 pergola.
This diy project was about 12×24 free standing pergola plans. If you have enjoyed the free project, I recommend you to share it with your friends, by using the social media widgets.
3 comments
Thank you very much.
That,s exactly what I was looking for.
a 10×20 plus or minus pergola.
thanks again.
Ferney
I think Im going to start building this in my yard, thank you for the plans. I notice there are 2 materials lists, is the 2nd one redundant to the 1st, just adding hardware?
A B C is the Cut list. The second list is the Shopping list