There’s something deeply satisfying about pulling a carrot straight out of the ground. Maybe it’s that pop of bright orange against the soil, the fresh earthy smell, or the satisfying crunch when you bite into it. Whatever it is, homegrown carrots just hit different. They’re sweeter, crisper, and far more flavorful than the store-bought kind that’s been hanging around in plastic for days—or weeks. And the best part? You don’t need raised beds, a sprawling garden, or even much experience to grow them. Carrots are one of the most beginner-friendly and rewarding root veggies out there.
With a little prep and a pinch of patience, you can grow beautiful, straight, and flavorful carrots right in your own backyard—or even in containers on a sunny balcony. The key to success? Start with loose, well-drained soil that’s free of rocks, clumps, and debris. Carrots are picky about their growing space—they need an obstacle-free runway underground to grow straight and smooth. If your soil’s heavy or compacted, work in some compost and sand to loosen it up, or go with a deep planter or raised bed that gives roots room to stretch.
Carrot seeds are tiny and delicate, so sow them shallowly—just about 1/4 inch deep—and keep the soil consistently moist while they germinate. This can take up to 2-3 weeks, so don’t give up if they’re slow to sprout. Once your seedlings are about 2 inches tall, you’ll want to thin them (we’ll talk more about that later), and from there it’s all about watering regularly and keeping weeds at bay.
Carrots love full sun, so choose a spot that gets at least 6 hours of sunlight a day. And don’t worry if your climate’s cooler—carrots actually love cool weather. In fact, they get even sweeter if they mature in the chill of early spring or fall. That’s because colder temps convert their starches to sugars as a kind of natural antifreeze. You can grow standard orange carrots, or try out fun heirloom varieties—like purple, red, or yellow ones—for a little extra garden flair. And if you stagger your plantings every few weeks, you’ll be enjoying a steady harvest instead of a single bulk pull. Plus, carrots store well in the fridge or a root cellar, so you’ll have tasty roots ready to go long after harvest day.
In this guide, we’ll walk you through everything you need to know—from picking the right variety and prepping your soil to watering, thinning, and harvesting those crisp, soil-dusted beauties. We’ll even throw in a few pro-level tips to help you dodge common rookie mistakes and grow carrots like you’ve been doing it for years. So grab a seed packet, roll up your sleeves, and let’s dig in. It’s time to grow some roots!
Start with the Right Soil (It Makes All the Difference)
If there’s one thing carrots are picky about, it’s the soil. These root veggies aren’t interested in fighting through rocks, clumps, or clay. They want loose, deep, and well-drained earth so they can grow straight and true. If the soil’s too compacted or filled with obstructions, you’ll end up with forked, stubby, or twisted carrots—still edible, sure, but not exactly the garden showstoppers you’re going for. So before you even open that seed packet, spend some time prepping your bed right.
Start by working the soil at least 10 to 12 inches deep—yes, deeper than most veggies need. Use a shovel, fork, or broadfork to break things up, and take the time to sift out any rocks, roots, or hard chunks. Mixing in compost is a great way to improve texture and drainage while adding gentle nutrition. Just skip the fresh manure or rich composts high in nitrogen—carrots don’t like it. Excess nitrogen causes them to grow big bushy tops and skinny, underdeveloped roots. That’s fine for lettuces or kale, but not for a veggie whose whole job is to be a tasty root.
Carrots thrive in sandy or loamy soils—anything that drains well and lets roots move easily. If you’re working with dense clay or poor native soil, raised beds or containers can be a game-changer. Fill them with a balanced mix of high-quality potting soil and coarse sand, plus a scoop or two of compost for a nutrient boost. The idea is to mimic the kind of light, fluffy soil carrots love. Get this part right, and you’re already halfway to a great harvest.

Sow Seeds Directly and Keep Them Moist
Carrots don’t like to be moved. They’re one of those crops that really need to be sown directly where they’re going to grow. Transplanting can damage the delicate taproot early on, leading to stunted or misshapen carrots—so it’s best to skip the starter trays and go straight to the soil.
When planting, sow the seeds shallow—no more than ¼ inch deep. They’re tiny, so it doesn’t take much to cover them, but that top layer of soil needs to stay consistently moist while they germinate. And here’s where it gets tricky: carrot seeds can take anywhere from 10 to 20 days to sprout, which is forever in garden time. If the soil crusts over or dries out even for a day, you could lose a whole batch before they ever break the surface.
To help keep the soil surface damp and cool, you can lay a piece of burlap, an old board, or even some lightweight row cover fabric over the freshly planted area. This traps in moisture and protects against crusting. Just be sure to check underneath daily and remove the cover the moment you see those first tiny green loops breaking through. From there, it’s all about steady watering and giving them time to stretch their roots.
Thin Early and Don’t Skip This Step
Once your carrot seedlings are about 2 inches tall, it’s time to do the one thing that feels a little wrong—but is absolutely essential: thinning. Yes, it stings a bit to pluck out those tiny green overachievers you worked so hard to sprout, but trust me on this—crowded carrots are a recipe for disappointment. Without space to spread out, you’ll end up with stringy, twisted, or forked roots. And nobody wants that.
The goal is to give each seedling about 2 inches of space, so each root has room to grow long, straight, and plump. If you’re growing larger varieties like ‘Danvers’ or ‘Autumn King’, you might even bump that spacing to 2.5 or 3 inches to give them the stretch they need. Instead of yanking the extras—which can jostle and stress the plants you’re keeping—use a small pair of scissors or snips to clip the weaker ones off at soil level. It’s clean, quick, and much gentler on the roots that are staying put.
Here’s another trick that makes a big difference: stagger your plantings every two to three weeks during the growing season. That way, you’re not harvesting 100 carrots on one random Tuesday—you’re pulling fresh, garden-ripe carrots all season long. From spring crunch to fall sweetness, that rolling harvest keeps things manageable in the garden and exciting in the kitchen.
So yeah, thinning might feel like a betrayal—but it’s actually a favor. A few snips now equals straighter roots, fuller harvests, and way more garden satisfaction later.
Water Deeply and Be Patient
Carrots are pretty low-maintenance once they get going, but they definitely appreciate a little consistency—especially when it comes to water. Since the roots are working their way deep into the soil, they need moisture that reaches down with them. Aim to water deeply once or twice a week, depending on your weather and soil type. The goal is to keep the soil evenly moist—not bone dry, and not waterlogged. Fluctuations between soggy and dry can lead to split roots or uneven shapes, and nobody wants a carrot with a waistline.
Mulching around your carrot rows can help a lot with moisture retention and weed control. Just keep the layer light so your seedlings don’t get smothered. Once the plants are established, mulch also helps keep the soil cool, which carrots love—especially during summer heat.
As for feeding, carrots are pretty light feeders. If you’ve prepped your soil with compost and created a good growing environment, you likely won’t need much more. A light application of balanced organic fertilizer (like a 5-5-5) about halfway through the growing season is usually plenty. Avoid anything high in nitrogen, especially later in the game—that’ll push leafy top growth at the expense of the roots you’re actually trying to grow. Keep things balanced and simple, and your carrots will do the rest.
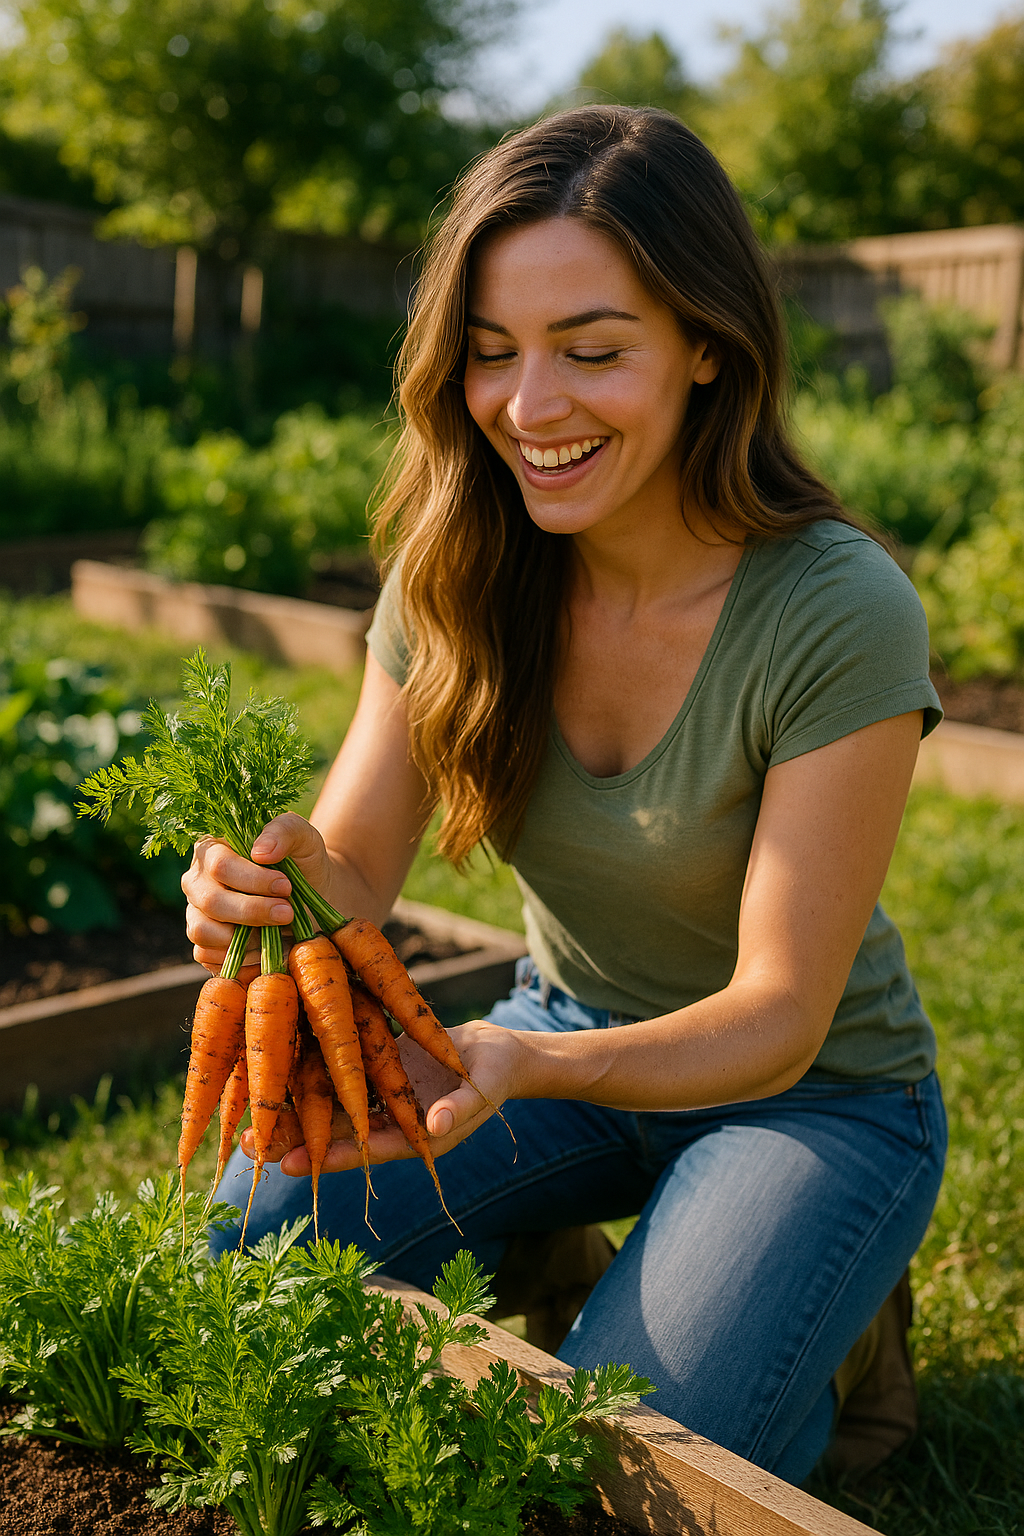
Know When and How to Harvest
Carrots are usually ready to harvest about 60 to 80 days after planting, though the exact timing depends on the variety you’re growing. Some baby varieties can be ready in as little as 30 days, while longer, full-sized types take closer to the full 80. One of the easiest ways to tell if your carrots are ready is by taking a peek—literally. As they grow, the tops of the roots will often start to push up through the soil. Gently brush away the dirt around the crown and check the diameter. If it looks close to what the seed packet promised, it’s probably time to pick.
For a sweeter, crunchier carrot, don’t rush the harvest. Let the roots thicken and the tops get sturdy. But also don’t wait too long—overmature carrots can become woody and lose flavor. When you’re ready to harvest, moisten the soil lightly first. That softens it up and makes pulling a whole lot easier. If the ground is dry and compact, use a garden fork or hand tool to loosen the soil around the carrot before pulling gently. Tugging too hard on dry soil can snap the roots or leave part of your prize behind.
Once your carrots are up, give them a quick rinse and trim the leafy tops down to about half an inch if you’re storing them. This keeps the foliage from drawing moisture out of the roots, helping your carrots stay crisp and fresh longer in the fridge. And if you’re harvesting in cooler weather—especially after a light frost—you might just find your carrots are even sweeter than expected.
Final Thoughts: Carrots Done Right
Carrots may take a little patience, but once you get the hang of it, they’re one of the most rewarding crops you can grow. They don’t ask for much—just loose, well-drained soil, consistent moisture, and a sunny spot. With the right conditions, these humble roots thrive quietly underground, transforming into sweet, crisp, and vibrant carrots that store well, cook beautifully, and taste amazing straight from the garden.
Whether you’re planting classic orange varieties or trying out purples, yellows, or even white carrots, the process is simple and satisfying. Just sow the seeds directly into the soil, keep the bed evenly moist, and thin the seedlings once they sprout. In a couple of months, you’ll be tugging up delicious carrots by the handful—perfect for roasting, juicing, or snacking on the spot.
If you’re looking for a beginner-friendly root veggie that delivers big flavor and a bit of garden magic, carrots are a top pick. So grab a seed packet, prep that bed, and get sowing. Once harvest time rolls around, you’ll wonder why you didn’t start growing carrots years ago.