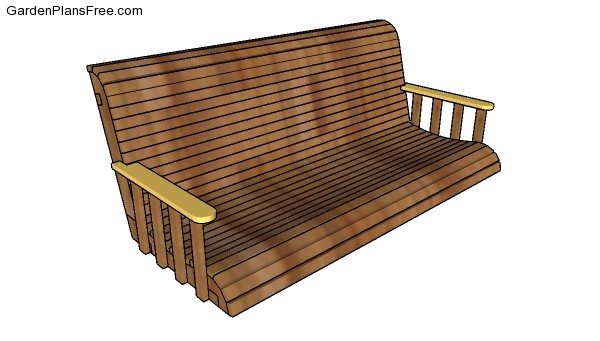
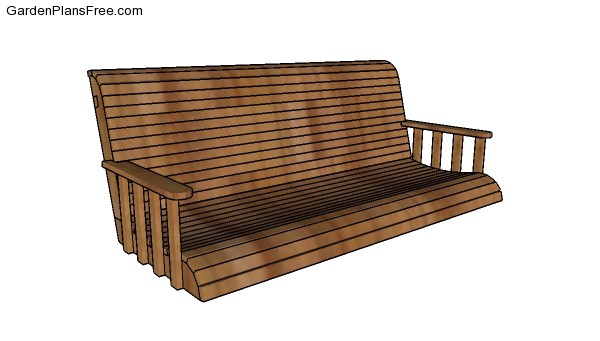
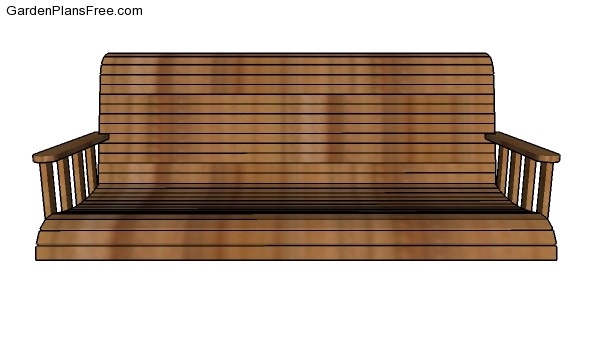
If you want to learn more about how to build a wooden porch swing bench you have to take a close look over the free plans in the article. I have designed this super simple to build a porch swing with a classical appearance, so you can add value to your backyard life. This porch swing bench is sturdy and it is highly comfortable. You can make small adjustments to fit a center console. More furniture plans HERE.
If you want to get the job done in a professional manner, we recommend you to plan everything with attention, as to prevent costly mistakes and to build a professional garden bench. Invest in high quality materials, such as cedar, pine or redwood, as the structure will be exposed to all kinds of weather. Apply a few coats of paint over the components, to enhance their appearance and to protect them from bad weather.
Porch Swing Plans – Free DIY Plans
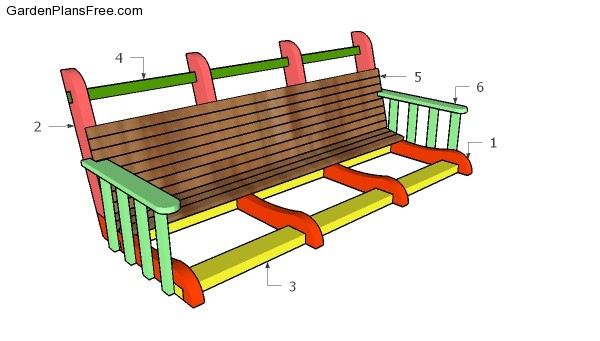
Building a porch swing bench
Materials
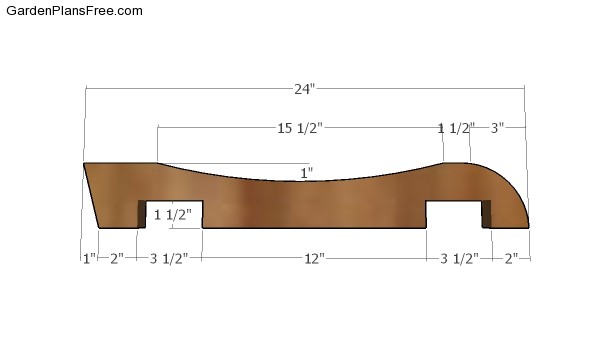
- 1 – 4 pieces of 2×4 lumber – 24″ long FRAME
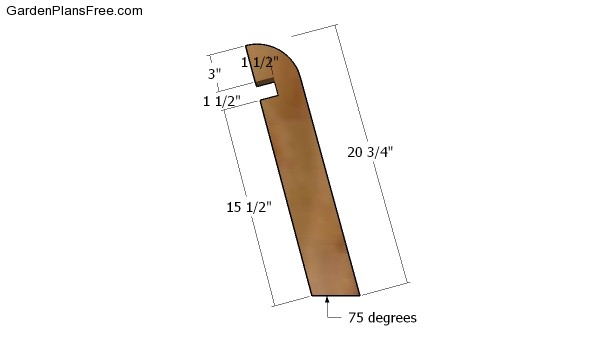
- 2 – 4 pieces of 2×4 lumber – 20 3/4″ long FRAME
- 3 – 2 pieces of 2×4 lumber – 60″ long SUPPORTS
- 4 – 1 piece of 2×2 lumber – 60″ long SUPPORT
- 5 – 29 pieces of 1×2 lumber – 60″ long SLATS
- 6 – 8 pieces of 1×2 lumber – 11″ long, 2 pieces of 1×3 lumber – 21″ long ARMRESTS
- 2 pieces of 2×4 lumber – 8 ft
- 1 piece of 2×4 lumber – 10 ft
- 1 piece of 2×2 lumber – 6 ft
- 16 pieces of 1×2 lumber – 12 ft
- 1 piece of 1×3 lumber – 4 ft
- 2 1/2″ screws
- 1 5/8″ screws
- wood glue, stain/paint
- hanging kit
- chain
Tools
- Hammer, Tape measure, Carpentry square
- Miter saw, Drill machinery, Screwdriver, Sander, Router
- Safety Gloves, Safety Glasses, Respiratory Mask
Time
- One day
STEP 1:
Seat frame
The first step is to build the base supports for the porch swing bench. Mark the cut lines to the 2×4 boards and then get the job done with a saw Use a jigsaw for the curved cuts and a circular saw for the notches and angle cuts. Smooth the edges with sandpaper, for a professional result.
STEP 2:
Backrest supports
Next, we need to build the backrest supports for the swing bench. Make the cuts with a jigsaw and a circular saw.
STEP 3:

Assembling the porch frames
Drill pocket holes through the bottom of the backrest supports. Lay everything on a level surface and align the edges flush. Add glue to the joints and insert 2 1/2″ screws to lock the frames for the swing together tightly.
STEP 4:
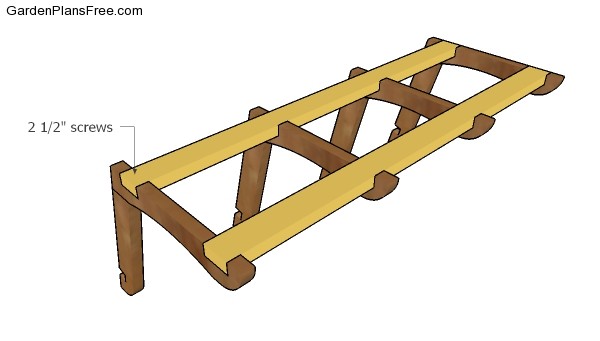
Seat horizontal supports
Next, we need to join the frames together by attaching the stretchers. Space the frames equally, leaving 18″ between them. Drill pilot holes through the supports and insert 2 1/2″ screws into the frames. Make sure the corners are square between the supports and the frames,.
STEP 5:
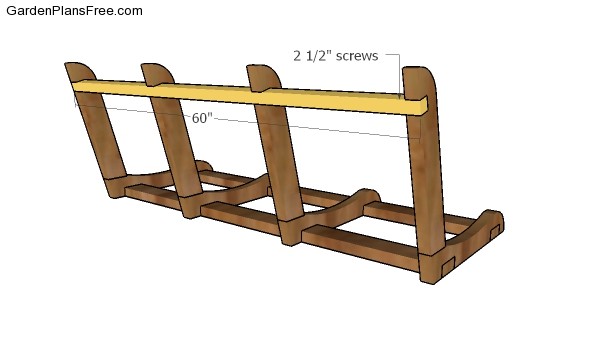
Backrest horizontal support
Fit the 2×2 beam to the back of the swing bench. Align the edges flush, drill pilot holes and insert 2 1/2″ screws to assemble everything tightly.
STEP 6:
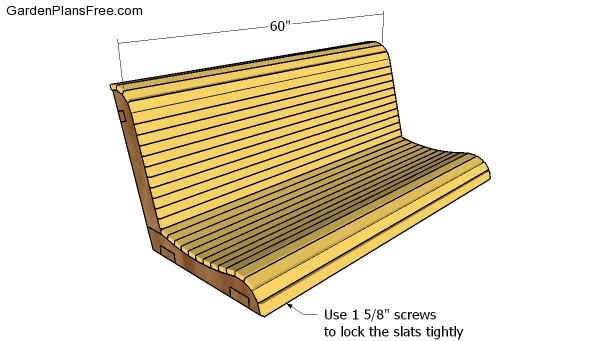
Fitting the seat slats
Attach the 1×2 slats to the frame of the swing bench. Align the edges flush. Drill pilot holes and insert 1 5/8″ screws to lock them into place tightly.
STEP 7:
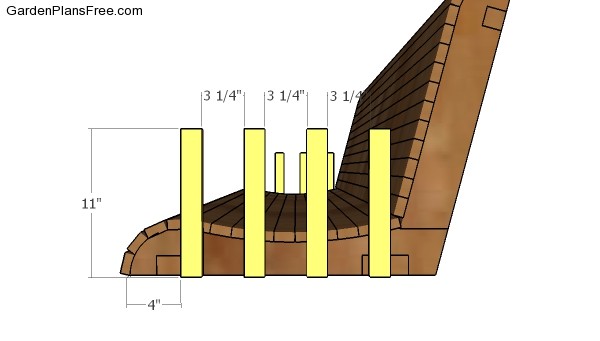
Fitting the armrests supports
Fit the 1×2 supports to the sides of the swing bench. Plumb the supports vertically with a spirit level. Drill pilot holes and insert 1 5/8″ screws to lock them into place tightly.
STEP 8:
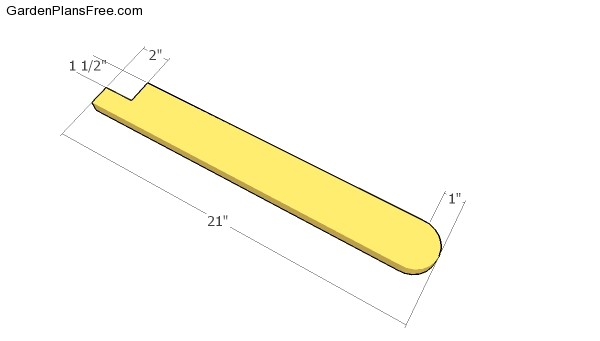
Armrests
Use 1×3 lumber for the armrests. Make the cuts to the components with a jigsaw. Smooth with sandpaper, or use a router to round the edges over.
STEP 9:
Fitting the armrests
Fit the armrests to the supports. Drill pilot holes and insert 2 1/2″ screws to lock them to the supports.
STEP 10:
Porch swing Plans
I recommend you to check if the components are locked into place properly and structure is rigid enough. Make sure there are no protruding screws or sharp edges. Fill the holes with wood putty and then smooth the surface with sandpaper. Install the chain, the eye hooks and the hangers.
How to build a porch swing
PRO TIP: Apply several coats of paint or stain over the components, in order to protect them from decay. Check out the rest of the project to learn more about building garden projects. Check out free plans for a nice swing stand HERE.

3 comments
Very nice swing design. I wish you had added instructions on attaching the hanging chains.
I have been looking for a pattern for a swing this is the best that I found going to make it in the next couple of weeks. Wish there was more about the hanging chains but will figure that out .
Yes, would be nice to know how and where to install the hardware for the chain set.