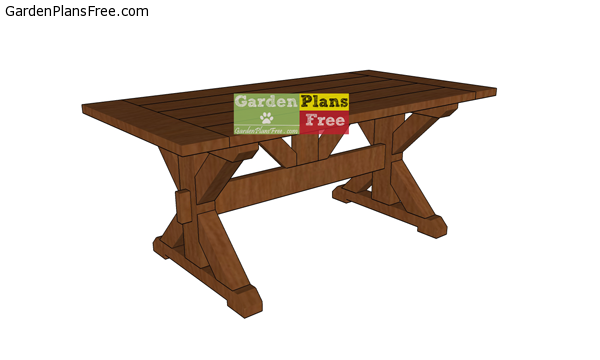
If you want to learn more about how to build a 6 ft patio table, we recommend you to pay attention to the instructions described in the article. This table is easy to build and it features a farmhouse style design. You can build this table with materials you find at any DIY store. This wooden table makes for the perfect choice for any patio or deck. You can build matching benches for this table, for which I will have some plans soon.
If you want to get the job done in a professional manner, we recommend you to plan everything with attention, as to prevent costly mistakes and to build a professional table. Invest in high quality materials, such as cedar, pine or redwood, as the bench will be exposed to all kinds of weather. Apply a few coats of paint over the components, to enhance their appearance and to protect them from bad weather.
Patio Table – Free DIY Plans
Building-a-patio-table
Materials
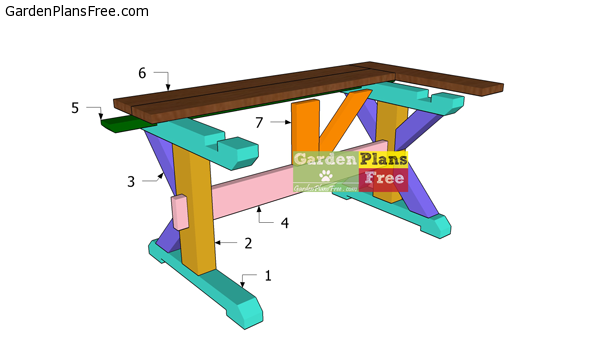
- 1 – 4 pieces of 4×4 lumber – 32 1/4” BASE
- 2 – 2 pieces of 4×6 lumber – 22″ POSTS
- 3 – 8 pieces of 4×4 lumber – 14 1/4″ BRACES
- 4 – 1 piece of 2×6 lumber – 45″, 2 pieces – 2″ STRETCHER
- 5 – 2 piece of 2×4 lumber – 68″ SUPPORTS
- 6 – 2 pieces of 2×8 lumber – 36 1/4″, 5 pieces – 57 1/2″ TABLETOP
- 7 – 1 piece of 2×6 lumber – 11 3/4″, 2 pieces of 2×4 lumber – 18 1/4″ TRIMS
- 1 piece of 4×4 lumber – 12 ft
- 1 piece of 4×6 lumber – 4 ft
- 1 piece of 4×4 lumber – 10 ft
- 2 pieces of 2×4 lumber – 8 ft
- 1 pieces of 2×6 lumber – 8 ft
- 2 piece of 2×8 lumber – 8 ft
- 2 pieces of 2×8 lumber – 10 ft
- 100 pieces of 2 1/2″ screws
- 20 pieces of 3 1/2″ screws
- wood glue, stain/paint
- wood putty
Tools
- Hammer, Tape measure, Carpentry square
- Miter saw, Drill machinery, Screwdriver, Sander, Router
- Safety Gloves, Safety Glasses, Respiratory Mask
Time
- One day
6 ft Farmhouse Table Plans
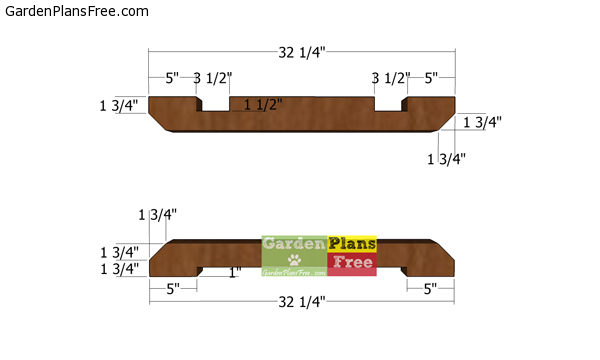
Base-and-top-for-side-frames
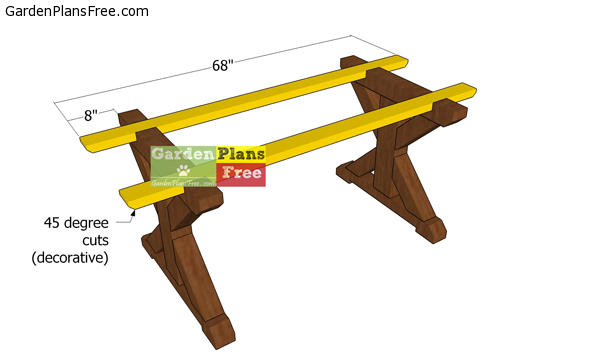
The first step of the project is to build the base and top components for the sides of the table. Mark the cut lines to the 4×4 beams and get the job done with a circular saw. Make parallel cuts inside the marked areas and use a chisel with a hammer to remove the excess material. Smooth the recess with sandpaper. Make the 45 degree cuts to both ends of the supports.
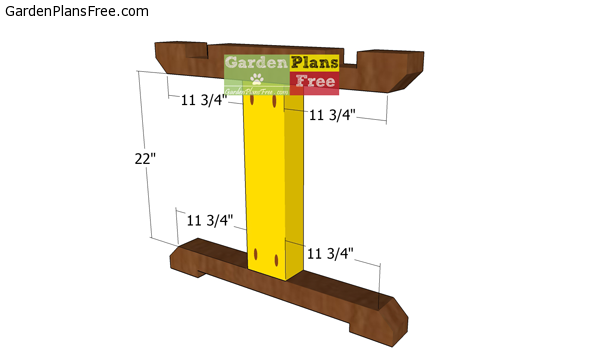
Base-and-top-for-side-frames
Use 4×6 lumber for the vertical supports. Drill pocket holes at both ends of the supports and center them to the horizontal components. Align the edges flush and make sure the corners are square. Insert 2 1/2″ screws to assemble the frames. Add glue to the joints.
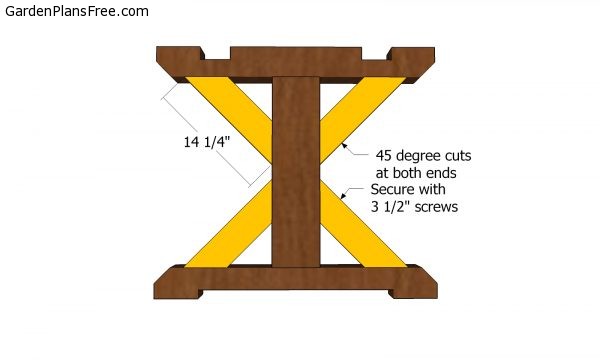
Fitting the diagonal braces to the sides of the table
Use 4×4 lumber for the diagonal braces. Make 45 degree cuts to both ends of the braces. Fit the braces to the frames. Drill pilot holes and insert 3 1/2″ screws to lock them into place tightly.
Fitting-the-tabletop-supports
Use 2×4 lumber for the tabletop supports. Make sure you have 8″ overhangs to both sides of the table. Plumb the side frames. Drill pilot holes through the supports and insert 2 1/2″ screws into the frames. Make sure the corners are square.

Fitting-the-tabletop-supports
The next step of the project is to build the tabletop. Drill pocket holes through the slats, as shown in the diagram. Lay everything on a level surface and clamp them together tightly, to leave no gaps between the components. Add glue to the joints. Insert 2 1/2″ screws to assemble the tabletop.
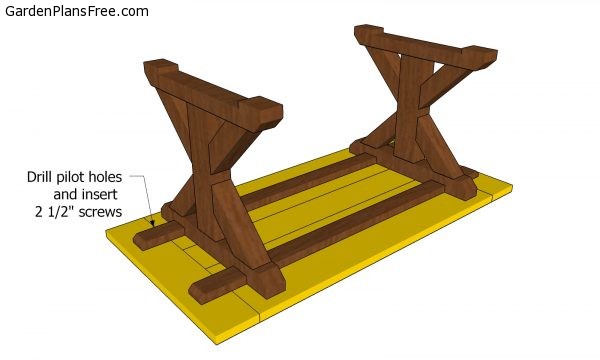
Fitting the tabletop
Lay the frame of the table to the tabletop. Align the edges with attention. Drill pilot holes through the supports and insert 2 1/2″ screws into the tabletop.
Fitting the stretcher
Use 2×6 lumber for the stretcher. Drill pocket holes at both ends of the stretcher. Center the beam to the frame of the table and insert 2 1/2″ screws.
Fitting the trims
Fit the trims to the sides of the table. Use glue to lock the beams into place tightly.
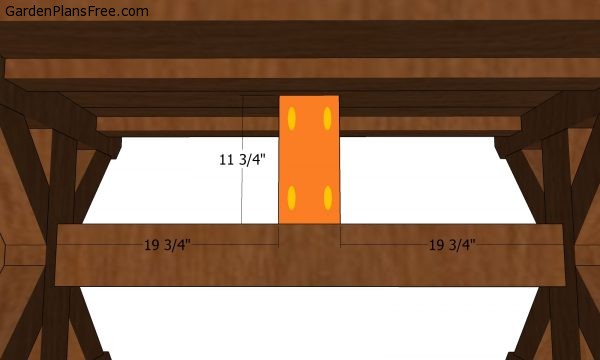
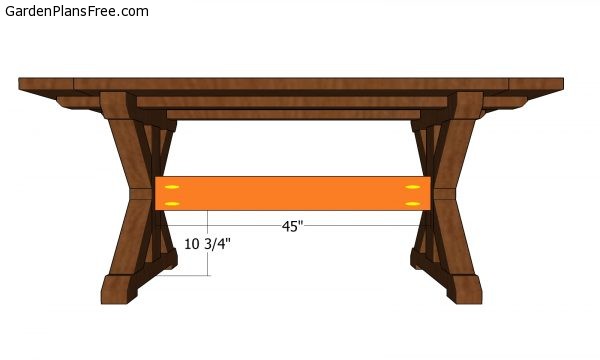
Fitting the middle support to the table
Use 2×6 lumber for the middle support. Drill pocket holes at both ends of the support. Center the support to the table frame and insert 2 1/2″ screws.
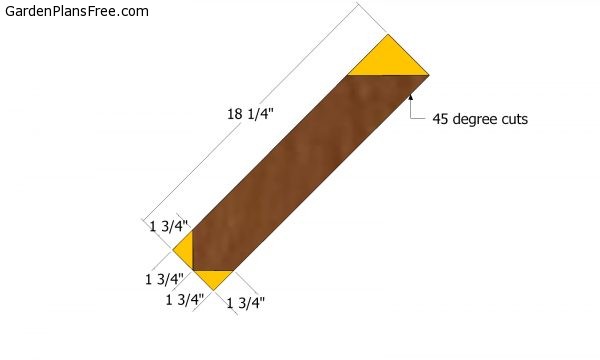
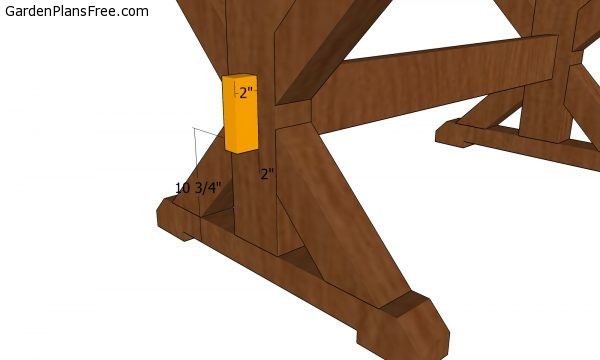
Braces diagonal
Use 2×4 lumber for the diagonal braces. Make the cuts to the braces, as shown in the diagram.
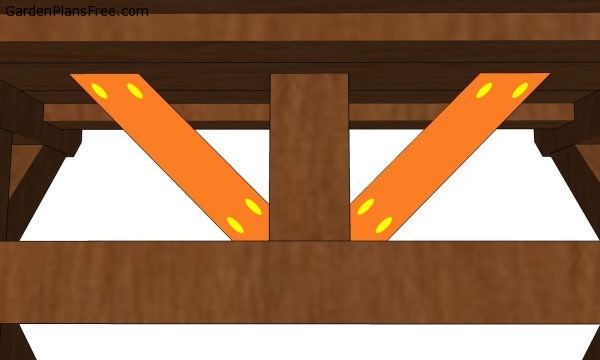
Fitting the diagonal braces
Fit the braces to the frame of the table. Secure the braces to the patio table with 2 1/2″ screws.
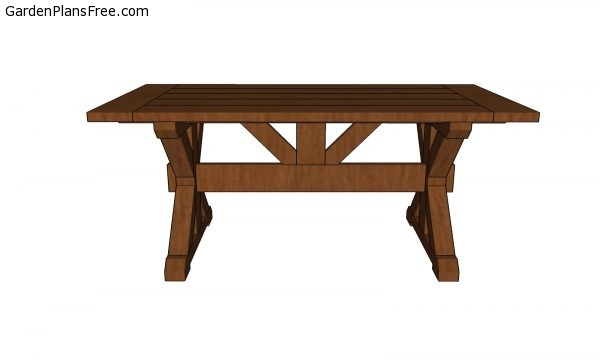
How to build a patio table
Last but not least, you should take care of the finishing touches. Therefore, we recommend you to check if the components are locked into place properly and structure is rigid enough for your patio. Make sure there are no protruding screws or sharp edges. Take a look over my 2 person table plans, if you want to see another approach.
6ft-Farmhouse-Table-Plans
PRO TIP: Fill the holes with a good wood filler and smooth the surface with medium-grit sandpaper. Apply several coats of paint or stain over the components, in order to protect them from decay. Check out the rest of the project to learn more about building garden projects. All furniture plans HERE.

This diy project was about 6 ft farmhouse table plans. If you have enjoyed the free project, we recommend you to LIKE and SHARE it with your friends, by using the social media widgets.