This detailed garden project is about free children’s picnic table plans. I already had plans for a popular 8 ft picnic table, so I decided to come up with a new design for a table bench for children. Even if you are new to woodworking, you can pull this project off and build yourself a very nice relaxation area in your backyard. See all furniture plans HERE.
We strongly recommend you to take a look over the rest of our plans, as there are may projects that could suit your needs and budget. Moreover, plan every aspect of the project to your needs before starting the actual construction. In this manner you can prevent mistakes and keep all the costs under control. Sand the edges of the slats with a sand-block in order to enhance the look of the chair.
Children’s Picnic Table – Free DIY Plans
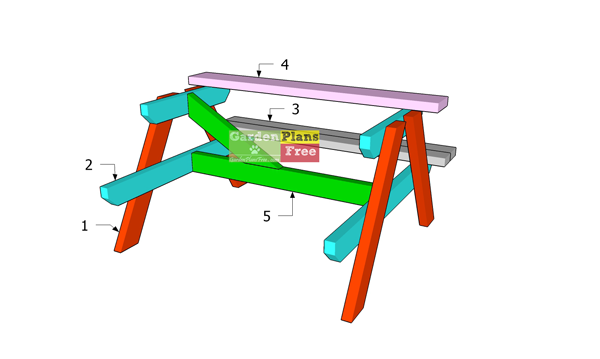
Building-a-children’s-picnic-table
Materials
- 1 – 4 pieces of 2×4 lumber – 29″ LEGS
- 2 – 2 pieces of 2×4 lumber – 22 3/4″, 2 pieces – 42″ SUPPORTS
- 3 – 4 pieces of 2×4 lumber – 48″ SEATS
- 4 – 4 pieces of 2×6 lumber – 48″ TABLETOP
- 5 – 1 piece of 2×4 lumber – 37″, 2 pieces – 21 1/2″ BRACES
- 2 pieces of 2×6 lumber – 8 ft
- 6 pieces of 2×4 lumber – 8 ft
- 200 pieces of 2 1/2″ screws
- 8 pieces of 3 1/2″ screws
- wood glue, stain/paint
Tools
- Hammer, Tape measure, Carpentry square
- Miter saw, Drill machinery, Screwdriver, Sander, Router
- Safety Gloves, Safety Glasses, Respiratory Mask
Time
- One day
Made from this plan
Step 1: Building the side frames
Legs-for-the-picnic-table
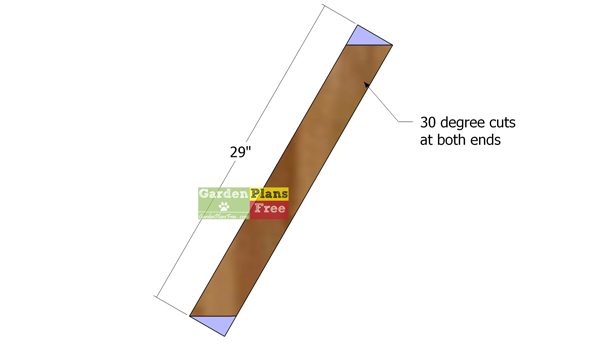
The first step of the outdoor woodworking project is to build the back legs for the kids picnic table. Therefore, use 2×4 lumber and make 30 degree cuts to both ends, as shown in the diagram. You an use a miter saw, which is the most accurate and quickest option, but you can also get the job done with a circular saw and a speed square.
Supports-for-the-kids-table
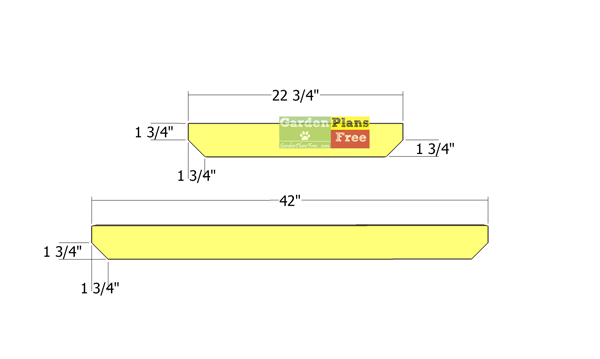
Use 2×4 lumber for the tabletop and bench supports. Use a saw to make the 45 decorative ends to the supports, as shown in the diagram. Smooth the edges with sandpaper.
Assembling-the-side-frames-for-the-picnic-table
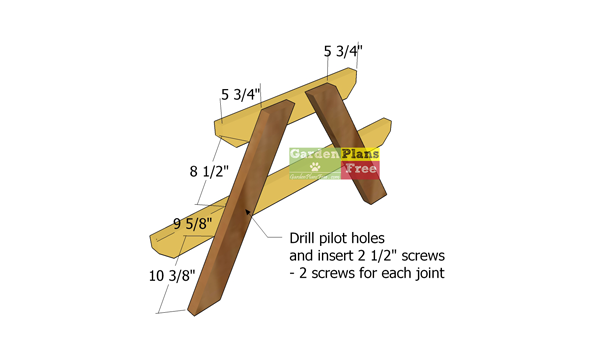
The next step of the project is to attach the supports to the legs of the children’s picnic table. Therefore, align the edges as shown in the 3D diagram. Drill pilot holes through the legs and then insert 2 1/2″ screws to lock everything together tightly. You can also use 3 1/2″ carriage bolts, if you want to be able to disassemble the table and make it mobile.
Step 2: Assembling the kids picnic table
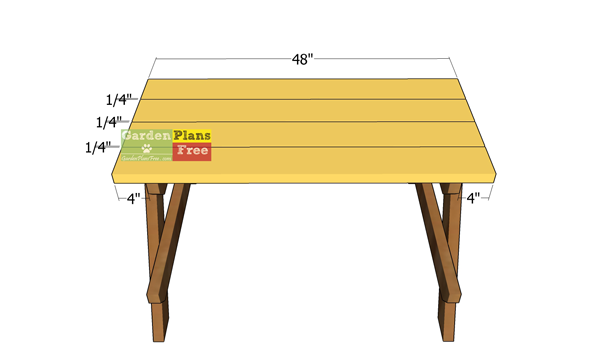
Fitting-the-tabletop-slats
Next, we need to attach the tabletop 2×6 boards to the table. See the 4″ overhangs on both sides of the table. Fit 1/4″ plywood pieces between the slats to create even gaps. Align the edges with attention at both ends. Drill pilot holes through the slats and insert 2 1/2″ screws to lock them to the supports. Leave no gaps between the boards and the supports.
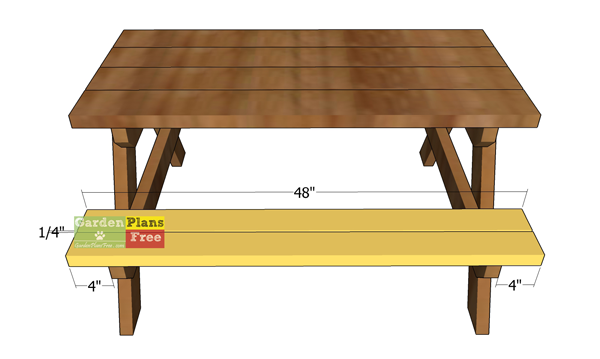
Fitting-the-seat-slats—kids-picnic-table
Fit the2x4 boards to the seat supports. See the 4″ overhangs to the sides of the seat. Drill pilot holes and insert 2 1/2″ screws into the supports.
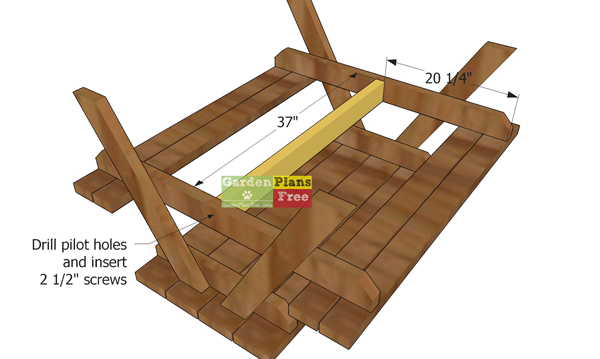
Fitting-the-stretcher—picnic-table
Fit the stretcher to the frame of the kids picnic table. Center the stretcher between the supports for the seat, drill pilot holes and insert 2 1/2″ screws to lock it into place tightly.
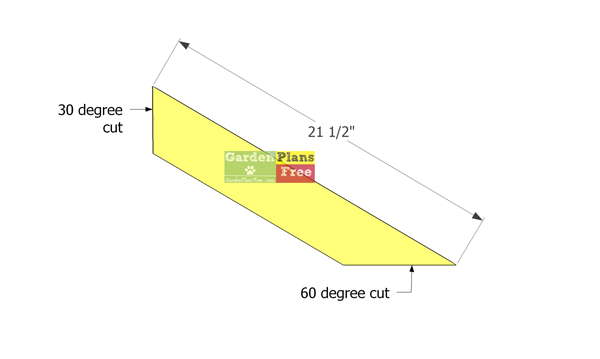
Diagonal-braces
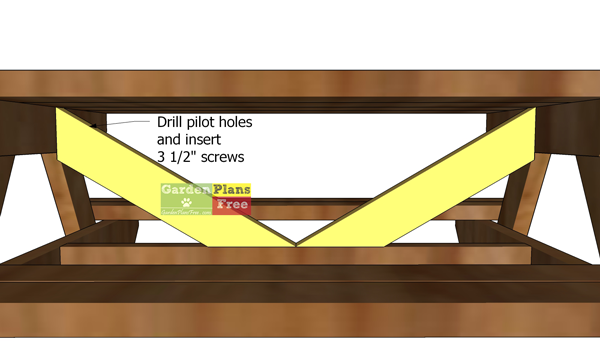
We also need diagonal braces to reinforce the structure of the picnic table. These diagonal braces will basically add support to the frame, so you prevent lateral movements.
Fitting-the-diagonal-braces
Fit the braces to the children table, as in the diagram. Drill pilot holes through the braces and insert 3 1/2″ screws, to lock them into place tightly.
Step 3: Finishing touches for the kids table
Kids-picnic-table-plans
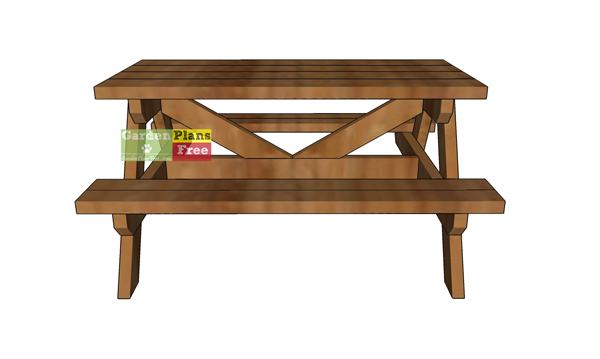
Lastly, take care of the finishing touches. Fill the holes with wood putty and smooth the surface with 120-220 grit sandpaper. You can use a router and a bit to round over the exposed edges. Apply stain or paint to protect the wood from the elements.
How-to-build-a-children’s-picnic-table
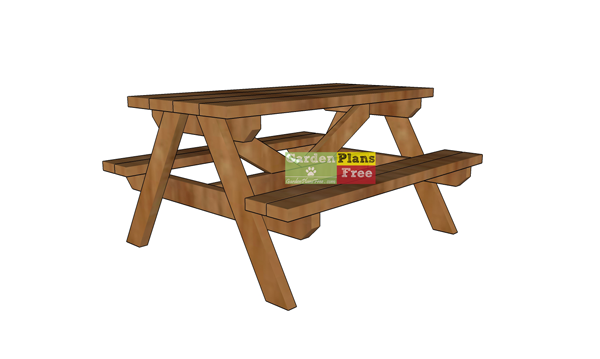
You can find free plans for a 8 ft picnic table, on my blog, as well. If you want your kids to spend a lot more time outside, in the garden, this is the right project for your needs. Therefore, this will be their favorite place because they can do a lot of activities.

Children’s-picnic-table-plans—dimensions
PRO TIP: This is a simple project that can be built by anyone with a drill and a saw. Behind this simple design, there is a table that your kids will love. If you love this design I recommend you to take a look over the rest of my furniture plans.
This diy project was about children’s picnic table plans. If you have enjoyed the free project, we recommend you to share it with your friends, by using the social media widgets.


1 comment
I want a copy of your plan, please