Detailed woodworking project about cat house plans. Building a shelter for your pet is easy and any person can get the job done in a professional manner in just a few days. There are many plans to choose from, so make sure you plan every aspect of the construction with great care. If you are going to place the shelter in your garden, we highly recommend you to use weather-resistant lumber.
If you want to create a nice shelter for your pet, you should pay attention to the instructions described in this article. Moreover, you should consider adjusting the size and the shape of the cat house to your needs and to match the style of your property. Invest in the best quality materials you afford, such as pine, redwood or cedar. Add trim to the exterior of the roof, in order to enhance the look of the constructions.
Cat house plans

Building a cat house
Materials
- 1 – 2 pieces of 2×2 lumber – 14″, 3 pieces – 16″ BASE
- 2 – 1 piece of 3/4″plywood – 14″x19″ FLOORING
- 3 – 8 piece of 2×2 lumber – 10″, 4 pieces- 19″, 4 pieces – 11″ WALLS
- 4 – 2 pieces of 3/4″ plywood – 14″x19″, 2 pieces – 22 1/2″x15 1/2″ WALLS PANELS
- 5 – 6 pieces of 2×2 lumber – 13″, 1 pieces – 19″, 4 pieces – 15 1/2″ RAFTERS
- 6 – 2 pieces of 3/4″ plywood – 13 1/2″x23 1/2″, 6 sq ft of shingles ROOFING
- 7 – 4 pieces of 1×3 lumber – 15 1/2″, 2 pieces – 23 1/2″ TRIMS
- 6 pieces of 2×2 lumber – 8 ft
- 1 piece of 1×3 lumber – 10 ft
- 1 piece of 3/4″ plywood – 4’x8′
- 1oo pieces of 2 1/2″ screws
- 1oo pieces of 1 5/8″ screws
- wood glue, stain/paint
- 6 ft tar paper, 6 sq ft of shingles
Tools
- Hammer, Tape measure, Carpentry square
- Miter saw, Drill machinery, Screwdriver, Sander, Router
- Safety Gloves, Safety Glasses, Respiratory Mask
Time
- One day
Building a cat house

Building the base of the cat house
The first step of the woodworking project is to build the base of the cat house. As you can see in the plans, you should use 2×2 lumber for the base frame, but you can get the job done with 2×4 lumber as well. Check if the corners are square before drilling pilot holes and inserting the 2 1/2″ screws. Attach a 3/4″ piece of plywood over the frame and lock it into place with 1 5/8″ screws.

Building the walls
Continue the project by building the walls and locking them to the base of the cat house. Assemble the wall frames on a level surface making sure the studs have the same dimension. Plumb the walls with a spirit level before drilling pilot holes through the bottom plates and inserting 2 1/2″ screws into the base frame. Lock the adjacent walls together by inserting screws. Check if the corners are square.
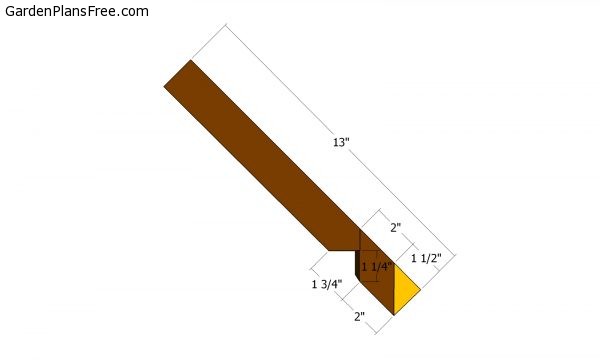
Rafters
Use 2×2 lumber for the rafters. Mark the cut lines to the beam and then get the job done with a saw. Notice the cut-outs on the rafters.
Fitting the rafters
Continue the project by building the frame of the roof. You should adjust the slope of the cat house to suit your tastes, so you don’t have to make it exactly 45 degrees, as shown in the plans. Drill pilot holes and insert 2 1/2″ screws to lock everything together tightly. Leave no gaps between the components.

Attaching the walls
It is essential to align the sheets at both ends before locking them to the frame, otherwise the cat house won’t have a professional appearance. Secure the sheets into place with finishing nails, making sure you insert them directly into the studs and into the plates.

Front face plans
If you want to get the job done in a really professional manner, we recommend you to attach 3/4″ sheets to the exterior of the construction. Cut out a small entrance inside the front face of the cat house, as shown in the image. Drill a starting hole and get the job done with a jigsaw. Smooth the cut edges with sanding paper. Use 1 5/8″ screws or nails to secure the panels to the frame.
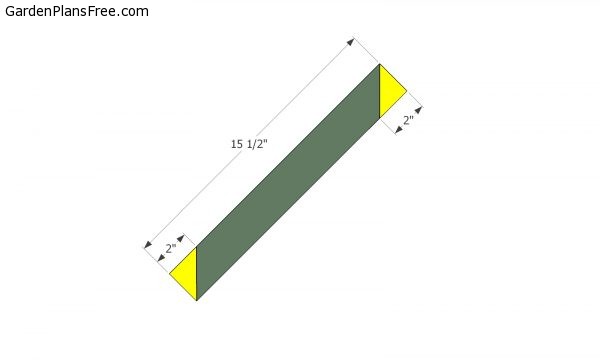
Trims
Use 2×2 lumber for the front and back overhangs.

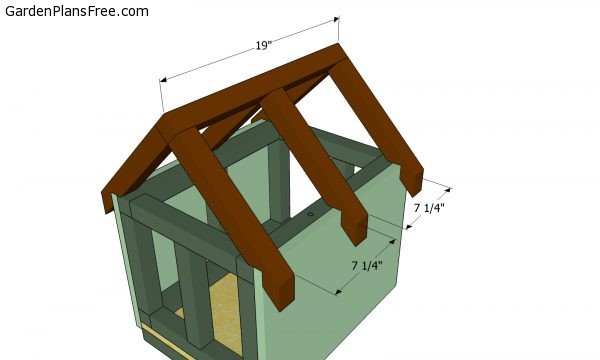
Installing the rafters
Fit the overhangs to the front and back of the cat house. Align the edges, drill pilot holes and insert 2 1/2″ screws to lock them into place tightly.

Attaching the plywood roof
The next step of the project is to attach 3/4″ plywood sheets to the rafters, as it can be noticed in the plans. Align the sheets at both ends and secure them into place with 1 5/8″ galvanized screws.
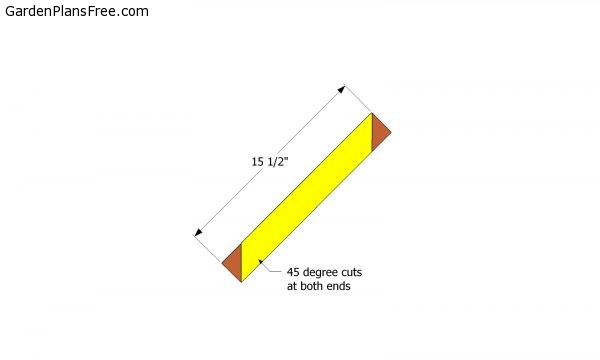
Trims for roof
Use 1×3 lumber for the roof of the cat house. Make the 45 degree cuts at both ends of the trims, as shown in the diagram.

Attaching the trims
Although it is not compulsory adding trims to the exterior of the rafters will enhance the look of the dog house, so make sure you consider this step. Use 1×3 lumber to get the job done and lock the components into place with 1 5/8″ galvanized screws.

Fitting the asphalt shingles
Install asphalt shingles to the roof sheets in order to protect the construction form water damage. Work with attention and seal the gaps with silicone if necessary.

Cat house plans
Last but not least, you should take care of the finishing touches. Check if the components are secured into place properly and if the frame is rigid. Make sure there are no protruding screws or sharp edges that could injure you.
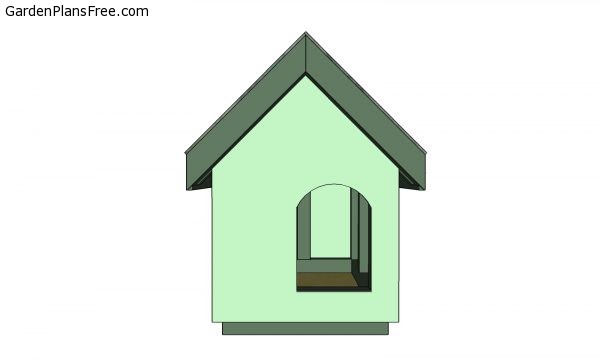
Cat house plans – front view
See free plans for a catio, here on my blog.
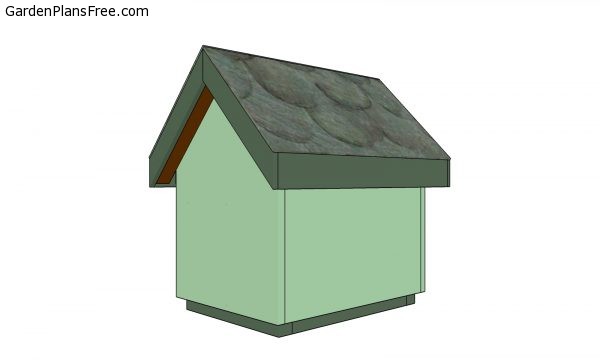
Cat house plans – back view
PRO TIP: Fill the holes with a good wood filler and smooth the surface with 120-grit sandpaper. Apply several coats of paint or stain over the components, in order to protect them from decay.

This diy project was about cat house plans free. If you have enjoyed the free project, we recommend you to share it with your friends, by using the social media widgets. LIKE us on facebook if you want to be the first that gets our latest projects.