This detailed project is about how to build a bbq grill. If you want to get the job done in a professional manner, we recommend you to choose proper bbq grill plans. In this article we show you all you need to know when building a simple bbq grill. Therefore, make sure you adjust the design and the size of the bbq to your needs and you invest in the best quality materials you afford.
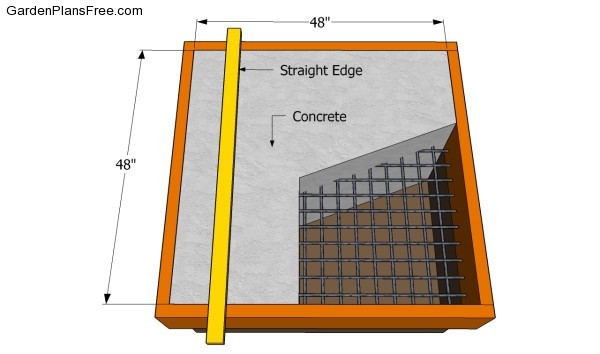
There are a lot of options to choose from when building the backyard barbeque, so make sure you consider several alternatives before starting the construction project. It is essential to pour a concrete foundation before laying the bricks. Therefore, dig at least 1′ into the ground and set a rigid formwork. Set a dense net of rebars inside the form and fill it with concrete. Smooth the surface with a straight edge and let it to dry out for several days.
Building a bbq grill
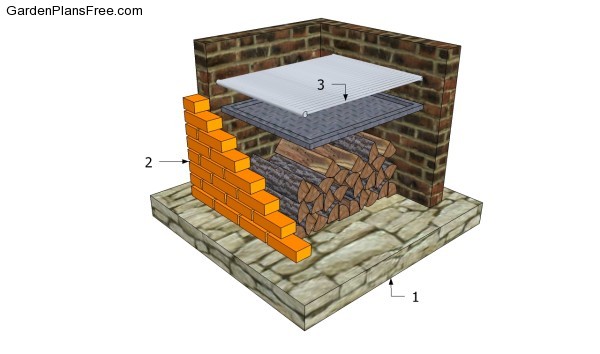
Build a barbeque grill
Materials
- 1 – concrete, rebars FOUNDATION
- 2 – 200 bricks BRICKS
- 3 – grill and charcoal – 9″ GRILL
Tools
- Hammer, Tape measure, Carpentry square
- Miter saw, Drill machinery, Screwdriver, Sander, Router
- Safety Gloves, Safety Glasses, Respiratory Mask
Time
- One day
Bbq grill plans
Pouring the foundation
The first step of the project is to pour the concrete foundation of the bbq grill. As you can see in the image, we recommend you to dig about 12″ in the ground, fit a reinforcing net and set 2×8 slats. Mix a small quantity of concrete and fill the form as in the image. Level the surface with a straight edge and let the concrete to dry out for several hours.
Laying the bricks
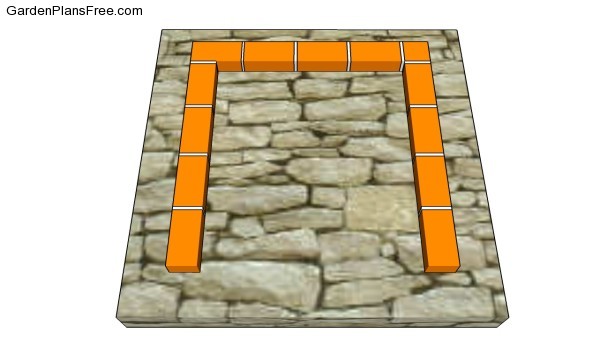
Start laying the bricks on a bead of mortar, making sure the layers are perfectly horizontal. After laying the first course, we recommend you to check if the bricks are horizontal by using a spirit level. In addition, we recommend you to remove the excess materials with a damp cloth.
Installing the second row
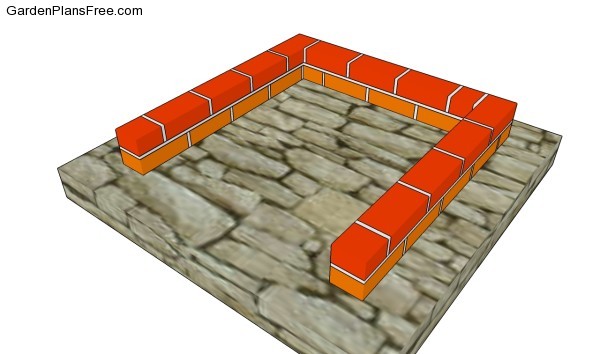
Make sure you lay the second course using the pattern described in the plans. Work with attention and with great care, if you don’t want to get a sloppy appearance. The gaps between the bricks should be even and filled with mortar. Plumb the bricks with a spirit level and adjust their position with a rubber hammer.
PRO TIP: Use a wet saw to adjust the size of the bricks, otherwise they might not fit into place properly.
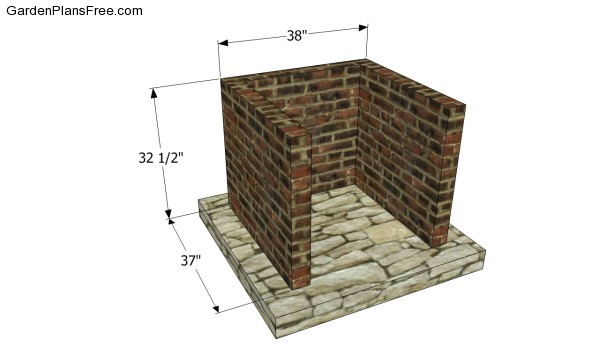
Building the bbq gril
Continue laying the rest of the brick courses, in the same manner described above. Don’t forget to check the walls for plumbness every time you lay a brick. Moreover, we recommend you to fit the supports for the grill and for the tray into concrete, at the desired height.
PRO TIP: Use a damp cloth to remove the excess mortar after fitting every brick, before it dries out.
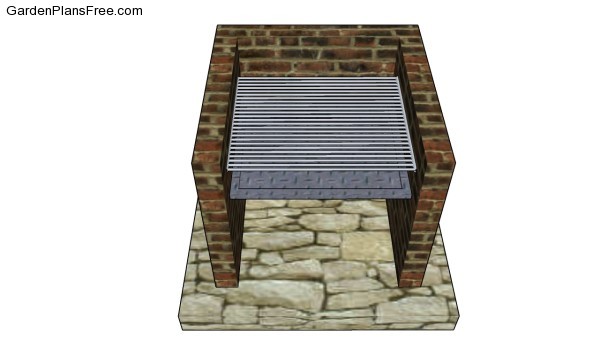
Installing the tray and the grill
One of the last steps of the brickwork project is to fit the tray and the grill, as shown in the free plans. Make sure the supports are properly installed, otherwise they might not support the weight of the firewood.

Bbq grill plans
Lastly, we recommend you to get the final touches done. Use a brush to even out the mortar between the bricks and clean the concrete slab thoroughly, before covering it with cladding.
PRO TIP: If you spend a lot of time in your garden or if you have many friends coming over your house during the weekends, we recommend you to attach a small table to the bbq grill. In this manner, it will be a lot easier to keep the plates and the meat close to the barbeque, without having to go to your house.
This diy project was about bbq grill plans free. If you have enjoyed the free project, we recommend you to share it with your friends, by using the social media widgets.
