Step by step garden project about tomato trellis plans. Building tomato trellis is easy and cheap, but the benefits are great, especially if you are an amateur gardener. In this project we show you how to build A-frame trellis for climbing plants, by using detailed instructions and diagrams. Nevertheless, pay attention to the tips and use professional tools, in order to prevent potential issues.
If you want to grow tomatoes in your garden but you don’t have an extensive expertise in the field, we recommend you to pay attention to this project. While building the wooden trellis is a simple and quick project, it will also make a huge difference on the time needed to take care of your plants. Adjust the size of the trellis to fit your needs and use quality and weather-resistant lumber.
Building tomato trellis
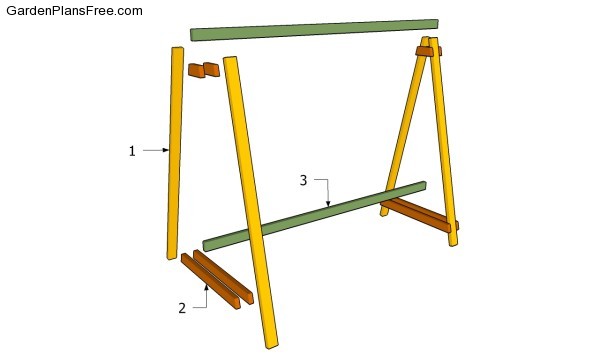
Building tomato trellis
Materials
- 1 – 4 pieces of 2×4 lumber – 96″ LEGS
- 2 – 4 pieces of 2×4 lumber – 45 1/2″, 4 piece – 9″ BRACES
- 3 – 2 pieces of 2×4 lumber – 120″ BEAMS
Tools
- Hammer, Tape measure, Carpentry square
- Miter saw, Drill machinery, Screwdriver, Sander, Router
- Safety Gloves, Safety Glasses, Respiratory Mask
Time
- One day
Tomato trellis plans
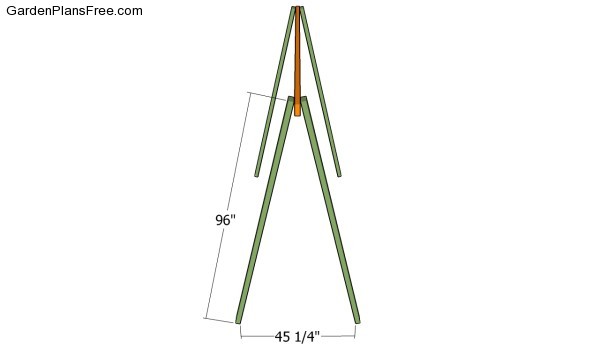
Building the frame of the trellis
The first step of the woodworking project is to build the A-frames, by using 2×4 lumber. Lean to components at about 13 degrees and lock them to the top beam. Drill pilot holes through the slats and insert 2 1/2″ galvanized screws. Align the components at both ends and work with great care, if you want to get a professional result.
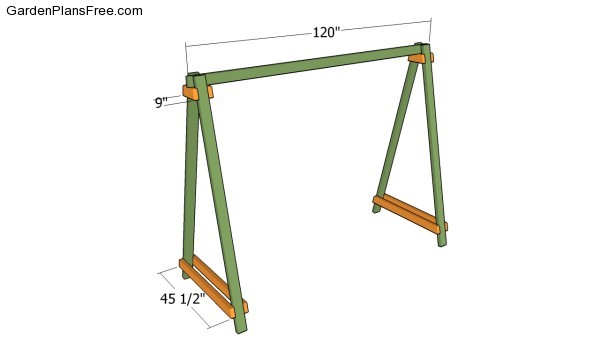
Attaching the braces
The next step of the woodworking project is to attach the braces to the A-frames, using the pattern described in the free plans. Cut both ends of the braces at 13 degrees and lock them to the legs with wood screws. Plumb the A-frames with a spirit level before attaching the braces into place.
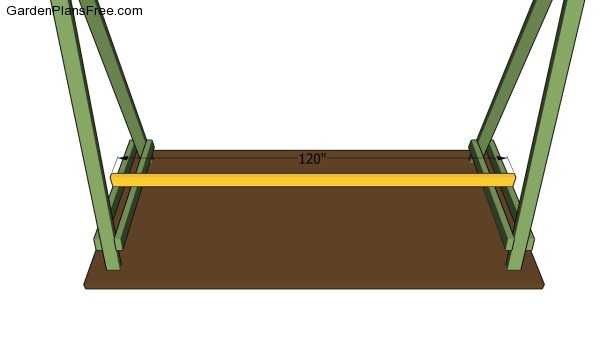
Installing the tomato support
One of the last steps of the woodworking project is to attach the support to the bottom of the tomato trellis. Align the support at both ends and insert the screws into the braces.
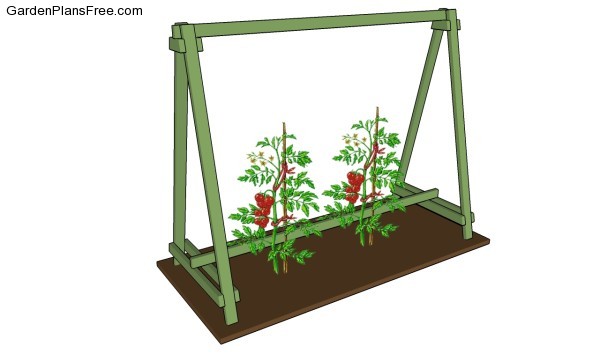
Tomato trellis plans
Lastly, we recommend you to get the final touches done. Fill the holes with putty and let it dry out for several hours. Afterwards, even out the whole surface of the chair, by using medium-grit sandpaper.
PRO TIP: Apply several coats of paint or stain over the components, in order to protect them from decay. We recommend you to check out the rest of the garden projects, as there are many plans that could suit your needs.
This diy project was about tomato trellis plans free. If you have enjoyed the free project, we recommend you to share it with your friends, by using the social media widgets.
