If you want to learn more about how to build a 6 foot picnic table you have to take a close look over the free plans and step by step instructions in the article. I got multiple requests for this popular picnic table size, so today is the big day when this brand new design is revealed. You can make a few modifications to the plans so they suit your needs. More furniture projects HERE.
If you want to get the job done in a professional manner, we recommend you to plan everything with attention, as to prevent costly mistakes and to build a professional garden bench. Invest in high quality materials, such as cedar, pine or redwood, as the bench will be exposed to all kinds of weather. Apply a few coats of paint over the components, to enhance their appearance and to protect them from bad weather.
6 foot Picnic Table Plans – PDF Download
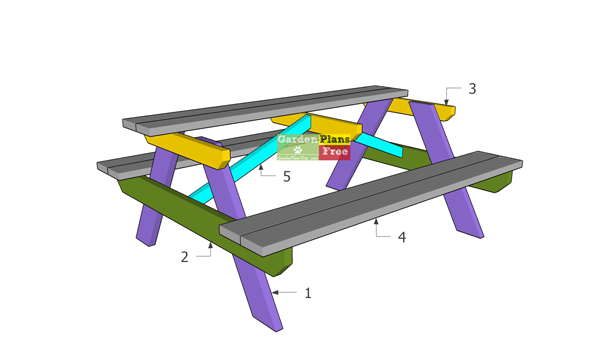
Building-a-6-ft-picnic-table
Materials
- 1 – 4 pieces of 2×6 lumber – 36″ long LEGS
- 2 – 2 pieces of 2×6 lumber – 60″ long BRACES
- 3 – 3 pieces of 2×4 lumber – 28 1/2″ long SUPPORTS
- 4 – 9 pieces of 2×6 lumber – 72″ long SUPPORT
- 5 – 2 pieces of 2×3 lumber – 33″ long BRACES
- 6 pieces of 2×5 lumber – 12 ft
- 1 piece of 2×6 lumber – 10 ft
- 1 piece of 2×4 lumber – 8 ft
- 1 piece of 2×3 lumber – 8 ft
- 100 pieces of 2 1/2″ screws
- 16 pieces of 3 1/2″ carriage bolts
- wood glue, stain/paint
Tools
- Hammer, Tape measure, Carpentry square
- Miter saw, Drill machinery, Screwdriver, Sander, Router
- Safety Gloves, Safety Glasses, Respiratory Mask
Time
- One day
STEP 1: Building the side frames
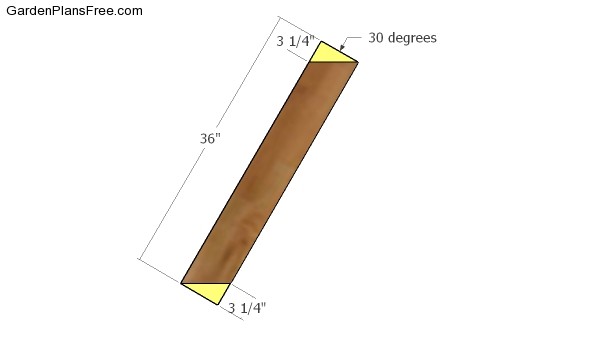
Building the legs
Firstly, build the legs for the picnic table from 2×6 lumber. You should make the 30 degree cuts to both ends of the legs with a miter saw.
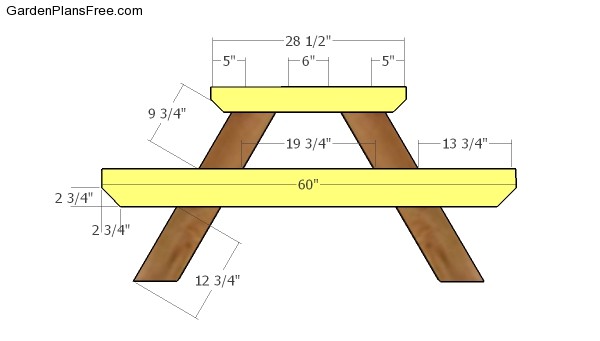
Fitting the braces
Next, lay the legs on a level surface and then attach the supports, as shown in the diagram. Align everything with attention and clamp the components together with quick clamps.
Thus, drill pilot holes through both the legs and the supports. Insert 3 1/2″ carriage bolts to assemble the supports. Use 2 bolts for each joint. The bolts will give superior rigidity to the frame and they will also make the table easily movable.
STEP 2: Attaching the top and seats
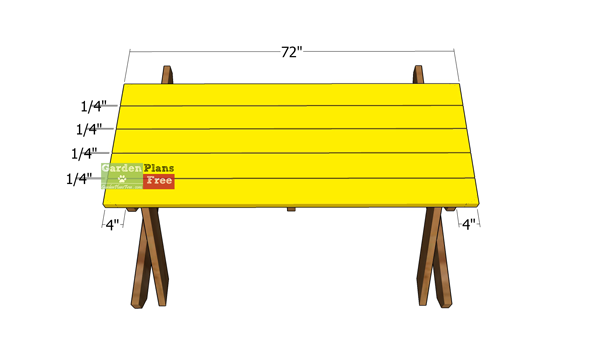
Fitting-the-tabletop-slats
Additionally, fit the 2×6 boards to the top of the side frames. Plumb the side frames with a spirit level and then attach the tabletop slats with 2 1/2″ screws.
Next, you need to place pieces of 1/4″ plywood between the slats to create even gaps. Notice the 4″ overhangs on both sides. Also, see the middle 2×4 support under the tabletop. Drill pilot holes through the tabletop slats and insert 2 1/2″ screws into the support.
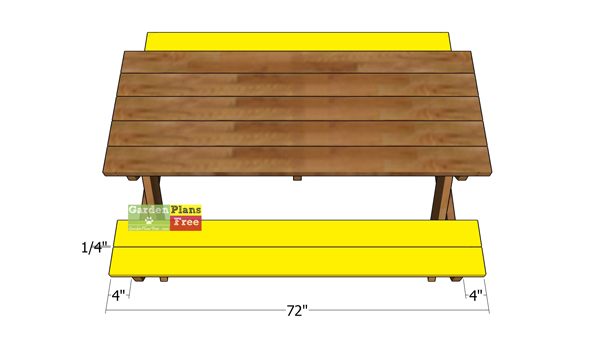
Fitting-the-seat-slats—6-ft-picnic-table
Continue the project by attaching the 2×6 boards to the seats of the picnic table. Center the boards to the frame, so you get 4″ overhangs on both sides. Drill pilot holes through the seat slats and insert 2 1/2″ screws into the frame.
STEP 3: Attaching the diagonal braces
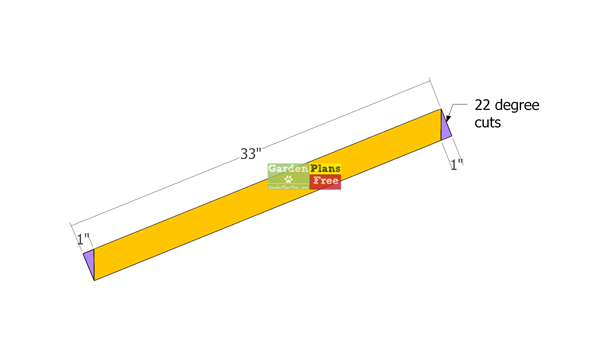
Diagonal-braces-for-the-6-ft-picnic-table
Furthermore, use 2×3 lumber for the diagonal braces. Next, use a miter saw to make the 22 degree angle cuts to both ends.
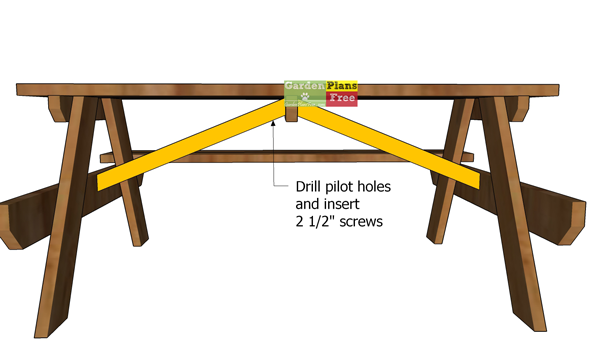
Fitting-the-diagonal-braces-for-the-picnic-table
Center the diagonal braces to the frame of the picnic table. Drill pilot holes and insert 2 1/2″ screws to lock them to the supports.
These braces will add rigidity to the picnic table and thus make it more durable and safe to use. Check out free plans to build a hexagon picnic table.
STEP 4: Finishing touches
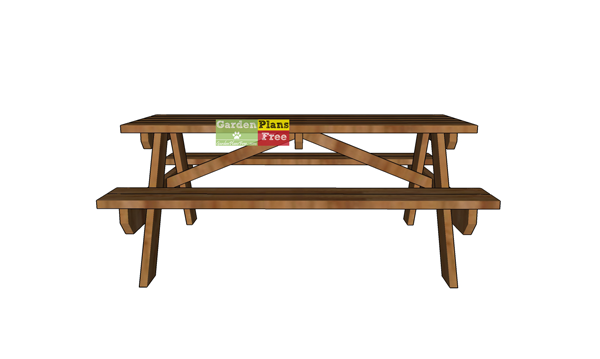
6-ft-picnic-table-plans—front-view
I recommend you to check if the components are locked into place properly and structure is rigid enough for your garden. Make sure there are no protruding screws or sharp edges.
Fill the holes with wood putty and then smooth the surface with sandpaper. Apply a few coats of paint or stain to protect the components from decay. You can go as far as using a router to round-out the exposed edges and thus make the project even more refined.
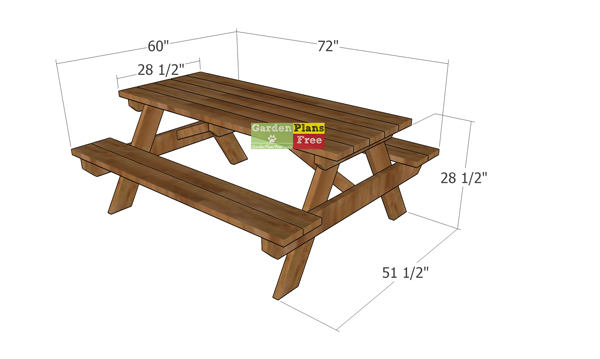
Dimensions-for-a-6-foot-picnic-table
This is a 6 ft wide picnic table with a simple structure and beautiful details. Since you are here, you might as well check the free plans for a 8 ft picnic table.
Notice the overall dimensions for this table, so you know if this suits your needs.
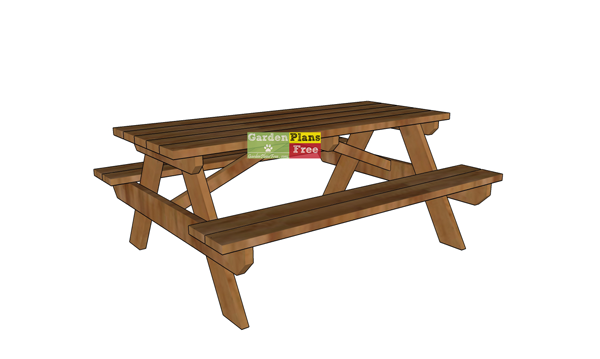
How-to-build-a-6-ft-pincic-table-from-wood
PRO TIP: Apply several coats of paint or stain over the components, in order to protect them from decay. Check out the rest of the project to learn more about building garden projects.
This diy project was about wooden 6 ft picnic table plans. If you have enjoyed the free project, we recommend you to share it with your friends, by using the social media widgets.


2 comments
The picnic bench says ‘free PDF dounload’ but when I click on the icon, it asks for $2.99.
It says PDF download, where do you see Free PDF Download?