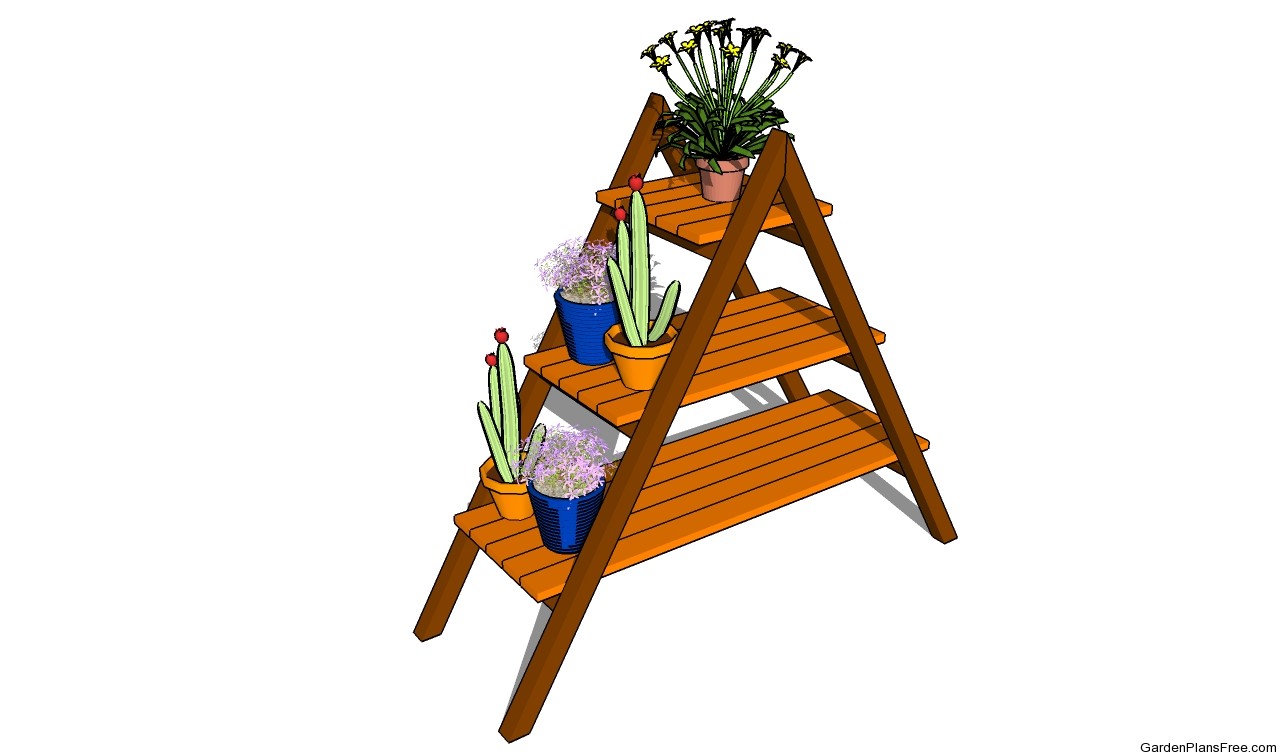
If you have many flowers and want to build a simple plant stand, you should pay attention to this project. Nevertheless, you should be aware that you can choose from many designs, shapes and sizes. Therefore, study attentively the alternatives and choose proper plant stand plans for your needs. Moreover, choose quality lumber, such as pine, cedar or redwood, as the components should be weather-resistant and have a nice appearance.
Always pre-drill the components at both ends, if you want to lock them together properly. Align the parts at both ends and drive the screws into the components. Countersink the head of the screws in order to get a nice appearance. After getting the job done, fill the holes with putty and smooth the wooden surface with medium-grit sandpaper. Apply several coats of paint to protect the components from decay.
Wooden plant stand plans

Building a plant stand
Materials
- 1 – 4 pieces of 2×2 lumber – 48″ long FRAME
- 2 – 6 pieces of 2×2 lumber – 13″ long SUPPORT
- 3 – 5 pieces of 1×3 – 40 1/2” long SLATS
- 4 – 5 pieces of 1×3 lumber – 26 1/2″ long SLATS
- 5 – 5 pieces of 1×3 lumber – 12 1/2″ long SLATS
- 3 pieces of 2×2 lumber – 8 ft
- 5 pieces of 1×3 lumber – 10 ft
- 2 1/2″ screws
- 1 1/4″ screws
- wood glue, stain/paint
Tools
- Hammer, Tape measure, Carpentry Square
- Miter saw, Drill machinery, Screwdriver, Sander
- Safety Gloves, Safety Glasses, Respiratory Mask
Time
- One Day
Plant Stand Plans

Building the A-frame
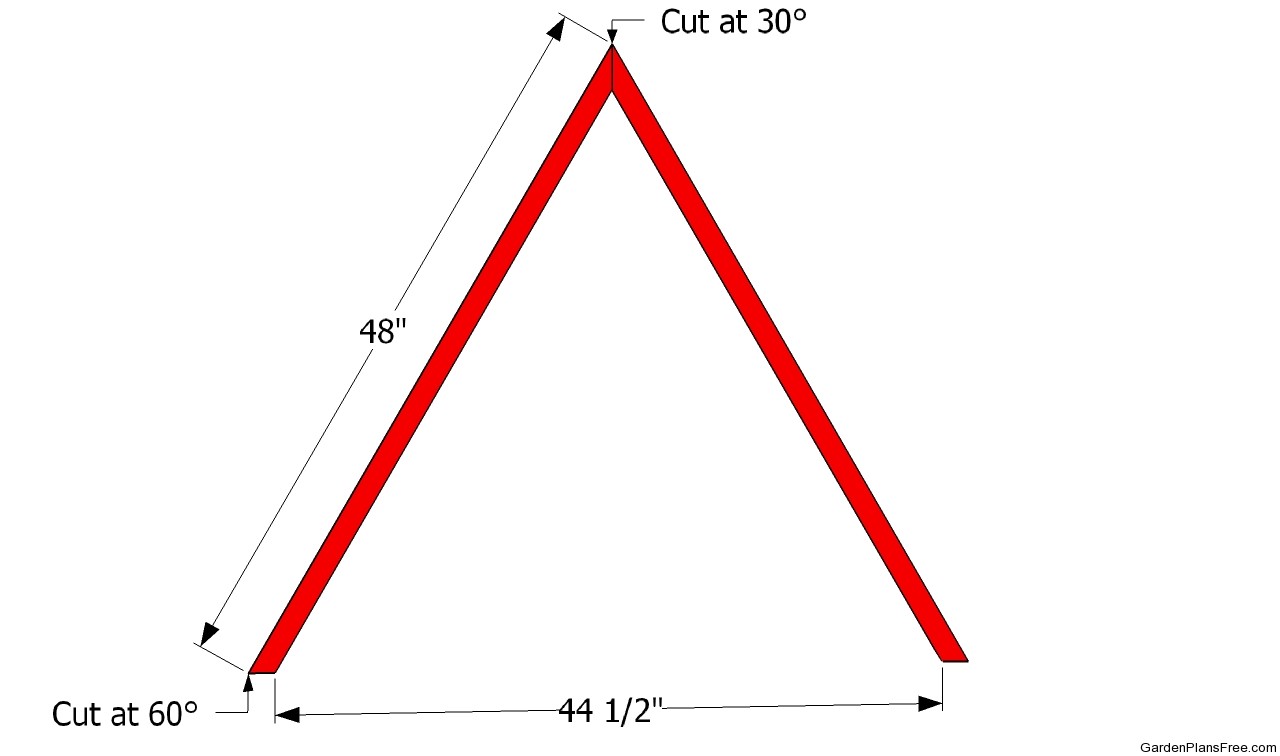
The first step of the project is to build the A-frame of the plant stand. Use 2×2 lumber to build the components of the frame, as in the plans. After cutting the lumber at the right size, you should assemble them together with 3 1/2″ galvanized screws. Drill pilot holes before inserting the screws, to prevent the wood from splitting.
PRO TIP: One end of the components should be cut at 30º, while the other one shoudl be cut at 60º.

Installing the supports
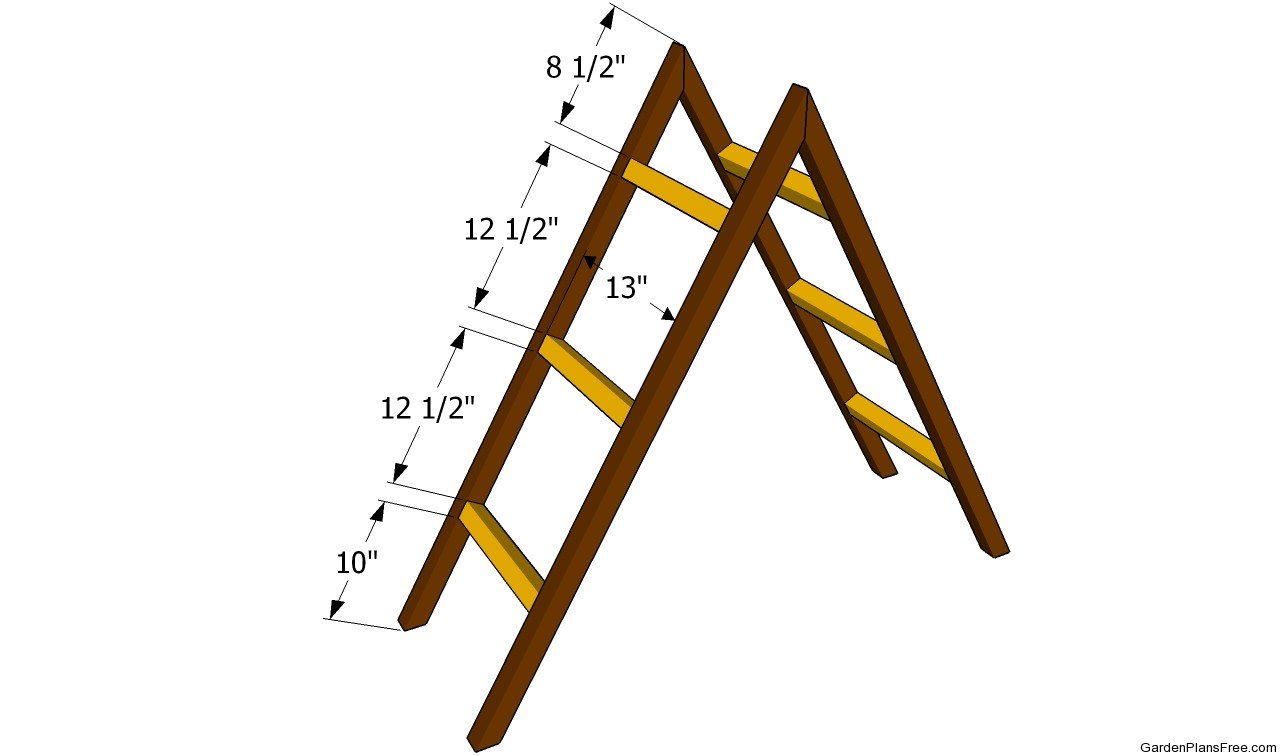
Secure the A-frames together with 2×2 lumber, as in the image. Level the supports with a spirit level, if you want to get a professional result. Drill pilot holes trough the frames and secure the supports with 3 1/2” galvanized screws. Don’t forget to countersink the head of the screws before inserting the screws, to get a professional result.

Installing the slats
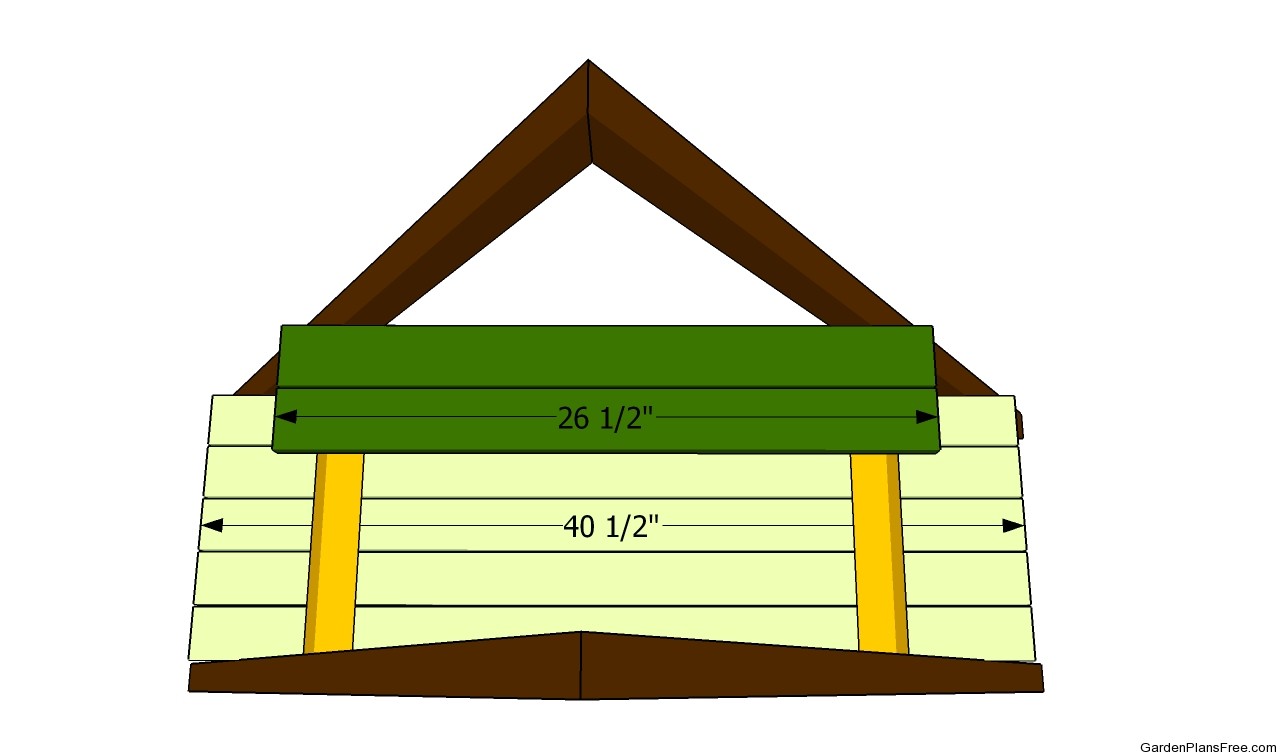
Continue the woodworking project by installing the shelves. As you can easily notice in the image, you need to use 1×3 slats to build the slats. Place the slats equally spaced and secure them to the supports with 2 1/2” galvanized screws. The slats should overhang about 1″ on both sides of the supports.

Installing the top shelf
Attach the slats to the shelf in the same manner described above. We strongly recommend you to decide the size of the plant stand, as well as the distance between the shelves, ac cording to the flowers and the location of the stand.

Plant stand plans
Last but not least, there are several aspects you should take into account. Therefore, you should fill the holes with wood filler and smooth the wooden surface after it dries out. In addition, check all the screws are inserted properly and round the exposed edges with a router and a 3/4 bit. Check out my other plans stand plans HERE.
PRO TIP: Apply several coats of paint over the components, in order to protect them from decay. Choose the colors as to fit the design of your garden.
This diy project was about plant stand plans. If you have enjoyed the free project, we recommend you to LIKE and SHARE it with your friends, by using the social media widgets.
