If you want to grow your own organic vegetables, you should take into account building a small 6’x10′ greenhouse. If you choose the right diy greenhouse plans for your needs, you could get the job done by yourself in just an weekend. Generally speaking, you need to cut the wooden components at the right size and lock them together tightly. Cover the structure with polyethylene film or poly-carbonate sheets.
If you want to build a durable greenhouse, you should take into account a few aspects. On one hand, we recommend you to choose the lumber with attention, as it has to be weather-resistant (cedar, pine) and perfectly straight. Align the components at both ends, before drilling pilot holes and inserting the galvanized screws. Check if the walls are plumb, using a good spirit level.
Building a diy greenhouse
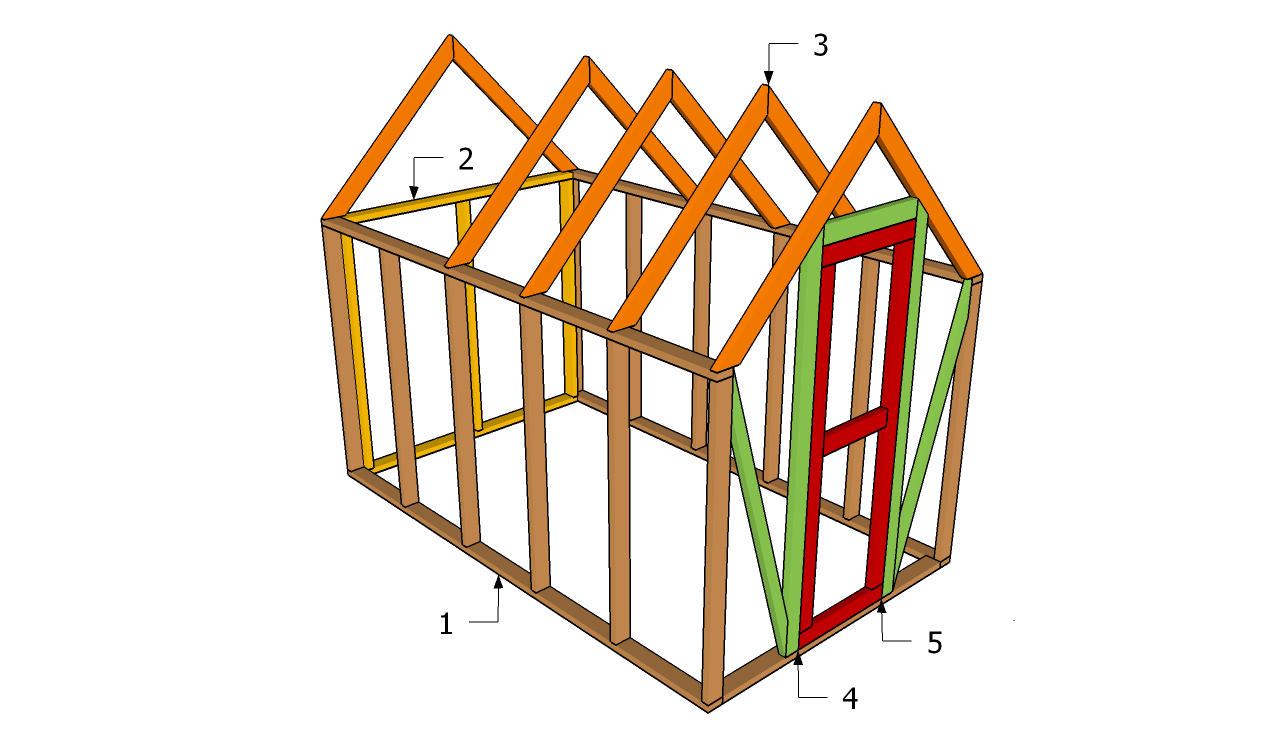
Building a diy greenhouse
Materials
- 1 – 4 pieces of 2×4 – 120”, 12 pieces of 2×4 – 60″ SIDE WALLS
- 2 – 2 pieces of 2×4 – 65″, 3 pieces of 2×4 – 60″ BACK FACE
- 3 – 12 pieces of 2×4 lumber – 51″ (both ends cut at 45º) RAFTERS
- 4 – 2 piece of 2×4 – 64″, 2 pieces of 2×4 – 80″, 1 piece of 2×4 – 25″ FRONT FACE
- 5 – 2 pieces of 2×4 – 69 1/2”, 2 pieces – 25″, 1 piece – 18″ DOOR
- 18 pieces of 2×4 lumber – 10 ft
- 2 pieces of 2×4 lumber – 12 ft
- 3 pieces of 2×4 lumber – 8 ft
- 500 pieces of 2 1/2″ screws
- 100 pieces of 3 1/2″ screws
- wood stain
- 300 sq ft of greenhouse film
- 3 hinges
- 1 latch
Tools
- Hammer, Tape measure, Carpentry square
- Miter saw, Drill machinery, Screwdriver, Sander, Router
- Safety Gloves, Safety Glasses, Respiratory Mask
Time
- One day
Diy Greenhouse Plans
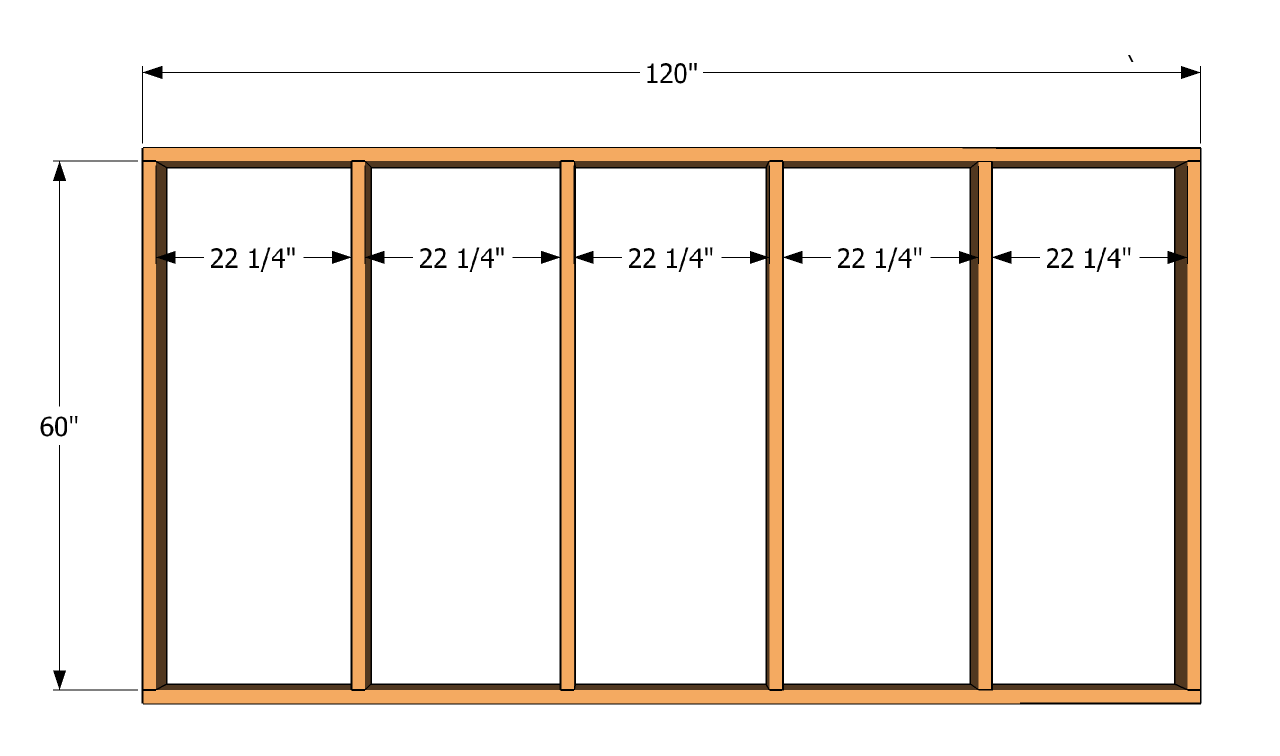
Building the side walls
The first step of the project is to build the side walls. If you have a shed, you will notice there are a few things common between these constructions. In order to get the job done in a professional manner, you should drill pilot holes trough the bottom and top plates. Check if the corners are right-angled and secure the studs to the plates, by using 2 1/2” galvanized screws.
PRO TIP: Secure the side walls into place temporarily with several braces. After Installing the front and back faces, you could remove the 2×4 braces, as the structure is rigid enough.
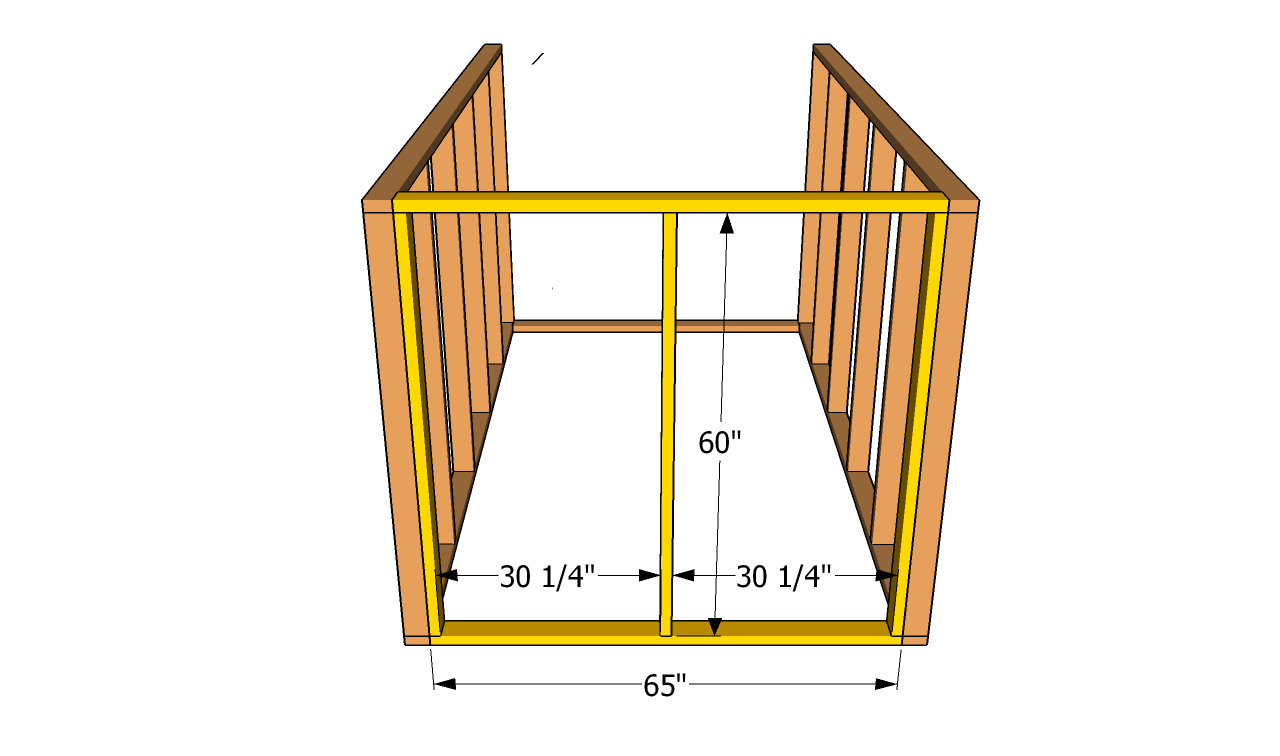
Building the back wall
Building the back wall of the greenhouse is a straight forward job, provided you choose quality materials and proper tools. Assemble the wall frame on a level surface and secure it to the side walls with 3” wood screws. Use a spirit level to check if the wall frame is plumb.
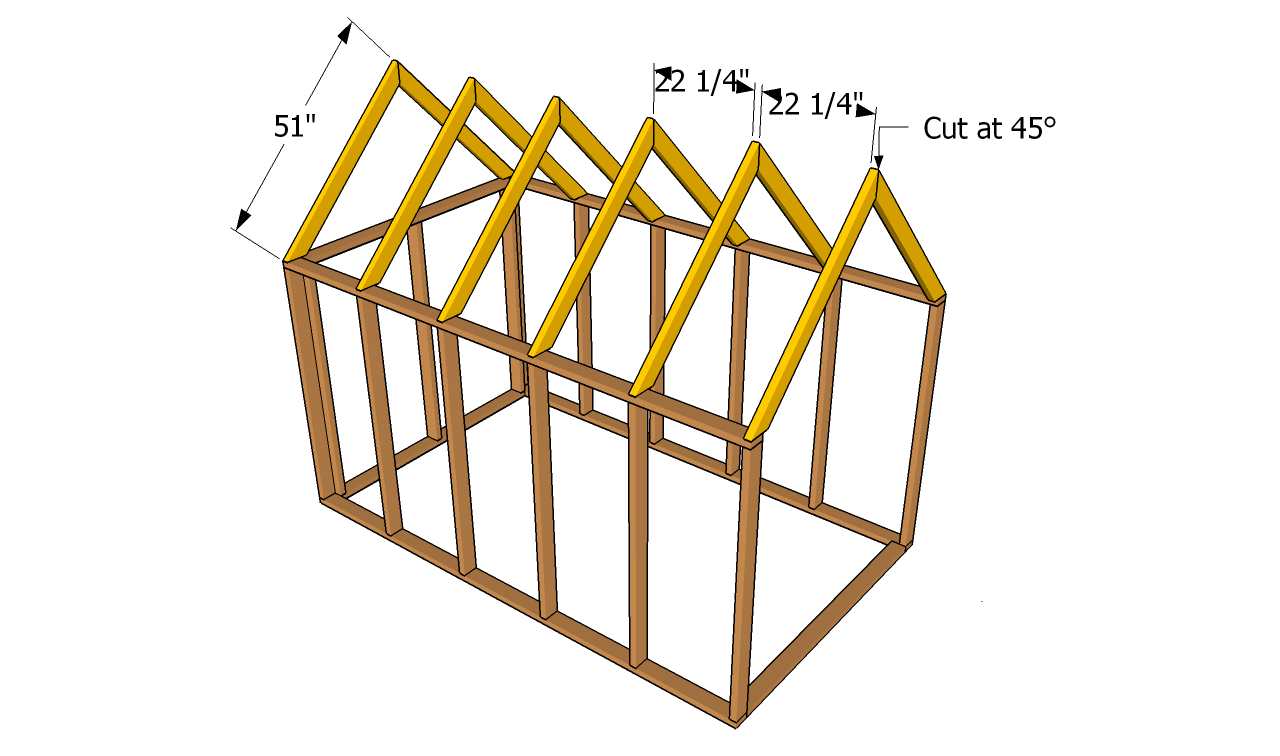
Installing the rafters
Build the rafters of the greenhouse using 2×4 lumber. As you can easily notice in the image, you need to miter cut both ends of the rafters at 45º. Assemble the trusses on the ground and lock them to the top plates with 3 1/2” galvanized screws.
PRO TIP: Use a spirit level to check if the trusses are plumb. Drill pilot holes trough components, to prevent the wood from splitting.
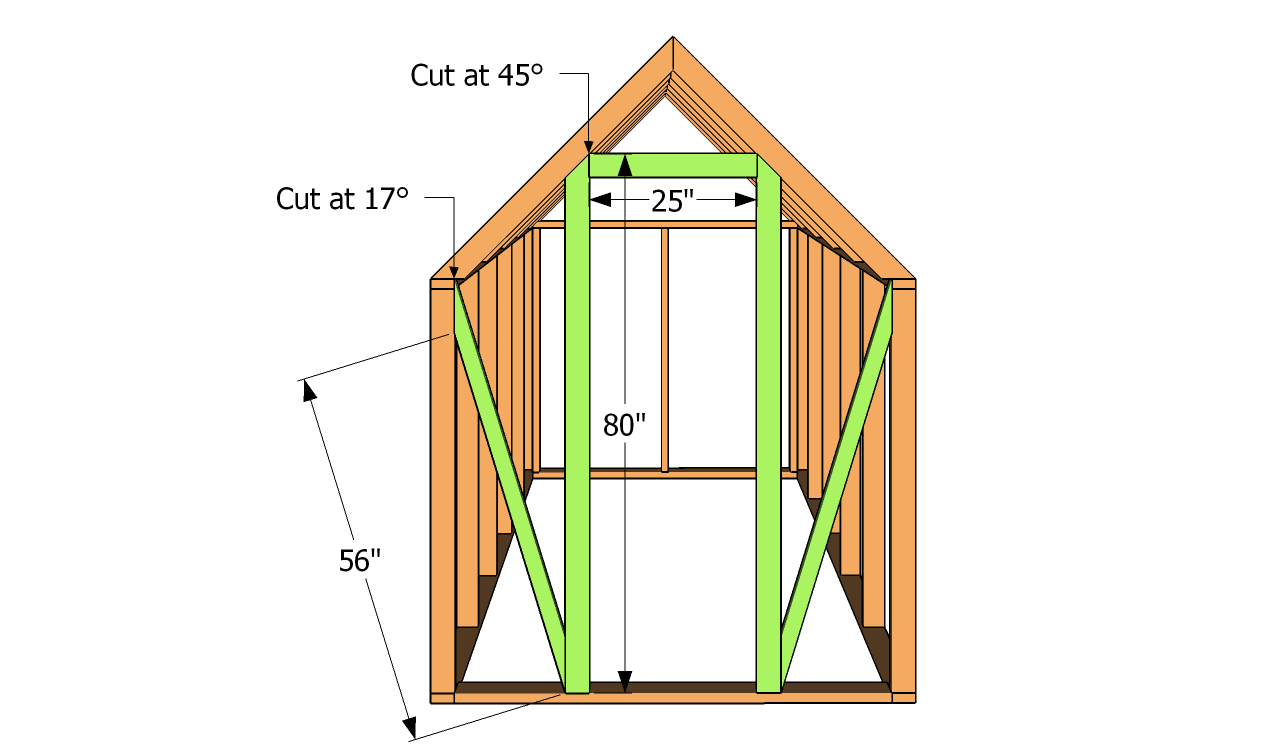
Fitting the door opening frame
The front face of the greenhouse is a little different, as you have to leave enough space for the door opening. As you can see in the plans, you should lock the components properly to the bottom plate and to the rafters. Remember that you should adjust these dimensions to fit your needs.
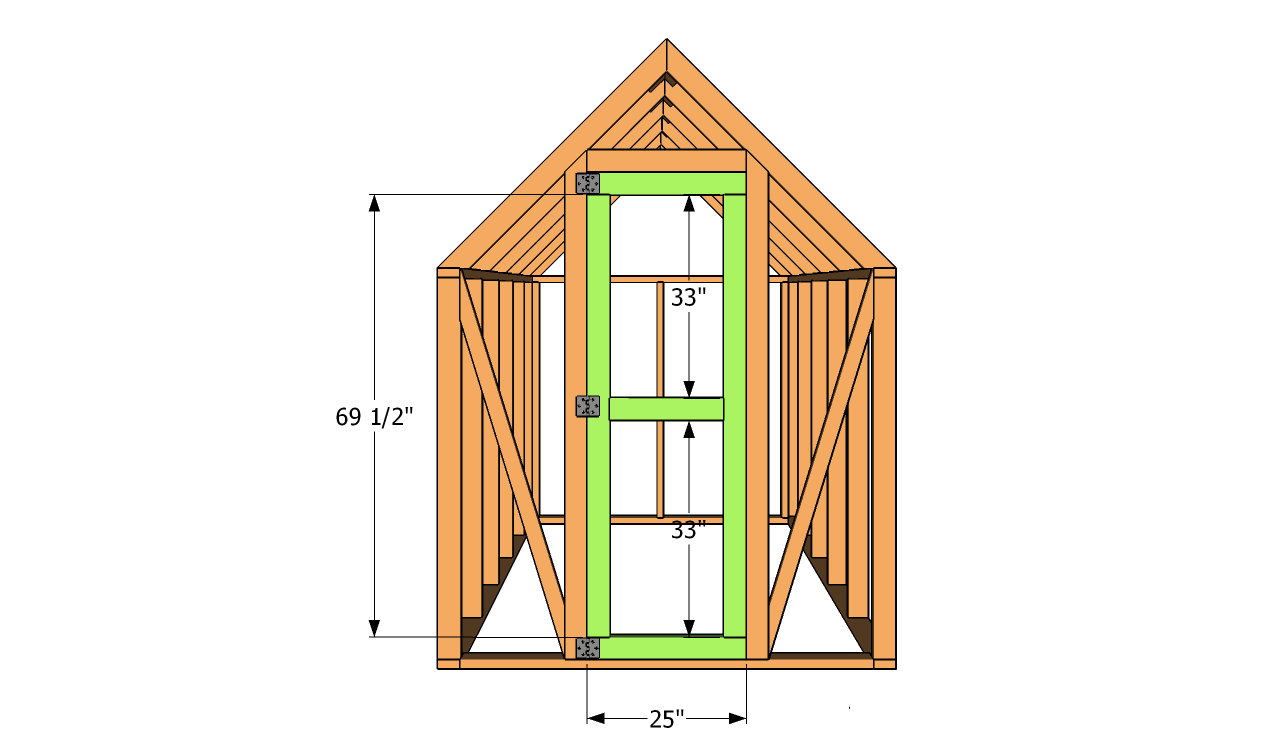
Installing the door
The next step of the project is to build the door. The easiest method you could use is to use 2×4 lumber, as in the plans. Use a jig to drill pocket holes, as this will create strong joints between the components. Check if the corners are right angled, before driving in the wood screws.
PRO TIP: Attach the door to the frame with a couple of metal hinges. Check if the door opens properly and install a latch, to lock it into place.
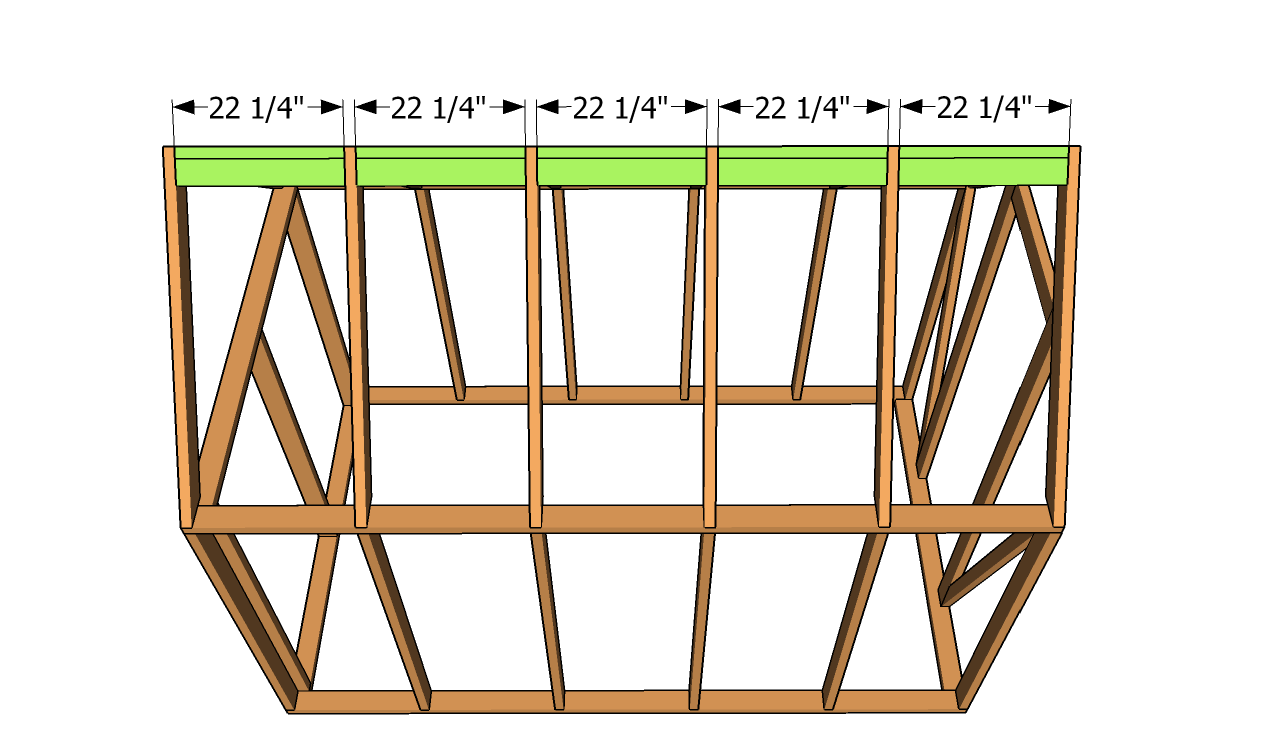
Fitting the blockings
Fit 2×4 blockings between the rafters to increase the rigidity of the structure. In addition, the components will protect the polyethylene film from breaking. Make sure the blockings are secured into place properly and aligned at both ends.
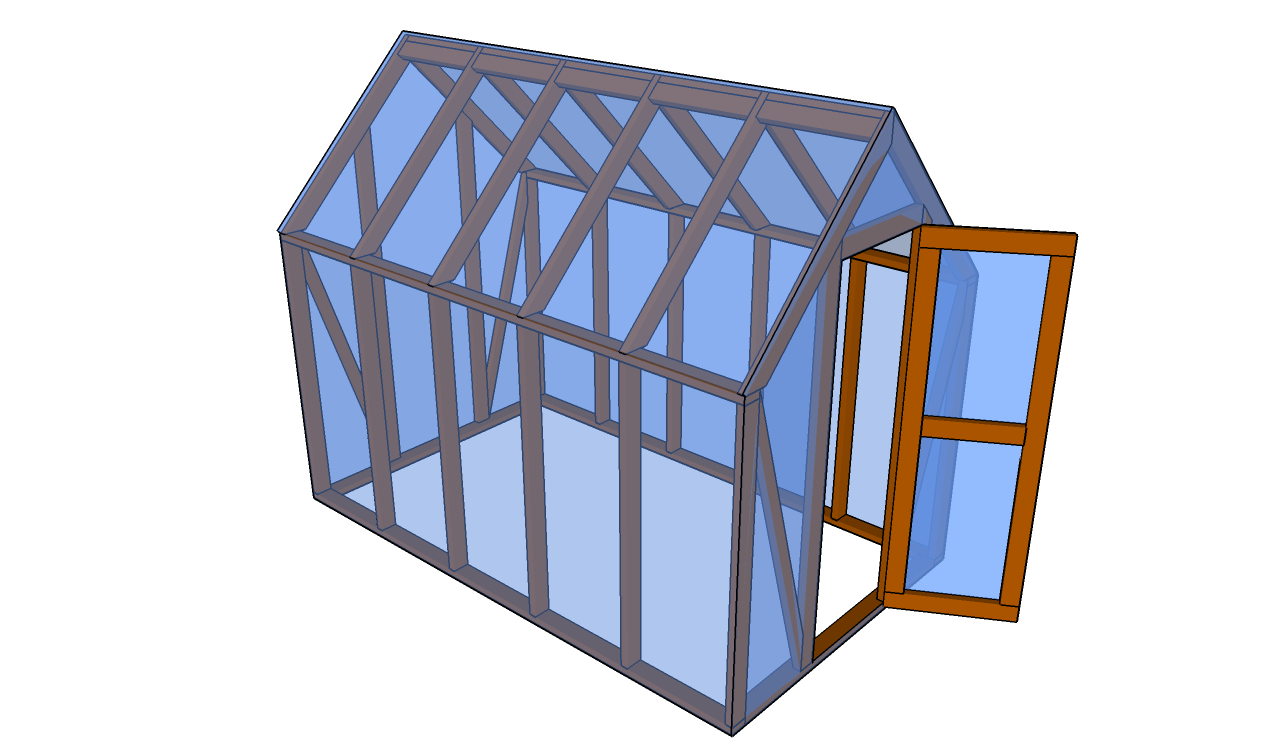
Diy greenhouse plans
Last but not least, you should take care of the finishing touches. Therefore, we recommend you to check if the components are locked into place properly and if the walls are perfectly plumb. Make sure there are no protruding screws or sharp edges that might damage the polyethylene foil.
PRO TIP: Stretch the film over the structure of the greenhouse and lock it into place with 1×2 strips of wood. Secure the 1×2 lumber to the rafters, using 1 5/8” wood screws.
This diy project was about diy greenhouse plans free. If you have enjoyed the free project, we recommend you to LIKE and SHARE it with your friends, by using the social media widgets.


2 comments
Do you know the overall height of this design?
It’s about 8′.