Step by step woodworking project about building a garden seat plans. Building a garden seat is easy, if the right plans, tools and techniques are used. There are many techniques you can choose from, so make sure you study the alternatives before starting the actual construction process. We recommend you to check out the rest of the outdoor furniture projects, as to see more step by step tutorials.
Make sure you use weather-resistant lumber when building a garden seat, such as pine, cedar or redwood. Lock the components together tightly if you want to get the job done as a professional. Drill pilot holes at both ends of the components, to prevent the wood from splitting. Align the components at both ends, insert wood screws and add wood glue, in order to get rigid joints.
Building a garden seat
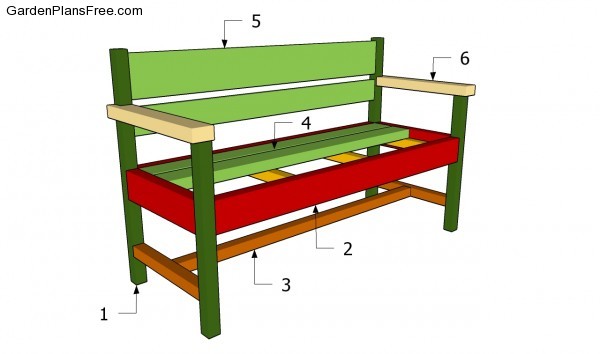
Building a garden seat
Materials
- 1 – 2 pieces of 2×2 – 22” long, 2 pieces of 2×2 lumber – 30″ long LEGS
- 2 – 2 pieces of 2×4 – 15 1/2” long, 2 pieces – 45″ long, 4 pieces of 2×2 lumber – 15 1/2″ long FRAME
- 3 – 2 pieces of 2×2 lumber – 21″ long, 1 piece – 45″ long SUPPORTS
- 4 – 4 pieces of 2×4 lumber – 45″ long SLATS
- 5 – 1 pieces of 1×4 lumber – 45” long, 1 piece of 1×6 lumber – 45″ long BACKREST
- 6 – 2 pieces of 2×3 lumber – 19″ long ARMREST
- 3 pieces of 2×2 lumber – 8 ft
- 4 pieces of 2×4 lumber – 8 ft
- 1 piece of 1×6 lumber – 4 ft
- 1 piece of 2×3 lumber – 4 ft
- wood glue, stain/paint
Tools
- Hammer, Tape measure, Carpentry square
- Miter saw, Drill machinery, Screwdriver, Sander, Router
- Safety Gloves, Safety Glasses, Respiratory Mask
Time
- One day
Garden seat plans
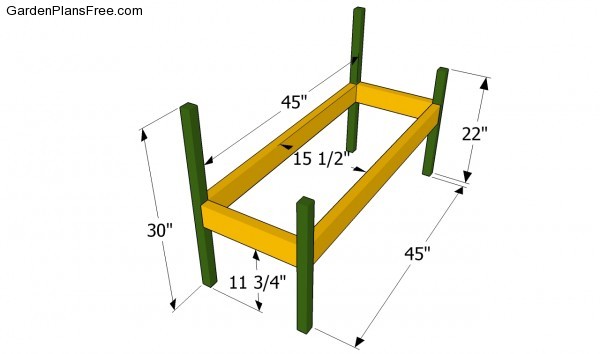
Building the frame of the seat
The first step of the project is to build the frame of the garden seat. As you can see in the free plans, you need to build the legs from 2×2 lumber and the frame of the seat from 2×4 lumber. Align the components at both ends, drill pocket holes at both ends and lock them together with 2 1/2″ galvanized screws.
PRO TIP: Place a spirit level on top of the frame, to check if the components are horizontal. In addition, check if the corners are right-angled, by using an L-square.
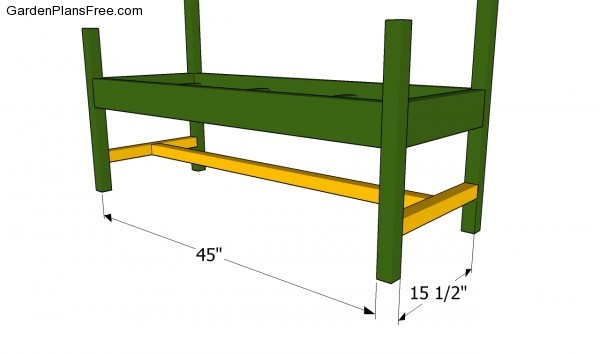
Installing the supports
In order to enhance the rigidity of the frame you need to install support at the bottom of the bench legs. As you can notice in the image, you need to drill pocket holes at both ends and lock the components into place with wood screws. Leave about 4-6″ from the bottom to the supports, as to protect the components from excessive moisture.
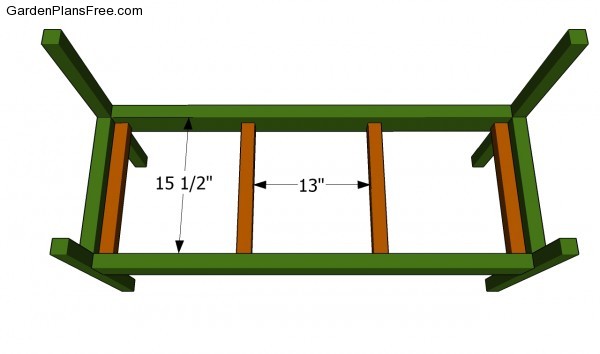
Installing the seat support
Before attaching the seat slats into place, you need to fit a couple of 2×2 cleats. As you can see in the image, you need to equally space the cleats and lock them to the frame tightly. Use a spirit level to check if the supports are perfectly horizontal.
Installing the seat slats
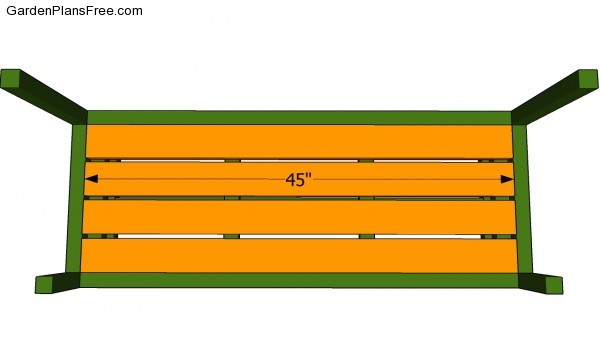
Continue the woodworking project by attaching the 2×4 slats into place. Leave about 1/4- 1/2″ between the slats and lock them to the cleats with 2 1/2″ galvanized screws. Drill pilot holes trough the slats and countersink the head of the screws, before inserting the wood screws. Sand the exposed edges of the slats with a router and a 3/4″ bit.
Installing the back support
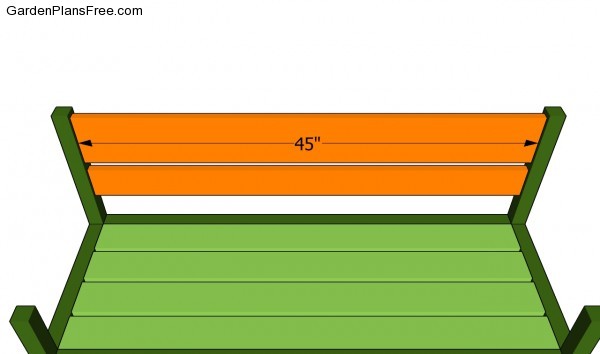
Attach the back rest of the wooden bench, as in the image. In order to get the job done as a professional, you need to use one 2×4 and one 2×6 slat, in order to add character to your woodworking project. Align the components at both ends and drill pocket holes, before inserting the screws into the legs.
Fitting the armrests
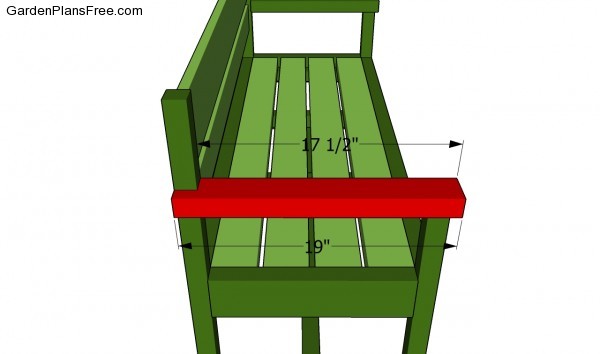
Build the armrest form 2×3 lumber and attach them into place, as in the image. Cut a notch in the armrests before fitting them into place. Drill pilot holes and countersink teh head of the screws. In addition, we recommend you to add waterproof glue to the components, in order to get rigid bonds.
Garden seat plans
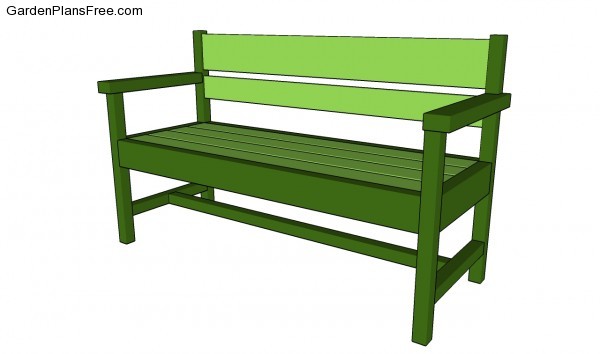
Last but not least, you should take care of the finishing touches. Therefore, we recommend you to check if the components are locked into place properly and if the frame is rigid. Make sure there are no protruding screws or sharp edges. Moreover, the components should be installed properly, making sure there are no gaps between the slats.
PRO TIP: Fill the holes with a good wood filler and smooth the surface with 120-grit sandpaper. Apply several coats of paint or stain over the components, in order to protect them from decay. See all furniture plans, as well.
This diy project was about garden seat plans. If you have enjoyed the free project, we recommend you to share it with your friends, by using the social media widgets.
