Detailed project about wood mail box plans. Building a wooden mail box is a straight forward project, if you plan everything from the very beginning and choose the best materials for your budget. Moreover, you need to adjust the size and the design of the mail box to fit your needs and to match the style of your backyard. If you want ta double mailbox, you shoudl adjust this project accordingly.
Building a wooden mail box is a straight forward outdoor project, but you need to pay attention when choosing the plans and the design for your project. Align all the components at both ends and drill pilot holes before inserting the screws, to prevent the wood from splitting. In addition, we recommend you to apply several coats of paint to the components, if you want to protect them from decay.
Building a wood mail box
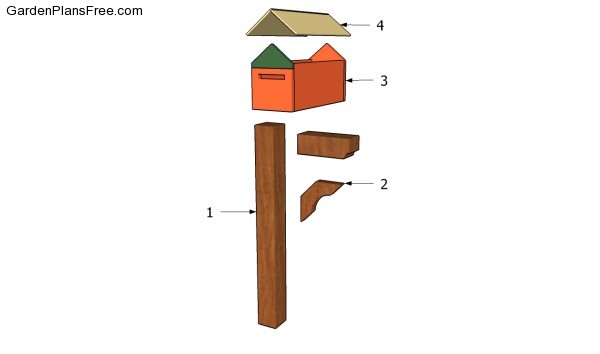
Building a mail box
Materials
- 1 – 1 piece of 4×4 – 64″, 1 piece – 10″ POST
- 2 – 1 piece of 2×4 lumber – 11″ BRACE
- 3 – 2 pieces of 1×8 lumber – 18 1/2″, 1 piece – 18 1/2″, 2 pieces – 10 1/2″ FRAME
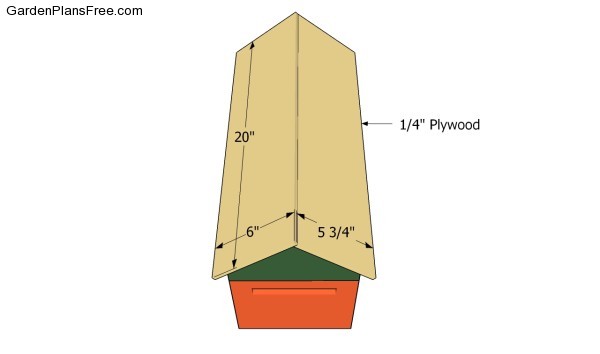
- 4 – 2 piece of 1/4″ plywood – 20″ x 6″ ROOF
Tools
- Hammer, Tape measure, Carpentry square
- Miter saw, Drill machinery, Screwdriver, Sander, Router
- Safety Gloves, Safety Glasses, Respiratory Mask
Time
- One day
Wood Mail Box Plans
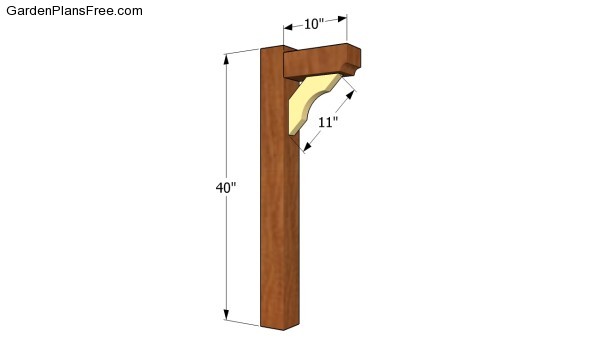
Building the post
The first step of the project is to build the support post for the mail box. As you can see in the image, you have to cut the wooden posts at the required size (make sure you add 24″) and assemble the support in a professional manner. Drill pilot holes trough the horizontal component before locking it to the post with 3 1/2″ screws and waterproof glue.
PRO TIP: In order to enhance the rigidity of the structure, we recommend you to install a 2×4 brace, as in the free plans. Cut the brace in a decorative manner, in order to enhance the look of the mail box.
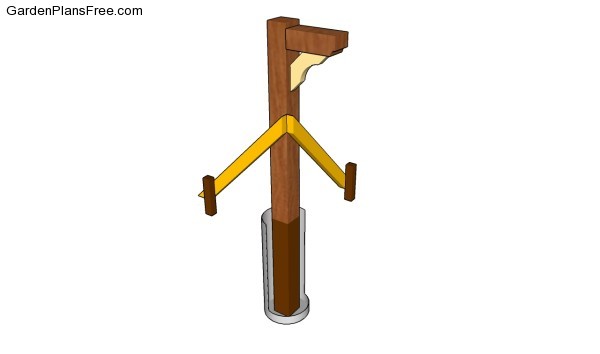
Installing the support post
Locking the posts into place is not difficult, especially if you follow these instructions. After choosing the location for the mail box, we recommend you to dig a 2′ hole in the ground and to set the post with temporary braces. Plumb the post and fill the holes with concrete.
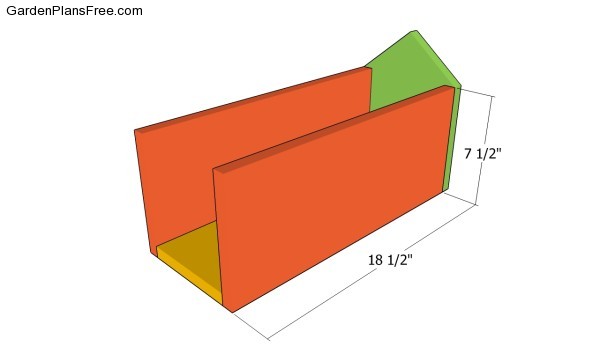
Fitting the sides
Building the actual mail box is not difficult, but there are many design options you can choose from. Build the frame of the wood mail box from 1×8 lumber, using the information shown in the free plans. Drill small pilot holes and insert the finishing nails after adding waterproof glue to the joints. Use a good saw to make the cuts, otherwise the components might not fit together easily.
Attaching the bottom
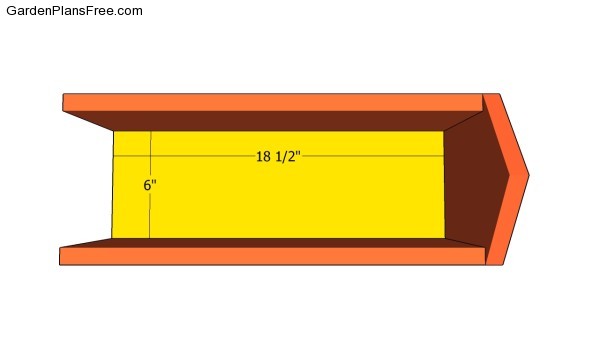
Build the bottom of the mail box from 1×8 lumber, adjusting the with of the board to 6″. Add waterproof glue to the joints and align the components properly, in order to get a rigid structure.
Building the gable ends
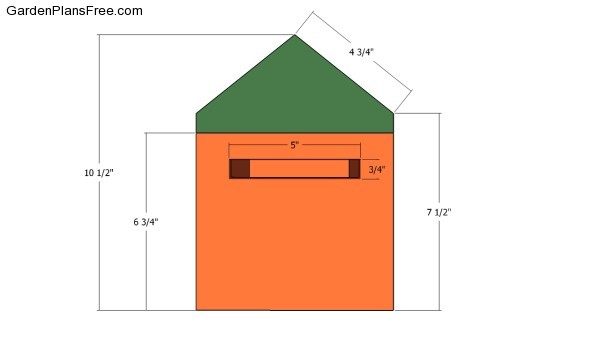
The front face of the mail box should be made out of 2 pieces, as you need to open the door and have access to the letters. Cut out the opening with a jigsaw, after drilling a starting holes. Fit the components into place and lock the door to the frame with hinges. In addition, install a small latch, if order to lock the door into place.
Attaching the roof
One of the last steps of the garden project is to attach the roof of the mail box. Cut two pieces of 1/4″ plywood and lock them to the frame with glue and finishing nails. Let the glue to dry before sanding the surface.
Wood mail box plans
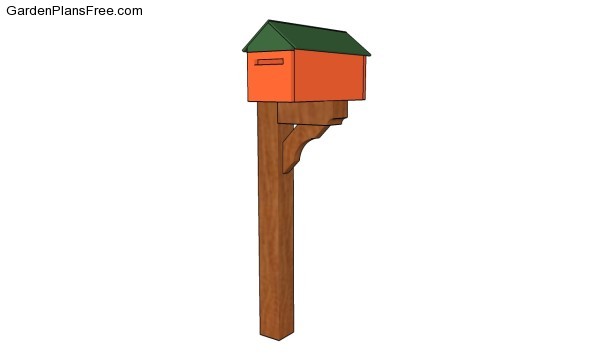
Lastly, pay attention to the final touches. Fill the holes and irregularities with putty and let it dry for several hours, before sanding the surface with 120-grit sandpaper along the wood grain and clean the residues with a dry cloth.
PRO TIP: Apply several coats of paint or stain over the components, in order to protect them from decay. Check out the rest of the garden projects, as there are many plans that could suit your needs.
This diy project was about wood mail box plans free. If you have enjoyed the free project, we recommend you to share it with your friends, by using the social media widgets.
