Step by step project about storage shed door plans. Building a door for your shed is easy, especially if you follow the instructions and use quality materials. Generally speaking, there are several designs and shapes you could choose form when building the shed door, so you should choose the one that fits you needs and the style of the shed. Fit the door inside the opening and lock it to the jambs with metal hinges.
In order to get the job done in a professional manner, we recommend you to use quality materials. Therefore, you should use the piece of 5/8″ grooved plywood that was cut in the previous step of the project. In addition, you need to build the trims and the jambs out of 1×4 lumber. Work with attention and with great care, making sure you apply the components at both ends.
TABLE OF CONTENTS:
PART 1: Lean to shed plans
PART 2: Shed door plans
Building a shed door
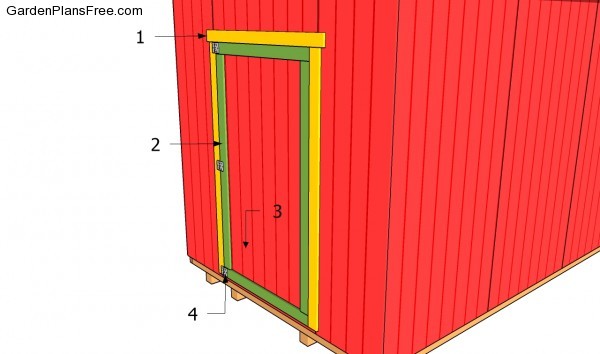
Building a shed door
Materials
- 1 – 1 piece of 1×4 lumber – 53 1/2″ long, 2 pieces – 78″ long JAMBS
- 2 – 2 pieces of 1×4 lumber – 43 1/2″ long, 1 piece – 71″ long TRIMS
- 3 – 1 piece of 5/8″ plywood – 43 1/2 x 78″ DOOR PANEL
- 4 – 3 pieces of metals hinges HINGES
Tools
- Hammer, Tape measure, Carpentry Square
- Miter saw, Drill machinery, Screwdriver, Sander
- Safety Gloves, Safety Glasses, Respiratory Mask
Time
- One Weekend
Storage Shed Door Plans
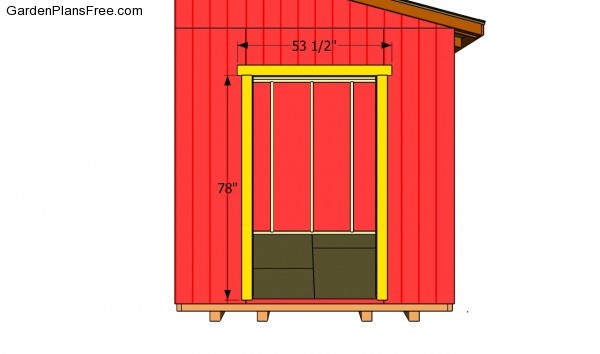
Installing the door jambs
The first step of the project is to attach 1×4 lumber to the exterior edges of the door opening. As you can easily see in the image, we recommend you to cut the pieces at the right size and lock them into place with 1 1/2″ finishing nails. Make sure you plumb the jambs with a spirit level and you enhance their bond to the siding by adding waterproof glue.
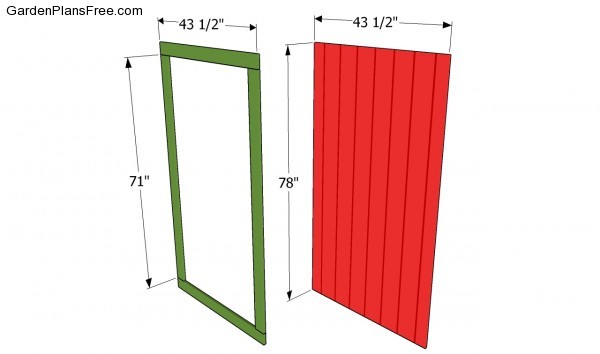
Building the door
The next step of the project is to build the actual door for the storage shed. As you can notice in the free plans, you need to use a piece of 3/4″ grooved plywood and 1×4 trims. Cut the trims at the right size and lock them to the door panel with 1 1/4″ finishing nails. In addition, use glue to enhance the rigidity of the door. Check if the corners are right-angled, by using a good carpentry square.
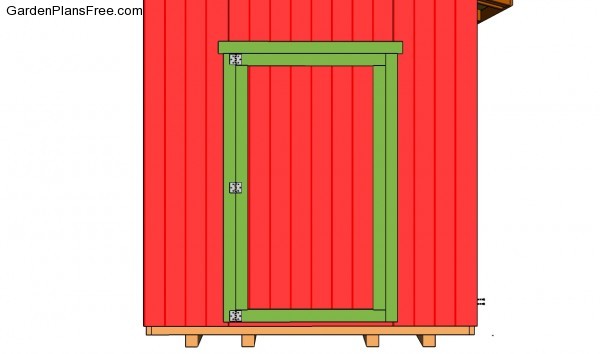
Attaching the shed door
Fit the door inside the opening and lock it to the jambs with metal hinges. Work with attention and with good judgement, as to make sure the door opens and closes easily. In addition ,we recommend you to attach a door latch.
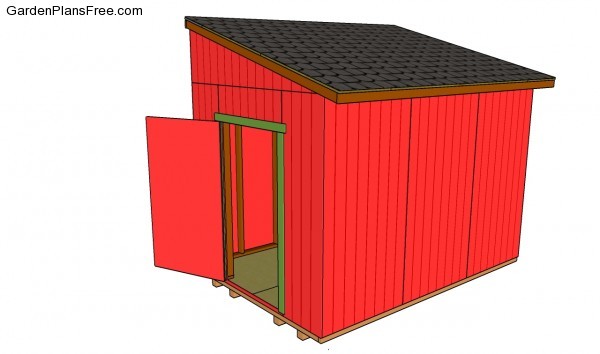
Shed door plans
After attaching the door inside the opening, we recommend you to take care of the finishing touches. Fill the holes and gaps with wood filler and smooth the surface with medium-grit sandpaper.
PRO TIP: Apply a few coats of paint to the wooden components, in order to enhance the look of the shed and to protect it from decay. Don’t forget to check out the rest of the project, in order to learn how to build a shed door.
This diy project was about storage shed door plans. If you have enjoyed the free project, we recommend you to share it with your friends, by using the social media widgets.
<<<< PREVIOUS | NEXT >>>>

