If you want to learn more about potato bin plans, you have to take a close look over the instructions described in the article. There are so many designs and plans to choose from, that we really recommend you to browse through the related plans before buying the materials and starting the assembly. This project will help you kids store their toys easily, if you decide to use it as storage bins for the bedroom.
If you want to get the job done in a professional manner, we recommend you to plan everything with attention, as to prevent costly mistakes and to build a professional garden swing. Invest in high quality materials, such as cedar, pine or redwood, as the bench will be exposed to all kinds of weather. Apply a few coats of paint over the components, to enhance their appearance and to protect them from bad weather.
Potato Bin Plans
Building potato bin
Materials
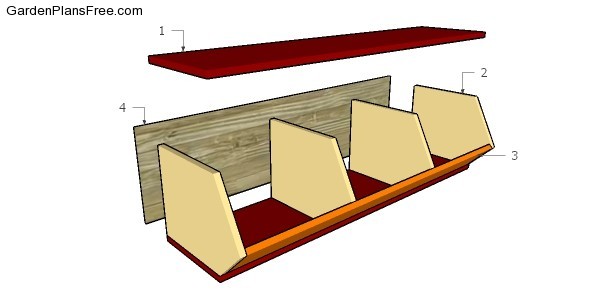
- 1 – 2 pieces of 1×12 lumber – 48″ TOP & BOTTOM
- 2 – 2 pieces of 1×12 lumber – 15 1/4″, 2 pieces – 14 3/4″ PARTITIONS
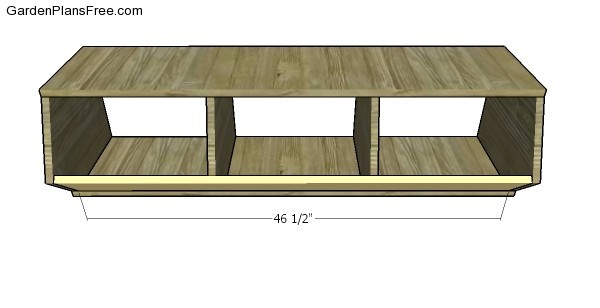
- 3 – 1 piece of 1×6 lumber – 46 1/2″ FRONT
- 4 – 1 piece of 1/4″ plywood – 12 3/4″x48″ BACK
- 2 pieces of 1×12 lumber – 8 ft
- 1 piece of 1×6 lumber – 4 ft
- 1/4″ plywood – 2’x4′
- 200 pieces of 1 1/4″ screws
- 100 pieces of 1 1/2″ nails
- wood stain
Tools
- Hammer, Tape measure, Carpentry square
- Miter saw, Drill machinery, Screwdriver, Sander, Router
- Safety Gloves, Safety Glasses, Respiratory Mask
Time
- One day
How to build a potato bin
Building the sides
The first step of the project is to build the sides for the potato bins. Mark the cut lines on the 1×12 slats and get the job done with a circular saw. Smooth the cut edges with sandpaper.
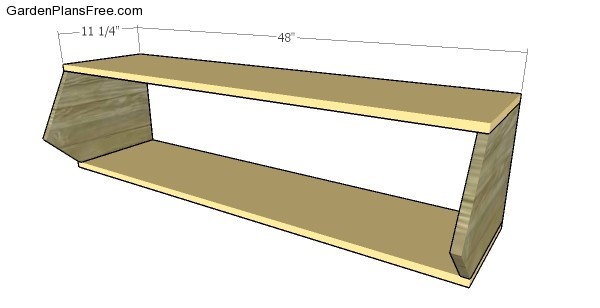
Assembling the frame of the bin
Attach the top and bottom components to the sides, as shown in the plans. Drill pilot holes through the top and bottom slats and insert 1 1/4″ screws into the sides. Make sure the corners are square and align the edges with attention.

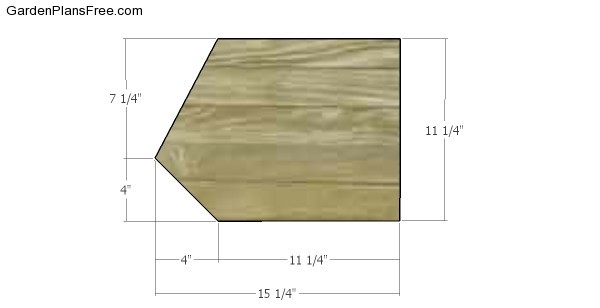
Building the partitions
Next, you need to build the partitions from 1×12 slats. Cut the components using the information from the diagram.
Fit the partitions to the bins, making sure you place them equally-spaced. Drill pilot holes through the top and bottom components and insert 1 1/4″ screws to lock the partitions into place.
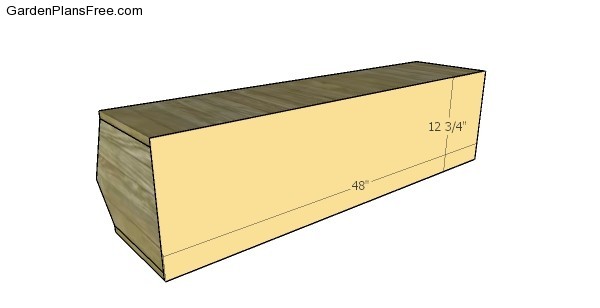
Attaching the back to the bin
Cut a piece of 1/4″ piece of plywood and secure it to the back of the potato bin using 1 1/2″ brad nails. Align the edges with attention, before inserting the nails.
Fitting the front slat
Fit a 1×6 slat to the front of the bins. Drill pilot holes through the side components and insert 1 1/4″ screws into the front slat. In addition, drill pilot holes through the slat and insert 1 1/4″ screws into the partitions.
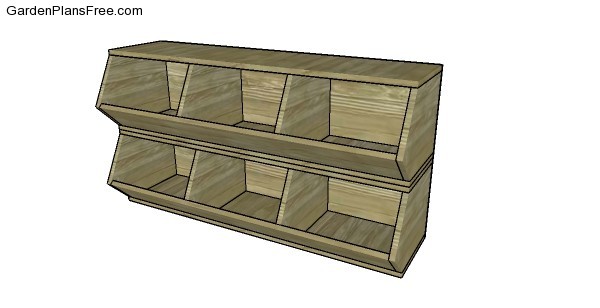
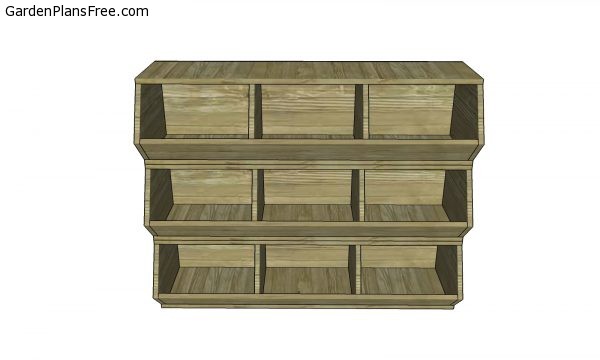
Potato bin plans
Last but not least, you should take care of the finishing touches. Therefore, we recommend you to check if the components are locked into place properly and if the structure is rigid enough. Make sure there are no protruding screws or sharp edges. You can use several bins to make most of your space.
Potato bin plans – front view
PRO TIP: Fill the holes with a good wood filler and smooth the surface with medium-grit sandpaper. Apply several coats of paint or stain over the components, in order to protect them from decay. Check out the rest of the project to learn more about building garden projects.

This diy project was about potato bin plans. If you have enjoyed the free project, we recommend you to LIKE and SHARE it with your friends, by using the social media widgets.