Starting a vegetable garden is one of the most rewarding DIY projects you can do, even if you’re limited on space and time. You don’t need a big backyard or endless free hours to grow fresh veggies for your family – with a bit of creativity and planning, a small garden can yield a surprisingly bountiful harvest. In this guide, we’ll walk you through everything you need to know to start a small vegetable garden in the USA, focusing on space-saving layouts, easy plants for beginners, organic practices, and practical tips. We’ve structured the information in clear sections, so it’s easy to follow and put into action. Let’s dig in!
Garden Layout Ideas for Small Spaces
When space is at a premium, choosing the right garden layout is key. The goal is to maximize every square foot so your plants have enough room to thrive without wasting space. Whether you have a tiny yard, a patio, or just a balcony, here are some layout ideas to consider:
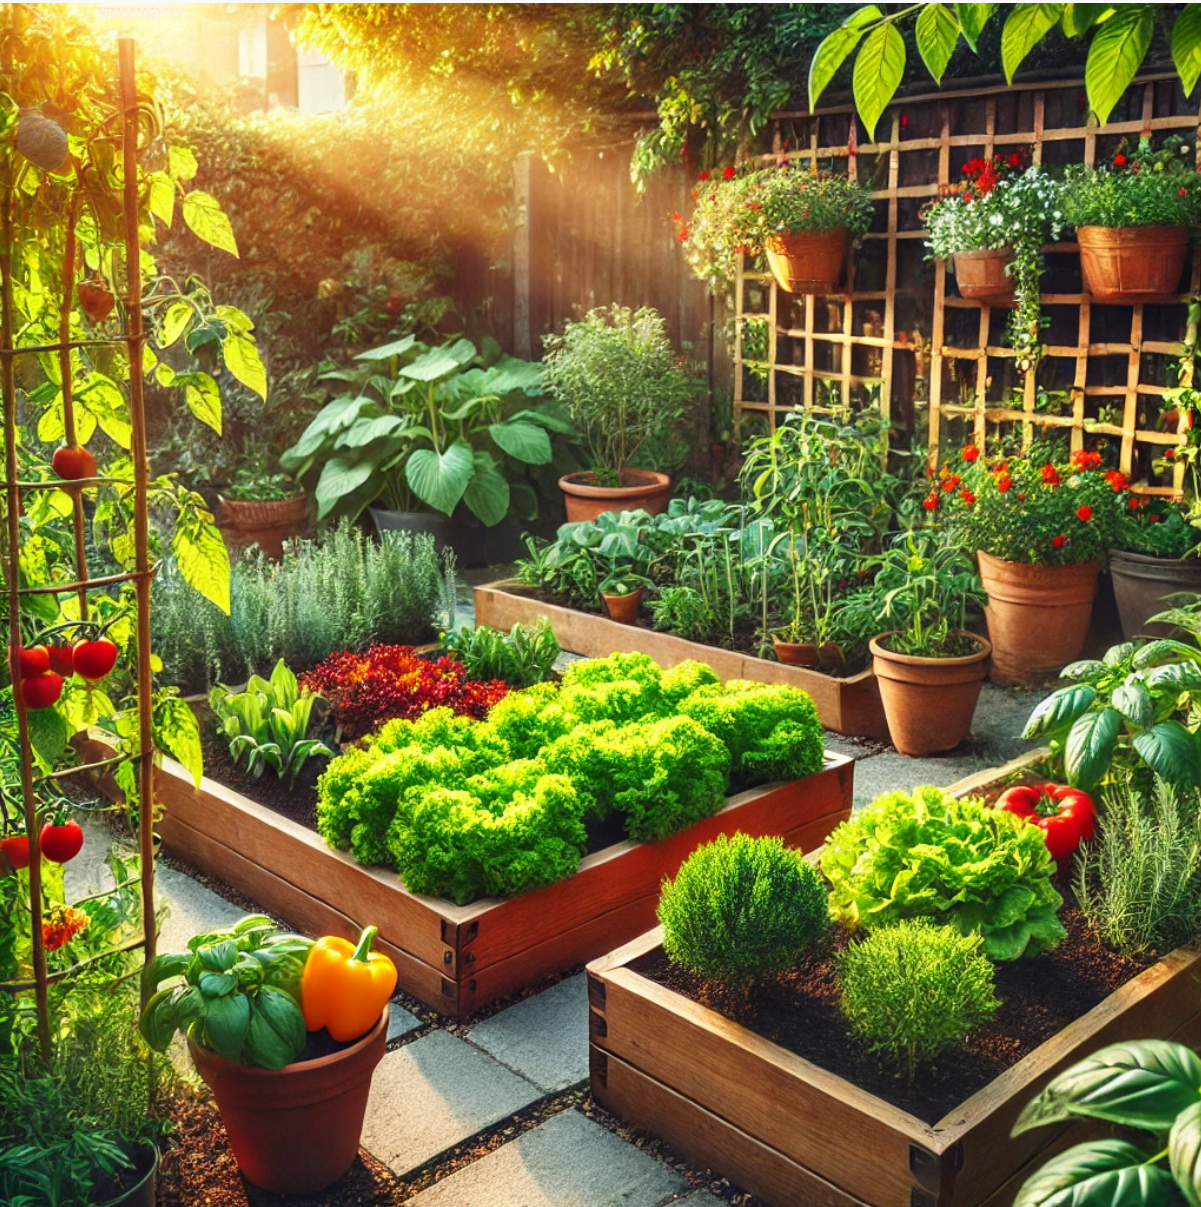
- Raised Bed Gardens – Great for small yards or even placed on top of concrete. Raised beds are essentially large planting boxes filled with soil, which you can shape to fit your space. They allow intensive planting (many plants in a small area) and can be built in creative dimensions (e.g. a narrow 2 ft x 8 ft bed along a fence). Raised beds make use of vertical height too, since they’re above ground level.
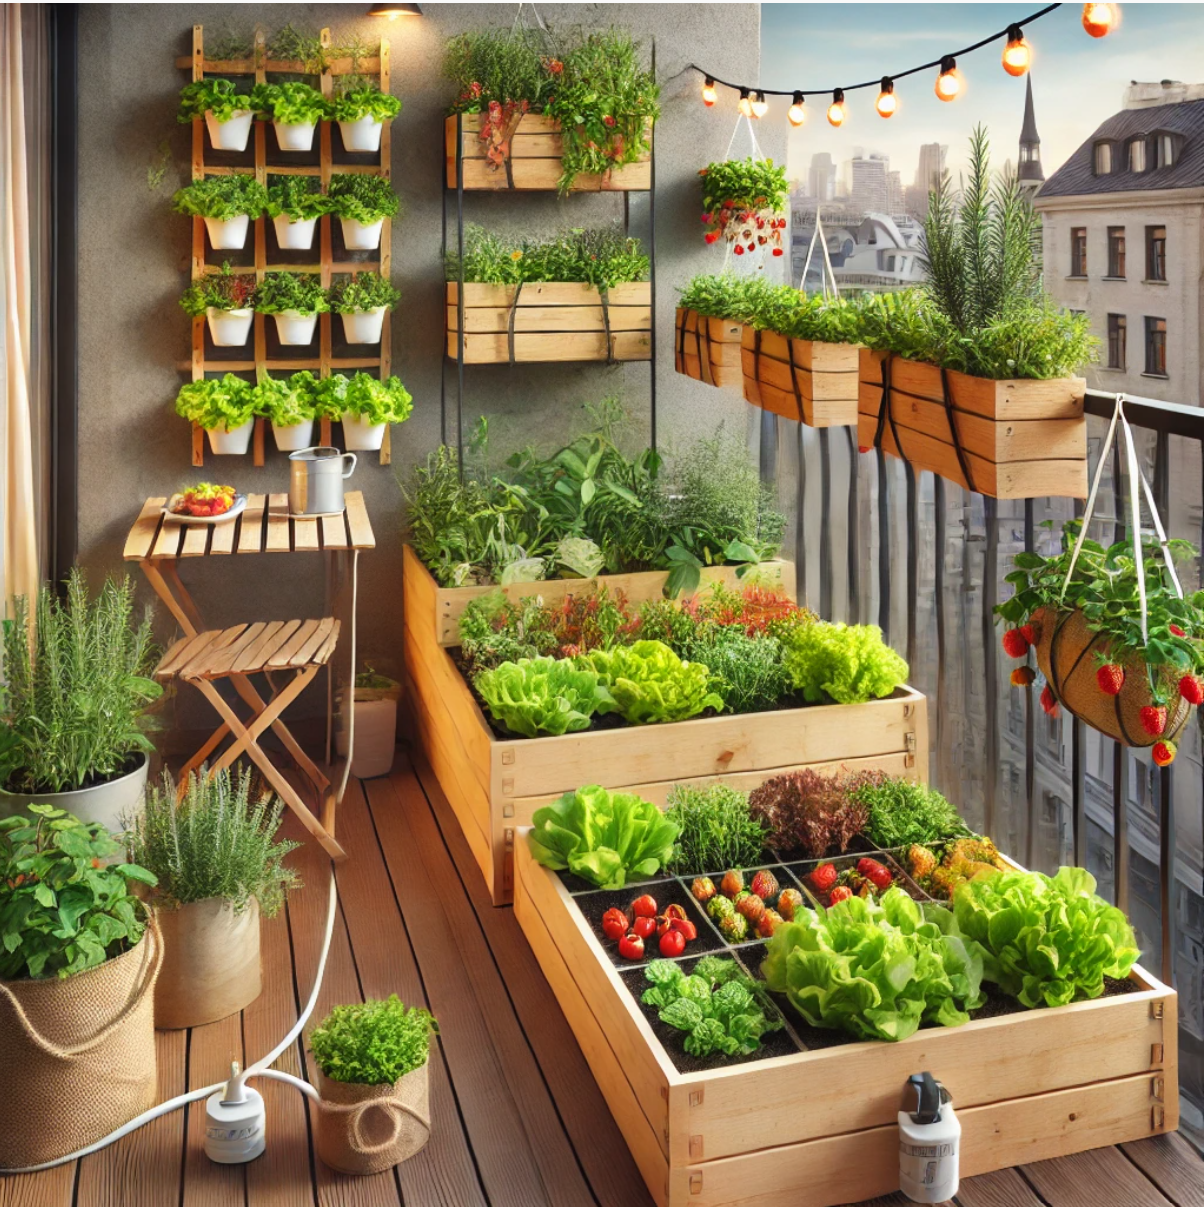
- Container Clusters – If you don’t have ground space, use pots, planters, or even buckets grouped together on a patio or balcony. Arrange containers of different sizes in a cluster so they create a little garden patch. You can put tall plants in the back and shorter ones in front to ensure each gets sun. This layout is very flexible – you can always rearrange pots or add more over time.
- Vertical Gardening – Go up instead of out! Vertical gardening uses trellises, shelves, hanging planters, or wall-mounted pockets to grow plants vertically. For example, train cucumbers or pole beans up a trellis, hang baskets of cherry tomatoes, or use a pallet against a wall to hold multiple small pots. Vertical setups effectively double or triple your growing area without taking more floor space.
- Square-Foot or Block Planting – Instead of traditional long rows, try a grid layout where the garden bed is divided into square-foot sections (if using a raised bed or in-ground space). Each square foot gets a certain number of plants (e.g. 4 lettuce, 9 bush beans, or 16 radishes per square) based on their spacing needs. This eliminates unused gaps and packs plants closely, which also helps shade soil and reduce weeds. Block-style planting has been shown to make very efficient use of small areas.
- Maximizing Patios and Decks – Think creatively about using railings, steps, and corners. Railings can hold window boxes or DIY planters, steps can host a pot on each level, and a sunny corner might fit a tiered plant stand. Ensure your layout leaves some walking space and that heavier planters are on stable surfaces.
Even a collection of pots on a porch can become a productive mini-garden for veggies and herbs. Many first-time gardeners are surprised by how much food they can grow in a few containers. The key with any small-space layout is to use vertical and horizontal space smartly – raised beds use vertical depth of soil, vertical gardens use height, and tight spacing uses every inch efficiently. Don’t be afraid to mix methods: for example, you could have a small raised bed plus some pots and a trellis against the wall. Having space restrictions just means you might have to get a little creative to take advantage of the spaces you do have to grow!. With a good layout, even a very small yard or balcony can turn into your personal veggie farm.
Raised Beds in Tight Spaces
Raised beds deserve a closer look because they’re so useful for small gardens. A raised bed is simply an enclosed frame (wood, metal, etc.) filled with soil, essentially creating a mini garden above ground. For limited spaces, you can build a bed to whatever dimensions fit – for example, a 4×4 foot square, or a long skinny bed 2 feet wide running along a fence line. Advantages: Raised beds let you control your soil quality fully (since you fill them with a soil/compost mix), and they prevent issues like tree roots or poor native soil. They also tend to warm up faster in spring, so you can plant earlier, and they have excellent drainage. Gardeners love that raised beds are easier to weed and maintain (less bending over) and that you can plant more densely because you don’t need space for walking rows. If you only have a small area, a raised bed concentrates your gardening in that spot efficiently. For example, one 4×6 ft raised bed can yield a lot of produce with proper intensive planting.
Tips for raised bed layouts: Keep the width to no more than 3–4 feet so you can reach the center without stepping in (2 feet wide if the bed is up against a wall). You can make the bed any length or shape that fits – some people do L-shaped or triangle beds in corners. Leave at least 2 feet of path space between beds or between a bed and a wall so you can comfortably access plants. If your raised bed is on a patio or asphalt (no ground underneath), ensure it’s deep enough (12+ inches) or has good drainage holes. Also consider adding trellis structures within the bed for vining plants (like an arch or stakes at the back of the bed) to maximize vertical space. One creative small-yard layout is to use U-shaped or L-shaped raised beds that border the perimeter of a yard, creating an inner sitting area and making the garden a focal feature.
Container and Vertical Garden Layouts
For those with zero ground soil (like apartment dwellers with only a balcony), container gardening is your go-to layout. Grouping containers together can mimic a “garden bed.” For example, you might cluster a half-barrel planter with a couple of large pots and a few smaller pots to create variation in height and fill a corner of your balcony. Grouping is beneficial because it creates a more humid microclimate around plants and makes watering easier (you can water them all at once). Use tiered plant stands or shelves to elevate some pots and fit more in a small footprint. Also take advantage of hanging planters or railing planters – these effectively add a second story to your container garden. A hanging shoe organizer can even be repurposed as a vertical planter on a door or wall for herbs and greens!
Vertical gardens can be both functional and visually appealing. Consider leaning a wooden pallet against a wall – you can attach small pots or fill the pallet slots with soil to grow lettuces and herbs vertically. Install a sturdy trellis or even a section of wire fencing at the back of a container or bed to let cucumbers, beans, or peas climb upwards instead of sprawling out. An A-frame trellis over a raised bed is another clever small-space layout: you can grow climbers on the A-frame, and underneath (shaded area) you could place shade-tolerant crops or even additional potted plants. Essentially, think of vertical elements as additional “plots” in your garden – the sky is the limit (literally).
In summary, layout is about arranging your gardening elements (beds, pots, trellises) to best use the space you have. Draw a simple sketch of your area and plot where a raised bed might go, where you could put a shelf or hanging planter, etc. You’ll likely end up using a mix of techniques. For instance, a beginner with a small townhouse yard might have two raised beds against the back fence, a vertical wall planter for herbs, and a couple of big pots by the back door – that covers ground, vertical, and container methods all in one compact garden. Feel free to start small with one type of layout and expand later. The great thing about small gardens is they are modular – you can always tuck in another pot or a window box if you find you have an extra corner. Now that you have an idea how to lay out your mini-garden, let’s talk about what to grow in it.
Plant Selection: Beginner-Friendly Veggies for Small Spaces
One of the exciting parts of starting a garden is choosing which vegetables to grow. As a beginner with limited space, it’s important to pick the right plants – ones that are easy to grow, produce well in small areas, and are suited to your climate (USDA hardiness zone) and season. Here we’ll cover how to select veggies that set you up for success.
Best Vegetables for Small Gardens
Not all veggies are created equal when it comes to small-space growing. You’ll want to favor compact or high-yield plants and probably skip the giant space hogs (save the pumpkin patch for when you have more room!). Here are some beginner-friendly vegetables ideal for small gardens, along with why they’re great:
- Lettuce & Salad Greens – Leaf lettuces, spinach, arugula, and kale grow quickly and don’t take much space. You can harvest them a few leaves at a time (cut-and-come-again style) for an ongoing harvest. They can be tucked into small gaps and even grown in shallow containers.
- Radishes & Green Onions – Radishes are one of the fastest veggies (ready in about 4 weeks) and can grow in small patches or even between slower plants. Green onions (scallions) have a slim profile and can be grown quite densely. These are great for kids to plant because of the quick payoff.
- Bush Beans (Green Beans) – Go for bush varieties (rather than pole/vining beans) if you don’t want to trellis, as they stay compact (about 1–2 ft tall) and produce a lot of beans in a small area. Alternatively, pole beans are fine too because they use vertical space – in fact, pole beans can be more productive in a small footprint since they climb. Either way, beans are generally easy and rewarding for beginners.
- Peppers (Bell or Chili) – Pepper plants have a relatively small footprint (a pepper plant might need a 12–14 inch pot or one square foot in a bed) and they yield multiple fruits per plant over the season. They love warm weather and are quite container-friendly. Varieties labeled “compact” or “patio” peppers do especially well in pots.
- Tomatoes (Cherry or Dwarf Varieties) – Tomatoes are super popular, but in a small garden opt for cherry tomatoes or determinate/bush varieties. Cherry tomatoes produce tons of bite-sized fruits and many varieties are manageable in containers (some are even bred as patio/container types). Determinate tomatoes stay bushy and smaller (as opposed to indeterminate vines that keep growing huge). Give each tomato a pot or space about the size of a 5-gallon bucket for best results. With a simple stake or cage for support, tomatoes can thrive in a corner of your small garden (and nothing beats home-grown tomato flavor!).
- Bush Zucchini or Summer Squash – Standard zucchini can get unruly, but there are bush varieties and even ones labeled for container growing that stay more compact. You usually only need one plant to get plenty of squash. They do need a decent-size pot/space and rich soil, but if you love squash, try a compact cultivar. Otherwise, you might skip squash in a very tight garden since the leaves are large. (Pro tip: patty pan squash or certain heirloom summer squashes often have semi-bush plants that are more contained than the typical sprawling zucchini.)
- Cucumbers (Compact or Trellised) – Cucumbers will vine out a lot, but you can train them up a trellis to save space. Additionally, look for varieties called “bush cucumbers” or “patio snacker” etc., which are bred to be shorter vines. They can even grow in a large pot with a small trellis. Fresh cucumbers are worth the effort if you can give them vertical space.
- Root Vegetables (Carrots, Beets, Turnips) – These can work in small gardens provided you have deep, loose soil (raised beds or deep containers are great for roots). Carrots need depth (choose shorter varieties for containers), and beets/turnips don’t take much surface area (you can plant them a few inches apart). They are fairly low-maintenance. One trick: plant radishes and carrots mixed together; radishes will mature and be pulled out, giving the slower-growing carrots more room later – a simple form of companion planting.
- Herbs – Don’t forget herbs! Basil, parsley, cilantro, chives, mint, oregano – many herbs grow well in small containers or tucked at the edges of beds. They often repel pests or attract beneficial insects, and they’ll elevate your cooking. Mint can overtake a garden, so it’s best in its own pot (it’s very easy to grow). Basil is a classic companion to tomatoes and thrives in similar conditions (warm and sunny). Herbs are generally very beginner-friendly.
- Others: Peas (good for early spring; dwarf varieties can grow in a pot or hanging basket, or grow climbing peas up a string), Swiss chard (pretty and productive, cut-and-come-again leaves), Eggplant (some compact types exist; fairy tale eggplants, for example, are small plants), and Leafy Cabbages or Asian Greens (like bok choy) for cool seasons.
On the flip side, here are a few things you might avoid in a very limited garden: giant pumpkins or winter squash (needs too much space), melons (same issue – vining and large), sweet corn (needs a block of multiple plants for pollination and takes lots of room for relatively few ears), and full-size indeterminate tomato monsters (unless you’ve got a big container and strong trellis). Also, plants like full-size cabbages or broccoli take a long time to mature and occupy space for months – you can grow them, but as a beginner you might get more bang for your buck with quicker, smaller crops first. (Broccoli and cauliflower are also noted as pest-prone and tricky for newbies, so you can try those once you gain experience.)
Seasonal Planting and Zone Considerations
The USA spans many climate zones, so what you plant and when you plant it will depend on your local conditions. First, identify your USDA Hardiness Zone (based on your average winter lows) – this mainly matters for perennials, but it gives a sense of climate. More practical for veggies is knowing your frost dates: the last spring frost date and first fall frost date for your area. These dates determine your growing season length.
- Cool-Season vs Warm-Season Crops: Cool-season veggies (like lettuce, peas, brassicas, root veggies) can tolerate or prefer cooler weather and can be planted in spring and/or late summer for fall harvest. Warm-season crops (tomatoes, peppers, squash, beans, etc.) need warm soil and air temperatures and are planted after the last frost for summer harvest. In a small garden, you can do succession planting – e.g. plant spinach and peas early in spring; once those finish by early summer, replace them with a summer crop like bush beans or basil in the same spot. Then as fall approaches, you might plant a quick batch of lettuce or radishes again. This way, one small space yields multiple harvests in a year.
- Hardiness Zones: While most common vegetables are grown as annuals (planted each year from seed or seedlings), the hardiness zone can affect which perennial herbs or fruits might survive winters, and it affects the timing. For instance, in Zone 5 (cold-winter climate), you’ll start warm-season crops later (maybe May) and end earlier (by September/October) than someone in Zone 9 (where you might plant as early as March and grow through November). If you’re in a hot southern zone, you might actually plant cool-season greens in fall/winter because summer is too hot for them. Choose varieties suited to your region: seed catalogs and plant tags often list if a variety is better for northern short seasons or if it’s heat-tolerant for the South, etc. For example, some tomatoes are bred for short seasons (they produce faster, good for Zones 3-5), whereas in Florida or Texas you’d choose varieties that can handle heat and humidity.
- Companion Planting for Yield: In a small garden, companion planting is less about complex planning and more about smart pairing. A classic example – plant basil under and around your tomato; they get along great, basil can repel some pests, and it doesn’t crowd the tomato (plus delicious together). Another trick: interplant quick growers with slow growers. As mentioned, radishes with carrots, or lettuce between broccoli, etc., so you get an early crop before the next needs the space. Marigolds are commonly interplanted in veggie gardens to deter nematodes and pests; they also add color. In tight spaces, polyculture (mixing different plants) can actually help – pests are less likely to find and decimate one type, and certain plants can enhance others. For instance, lettuce can grow in partial shade of taller plants, and its presence might keep soil cooler for the roots of those tall plants. If you’re curious, try one or two known companions (like tomato + basil + marigold in the same container/bed) and see how it goes.
Below is a quick reference table of some easy crops divided by cool vs warm season, suitable for small gardens:
(The above is not exhaustive, but it gives you an idea of what fits in cool vs warm slots. Always consider your local climate – e.g., in Zone 8-10, some “cool” crops might grow in winter; in Zone 4, “warm” crops may need indoor head-starting.)
A quick note on buying seeds vs seedlings: As a beginner, it’s often easier to start with some nursery seedlings (transplants) for things like tomatoes, peppers, or broccoli, while direct-sowing seeds for quick growers like beans, radish, lettuce. The West Virginia University Extension notes that crops like cucumber, beans, lettuce, peas, and squash are often direct-seeded, whereas tomatoes, peppers, eggplant, cabbage are usually started indoors or purchased as young plants to transplant. This can save you time and get you to harvest faster. So when planning your plant list, decide which you’ll seed and which you might grab as starts from a garden center.
Finally, hardiness and season extension: if you’re eager to grow more, you might use simple season extenders like row covers or cold frames to start earlier or continue later (more on that in the Cold Frames section). But even without that, by choosing the right plant varieties for each part of the season, a small garden can be producing from April to October in many areas. Stick to the tried-and-true veggies above to build confidence. As you gain experience, you can always experiment with that giant pumpkin or a new exotic veggie next time!
Types of Garden Beds: Raised Beds, Containers, vs. In-Ground – Pros & Cons
When setting up your garden, you have a few options for where to plant: in raised bed planters, in containers, or directly in the ground. You might even use a combination. Each method has its pros and cons, especially for small-space gardening. Let’s compare these three types of garden beds and go over best practices for each:
As you can see, each method has trade-offs. In practice, many small-space gardeners use a mix: perhaps a raised bed or two for the main crops, plus some containers for mobility, plus maybe a little in-ground strip for overflow or perennials. There is no one “right” answer – it depends on your site and needs.
Here are some best practices and tips for each type:
- Raised Beds: Use durable, safe materials. Cedar or redwood lumber is naturally rot-resistant (and looks beautiful), though more expensive; untreated pine is affordable but will decay sooner. Avoid old railroad ties or any wood treated with creosote or unknown chemicals, as these can leach into soil. Modern pressure-treated lumber no longer uses arsenic and is considered okay by many, but if you want to stay fully organic, stick to untreated or naturally rot-resistant wood. You can also use materials like concrete blocks, bricks, or metal troughs as raised beds. Bed depth: 6 inches is the minimum for shallow-rooted crops, but 10-12 inches is better for most veggies. If placed on soil, leave the bottom open (no landscape fabric under it, unless you have serious weed issues) so roots can penetrate deeper and worms can enter. If on a hard surface, ensure ample depth and maybe a liner to hold soil. Soil filling: Fill with a mix of good quality topsoil and compost – a common recipe is 2/3 soil to 1/3 compost. This gives a fertile, fluffy growing medium. Plan for how you’ll water (hand-water, soaker hose, drip line) and maybe mulch the top to conserve moisture. Over the years, add compost or organic fertilizer to replenish nutrients because intensive planting will use them up. Rotate crop families if possible (even in a small bed, don’t put tomatoes in the exact same spot each year) to prevent disease build-up.
- Containers: Size and material matter. Use the largest containers you can manage for big plants – for example, tomatoes and peppers do best in at least 5-gallon sized pots (bigger is better). Smaller pots will dry out extremely fast and stunt some plants. Make sure every container has drainage holes so excess water can escape (drill holes if using buckets or unconventional items). Clay pots look nice but dry out quicker than plastic. Fabric grow bags are a fantastic option – they are lightweight, come in many sizes (from 1 gallon up to 20+ gallons), and provide good root aeration; just note they’ll also dry out quickly through the fabric. Soil: Never use plain garden soil in a container – it compacts and drains poorly in pots. Use a potting mix which often contains peat or coco coir, vermiculite/perlite, compost, etc. for a light texture. This ensures roots get air and water moves freely. Containers are essentially isolated, so you’ll need to water and fertilize regularly. An advantage is you can give tailor-made care: e.g., you can move a pot into shade during a heatwave or bring a herb pot indoors if a frost threatens. Arrangement: Group thirsty plants together (maybe even in a tray that catches runoff) and drought-tolerant plants separately so you can water appropriately. Consider self-watering containers (which have a water reservoir) if you travel or forget to water – these can be a game-changer for keeping container plants happy.
- In-Ground Beds: Choose a spot with as much sun as possible (most veggies need ~6+ hours of direct sun). Outline the bed shape (could be a simple rectangle or a curved border in your landscape). Typical width is 3-4 feet so you can reach in without stepping; length as space permits. Soil prep: This is crucial. If there’s grass, remove the sod layer or smother it (lay cardboard/newspaper over grass and pile soil/compost on top to create a bed – a no-dig method). Loosen the soil to a shovel’s depth (about 8-12 inches) – you can double-dig for extra loose soil if ambitious. Remove rocks and roots. Work in compost generously – this improves any soil type. If your native soil is clay-heavy, compost + perhaps coarse sand (if drainage is an issue) will help; if it’s sandy, compost will help retain moisture. You might consider getting a soil test (through local extension service) to know if you need lime (for pH) or specific nutrients. Pathways: Plan where you will step so you do not compact your planting area. It can help to mark rows or use boards to distribute weight if you must step in. Mulch exposed soil after planting to reduce weed germination and hold moisture (straw, leaves, or wood chips between rows). In-ground gardens benefit from techniques like crop rotation (even on a small scale, try not to grow tomatoes/potatoes in same spot every year to avoid soil diseases) and cover cropping (planting a quick cover crop like clover or oats in fall to improve soil over winter, then tilling it in). But for a beginner, focus on getting the soil rich in organic matter and the rest will come. One more tip: if your ground soil is truly terrible or contaminated (e.g., high lead in urban soil), opting for containers or raised beds to bring in good soil is safer and often easier than trying to massively amend bad soil in the ground.
A special hybrid option is the “no-dig” or lasagna bed on top of soil: you lay down cardboard over grass, then pile 6-8 inches of compost/soil mix on top and plant into that (essentially creating a raised bed without solid sides). This can work for starting an in-ground bed with less labor and is worth mentioning as a small-space trick if you want an instant garden bed on top of lawn without wood construction.
In summary, raised beds are excellent for small yards, giving you control and efficiency; containers are perfect for patios or mixing into any space (plus great for beginners who want to start small); in-ground can yield a lot if you have a bit of yard and invest in soil prep. None of these is “wrong” – you can successfully garden with any of them. Think about your constraints: e.g., renting an apartment (go containers), small yard with terrible soil (raised beds), decent yard and minimal budget (in-ground). Many urban gardeners do raised beds for veggies and use in-ground areas for ornamental landscaping – you can do the same on a small scale. And remember, gardening is flexible: you might start with a couple of containers this year and decide to build a raised bed next year as you gain confidence.
Organic Gardening Principles for a Healthy Garden
Growing your own vegetables organically is rewarding and aligns well with the DIY spirit – it means working with nature to cultivate healthy plants and soil, rather than relying on synthetic chemicals. Organic gardening might sound complicated, but the fundamentals boil down to this: build good soil, feed and protect your plants naturally, and encourage biodiversity. Let’s break down some key organic principles and practices that every beginner should know:
Building Healthy Soil (Organic Soil Preparation)
Soil is the foundation of your garden – literally. In organic gardening, a common saying is “feed the soil, and the soil feeds the plants.” This means instead of just dumping chemical fertilizers on plants, we focus on enriching the soil with organic matter so it becomes a living, nutrient-rich environment. Here’s how to create great soil:
- Add Compost: Compost is decomposed organic material (like kitchen scraps, leaves, manure, etc.) and is a miracle ingredient for soil. Mix compost into your garden beds when starting out – aim for at least 2–3 inches on top of your soil, worked in. Compost improves soil structure (making clay soil looser and sandy soil more water-retentive) and adds a broad spectrum of nutrients in a slow-release form. It’s essentially plant food and soil conditioner in one. Even if you do nothing else “organic,” adding compost yearly will make a huge difference. You can buy bagged compost or make your own (more on composting in a bit).
- Avoid Harsh Chemicals: Don’t use synthetic fertilizers that can harm soil life. Instead, use organic fertilizers or amendments if needed (like composted manure, fish emulsion, bone meal, etc.). Organic matter in soil feeds beneficial microbes and fungi. A University of Illinois Extension horticulture educator noted that organic fertilizers (like fish emulsion, corn gluten meal, etc.) often are byproducts of other industries and provide proteins that feed soil microorganisms, building a robust soil food web. This soil life then helps make nutrients available to plants. By contrast, high doses of synthetic fertilizer can upset soil microbe balance and even “burn” plants if overapplied.
- Adjust Soil pH Naturally: Vegetables generally prefer a slightly acidic to neutral pH (~6 to 7). If a soil test shows your pH is off, choose organic amendments to fix it – e.g., lime (ground limestone) to raise pH if too acidic, or sulfur to lower pH if too alkaline. These are natural mineral products. Many soils won’t need big pH adjustments, but local extension services can test and advise. In lieu of a test, adding compost tends to buffer minor pH issues anyway.
- No-Till/Low-Till: Consider minimizing digging in the long run. While you might till or dig initially to break ground, constant tilling can disrupt soil structure and the fungal networks. Many organic gardeners practice “no-till” by continually adding compost/mulch on top and letting worms do the mixing. This also helps carbon stay sequestered in soil. It’s not a must-do, but be aware that soil is an ecosystem – sometimes less disturbance leads to healthier soil life.
- Cover the Soil: In organic gardening, you never want bare soil exposed for long (except maybe in early spring when you’re warming it up for planting). Use mulch in growing season (straw, untreated grass clippings, shredded leaves, etc. around your plants) to suppress weeds, conserve moisture, and add organic matter as it breaks down. In winter or off-season, consider planting a cover crop (like clover, rye, or buckwheat) or at least mulch heavily. Cover crops (green manure) are grown not to eat, but to later be chopped and left to decompose, adding nutrients and organic matter. For a small garden, even sowing a patch of oats or peas after you clear summer crops can protect and enrich soil over winter. It’s an extra step, but it’s a very organic-minded practice.
- Use Composted Manure (if available): Aged or composted animal manure is a time-honored way to boost soil fertility organically. If you have access to composted cow, horse, or chicken manure, you can work some into soil in fall or well before planting. Never use fresh manure on growing beds, as it’s too strong (high in ammonia) and can contain pathogens – fresh manure should be applied and then wait 90–120 days before harvesting any crops from that area, per organic guidelines. Composting the manure first eliminates those concerns and mellows it. Many garden centers sell composted manure in bags. It’s rich in nitrogen and other nutrients. Just use it carefully – a little goes a long way. Important: if using manure (or even compost), know the source – occasionally herbicide residues from hay can survive in manure and harm vegetables. Buying from reputable sources or composting it yourself for a long time helps avoid this.
Overall, think of your soil as alive. An organically managed soil will be full of earthworms, microbes, and organic matter. This living soil is better at holding nutrients and water, and resisting pests and diseases. It might take a bit of time to build up, but each season it will improve if you keep adding organic matter. The payoff is healthier plants and less need for interventions.
Composting: Turning Waste into Garden Gold
One of the best ways to garden organically and sustainably is to start a compost pile or bin. Composting lets you recycle kitchen scraps, yard waste, and organic material into that black gold your garden craves. It might sound intimidating, but home composting can be very simple:
- Basic Composting: Find a spot or bin (could be as simple as a heap in a corner, a DIY bin made of wood pallets, or a store-bought compost tumbler). Add a mix of “greens” (nitrogen-rich, like vegetable peels, fruit scraps, coffee grounds, fresh grass clippings) and “browns” (carbon-rich, like dry leaves, straw, shredded newspaper, cardboard). Aim roughly for 1 part greens to 2-3 parts browns. Keep it moist like a wrung sponge (not soaking, but not bone-dry) and turn or fluff it occasionally to add air. Over weeks to months, it will decompose into dark compost. As a busy or small-space gardener, don’t stress – even if you just pile stuff and wait, it will compost eventually.
- Small-Scale/Vermicomposting: If you have very limited space or want to compost kitchen scraps without an outdoor pile, consider vermicomposting – composting with worms. A worm bin (often kept in a garage, balcony, or under a sink) uses red wiggler worms to eat food scraps and produce worm castings (which are an excellent fertilizer). Worm bins are odorless if maintained right and can handle a decent volume of scraps for a small household. This is a fun project, even for kids, and yields high-quality compost (worm castings) and worm tea (liquid runoff) that you can use on your plants.
- Avoid composting: meat/dairy/oily foods (they attract pests), weeds that have gone to seed (you don’t want to spread those seeds later), and obviously no inorganic trash. Also be cautious adding diseased plant material or persistent herbicide-treated grass clippings into compost. Most home compost piles won’t reach high enough temperatures to kill every pathogen or weed seed, so when in doubt, leave it out.
- Using compost: Fully finished compost is dark, crumbly, and smells earthy – you shouldn’t recognize the original materials. Use it by mixing into soil (before planting or sidedress around plants), or use as a top-dress/mulch. Remember that compost has somewhat unpredictable nutrient content – it’s generally rich in organic matter and some nutrients, but not uniformly high in N-P-K like a fertilizer. It’s possible to grow plants just on compost’s nutrients, but often you’ll complement it with an organic fertilizer for heavy-feeding plants. The Spruce’s gardening experts note that mature compost is excellent for soil, but you shouldn’t rely on it alone for all nutrition needs . Think of compost as a conditioner and mild fertilizer combined.
- Compost tea: Some gardeners make a liquid extract by steeping compost or worm castings in water (sometimes aerating it with a pump) – this “compost tea” is used to water plants or even as a foliar feed. As a beginner, this is optional. Plain compost is easier to manage. But if you have a surplus of compost, compost tea can stretch it further for feeding many containers, etc.
By composting, you reduce waste (less going to the landfill) and create a free soil amendment – it’s a win-win. Plus, you know exactly what went into it. Use your compost freely in your organic garden; it’s gentle and won’t burn plants like synthetic fertilizers can. One warning from experts: certain persistent herbicides (used in some lawns and hay fields) can survive the composting process, so be mindful if collecting grass clippings or hay for your pile – make sure they’re not contaminated. This is a rare issue but good to be aware of.
Natural Pest Control (Protecting Your Plants Organically)
Pests happen in every garden, but an organic approach tries to manage pests without synthetic pesticides. The idea is to use an Integrated Pest Management (IPM) strategy: prevent problems through good practices, monitor your plants, and only intervene in targeted ways when necessary, using natural or least-toxic methods.
Here are organic pest control tips:
- Healthy Plants Resist Pests: This goes back to soil and proper plant selection. Stressed or weak plants (from poor soil, wrong climate, etc.) attract pests and disease more than vigorous ones. So, the first line of defense is keeping plants healthy through good soil, right watering, and adequate spacing (crowding can lead to disease due to poor air flow). Also, choose disease-resistant varieties when possible (seed catalogs often list resistance codes for things like blight-resistant tomatoes, etc.). If you know certain pests are common in your area, sometimes variety choice can help (for example, some squash varieties are more resistant to vine borers or mildew).
- Encourage Beneficial Insects: Not all bugs are bad – many are garden heroes. Ladybugs, lacewings, hoverflies, and parasitic wasps all prey on common pests like aphids, mites, and caterpillars. You can attract these beneficial insects by planting flowers and herbs that they like (e.g., marigolds, calendula, dill, cilantro, yarrow – many produce small nectar-rich flowers that feed beneficials). A diverse garden with some flowers is inherently more balanced than a monoculture. For instance, a few marigolds or alyssum among your veggies can draw in hoverflies whose larvae eat aphids by the hundreds. Additionally, pollinators like bees and butterflies are crucial for crops like cucumbers, squash, tomatoes, etc. Having blooms in the garden will increase pollination and yields.
- Hand-Picking and Barriers: In a small garden, you can often control pests simply by physically removing them. Check your plants regularly (at least a couple times a week). If you see clusters of insect eggs (little dots on the underside of leaves), rub them off. Pick off caterpillars or beetles and drop them into a soapy water cup (for example, pluck tomato hornworms or cucumber beetles when you spot them). For slugs, you can do evening/early morning patrols or set out beer traps (slugs crawl in and drown). Row covers (lightweight fabric that lets light/water through but blocks insects) are a fantastic organic tool – for instance, covering young squash or brassicas with row cover can keep out squash vine borers or cabbage worms entirely; just remove covers when flowering so pollinators can access. Using fine nets or mesh can also protect against pests like birds or rabbits if those are an issue.
- Organic Pesticides (Use Sparingly): There are some natural-origin sprays and solutions that can combat pests. Examples: insecticidal soap (effective on soft-bodied insects like aphids; it basically suffocates them), Neem oil (a plant oil that repels and disrupts many pests and also has some fungicidal properties; use with care and don’t spray when bees are active, as it can harm them if directly contacted), Bacillus thuringiensis (Bt) – a naturally occurring soil bacteria that is formulated as a spray to target caterpillars (when they ingest it, it kills them; very specific to larvae of butterflies/moths). Bt is great for things like cabbage loopers or tomato hornworms without harming other creatures. Diatomaceous earth (DE) is a powder of fossilized algae that damages the exoskeleton of insects like slugs, ants, etc., used as a barrier on soil (but it can also harm beneficial insects if they contact it, so use carefully). All these are allowed in organic gardening, but they should be last resorts. As the saying goes, in organic IPM even an organic pesticide is still a pesticide – use only when needed and in targeted ways. Always identify the pest correctly first and read product instructions. And remember, some pest damage is tolerable – if a few leaves have holes but the plant is still thriving and producing, you might not need to spray anything.
- Disease Control: Plant diseases (fungi, bacteria, viruses) can also strike. Organic control here emphasizes prevention: choose resistant varieties, rotate crops (don’t plant same family in the exact spot year after year), provide good spacing and air flow (to prevent mildews and blights), water at soil level (avoid constantly wet leaves), and remove diseased plant debris promptly. If disease appears, remove affected leaves or plants to stop spread. Some organic sprays like copper or sulfur can help with certain fungal issues, and Neem oil helps with powdery mildew, but again, these are moderate interventions. Often, ensuring healthy soil and not over-watering goes a long way. Also, diversifying plantings can make diseases less catastrophic – for example, interplanting tomatoes with basil and marigold means a blight might not wipe out your entire garden as it might in a monoculture of only tomatoes.
- Crop Rotation and Diversity: Even in a small raised bed, try not to plant tomatoes/potatoes/peppers (nightshade family) in the same exact soil two years in a row – this rotation can prevent soil-borne disease build-up. Follow a heavy feeder with a lighter feeder or soil-enriching crop next time (e.g., plant beans or peas that fix nitrogen in a spot where you had heavy-feeding cabbage last season). If space is so tight rotation is hard, at least swap containers or refresh soil. Also, practice sanitation: clean up plant residues at end of season, and disinfect containers if a disease was present (a mild bleach solution rinse).
The mindset to adopt is “observe and intervene only if necessary.” Many times, nature will balance minor pest populations out – for example, a small aphid infestation often attracts ladybugs that then clear them up. If you nuked the aphids with a broad insecticide, you’d also likely kill ladybugs and other allies. This is why broad-spectrum synthetic pesticides are discouraged – they can create a vicious cycle of dependency and environmental harm.
As proof of concept, many home gardeners successfully grow vegetables organically with minimal losses. It might require a bit more vigilance (checking plants often), but it avoids chemicals and fosters a healthier garden ecosystem. And eating produce that you know is 100% chemical-free is peace of mind for you and your family.
The Importance of Biodiversity and Pollinators
An organic small garden isn’t just about the vegetables – it’s about creating a little ecosystem. Biodiversity means having a variety of plants and organisms. Why does this matter? Because a diverse garden is more resilient. Monocultures (only one type of plant) tend to invite pest outbreaks and deplete certain nutrients. A mix confuses pests and shares resources.
- Mix in Flowers: As mentioned, adding some flowers or ornamental plants can greatly benefit your veggie garden. They attract pollinators (bees, butterflies, hummingbirds) which will increase yields of fruiting veggies. They also bring in predatory insects as discussed. Plus, it makes your garden prettier – a win-win if you want it to be a focal point. For example, plant some nasturtiums at the edge of a bed – they have lovely orange/yellow edible flowers, can sprawl a bit to cover soil, and they attract aphids (often used as a “trap crop” to lure aphids away from other veggies) as well as pollinators. Marigolds not only repel some pests in soil, they add color and attract hoverflies. Sunflowers can be a dramatic addition – even one or two sunflowers in the corner of a small garden bring bees and can act as a trellis for vining plants like beans to climb.
- Herbs and Perennials: Many herbs when left to flower are pollinator magnets (e.g., dill, cilantro, basil, chives – if you don’t pinch all the flowers). Some gardeners maintain a small perennial patch or border next to the veggie area with natives or wildflowers to support beneficial insects. The idea is to mimic nature’s diversity. The Spruce’s organic gardening guide emphasizes not limiting your organic efforts just to the veggie patch, but to consider the whole yard’s ecosystem – for instance, it doesn’t help to have an organic vegetable plot if right next to it your lawn is being doused in herbicides. An organic mindset could lead you to reduce lawn size, add native plants, etc., which all support your vegetable garden indirectly by improving the local environment.
- Wildlife Friends: Biodiversity also includes soil life (earthworms, etc.) and other creatures. Embrace the little garden helpers – toads eat slugs, birds eat caterpillars (you can encourage birds by having a birdbath or feeder, but beware of birds also pecking fruits like tomatoes). Even snakes can be allies (many small snakes eat rodents and slugs). In a small urban garden, you might not see larger wildlife, but even having a small bee house or a shallow water dish with stones (for pollinators to drink) can invite helpful critters. If you involve kids, building a “bug hotel” from sticks and pinecones can be a fun way to learn about beneficial insects taking shelter.
By gardening organically and fostering biodiversity, you’re not just growing veggies – you’re creating a mini-ecosystem that is healthier and often more beautiful. Over time, your garden will kind of manage itself with the right balance (less work for you). It’s not utopia – you will still have to pull the odd weed or squish a pest – but you’ll likely have fewer major problems. Plus, you’ll be avoiding harmful chemicals in your food and environment. Homegrown organic produce often has superior taste as well, since you can grow heirloom or variety types that aren’t bred just for shipping durability like supermarket produce.
Think of organic gardening as nurturing nature while it nurtures you. It might take a bit more observation and patience, but it pays off in safer, tastier harvests and the satisfaction of doing things naturally. As April Wilkerson might say, it’s a hands-on approach that might involve some extra elbow grease (compost turning, anyone?), but it’s straightforward and you can absolutely DIY it with great results.
Extending Your Season with Cold Frames and Greenhouses
Wouldn’t it be nice to harvest homegrown salads earlier in spring or keep veggies going into late fall? Cold frames and small greenhouses are tools that help you extend the growing season on both ends – they create a microclimate that’s warmer than the open air, protecting plants from cold weather. For a small-space gardener, these can be compact, budget-friendly structures that significantly increase your gardening success, especially in cooler regions.
What is a Cold Frame and Do You Need One?
A cold frame is essentially a mini-greenhouse: it’s a bottomless box with a clear lid that goes over plants to trap warmth. Think of it as a small sun-powered hot house for your garden beds or pots. Classic cold frames are made of wood or cinderblock sides with an old window or clear plastic lid on top, angled toward the sun. They warm the soil and air inside by day and keep heat in at night, protecting plants from frost, wind, and cold.
Cold frames are incredibly useful if you want to start seedlings outdoors earlier, harden off indoor-grown seedlings, or keep growing cold-tolerant crops into the chilly months. They can extend your season by several weeks in spring and fall (Iowa State University Extension notes 2–4 weeks on each side of the season is common with cold frames). For example, you could plant lettuce or spinach under a cold frame in late winter, weeks before outdoor planting would normally be safe, and harvest in early spring. In fall, you could keep greens, carrots, or herbs going under a frame well past the first frosts.
Do you need one? If you live in an area with a short growing season (zones 3-6 especially) or you’re eager to get a jump on planting, a cold frame is a great investment. If you’re in a warm zone where frost is rarely an issue (say Zone 9+), you might not need cold protection; your challenge might be more heat, in which case shade cloth is more useful than a cold frame. But for most temperate climates, even a simple DIY cold frame can be very beneficial for a small garden – it allows you to grow more in essentially the same space by leveraging cooler months.
Using a cold frame: Place it in a sunny spot (south-facing exposure is best) over a section of your garden or even over grow bags/containers. Typically, gardeners will start seedlings inside the frame or move potted plants under it to protect from cold. You can also direct-seed things like radishes or lettuce inside the frame extra-early. During sunny days, you must vent the frame (prop the lid open) so it doesn’t overheat – temps can soar inside quickly, even in February! Ventilation is crucial whenever the interior goes above ~80°F . An Iowa State horticulturist advises checking cold frames daily during temperature swings, opening the cover when inside hits about 85°F and closing before sunset. At night, close the lid to conserve heat. If an extra cold night is forecast, you can throw a blanket or straw mat over the frame for added insulation. Cold frames are usually not heated (if you add a heating cable, it becomes a “hot bed”). They rely on solar gain, and the soil itself releases warmth at night under the cover.
For DIYers: building a cold frame can be a fun project. Use lumber or even bales of straw for the sides, and an old window or clear acrylic sheet as the top. Make the back higher than the front so the lid slopes toward the winter sun (plus lets rain runoff). Hinges on the lid are handy. But you can go even more low-tech – some people use old clear plastic storage bins with the bottom cut out, or bend wire hoops over a bed and lay clear plastic or glass on top as an improvised frame.
Small Greenhouses and Hoop Houses
A step up from cold frames are greenhouses or hoop houses. These are larger structures, often tall enough to stand in, used to grow plants in a protected environment. For beginners with limited space, a full greenhouse might be overkill – but there are mini-greenhouses that could fit on a deck or small yard.
- Mini Greenhouse Kits: You may have seen those shelf-like greenhouses – essentially metal shelving units covered with a zip-up clear plastic cover, often about 4-6 feet tall and 2-3 feet wide. They are inexpensive and can be placed against a wall or on a patio. These act like portable greenhouses for starting seeds or sheltering plants. They are not super sturdy in heavy wind, so secure or weigh them down. They’re great for early spring seed starting outdoors (instead of using your kitchen space, you can start trays of seeds on the shelves in the mini-greenhouse). They also can extend fall by holding tender potted plants.
- Hoop Houses/Row Covers: On a garden bed, you can create a temporary greenhouse effect by using hoops with plastic. For instance, push flexible rods (PVC, metal, or even thick wire) into the soil to form hoops over a bed, then drape clear polyethylene plastic over it, securing the edges. This makes a tunnel greenhouse, sometimes called a low tunnel. It’s like a cold frame but longer and taller. Great for covering an entire raised bed. You open the ends or sides to vent as needed. This is an affordable way to cover more area than a small cold frame, and it’s easy to take down in summer. If you use a heavier plastic, it can act almost like a greenhouse for overwintering hardy greens.
- Greenhouses/Polytunnels: If you have a bit more space and budget, a small greenhouse (say 6×8 feet or so) or a polytunnel (a larger hoop house) can truly extend your growing to year-round in some cases. In warmer zones, an unheated greenhouse might allow tomatoes and peppers to grow through winter. In cold zones, it won’t keep summer crops alive through deep winter without heat, but it can overwinter hardy greens or at least protect perennials. Greenhouses are more common for serious gardening enthusiasts – but even a little one can be fun if you’re very keen on seedlings or growing exotic plants. Keep in mind, in hot climates, a greenhouse will need shade/ventilation to not cook plants. In cold climates, an unheated greenhouse still gets cold at night – many plants will go dormant or freeze if it’s frigid outside, though you can add thermal mass (like barrels of water) to absorb heat during day and release at night, moderating the temperature.
When are they necessary? If you want to maximize production in a small footprint, extending the season is key. For example, someone in zone 5 who only has a 4’x4’ bed might use a cold frame to start lettuce in March, harvest in April, then use the bed for warm crops May-August, then put a hoop cover in September to November to keep greens growing – thus, that 16 sq ft is producing maybe 8-9 months of the year, not just 4-5 months. If you’re content with the normal growing season, you may skip cold frames/greenhouses initially. But many gardeners catch the bug and want to experiment with early tomatoes or late spinach, etc.
One more use: overwintering plants. A small greenhouse or cold frame can overwinter semi-hardy plants (like potted herbs or flowers that can’t quite survive open winter but can in a protected spot). It can also be used to store dormant potted perennials or bulbs, kind of like a storage shelter.
Operating tips: Treat the inside of a greenhouse as a different climate zone – you’ll need to water plants inside since rain might not reach them (unless you vent or open it). Watch for pests like aphids which can build up in the protected environment – sometimes you might need to hand-water or hose off plants inside a greenhouse because natural predators might not find them. Ventilation is crucial in sunny weather even if it’s cold outside. One can install automatic vent openers (temperature-sensitive devices that push a window open when hot – handy so you don’t bake your plants if you forget to open vents). At night, greenhouses keep it a bit warmer than outside but not by huge amounts unless you add heat.
Cold frame vs greenhouse: A cold frame is cheap, small, and typically used for low-growing plants. A greenhouse is larger and you can grow tall plants in it or hang things. Cold frames often complement a garden bed, whereas a greenhouse is its own growing space. Some gardeners use cold frames inside a greenhouse for extra protection, or start in greenhouse and then harden off in cold frame, etc. You don’t necessarily need both – decide based on your goals.
In a nutshell, cold frames and mini greenhouses are like season-extending tools that can greatly expand your gardening capabilities without a lot of square footage. They’re particularly useful for avid gardeners in cooler climates or those who want continuous harvests. With a little carpentry or assembly, you can build one in a weekend. Once you taste a homegrown salad in April or pick carrots in November, you’ll appreciate the magic of these structures. As one gardener said, a cold frame can be a “super cheap and easy” project that adds weeks or months to your growing season). That means more fresh food and fun experimentation with early/late crops. So if you’re up for extending your garden’s productivity, consider incorporating a cold frame or mini greenhouse into your small-space garden plan.
Organic Weed Control Tips for Small Gardens
Let’s be honest: weeds are the least fun part of gardening. In a small vegetable garden, weeds can be managed without resorting to chemical herbicides by using a combination of preventative tactics and old-fashioned elbow grease. The good news is that a small space means less area for weeds to invade, and with diligent attention, you can keep them very much in check. Here are some effective organic strategies for weed control:
- Mulch, Mulch, Mulch: Mulching is your best friend against weeds. Cover any bare soil between and around your plants with an organic mulch material. This could be straw, shredded leaves, pine needles, grass clippings (from untreated lawns), or wood chips in pathways. A thick layer of mulch (about 2–4 inches) blocks sunlight from reaching weed seeds in the soil, preventing them from germinating. It also holds moisture (bonus!). For example, after planting your seedlings or seeds, mulch the bed except where seedlings will come up. Straw is a popular veggie garden mulch – it’s light and easy to push aside for planting, and at end of season it can be turned into the soil. Tip: Keep mulch a tiny bit away from direct contact with plant stems to avoid any rot issues. In small raised beds or containers, even a little mulch (like a layer of compost or cocoa hulls) can suppress weeds. Mulching is arguably the most effective organic weed deterrent – as one organic gardener quipped, “Weeds can’t compete if they can’t see the light of day.”
- Hand Weeding (Early and Often): It’s old-school but it works. The key is to catch weeds when they’re tiny – a quick run-through each week pulling out seedlings is much easier than dealing with deep-rooted mature weeds. Most weed seedlings can be lifted or disturbed with a light flick of your fingers or a hoe when they’re in the first inch of growth. After rain or watering, soil is softer – that’s a great time to pull weeds (roots come out easier). Use small hand tools like a forked weeder or a hand cultivator to flick out weeds around plants. In a small space, you can usually hand-pull everything if you’re consistent. Make sure to remove the whole root when possible (especially for pernicious weeds like dandelions). Never let weeds flower or seed! A single weed left to seed can produce hundreds or thousands of seeds and create future headaches. So if you see a weed approaching flowering stage, pull it immediately and dispose of it (don’t compost seeding weeds unless you have a hot compost that kills seeds).
- Use the Right Weeding Tools: In larger beds or where you have space between rows, a hoe is invaluable. There are different types – a stirrup hoe (oscillating hoe) or a collinear hoe are designed to skim just under the soil surface, cutting off weeds efficiently. These let you weed while standing, and you can cover ground quickly. For tight spaces, a hand hoe or cultivator works. A sharp hoe can slice young weeds off at soil level – do this on a dry day and the uprooted weeds will shrivel up on the surface. Remember not to dig too deep so you don’t bring more buried weed seeds up to the surface (where they’ll germinate). Essentially, shallow cultivation is enough for tiny weeds. A tool called a hori-hori knife (a Japanese gardening knife) is also excellent for digging out taproots or tough weeds, and it doubles as a transplanting tool.
- Weed Barriers: Consider using physical barriers in certain areas. For instance, in pathways or under raised beds, you might lay down landscape fabric or cardboard topped with mulch to block weeds completely. In a small garden, some people plant through a biodegradable paper or cardboard sheet – for example, placing a sheet of wet newspaper around a transplant and then mulching over it, which adds an extra layer of weed suppression. You can also use living mulches or groundcovers – planting a low-growing cover crop or even a thick planting of something like clover in pathways to outcompete weeds.
- Corn Gluten Meal (Organic Pre-emergent): This is a byproduct of corn processing that has natural herbicidal properties – it inhibits seed germination. It’s sometimes used as an organic “pre-emergent” weed preventer. You apply it to soil, and it can reduce new weed seedlings. However, be cautious: it will also prevent germination of any seeds you sow intentionally! So it’s best used in established perennial beds or lawns, not where you’ll be sowing veggie seeds. It’s safe and natural, but results can vary. If you have a bed where you transplant all your veggies (no direct seeding), you could apply corn gluten meal early in the season to help stop weed seeds from sprouting (and it doubles as a nitrogen fertilizer ~10% N). But again, once you put in seedlings, you’d mulch anyway, so corn gluten is optional.
- Cover Cropping & Off-Season Weed Suppression: If you have any downtime when a bed isn’t in production, don’t leave it bare. Either cover it with mulch/cover crop or even temporarily cover with a tarp or cardboard to smother weeds. Some gardeners practice the “occultation” method: covering a bed with a black tarp for a few weeks to kill off weeds before planting. Cover crops like buckwheat (in summer) or rye (in winter) can outcompete weeds and then be cut down. Even in a small garden, if you take a break, throw some fast cover crop seeds rather than let weeds colonize.
- Proper Spacing and Plant Density: It’s worth noting that planting your veggies at recommended spacings (or slightly closer in intensive planting schemes) helps shade the ground once they grow, which naturally suppresses weeds. If plants are too far apart, weeds have more room to thrive. For example, closely spaced lettuce or a patch of bush beans will create a canopy that makes it hard for weed seedlings underneath to get enough light. So, intensive gardening inherently reduces weed issues – another benefit of small-space methods.
- Water Strategically: Weeds need water to germinate and grow. If you use drip irrigation or soaker hoses, you are only watering the intended plants’ root zones, not the entire soil surface. This can prevent a lot of weed seeds from sprouting in drier areas. Overhead sprinklers wet everything and wake up weed seeds everywhere. In a container, obviously everything gets water, but in beds, drip lines right under your plant row will concentrate moisture for your veggies and not in the empty aisles.
- Persistency: The battle with weeds is ongoing, but the more you stay on top of it, the easier it gets. Each year that you prevent weeds from seeding heavily, the seed bank in your soil diminishes. For instance, if you constantly remove crabgrass before it seeds, over a couple of years you’ll see far less of it. Conversely, one neglected season can set you back as seeds accumulate. So especially in year 1 of your garden, be vigilant to prevent a reservoir of weed seeds. It truly will get easier. Many small raised bed gardeners report that after mulching and diligent weeding the first season, they spend very little time on weeds in subsequent seasons.
One additional tip: identify your weeds. Some “weeds” might actually be edible or useful. For example, purslane often pops up in veggie gardens – it’s a succulent groundcover weed, but it’s also a tasty edible green rich in omega-3s! You can toss it in salads. Rather than letting it overrun, you can harvest it (weeding and eating simultaneously). Knowing the name of your weeds can also inform you about your soil (certain weeds thrive in certain conditions) and life cycle (annual vs perennial weeds). Perennial weeds (like bindweed or Bermuda grass) are tougher – you must get all the roots out, or they’ll regrow. Annual weeds (like chickweed, pigweed, lambsquarters) are easier – just don’t let them seed, and pull them up. Clemson Extension notes that small-seeded annual weeds are easier to control than deep-rooted perennials.
In a small garden, you likely won’t face big weedy fields; it’ll be the little intruders here and there. By mulching and hand-weeding a bit each week, you can usually keep the garden nearly weed-free with minimal effort. Some gardeners find a quick 5-minute weed-pull therapeutic, like a mini workout and stress reliever. If you involve kids, make a game of who can pull the most weeds (just be careful they know what not to pull – maybe not a game for very young kids if they can’t distinguish your carrot seedlings from grass!).
Lastly, maintain healthy soil and the right moisture – vigorous veggie plants can themselves outcompete weeds. And any weeds that do show up, you have the power to yank them out. No chemicals needed, no expensive solutions – just consistent, simple methods. The result is a clean garden where your vegetables don’t have to fight for nutrients or water with unwanted plants. By mid-season, you’ll likely have very few weeds if you started early. And if one does pop up next to a tomato, well, at least you know it’s an organic garden salad garnish (looking at you, purslane)!
Efficient Irrigation Solutions for Small Gardens
Watering can make or break your vegetable garden, especially in the heat of summer. Small gardens might seem easier to water by hand (and often they are), but if you have a busy schedule or want to conserve water, it pays to set up an efficient irrigation system. This section explores easy watering options like drip irrigation, soaker hoses, and even rainwater harvesting – all great choices to ensure your veggies get the moisture they need without waste or daily hassle.
Why Efficient Irrigation?
Efficient watering systems deliver water directly to plant roots at a gentle rate, minimizing evaporation and runoff. This not only saves water (environmentally and on your utility bill) but also keeps foliage drier which can reduce diseases (fungal issues often spread on wet leaves). Moreover, watering only where needed means you’re not watering weed seeds elsewhere (tying back to weed control!). By automating or simplifying watering, you also free yourself from needing to lug the watering can every day.
For a small space, you won’t need a huge sprinkler setup – in fact, sprinklers are usually the least efficient method (lots of water lost to the air and hitting areas with no plants). Let’s look at better options:
Drip Irrigation
Drip irrigation is a system of tubes or hoses with small emitters/holes that drip water slowly at the base of plants. It’s like giving each plant a little IV drip of life-giving water. Drip can be set up with a faucet/tap connection and often with a timer for automation.
Pros of Drip: It’s extremely water-efficient and precise – water goes right where you place the emitters (near plant root zones). You can snake drip lines through raised beds or containers. It’s gentle, so soil isn’t eroded and plant roots get a steady soak. Drip systems are also very durable and can last many seasons. A big plus is you can automate it easily: attach a battery-operated timer to your spigot, and your garden can be watered automatically each morning or every couple of days as needed – great for vacation or forgetful days. Drip irrigation is scalable; you can run a main line and then smaller “spaghetti” tubes to individual plants or use drip tape/line that has emitters every 6-12 inches along it.
For example, you might have a raised bed and lay a couple of drip lines across it so that each plant gets dripped. Or in a collection of pots, run a thin tube into each pot with a little dripper stake. Drip systems can even be used with rain barrels (gravity fed, though slower) or hooked to a hose faucet.
Cons of Drip: It has a higher initial setup cost and effort than just using a hose. You need to plan the layout, cut and connect tubing, etc. For a very tiny garden, some might find it overkill (watering 3 pots by hand isn’t hard). But if you have, say, 10+ containers or a couple of raised beds, drip is a worthy investment. Also, emitters can clog over time (especially if your water has sediment or minerals) – using a filter on the system and occasionally flushing lines helps. Drip lines with built-in emitters usually last years but if one section gets clogged, you might need to replace that part. Another minor con: because drip is targeted, you might not notice if a part fails unless you inspect (whereas with overhead watering you see it raining). So check your drip emitters now and then to ensure they’re doing their thing.
Despite the cons, many gardeners swear by drip for saving time and water. Better Homes & Gardens notes that drip is superbly versatile and can be customized and even repaired easily if damaged (unlike soaker hoses that often need replacement). It’s indeed a bit of a DIY project to set up (think of it like assembling a Lego plumbing set), but plenty of beginner kits are available with instructions.
Soaker Hoses
Soaker hoses are another convenient option. These are hoses made of porous material (often recycled rubber) that “sweat” water along their entire length. You lay a soaker hose through your garden bed, twist the faucet on, and the hose leaks water slowly into the soil all along its length.
Pros of Soaker Hoses: Super easy to use – just place and go. They are cheaper than drip kits and don’t require emitters or fancy connectors (you usually just attach the hose to the spigot like a normal hose). They work great for linear layouts like rows or perimeter watering. They also can be moved around as needed (though moving them a lot can cause kinks/breaks). Soaker hoses deliver water fairly evenly and, like drip, avoid wetting the foliage too much. They’re best for relatively level ground and small to medium beds. In a small raised bed, you might snake a 25-foot soaker hose back and forth a few times and cover a whole bed. They conserve water better than sprinklers for sure, though not as precisely as drip.
Cons of Soakers: They are less precise – they weep along the whole hose, so if you have gaps or if one end is among plants that need less water, you can’t easily differentiate (drip allows different emitters for different plants). They also degrade: sun and UV can make them crack after a couple years, and they sometimes have uneven flow if water pressure isn’t right (e.g., more comes out at the start of the hose than the end if it’s long). Typically, a soaker hose shouldn’t be super long (over 50 feet) or pressure issues arise. They can clog too (mineral deposits in the pores over time), but you can often revive them by flushing or even lightly running vinegar through to dissolve mineral buildup. Better quality soaker hoses and good care (store over winter) will extend life.
Soaker vs Drip is a common debate. Soaker hoses are great for smaller gardens and budget-conscious gardeners – quick to implement, lower cost. Drip systems shine in more complex setups or larger container collections, and they allow fine-tuning. Eartheasy (a sustainable living site) points out that soaker hoses excel in small gardens on level ground with simple layouts, and have a very low upfront cost, while drip is more customizable and better for varying terrains or permanent installs. Both save time, water, and help reduce weed watering.
Using Rainwater: Rain Barrels and More
Another aspect of irrigation is water source. Collecting rainwater is an eco-friendly way to irrigate your garden for free. A simple rain barrel connected to a downspout from your roof can yield a surprising amount of water. One inch of rainfall on a typical roof can provide up to a half-gallon of water per square foot of roof area – that adds up fast (for example, a 500 sq. ft. roof could collect ~250 gallons in a 1” rain!). Usually, rain barrels are 50-60 gallons each; they fill up quickly in a decent rain.
Rain Barrel Basics: You place a barrel under a gutter downspout (or use a diverter kit). The barrel has a spigot near the bottom to which you can attach a hose or fill a watering can. Use that water on your plants instead of tap water. It’s naturally soft water (no chlorine, etc.), which plants appreciate. Many barrels can be linked together if one is not enough. Just be sure to have a fine screen on top to keep mosquitoes out (standing water can become a mosquito breeding site without a lid/screen).
While a barrel itself won’t pressure-run a drip system without help (gravity pressure is low unless the barrel is elevated significantly), you can use it to fill watering cans or attach a soaker hose if the barrel is a bit up. Even a modest elevation (barrel on cinder blocks) can allow water to flow via hose for short distances. Some drip systems can be run on gravity but might need special low-pressure emitters. Alternatively, you can dip a watering can in, or use a solar pump to push rain barrel water into your irrigation.
Why use rainwater? It conserves treated drinking water (good for environment and saves you money on the water bill). In some areas with watering restrictions, having stored rainwater lets you water your garden during dry spells. Plants often respond well to rainwater – you might notice how gardens perk up after a rain even more than after an equivalent hand-watering; part of that is distribution, but also rain doesn’t have chlorine or hard minerals that tap water does.
Tips: Keep the barrel covered (for safety and mosquito reasons). Use the water regularly so it doesn’t stagnate long – empty within a week or so after a rain if you can. Clean the barrel yearly to avoid algae buildup. If you live in a place where it freezes, drain and disconnect it over winter. Also, consider the roof type – asphalt shingles can leach very minor residues; most say it’s fine for ornamentals and vegetables (the concentration is extremely low), but if you’re concerned, use that water for ornamentals and use tap for edible parts. Many organic gardeners use rain barrel water on veggies without issue, however.
Using a Watering Schedule or Automation
For small gardens, you might decide to water manually – that’s perfectly fine. But if you want to streamline, consider a watering timer. These screw onto your faucet and can be programmed to turn water on and off at set times. For instance, you could set drip or soaker to run 15 minutes every morning. Early morning is ideal because plants get hydrated before heat, and water can soak in with minimal evaporation (and leaves dry quickly after sunrise, reducing disease). Avoid watering in late evening if possible, as leaves staying damp overnight can invite fungus.
A simple single-outlet timer is relatively inexpensive and can be very helpful if you’re away during the week or just want the consistency. There are also multi-zone timers if you have separate areas or containers to alternate. Just remember to adjust or shut it off if a big rain came – you don’t want to overwater (smart timers with moisture sensors exist, but for a small setup, manual adjustment is fine).
Tips for Irrigating Wisely
- Water deeply and infrequently rather than shallow and often. Deep watering encourages roots to go down, making plants more resilient to drought. With drip or soaker, this is easy – run it long enough to thoroughly moisten the root zone a few times a week rather than a little sprinkle daily. The exception is seedlings or freshly transplanted starters – they need frequent light watering until established.
- Know your plants’ needs: Some veggies like consistently moist soil (e.g., lettuce, celery), others are more drought-tolerant (e.g., rosemary, okra). Group plants with similar needs on the same irrigation line or zone if possible. For example, you might not put your cacti-like herbs on the same soaker hose as your thirsty cucumbers.
- Check soil moisture: Even with automated systems, poke your finger in the soil or use a moisture meter to ensure the soil isn’t getting waterlogged or too dry. Adjust as needed. Containers especially can dry faster – they might need daily watering in hot weather, whereas a raised bed with mulch might only need every 2-3 days.
- Use a rain gauge or simply observe – if you get about 1 inch of rain in a week, you can dial back irrigation. If it’s very hot and windy, plants use more water, so increase as needed.
- Drip/Soaker Layout: Lay lines about 12-18 inches apart in beds (closer for very sandy soil, wider for clay soil because water spreads more laterally in clay). In containers, one emitter per small pot, 2-3 for big pots. For soaker hoses, weave it so it passes near all plants (within a few inches). You can hold hoses in place with wire garden pins or stakes.
- Maintain your system: Before each season, flush out drip lines to clear debris. Check for leaks or holes (drip lines can be chewed by critters occasionally or damaged by digging tools). Repair kits are available (drip is easy to patch by cutting out bad section and joining with a coupler). For soaker hoses, see if any sections seem dry while others are wet – that could indicate clogs or deteriorating hose.
By implementing drip or soaker hoses, your small garden will practically water itself, and you’ll be using water wisely – a win-win. A study of gardeners found that drip systems can save 30-50% of water compared to sprinklers and also reduce weed growth and plant disease. In a time where water conservation is important, this is a great way to make your garden more sustainable.
If you prefer hand-watering, that’s okay too! Use a watering can or a gentle hose nozzle (like a shower setting) to avoid blasting soil out. Water at the base of plants. Hand-watering can be meditative, but just be consistent so your plants don’t suffer dry spells.
Finally, pay attention to your plants – wilted leaves in morning can indicate under-watering (wilting in midday sun can be normal heat stress – if they perk up by evening, they’re probably fine; if still wilted at night, they likely need water). Conversely, yellowing leaves or fungus might indicate overwatering or poor drainage.
With efficient irrigation in place, your garden will thrive with minimal fuss, leaving you more time to enjoy tending, harvesting, and simply relaxing among your plants rather than dragging hoses around. Plus, you’ll be ready for those scorching July days when missing even one watering could spell disaster – your irrigation system will have your back (and your plants’ roots).
Organic Fertilization: Feeding Your Soil and Plants the Natural Way
Beyond initial soil prep and compost, your vegetables may need a nutrient boost during the growing season to reach their full potential. Plants use up nutrients as they grow (especially heavy feeders like tomatoes, corn, cabbage), and with intensive planting in small spaces, it’s important to replenish those nutrients organically. Organic fertilization focuses on using natural materials to feed plants and soil life, maintaining a healthy ecosystem. Let’s go over how to fertilize your garden organically, from types of organic fertilizers to timing and application.
Slow and Steady Nutrients
Organic fertilizers tend to release nutrients more slowly than synthetic ones, which is generally beneficial – it provides a steady feeding and reduces risk of burning plants. They also often contain a broad range of micronutrients and organic matter, not just N-P-K. However, because they’re lower concentration, you might need to use larger quantities or more frequent applications for heavy-feeding plants.
Common Organic Fertilizer Options:
- Compost: As discussed, compost is both a soil amendment and a mild fertilizer. It typically has low N-P-K percentages (maybe 1-1-1 or so, depending on content), but it continuously feeds soil organisms which then make nutrients available. Many organic gardeners use compost as their primary fertilizer – adding an inch or two before planting and maybe side-dressing during mid-season. If your soil is already rich, this might suffice for medium feeders.
- Aged Manure: Composted cow, horse, or chicken manure adds more nitrogen and other nutrients. Chicken manure is quite high in nitrogen (but must be well-aged or it can burn plants). Manure also adds organic matter. As per Oregon State University Extension, fresh manure can have too much salt and potential pathogens, so always use composted/aged manure and wait at least 90-120 days after application before harvesting if it contacts the edible parts. Many farmers apply manure in fall so it breaks down by spring planting.
- Plant-Based Fertilizers: Alfalfa meal, soybean meal, cottonseed meal – these are plant meals that break down to release nitrogen and some phosphorus/potassium. They are sometimes used as slow-release fertilizers (alfalfa meal, for example, is around 2-1-2 NPK and contains a natural growth stimulant called triacontanol). They break down over a few weeks/months.
- Animal-Based Meals: Blood meal (dried blood, high N ~12-0-0), Bone meal (ground animal bones, rich in phosphorus ~3-15-0 and calcium), Fish meal (ground fish, e.g. 8-6-0), and feather meal (ground feathers, high N ~12-0-0) are traditional organic fertilizers. Blood meal provides a quick nitrogen boost (use carefully – it’s potent), bone meal is great for root crops and flowering (adds P and some calcium). Fish bone meal is another P source with some N. These are all slow-moderate release except blood (which is faster). Use according to package directions, typically mixing into soil at planting time or around plants (bone meal is often added when planting bulbs or root crops to help root development).
- Fish Emulsion & Kelp/Seaweed: These are liquid fertilizers. Fish emulsion is a liquid concentrate made from fish byproducts (NPK roughly 5-1-1, though can vary) and is a quick-acting nitrogen source (great for giving a boost to leafy plants). It also contains micronutrients. It does have a fishy odor, but when diluted and watered in, the smell dissipates after a day or two (just don’t spill the concentrate on yourself!). Some gardeners call it “fish fertilizer tea.” Seaweed or kelp extracts are loaded with micronutrients and hormones that stimulate plant growth (they’re more of a tonic than a strong NPK source; typically low NPK like 0-0-1 but lots of trace elements). Using a fish + seaweed blend is popular to feed plants and soil microbes. One caution: fish emulsion can attract animals (cats, raccoons may dig where it was applied, thinking there’s fish – as an Illinois Extension anecdote noted, raccoons dug up pots where fish emulsion was used). If critters are an issue, perhaps use a different fert or be prepared to guard those areas briefly.
- Compost Tea and Worm Tea: If you have compost or a worm bin, the liquid derived (or a brewed tea) can be used to water plants, adding a mild dose of nutrients and beneficial microbes. It’s harder to quantify its fertilizer content, but it’s gentle and free if you make it. Use it fresh for best results.
- Mineral Amendments: For specific nutrient deficiencies or pH adjustment, organic gardeners use things like greensand (adds potassium and iron, slow release), rock phosphate or bone meal (for phosphorus), elemental sulfur (to lower pH if needed), lime (to raise pH and add calcium/magnesium). Also gypsum (calcium sulfate) can add calcium without raising pH and helps condition soil. Epsom salt (magnesium sulfate) is occasionally used if magnesium is deficient (and to green up plants, though use sparingly). These are more amendments than “fertilizers” per se, but they address mineral needs.
- Packaged Organic Fertilizers: There are many commercial organic fertilizer blends (often labeled for tomatoes, or for general garden, etc.). They might be pelleted or powdered. For instance, a tomato-tone or garden-tone product with an NPK like 3-4-6 plus micronutrients, made from a mix of meals and minerals. These are convenient – you follow label rates, usually scratching them into soil around plants or adding to planting holes, and they release over time. If you’re new to organic feeding, using a well-known organic blend (Espoma, Dr. Earth, etc. brands in the US) can simplify things since the mix is balanced. They also often contain beneficial mycorrhizae or microbes.
How to Fertilize Organically: The approach can be summarized as feed the soil at planting, then feed the plants during growth if needed.
- At Planting: Incorporate compost and perhaps an organic fertilizer into the soil when preparing the bed. For example, in each planting hole you might mix a handful of compost and a spoon of bone meal for a tomato transplant. Many gardeners mix a balanced organic granular fertilizer into the top 4-6 inches of the bed before seeding/transplanting. This gives a baseline fertility.
- Side-Dressing: This means adding fertilizer beside the plant mid-season. Commonly done when plants hit certain stages (e.g., when tomatoes begin to flower and set fruit, give them a side-dress of compost or an organic tomato fertilizer to provide extra phosphorus and potassium for fruiting; when corn is knee-high, give nitrogen to fuel its rapid growth). To side-dress, gently work in the fertilizer around the root zone (not right at stem) and water it in. For example, you could side-dress heavy feeders like squash, corn, tomatoes about 6 weeks after planting with an organic 5-5-5 or with more compost/manure.
- Foliar Feeding: Spraying diluted liquid fertilizer on the leaves can give a quick nutrient boost (plants can absorb some nutrients through foliage). Kelp or fish-seaweed blends are often foliar fed. Do this in the early morning or late afternoon (not hot sun) to avoid leaf burn. While beneficial, foliar feeding is supplementary – the main feeding should be through roots.
- Frequency: Because organics are slower, you might apply them a bit earlier anticipating the need. A general rule: light feeders (root crops, beans, peas, herbs) may do fine with just the pre-plant compost/fertilizer. Moderate feeders (lettuce, carrots, etc.) might appreciate a monthly boost (like a drink of fish emulsion). Heavy feeders (tomatoes, corn, broccoli, cucumbers, squash) often need feeding every 3-4 weeks in peak growth – whether that’s side-dressing granular or giving liquid feed. Observe plant vigor: pale leaves may indicate nitrogen deficiency (try a nitrogen fix like fish emulsion or blood meal scratch-in); purplish leaves may indicate phosphorus deficiency (bone meal or fish bone meal can help for next season; for quick fix, a soluble bloom fertilizer or compost tea).
- Avoid Over-fertilizing: Yes, organics are gentler, but you can still overdo it. Too much nitrogen, for instance, can cause lots of leafy growth at expense of fruiting (and can leach into groundwater). It’s harder to burn plants with organics, but not impossible with potent ones like blood meal or if you dump a ton of manure. So follow recommended rates. Typically, an initial soil enrichment plus one or two side applications is plenty. Remember that compost is also contributing nutrients. If plants look green and are growing well, you might not need any extra fertilizer mid-season. “The dose makes the poison” as they say – even organic products should be used judiciously.
Special Cases: Container veggies will need more regular feeding because frequent watering flushes nutrients out. Using slow-release organic pellets in potting mix and/or weekly weak liquid feeds keeps container plants productive. Also, some plants have unique needs: e.g., fruiting plants like tomatoes and peppers need more phosphorus and potassium once flowering, so switching to a bloom fertilizer (low N, higher P/K) or adding things like kelp (for K) and bone meal (for P) can improve yields.
One thing OSU Extension highlighted is that it’s important to know what nutrient you need to add. Blindly adding too much of one thing can cause imbalances. For example, adding high-phosphorus fertilizer every year when soil P is already high can lock out other nutrients. That’s why periodic soil testing is useful if you garden the same area for years. But in the short term, a balanced approach (compost plus a balanced organic fert) is safe.
Also, be aware that fresh organic matter (like sawdust or undecomposed straw) can tie up nitrogen as it breaks down – if you dig in something like that, you may need extra nitrogen to compensate. Usually, adding well-composted material avoids this issue. If you do something like use straw mulch that isn’t fully decomposed by next planting, add some nitrogen (like composted manure or blood meal) to feed the microbes that will break it down, so they don’t steal nitrogen from your plants.
In summary, an organic feeding regimen for a small garden might look like this: In spring, spread compost and a complete organic fertilizer across beds. Plant your veggies. A month later, give them a dose of fish emulsion via watering can. As tomatoes begin fruiting, side-dress with compost or an organic tomato-tone. That’s it. This ensures your soil stays fertile and your plants get what they need, all while improving soil health each year. The advantages over synthetic fertilizer: you won’t get that sudden growth then crash; instead, you build up long-term fertility and structure. And you’re keeping it natural – important for soil life, environmental health, and producing truly organic food.
Your plants will show their appreciation by yielding delicious, nutrient-packed produce. And you’ll have the peace of mind that comes from sustainable practices – you’re not dumping chemicals that could runoff or accumulate; instead you’re cycling organic nutrients much like nature does in a forest floor. It’s a satisfying way to grow.
Involving Kids in Gardening – Fun Projects and Kid-Friendly Crops
Gardening can be a wonderful family activity. Involving kids in your vegetable garden not only teaches them about nature and where food comes from, but it can also be downright fun and rewarding for everyone. Kids are naturally curious and love to get hands-on (yes, even if it’s getting their hands dirty in the soil!). Here are some ideas to make gardening engaging for children, including easy crops they can grow and simple projects to spark their interest.
Why Garden with Kids?
First, it helps to know the benefits: gardening with children has been shown to improve their fruit and veggie eating habits (kids are far more likely to taste what they grow), enhance their science knowledge, and teach responsibility and patience. It’s also quality unplugged time outdoors, which is great for physical and mental health. So, getting them involved is a win for both education and family bonding.
Kid-Friendly Crops (Quick, Colorful, Tasty)
Choose plants that are easy to grow, fairly fast, and have some “wow” factor:
- Radishes: One of the fastest vegetables (ready in as little as 4 weeks from seed). Kids can sow radish seeds and see results quickly. They come in fun colors (red, pink, even purple) and shapes (round or long). Some radish varieties like ‘Watermelon radish’ have a cool pink interior. Even if kids find them spicy to eat, they love pulling them out of the ground like hidden treasures.
- Cherry Tomatoes: Many kids love sweet cherry tomatoes, and the plants produce lots of bite-sized fruits which are fun to pick. Cherry tomatoes are easier to grow than big beefsteak types and ripen faster. Try colorful varieties – yellow, orange, or even chocolate-colored cherry tomatoes. Kids can snack on them right in the garden (nothing tastes better!). Tip: If possible, let the child have their “own” tomato plant in a pot to tend – they’ll take pride in it.
- Snap Peas or Snow Peas: These are great because kids can eat them raw on the spot and they’re sweet. They germinate in cool weather, climb a trellis (kids enjoy training vines onto supports), and produce pretty quickly (60 days or so). Peas have soft leaves and stems that are easy for little hands to handle. The act of opening a fat snap pea pod to find peas inside is delightful discovery for youngsters.
- Bush Beans (Green Beans): Plant a row of bush beans and they’ll sprout in a week or so, then grow into small bushes that yield a bunch of beans kids can pick. Beans are sturdy plants. Purple green beans (which turn green when cooked) are a neat novelty. Beans also have big seeds that are easy for little fingers to sow with proper spacing.
- Sunflowers: Not a vegetable per se, but very worthwhile in a kids’ garden. Sunflowers sprout fast, grow tall (the giant ones can tower over kids, which is exciting), and attract bees and birds. You can even have contests: whose sunflower grows tallest or blooms first? At season’s end, harvest the seeds (another lesson and snack when roasted). Even a small variety in a pot is fun.
- Pumpkins or Gourds: If you have a bit of extra space or even just a large container, growing a pumpkin or a few mini gourds can be magical for kids. Watching a tiny seed become a sprawling vine and then a big orange pumpkin feels like real-life Jack and the Beanstalk. Mini pumpkins (like Jack Be Little) or gourds might fit better in a small garden and mature faster. They can decorate with their pumpkins in fall.
- Strawberries: These are a super kid-friendly crop – who can resist sweet strawberries? They are perennials, so you can plant some everbearing or day-neutral strawberries in a container or small patch and get berries through summer. Children will gladly water and care for strawberry plants once they taste the fruits! Just protect from birds (maybe let the kids help make a net or scarecrow).
- Lettuce/Salad Mix: Quick reward and colorful if you choose a mix with reds and greens. Kids can scatter the tiny seeds and see sprouts in days. They might not find lettuce thrilling to eat, but they do enjoy cutting leaves for a salad they “made.” For more fun, grow varieties like speckled lettuce or frilly endive. Even better, include edible flowers like nasturtiums in the salad mix – kids will be amazed they can eat a flower.
- Herbs (Basil, Mint): Herbs like mint and basil have strong scents that kids often enjoy. Mint is fun to pick and smell (maybe make mint tea or lemonade). Basil can tie into making homemade pizza or pasta sauce. These plants are also pretty hardy. Do keep mint confined to a pot as it can take over a bed.
In general, large seeds (beans, peas, sunflower, corn) and quick growers (radish, lettuce) are great for younger kids because they can easily plant them and see progress. Also sensory plants (like lamb’s ear for touch, or lemon balm for smell) enrich the experience.
Fun Gardening Projects for Kids
In addition to just growing veggies, involve kids in creative, fun projects:
- Personalized Planters: Let kids decorate clay pots with paint for their personal plant. Maybe they each get a pot to paint and plant with something like a tomato, a marigold, or a herb. They’ll feel ownership and excitement seeing “their” plant grow.
- Garden Crafts: Build a simple scarecrow together, or a painted wooden sign with the child’s name (“Emily’s Garden”). Painting rocks as plant labels or garden decor is another crafty afternoon (e.g., paint a ladybug rock or write plant names on stones). April Wilkerson style would be to use some scrap wood and do a DIY project – for instance, building a small raised bed or a trellis with the kids helping to screw boards together (with supervision) can make them proud of the garden structure they built.
- Sunflower House or Bean Teepee: If space allows a few tall plants, you can plant sunflowers or pole beans in a circle to create a little “fort.” For instance, push poles or bamboo canes in a tepee shape and plant pole beans or morning glories at the base – as they grow and cover the poles, it forms a living teepee kids can sit under. Similarly, a ring of sunflowers with an opening can become a sunflower house (plant climbers like beans at their base to make a “roof” between sunflower stalks). These little hideouts are enchanting for children.
- Worm Farm or Bug Hunting: Teach kids about composting by starting a worm bin with them. Red wiggler worms in a bin can consume kitchen scraps and kids can check on “their worms” and later use the worm castings in the garden – a full cycle science lesson. If not that, simply encourage beneficial bugs – have them hunt for ladybugs or make a “bug hotel” out of stacked twigs, pinecones, etc. to provide habitat for insects.
- Sprouting Experiments: A quick indoor project – sprout seeds like beans or alfalfa in a jar (to eat) or even just on a wet paper towel to see roots/shoots. This can complement outdoor gardening especially on rainy days. Or try regrowing kitchen scraps (like placing a celery base or carrot tops in water to see them sprout greens).
- Themed Gardens: Consider making a small themed section just for the kids. For instance, a pizza garden: grow tomatoes, basil, oregano, peppers (and maybe wheat if you really want to go full pizza!). Or a rainbow garden: plants of different colors (rainbow chard, purple beans, yellow tomatoes, orange marigolds, etc.). A sensory garden theme is great for younger children – plants to feel, smell, taste, see bright colors, and even hear (like ornamental grass rustling).
- Watering Fun: Kids often enjoy watering if you give them child-sized watering cans or let them use a gentle hose nozzle. It can be a play activity on hot days (watering plants and maybe sprinkling themselves!). Just guide them about not overwatering seedlings to mush.
- Harvest and Cook Together: The ultimate project is using the harvest. Simple recipes that use garden produce will give kids a real sense of accomplishment. For example, make a garden salad with their lettuce, radishes, and cherry tomatoes; or homemade pesto from their basil; or funny face pizzas using veggie toppings they grew. Even just shelling peas and then eating them steamed with butter can be a memorable farm-to-table experience for a child. This connects the garden to real life results (and as research shows, kids who grow veggies are much more likely to eat them).
Giving Kids Ownership and Tasks
To keep children engaged, give them age-appropriate responsibilities. A younger kid might be in charge of checking every day if the garden needs water and reporting back (or watering their specific plant). An older child could help with bigger tasks like building a trellis, mixing soil, or sowing seeds in rows carefully. Create routine: maybe every Saturday morning is “garden time” together to weed and harvest. Make it fun, not a chore – so play music outside, or make a game out of weed pulling (like a treasure hunt).
It’s also important to be patient and embrace imperfection: kids might plant seeds too close or pull up a carrot too early out of excitement. That’s okay. Keep the mood light. The goal is to cultivate their interest, not necessarily a perfect garden. If a plant fails, use it as a learning opportunity (why do they think it happened? What could we try next time?). Celebrate successes – literally cheer when they harvest their first cucumber or when the sunflower finally blooms.
Safety note: If using tools, teach proper tool handling. Perhaps assign them kid-safe tools (blunt trowel, small watering can, gloves). Keep any organic fertilizers or garden chemicals (even organic ones like Neem) out of reach or only used by adults, because kids might not differentiate. Also watch out for stinging insects or prickly plants. Overall, gardens are pretty safe, but just supervise accordingly.
Many adults who garden today have fond childhood memories of picking tomatoes with a parent or grandparent. By involving your kids, you’re creating those lifelong memories and skills for them. A kid who grows up gardening is more likely to appreciate nature, understand nutrition, and have the confidence to grow their own food later in life. You’re planting the seed (pun intended) for the next generation of gardeners.
So hand them a little shovel and let them dig in! They might get muddy and the rows might not be straight, but the smiles and sense of wonder are well worth it. The garden will become a place of family connection – imagine their pride when you serve a meal and they announce “I grew the carrots in this soup!” That’s priceless. As Ana White might say in her DIY blogs, it’s about empowering people (in this case, little people) to build and create – and a garden is a perfect project to build together.
Making the Garden a Focal Point – Beauty and Productivity Combined
Just because your vegetable garden is functional doesn’t mean it can’t be beautiful! In fact, incorporating your veggie patch into the overall landscape can turn it into a charming focal point of your property. This is sometimes called edible landscaping – blending edibles with ornamentals. With a bit of design thinking, your small vegetable garden can be both a source of fresh produce and an attractive feature that enhances your yard or patio.
Here are some ideas to integrate and beautify your garden space so it’s an appealing focal point:
Blend Edibles with Ornamentals
Who says veggie gardens must be separate, squared-off plots? You can plant vegetables in existing flower beds or mix flowers into vegetable beds. The result can look like a lush cottage garden with the bonus of food production. For example, plant curly kale or purple cabbage alongside petunias and zinnias – the contrast of textures and colors can be stunning (ornamental kales are often used in flower displays anyway). Edges of a vegetable bed can be lined with low ornamental plants like sweet alyssum or lobelia, which spill over nicely and attract beneficial insects.
Vegetables themselves can be quite ornamental: rainbow chard has vibrant stems, eggplants have glossy purple fruits, frilly carrot tops add greenery, and scarlet runner beans have beautiful red flowers. Utilize these traits. A front yard vegetable garden can be designed with aesthetics in mind by including structural plants and varying heights. Perhaps have a backdrop of sunflowers or corn, mid-layer of bushy tomatoes and peppers, and border of marigolds and herbs for a pleasing tiered look.
One concept is the potager garden (French kitchen garden) style, which traditionally combines vegetables, herbs, and flowers in an artful layout. Think geometric beds with neat pathways, or alternating rows of lettuce and pansies for color contrast. The Pioneer Woman magazine suggests pairing edibles with shrubs and perennials in foundation beds – for instance, tucking parsley or lettuce at the front of a rose or shrub border. The edibles provide texture and can actually complement the look of ornamentals.
Use Attractive Structures
Instead of plain wire tomato cages or random stakes, choose (or DIY build) some attractive supports that add visual interest. For example:
- Trellises and Arbors: A wood trellis or an obelisk teepee can be a focal point on its own. Grow climbing veggies like pole beans, cucumbers, or even a squash vine up a pretty trellis or an arch. A classic idea is an arch at the garden entrance with beans or small melons hanging down. Not only does it save space, it’s picturesque. Garden arches or arbors with vines give a cozy, secret-garden feel.
- Raised Bed Design: If you’re using raised beds, consider painting or staining the wood an attractive color to match your house trim or using decorative materials. A well-built cedar bed with caps on the corner posts can look like a nice piece of yard architecture. You can even install trellis panels on the north side of a raised bed for climbers, doubling as a privacy screen or backdrop. There are also metal raised beds in stylish colors that can add a modern focal point.
- Pathways and Edging: Define the garden area with nice edging or paths. Brick, stone, or gravel paths between beds instantly make the space look intentional and inviting. If your veggie patch is in the lawn, edge it with a low fence or a border of bricks so it looks like a planned garden room. A little bistro set (table and chairs) near the garden can create a spot to sit and admire – functional and aesthetic.
- Containers as Art: For patio or balcony gardens, choose some decorative pots for your veggies. Glazed ceramic pots, whiskey barrel planters, or painted buckets add character. You could even get the kids to paint terra cotta pots in bright patterns. Arrange containers at varying heights (maybe put some on sturdy crates or stands) to create a dynamic, layered look rather than everything flat on the ground.
Raised beds filled with vibrant vegetables can be both productive and visually striking, becoming a highlight of the landscape. The lush greens of kale and cabbage in defined raised beds create a pleasing, organized look that draws the eye. Structured planting like this can transform a corner of your yard into a mini kitchen garden that’s as beautiful as it is tasty.
Color and Aesthetics
Think about color and seasonality. Mix in plants that will give blooms or color when perhaps some veggies aren’t at peak. For example, early spring bulbs (tulips, daffodils) could be planted at corners of beds – they’ll flower and finish before the veggies really take over. Or plant some calendula or cosmos among your crops for summer-long blooms.
Even foliage color can be considered: purple basil, variegated thyme, or the bluish leaves of artichoke can add visual variety. One could make a gorgeous ornamental edible container by combining, say, purple kale, yellow marigolds, trailing thyme, and red leaf lettuce – it would look like a designer planter and be mostly edible.
Don’t forget vertical color: if you trellis something like nasturtiums or scarlet runner beans, you get fiery flowers climbing up. Edible flowers such as nasturtium, calendula, borage, and viola not only beautify the garden, they can be harvested to decorate salads and desserts (that often impresses kids and guests alike – an edible flower on a cupcake or salad feels gourmet).
Make it Welcoming
If you want your garden to be a focal point, make it a place people (and you) want to walk through or sit near. A small ornamental fence around it can define the space (white picket fence around a veggie plot gives a charming cottage vibe and also keeps out rabbits). An arbor entry as mentioned can set it apart as a special area. Add a stepping stone with a cute quote (“Gardening Grows the Spirit” or something) or a piece of garden art (a whimsical gnome, a metal butterfly stake, wind chimes) to personalize it.
Lighting can also turn your garden into a focal point at night. Some solar stake lights along the paths or string lights on a trellis make the veggie garden an evening attraction as well.
Front Yard Veggies – Yes, You Can!
If your only sunny spot is the front yard, don’t hesitate to plant edibles there but do it with design in mind. Choose plants that have neat forms or attractive fruit. Peppers can look like ornamental peppers. Chard and kale can be as pretty as any ornamental grass or annual. You can edge a front walk with parsley or red lettuce as easily as you would with begonias, and it looks lovely. Incorporate a dwarf blueberry shrub or grapevine on a decorative trellis. This way the garden doesn’t scream “farm,” it just looks like a well-landscaped yard with the bonus that you can nibble on it. Many gardeners have successfully made beautiful front-yard potagers that even pass HOA scrutiny because they’re artfully done (geometric patterns, mixed flowers, etc.).
The key is to maintain it – keep up with removing spent plants, tidy the edges, and maybe succession plant to avoid bare dirt for long. For instance, after harvesting spring lettuce, pop in some colorful zinnias or plant a quick bush bean crop so the area isn’t empty.
Combining Form and Function
One example approach: say you have a small rectangular plot visible from your patio. Instead of plain rows, you could divide it into a little grid of four mini-beds with a sundial or decorative pot in the center as a focal point. Each mini-bed can have a different theme or color scheme (one with red-toned plants like red lettuce and nasturtium, one with cooler greens and purples like sage and purple cabbage, etc.). Put an obelisk trellis in one for climbing beans, which adds height. Surround the bed with a border of white alyssum flowers which not only looks nice but also attracts beneficial insects. Now you have a feature that’s interesting to look at, smells nice (herbs and flowers), and yields food.
Fine Gardening magazine suggests using design principles like color, texture, and form in the veggie garden just as you would in ornamentals – e.g., the glaucous blue of cabbage leaves next to fine-textured carrot tops for contrast. They also recommend giving an “entrance” to the garden area to signal it’s a intentional garden room (like an arch or distinctive gate). The idea is to treat your edible garden as a part of your home landscape design, not an afterthought.
Containers and Arrangements
If your garden is all containers on a balcony, you can still aim for focal point appeal: Use decorative plant stands to create levels, pair tall and trailing plants, and maybe add a comfy chair and some outdoor decor so the container veggie garden feels like a green oasis living space. For instance, put a tomato in a nice pot with a bamboo cage, underplant it with creeping thyme, place it next to a pot of bright nasturtiums and a pot of peppers, and behind them have a wall planter of mixed lettuce – now you have layers of height and color. Throw a bright outdoor rug or mat on the balcony and it becomes an attractive hangout area that just happens to also provide dinner ingredients.
Maintenance for Beauty
To keep the garden as a focal point, maintenance is key: remove diseased leaves, train wayward vines, and replant gaps. Use mulch (it tidies the look by covering bare soil and making plant colors pop against a uniform background; plus the other benefits we discussed in weed control). You can even choose decorative mulch like cocoa bean hulls or straw (straw gives a rustic farm look that some find charming, while a dark compost mulch gives a more formal look).
Also, plant in succession or interplant to avoid the eyesore of big empty areas when one crop is done. If your spring broccoli is finished, have some summer flowers or quick veggies ready to plug in. Or do as some decorative gardeners do: fill in temporary gaps with a few nursery-bought flowers to keep it looking full.
Finally, pride and enjoyment: display your garden proudly! Invite friends over to stroll through it. Use the produce in table centerpieces (like a bowl of multicolored peppers or eggplants can be as lovely as a floral arrangement). When the garden is integrated with your living space visually, it becomes a conversation piece and a source of joy beyond just the harvest. You might find yourself or family members lingering in the garden area simply because it’s pleasant – smelling the herbs, watching pollinators hop flower to flower, and relishing the little paradise you created. That’s when you know your vegetable garden has truly become a focal point of your home in every sense.
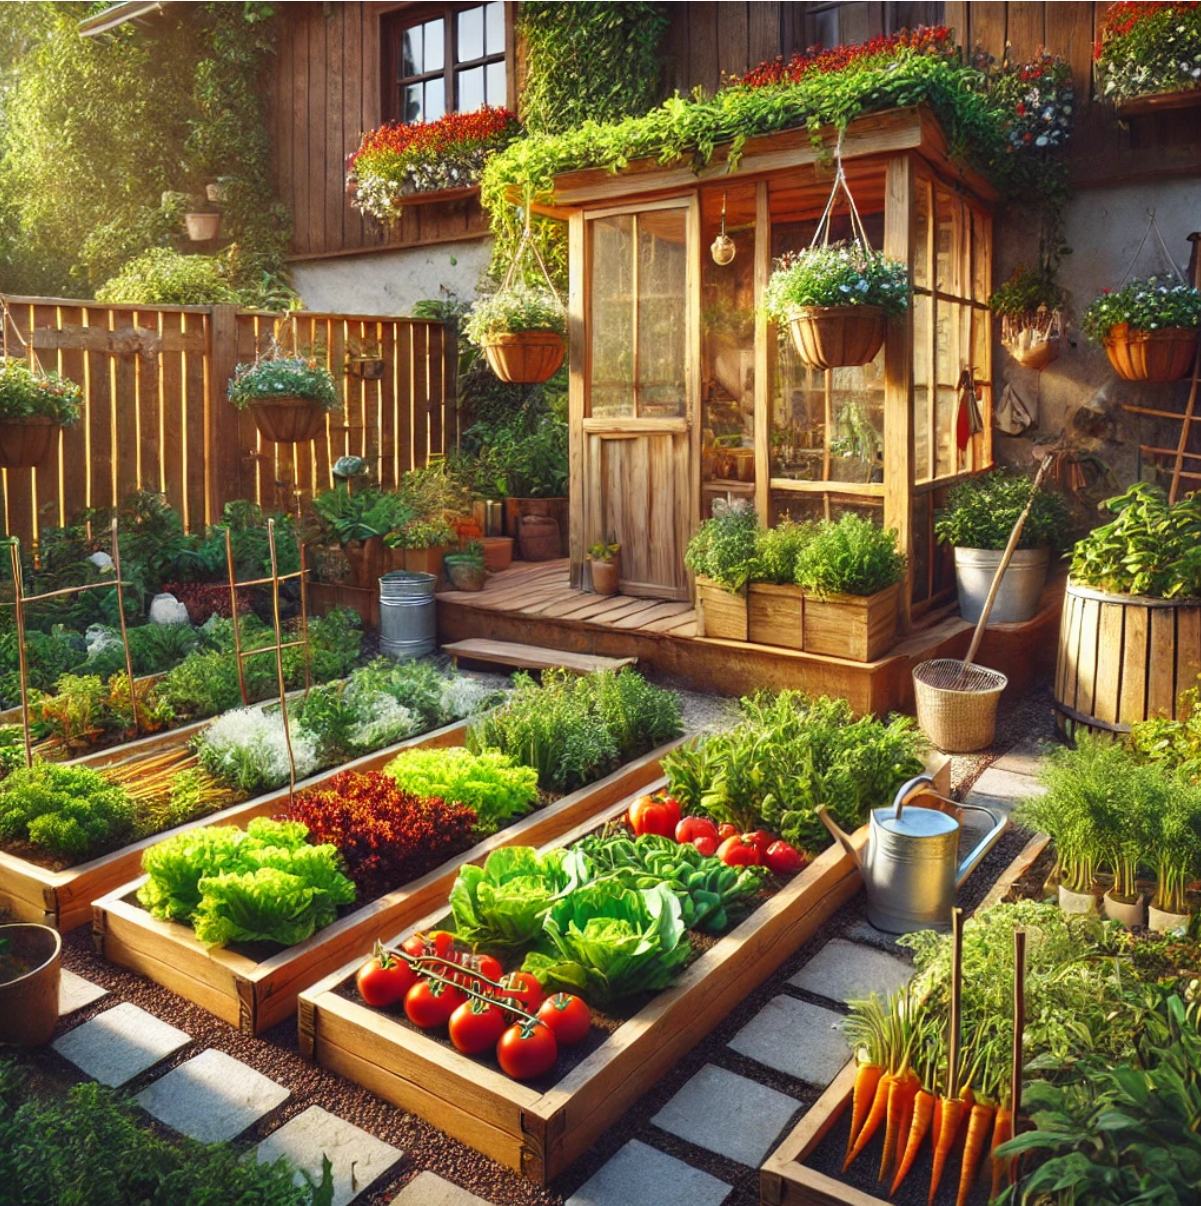
Essential Tools and Materials for the Beginner Gardener
Starting a small vegetable garden doesn’t require a ton of fancy gadgets, but having a set of basic, quality tools will make your gardening tasks easier and more enjoyable. It’s tempting to buy all sorts of tools, but as a beginner, focus on a core set of must-haves. As the old saying goes, “use the right tool for the right job” – it can save you time and frustration (and maybe your back!). Below is a list of essential tools and materials, along with tips on what to look for in terms of quality and durability.
Must-Have Tools:
- Hand Trowel – This small digging tool is your best friend for planting seedlings, digging holes for seeds, and scooping soil or compost. Look for a trowel with a narrow, sturdy stainless steel blade that won’t bend in tough soil. A comfortable grip (ergonomic rubber handle or similar) is important because you’ll use it a lot. A good trowel will last years. Cheap ones can snap or the handle can come loose. Invest in a solid one-piece or well-fastened trowel – it’s worth it.
- Hand Cultivator (Hand Fork) – This is a small 3-pronged claw tool. It’s used for loosening soil, scratching up weeds, and mixing in fertilizer in tight spaces. Like the trowel, get one that’s sturdy (some come in sets with trowels). It’s great for raised beds and containers where you work close-up. You can often find a combo tool (one side trowel, one side cultivator) but separate tools are usually easier to use. A hand fork with strong tines that won’t snap on roots is key.
- Gloves – While not a “tool” in the digging sense, a good pair of gardening gloves will protect your hands from blisters, thorns, and dirt. For most veggie gardening, lightweight nitrile-coated gloves are excellent – they’re like a second skin, giving you dexterity to pick up seeds but keep your hands dry and clean. They’re cheap and replaceable. For heavier jobs (pruning roses or moving rocks), a thicker leather glove is useful, but for daily veggie chores, nitrile or rubber-coated fabric gloves are comfy. Make sure they fit well.
- Pruning Shears (Hand Pruners) – A quality pair of hand pruners is essential for snipping herbs, pruning tomato suckers, cutting thick stems or harvesting produce like peppers and eggplants. Bypass pruners (where one sharp blade slices past a blunt blade, like scissors) are preferred for clean cuts. Brands like Felco or Corona have good reputation. Look for pruners that feel solid, with sharp replaceable blades, and a safety latch. They come in different sizes – choose one that fits your hand comfortably.
- Watering Can or Hose with Spray Nozzle – You need a way to water your garden. If you’re on a balcony or have a very small area, a watering can (2-gallon size or so) with a rose (sprinkler head) is fine. For a yard garden, a hose is more convenient. Either way, use a gentle spray or shower setting so as not to blast your seedlings. If hose, get a quality hose that doesn’t kink easily. Also consider a soaker hose or drip kit as mentioned in irrigation, but to start, a can or hose works. Don’t forget a hose nozzle with adjustable patterns (gentle shower for garden, possibly jet for cleaning). Watering is a daily job, so ensure your watering tool is durable and not too heavy when full (consider weight of a metal vs plastic watering can).
- Long-Handled Shovel/Spade – If you are doing any in-ground digging or moving significant soil/compost, a long-handled spade is very useful. A spade has a flat blade ideal for digging straight down, edging, or lifting sod. A shovel has a pointed blade for digging and moving soil. Some tools combine features. For starting a small raised bed, turning a compost pile, or digging a planting hole for a shrub, you’ll want a decent shovel. Look for forged metal heads (one piece metal is strong) and a comfortable handle length (longer handles give more leverage). Wooden handles are fine if well-made; fiberglass handles are very durable. A quality shovel can last decades. It’s a bit of an investment but an indispensable tool if you need it.
- Garden Fork (Pitchfork) – Not everyone needs this, but if you are turning soil or compost, a garden fork (with 4+ tines, like a pitchfork but shorter handle usually) is extremely handy. It digs into dense material better than a spade. For initial ground breaking or heavy clay, a digging fork helps to loosen soil without cutting worms. Also great for lifting root crops like potatoes or garlic without slicing them. Ensure the tines are metal and strong (they shouldn’t bend on hard soil). If you have raised beds with soft soil, you might not need a long-handled fork; the hand cultivator might suffice. But for in-ground gardens or compost, this is a workhorse tool.
- Garden Hoe – If you have any length of row or open soil, a hoe is excellent for weeding and making furrows for planting seeds. For small raised beds, you might not need a long hoe, but many gardeners still like a stirrup or scuffle hoe for quick weed slicing. A traditional hoe (flat blade) can be used to draw soil up around plants (hilling potatoes) or scrape weeds. If you have a small area, a hand hoe or even just hand pulling might be enough, but as your garden grows, a hoe saves your back by allowing you to weed standing up. Make sure the hoe’s head is securely attached and the handle comfortable (wood is common). There are various designs – for primarily weeding, the stirrup (oscillating) hoe is very effective and easy to use.
- Rake – There are two main types: garden rake (bow rake) which is rigid with metal tines – good for leveling soil, spreading compost, etc., and leaf rake which is fan-shaped and good for gathering leaves or light debris. For vegetable gardening, a bow rake is more essential – after tilling or digging, you use it to break clods and smooth the soil surface for planting. It’s also useful for scratching in seeds over a larger area, or pulling dead plants off the bed. A leaf rake is less critical unless you have trees and lots of leaves or straw mulch to gather (though it is handy for general yard care). If you had to pick one, go with a sturdy garden rake. Ensure it has a strong connection to handle (e.g., a bolted metal head). Metal tines last longer than plastic. Plastic leaf rakes can break; if getting a leaf rake, those with metal tines or high-quality poly last longer.
- Wheelbarrow or Garden Cart – In a very small garden, you might not need this, but if you have a yard, a wheelbarrow or garden cart for hauling soil, compost bags, mulch, tools, and harvested produce is extremely helpful. It spares your back from carrying heavy loads. For limited storage, consider a collapsible canvas cart or a smaller 4-cu-ft poly wheelbarrow. If buying a wheelbarrow, look for one with a single, well-balanced wheel for maneuverability or two wheels for stability (two-wheeled carts are easier to keep balanced but less nimble). Ensure the tray is durable (steel or heavy poly) and handles are sturdy. If you only have a patio garden, you can skip this, but for any yard work beyond a couple pots, you’ll find a cart makes work easier.
Now, aside from tools, here are some essential materials:
- Quality Soil/Potting Mix: If using raised beds or containers, you’ll need good soil. Don’t skimp here – the plants’ health depends on it. Use a vegetable garden soil mix or potting mix (often a blend of compost, peat/coir, vermiculite, etc.). Many beginners make the mistake of using yard topsoil in containers – it becomes compacted. Instead, buy bagged potting mix or create a mix of 1/3 compost, 1/3 peat moss (or coco coir), 1/3 vermiculite for raised beds (that’s basically Mel’s Mix from Square Foot Gardening, a proven formula). For in-ground, consider getting a soil test kit to know if you need to add lime or other amendments.
- Compost or Organic Matter: As discussed earlier, have some compost on hand to enrich soil. Either your own or store-bought. Many municipalities sell compost or you can get mushroom compost, etc. Also, straw or leaves for mulch if available. Stockpiling fall leaves to use as mulch or compost carbon is an excellent practice.
- Seeds/Seedlings: Of course, you need something to plant! Get quality seeds from reputable companies (germination rates are usually higher). For some items, you might start with purchased seedlings (tomatoes, peppers). Materials needed for starting seeds indoors include seed trays, a light source, seed-starting mix, etc., but that’s optional if you plan to buy starts or direct-sow outside. Still, having a few seedling pots or trays and some labels is useful in any garden (you can repurpose yogurt cups, etc., too).
- String/Ties/Supports: Soft plant ties or twine for tying plants to stakes (like tomatoes to their cage, or beans to a pole). Biodegradable twine is nice because you can compost it with the plant at end of season. Also consider some stakes or cages: tomato cages (ideally strong ones that won’t collapse), bamboo stakes or metal rods for staking tall plants, a trellis netting if you plan to train cucumbers or peas. These aren’t “tools” but materials often needed for supporting plants.
- Measuring Tools: A small ruler or measuring stick to space seeds, or just use the markings often found on a trowel (some have inch marks). Also a yardstick or tape measure when laying out beds can help get spacing right. This isn’t mandatory, but if you like precision, it helps.
- Wheelbarrow (if needed): Mentioned above, included in tools.
- Irrigation Components: If you go the drip irrigation route, essential pieces include a timer, backflow preventer, pressure reducer, filter, tubing, emitters, etc. If that’s too much at start, just ensure you have a good hose and nozzle.
- Garden Storage: Think about where you’ll keep your tools. A bucket or tote to carry small tools around is useful (you can even use a 5-gallon bucket with a bucket tool organizer apron). A shed or storage box to keep tools out of the rain will prolong their life (no rust). It also keeps things tidy.
- Sharpening/File: Eventually, pruners and shovels work best when sharpened. A simple mill file or sharpening stone can tune up your hoe, shovel edge, and pruner blade annually. It’s a good practice to wipe tools clean and dry after use, maybe oil metal parts lightly for storage, and sharpen as needed. This protects your investment.
A note on quality vs cheap: It can be tempting to buy that $5 trowel or bargain tool set. But cheap tools often break quickly, leading you to buy again – false economy. Spend a bit more on well-made tools from known brands; they will perform better and last longer. Focus on basic, durable tools that will “last a lifetime” rather than all the new gimmicks. For example, a quality hand pruner can be resharpened and used for decades, whereas a $10 blister-pack pruner might get dull and loose in a season.
That said, you don’t need the deluxe gold-plated versions either. There are many mid-priced tools that are excellent (look for reviews or brands like Fiskars, Corona, Felco, True Temper, etc.). Sometimes home centers have decent ones, but specialty garden stores may offer better.
Also consider ergonomics: if you have any physical limitations (like kneeling difficulty), tools like a garden kneeler pad or stool, and long-handled versions of small tools can help. For instance, there are extended reach trowels or cultivators so you can work in raised beds without bending too far. And if you have a bit of budget, one of the best “tools” can be a simple rain gauge to measure rainfall so you know how much to water (and it’s fun for kids to check too).
Finally, aside from tools, the essential ingredient is enthusiasm and patience. With those, and this handful of tools, you’re equipped to start and maintain your garden. Take care of your tools (clean off dirt, maybe use a sand/oil bucket to store metal hand tools to prevent rust) and they’ll take care of you. As you gain experience, you might expand your toolkit (maybe a pole pruner for trees, or a tiller if you expand ground beds, etc.), but many gardeners find the above list is 90% of what they use daily.
To recap, the beginner’s toolbox might look like: gloves on, trowel and cultivator in a bucket, pruners in pocket, a hoe or rake over shoulder, watering can filled, and a smile on your face. With these, you can accomplish the vast majority of planting, tending, and harvesting tasks in your small garden.
Conclusions
By covering all these aspects – from planning your garden layout, choosing the right plants, building healthy soil, managing pests organically, extending your growing season, keeping weeds at bay, efficiently watering, involving the whole family, making the garden look great, to using the proper tools – you now have a comprehensive roadmap to start your own small vegetable garden. It may seem like a lot of information, but gardening is a journey of continuous learning. Take it one step (or one season) at a time.
To summarize some key takeaways:
- Start small and smart: a couple of raised beds or a set of containers with a few reliable crops is a great beginning.
- Invest in soil: nourish your soil with compost and organic matter, and it will nourish your plants.
- Right plant, right place: choose veggies that fit your climate and season, and give them the space and supports they need.
- Organic methods yield healthy results: embrace compost, natural pest control, and crop diversity to create a resilient mini-ecosystem.
- Be consistent with care: watering, weeding, and feeding on a regular schedule makes the work manageable and your plants happy.
- Have fun and be creative: personalize your garden, involve your kids or family, and don’t be afraid to try new things.
Gardening is as much art as science, and it’s okay if not everything goes perfectly. Plants want to grow – you’re just there to help them along. As you enjoy that first homegrown tomato or a handful of sweet peas, you’ll experience the unique satisfaction that comes from cultivating your own food. Plus, you’ll likely find gardening to be a relaxing, rewarding hobby that connects you with nature and perhaps with community (swapping zucchini with neighbors, anyone?).
So grab your trowel and get started! Follow the guidelines in this article step by step, and soon you’ll have a thriving small vegetable garden that fits your space and lifestyle. More importantly, you’ll have the confidence and knowledge to keep it growing year after year. Happy gardening!