If you are looking for easiest way to create a relaxation corner in your garden, you should consider building a wooden bench. In this article we show you simple garden bench plans along with detailed instructions and a list with the materials needed for the project. A wooden bench is ideal for any patio or pergola, but you should match its design with the rest of your backyard.
Taking into account the simple but efficient design, anyone with basic carpentry skills can get the job done in just a few hours, provided the right tools and materials are used. Buy quality and durable materials, such as: cedar, redwood or pine. Make sure the slats are straight and in a good condition before installing them into place with galvanized screws.
How to build a garden bench
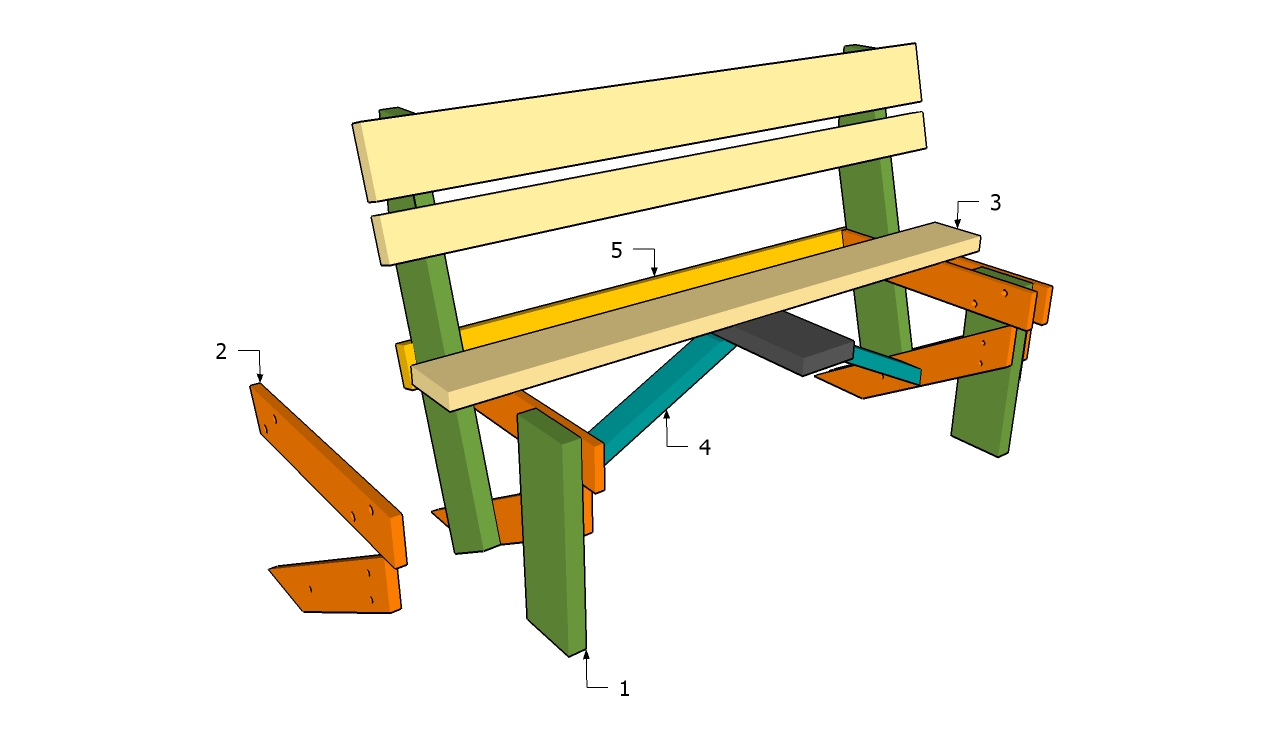
How to build a simple garden bench
Materials
- 1 – 2 pieces of 2×6 lumber – 17” long, 2 pieces of 2×6 lumber – 36” long LEGS
- 2 – 2 piece of 1×4 lumber – 22 1/2” long, 2 pieces of 1×4 lumber – 27” long CROSS-BRACES
- 3 – 3 pieces of 2×6 lumber – 57” long, 2 pieces of 2×4 lumber 57′” long SLATS
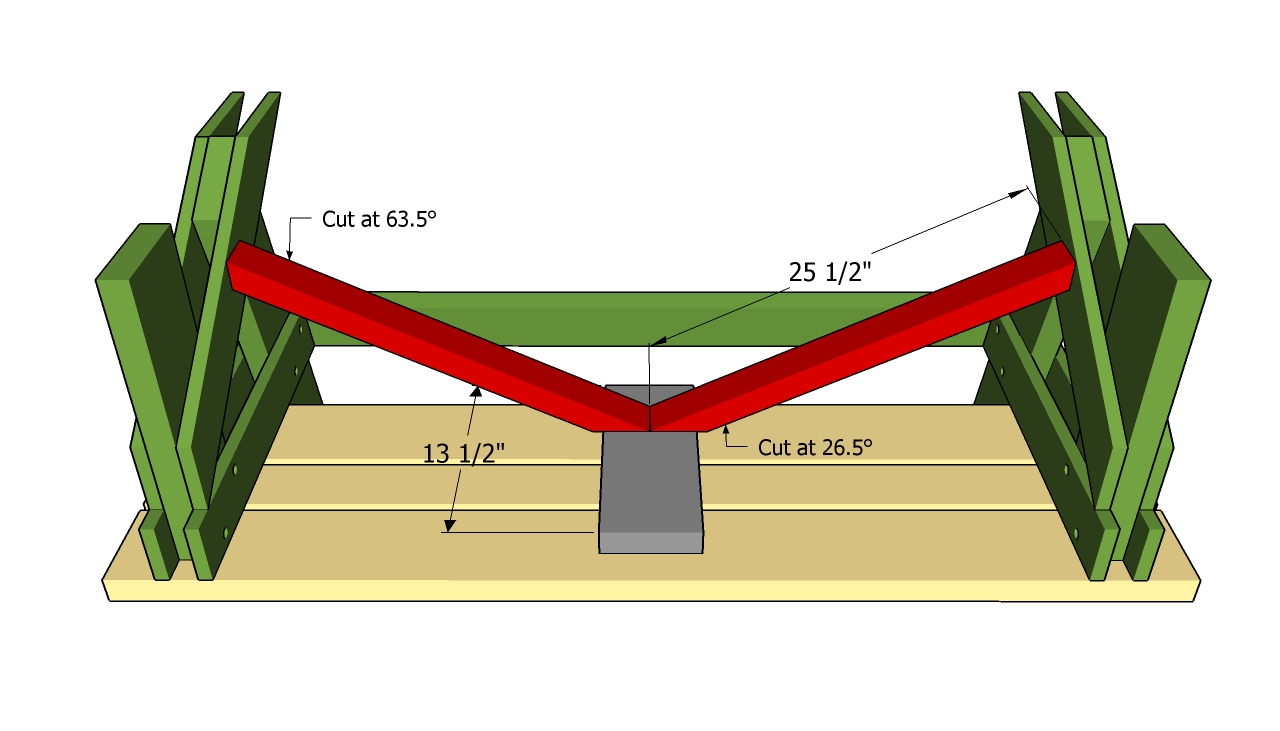
- 4 – 2 pieces of 2×3 lumber – 25 1/2”, 1 piece of 2×6 – 13 1/2” long BOTTOM BRACES
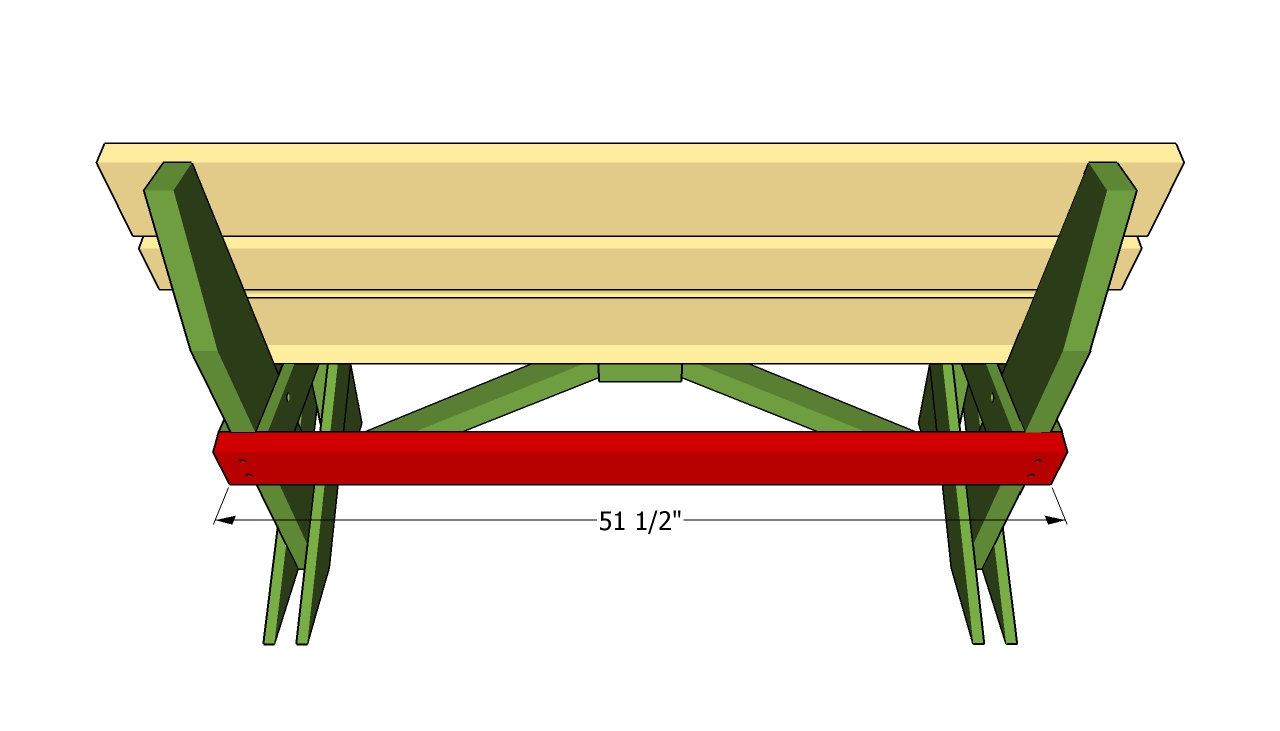
- 5 – 1 pieces of 1×4 lumber – 51 1/2” long BACK BRACE
- 2 pieces of 2×6 lumber – 8 ft
- 1 piece of 2×6 lumber – 10 ft
- 2 pieces of 1×4 lumber – 8 ft
- 1 piece of 2×4 lumber – 10 ft
- 1 piece of 2×3 lumber – 8 ft
- 50 pieces of 2 1/2″ screws
- 14 pieces of 3 1/2″ screws
- wood glue, stain/paint
Tools
- Hammer, Tape measure, Carpentry square
- Miter saw, Drill machinery, Screwdriver, Sander, Router
- Safety Gloves, Safety Glasses, Respiratory Mask
Time
- One day
Simple Garden Bench Plans
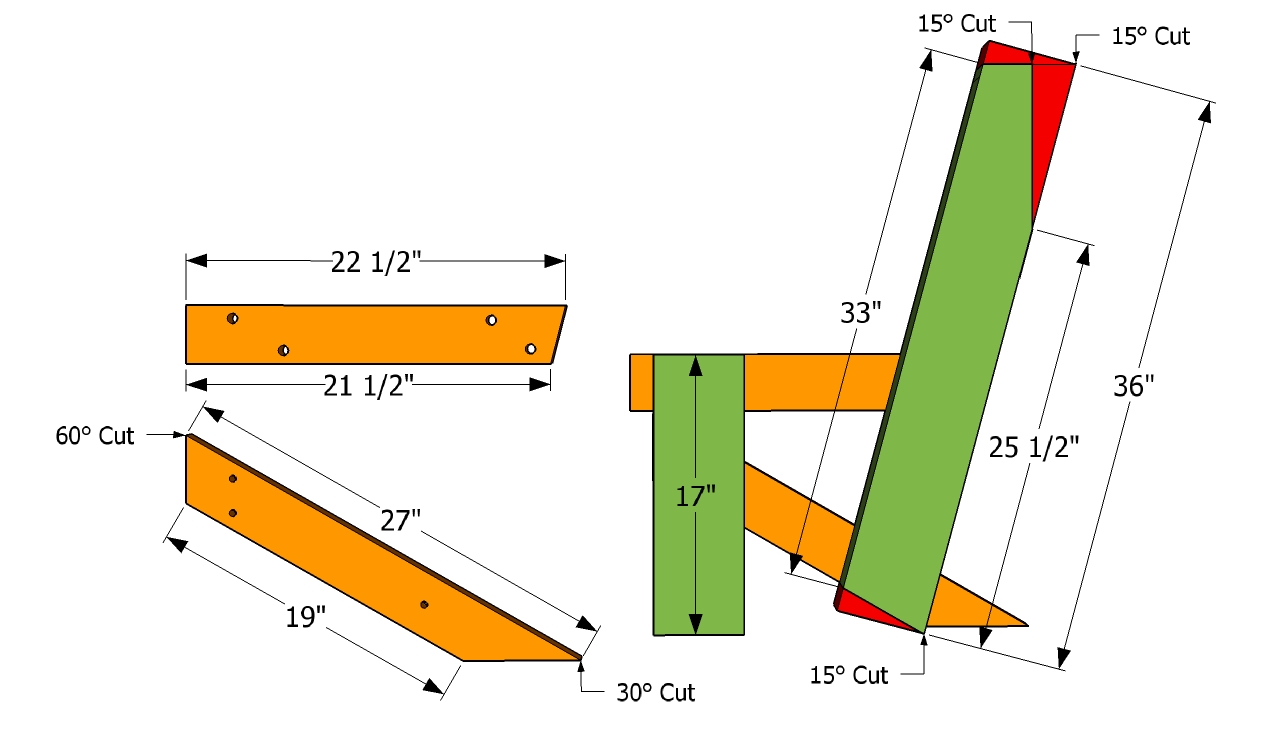
Building the sides of the bench
The very first step of the woodworking project is to build the legs of the garden bench. In order to get a rigid structure, you should make the components from 2×6 lumber, using the plans in the image. Afterwards, build the cross-braces from 1×4 lumber and drill pilot holes trough them and trough the legs.
PRO TIP: Attach the legs to the cross-braces on a level surface and align the components at both ends. Insert 3 1/2″ carriage bolts to assemble the sides.
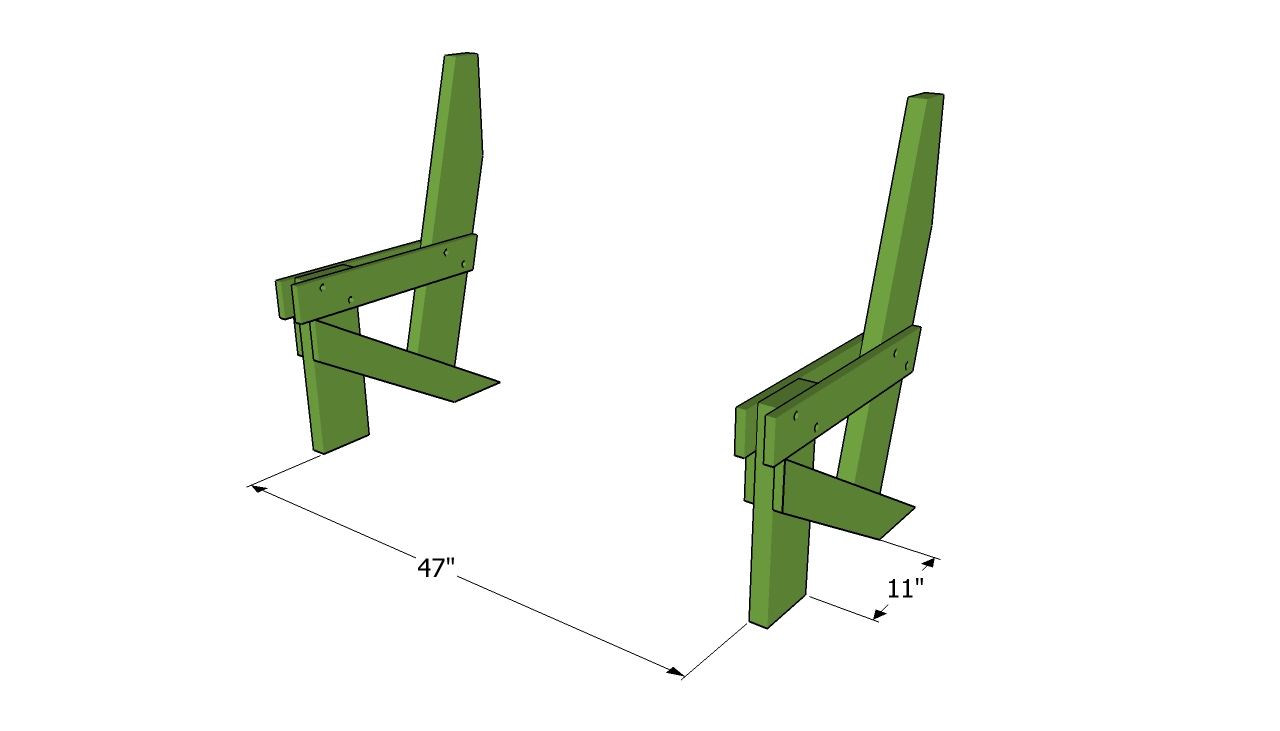
Simple bench frame
As you can see in the image, the sides components of the bench should have the same size and shape, otherwise the bench won’t have a neat appearance. Plumb the sides of the bench with a spirit level, before attaching the seat slats.
PRO TIP: Ask a friend to hold the parts into place, while you drive in the screws.
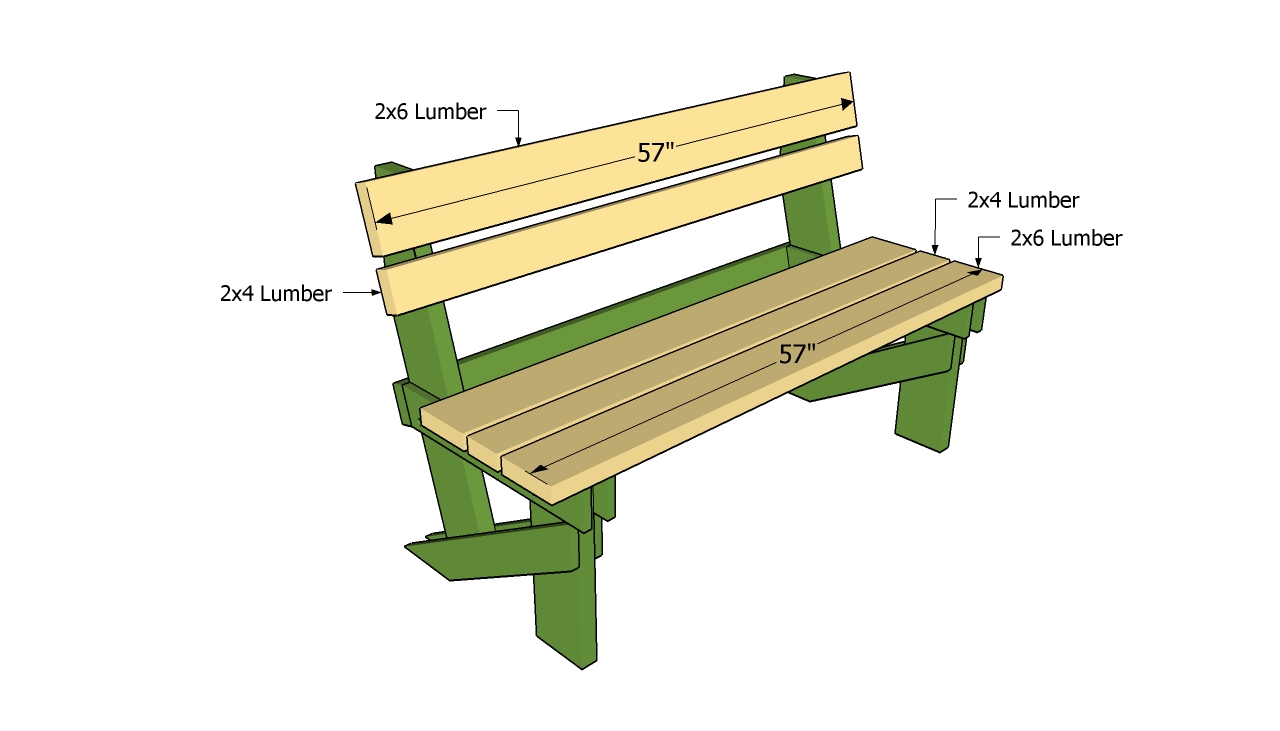
Attaching the slats
Build the seat and back support slats from 2×4 and 2×6 lumber, as in the plans. Drill pilot holes at both ends of the slats, countersink their heads and drive in 2 1/2” galvanized wood screws into the cross-braces. Place the seat slats every 1/2” and leave about 1” between the back support slats.
Installing the bottom braces
At this stage the simple bench might not be sturdy enough to support your weight, so you should increase its rigidity by fitting the bottom braces. As you can easily notice in the plans, you have to fit two 2×3 supports to the crossbraces and to the seat slats.
PRO TIP: It is essential to align the components before driving in the screws and to check if the legs are plumb.
Installing the back brace
In addition, you should fit a 1×4 or 2×4 brace to the back of the garden bench, in order to join both sides together. Drill pilot holes at both ends and drive in 2 1/2” wood screws into the legs of the bench.
Simple garden bench plans
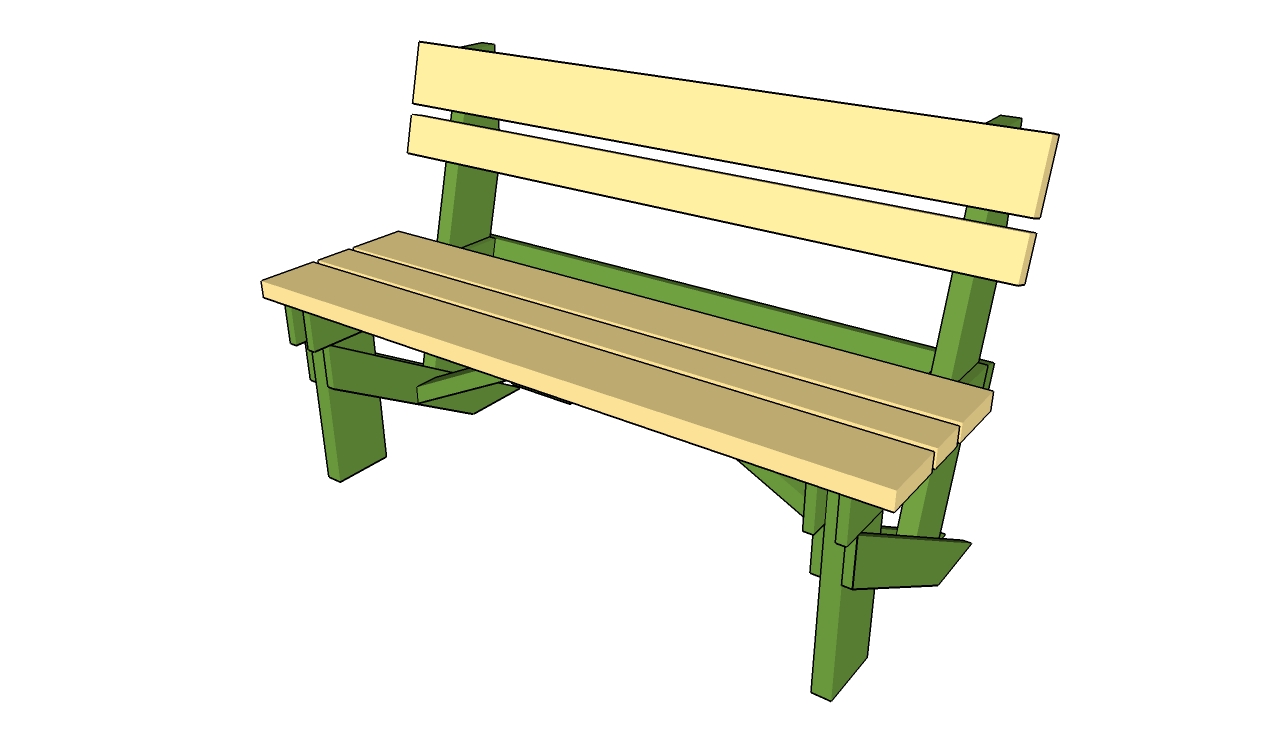
Last but not least, you should check if the wooden components are locked together tightly and the heads of the screws are aligned with the wooden surface. In order to enhance the look of the bench, you should fill the holes with wood filler and let it dry out for several hours.
PRO TIP: Smooth the surfaces with 120-grit sandpaper and vacuum the residues, before applying several coats of protective pain. In addition, you could round the exposed edges of the components with a router and a 1/4” bit, or using a sand-block. See all furniture plans HERE.
This diy project was about simple garden bench plans. If you have enjoyed the free project, we recommend you to share it with your friends, by using the social media widgets.

