If you want to learn more about how to build a large double chair bench, you have to take a close look over the free plans in the article. This project comes with 3D diagrams, full Cut and Shopping lists, so you can build this outdoor bench with backrest and a middle table.
If you want to get the job done in a professional manner, we recommend you to plan everything with attention, as to prevent costly mistakes and to build a professional garden bench. Invest in high quality materials, such as cedar, pine or redwood, as the bench will be exposed to all kinds of weather. Apply a few coats of paint over the components, to enhance their appearance and to protect them from bad weather. See all furniture plans HERE.
Large Double Chair Bench – Free Online – DIY Plans
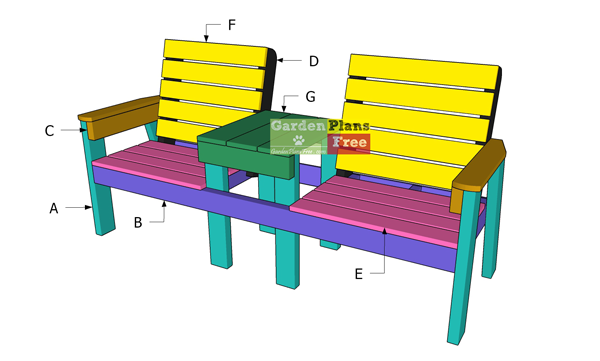
Building-a-large-double-chair-bench
Materials
- A – 2 pieces of 2×4 lumber – 23″ long, 6 pieces – 24 3/4″ long LEGS
- B – 2 pieces of 2×4 lumber – 68″ long, 6 pieces – 18″ long SEAT
- C – 2 pieces of 2×4 lumber – 21 3/4″ long, 1 pieces of 1×4 lumber – 22 1/4″ long ARMREST SUPPORT
- D– 4 pieces of 2×4 lumber – 24″ long BACKREST SUPPORTS
- E – 8 pieces of 1×4 lumber – 25 1/2″ long SUPPORTS
- F – 10 pieces of 1×4 lumber – 24″ long TABLE FRAME
- G – 2 pieces of 2×4 lumber – 17″ long, 3 pieces of 1×6 lumber – 20″ long TABLE
- 1 piece of 1×6 lumber – 8 ft
- 7 pieces of 2×4 lumber – 8 ft
- 5 pieces of 1×4 lumber – 10 ft
- 100 pieces of 3 1/2″ screws
- 200 pieces of 2 1/2″ screws
- 200 pieces of 15/8″ screws
- wood glue, stain/paint
Tools
- Hammer, Tape measure, Carpentry square
- Miter saw, Drill machinery, Screwdriver, Sander, Router
- Safety Gloves, Safety Glasses, Respiratory Mask
Time
- One day
Related
Made from this plan
Step 1: Building the frame of the bench
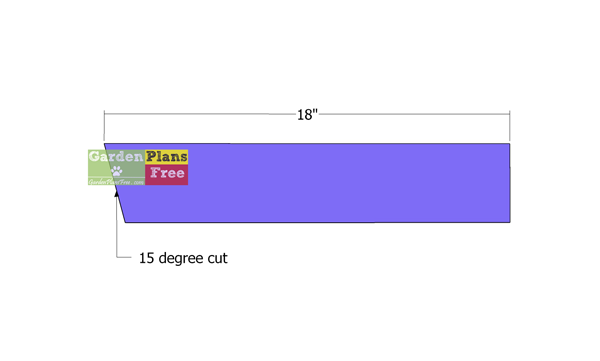
Seat-frame
First of all we need to build the components for the seat frame. Use a miter saw to make the 15 degree angle cut. Smooth the edges flush with sandpaper.
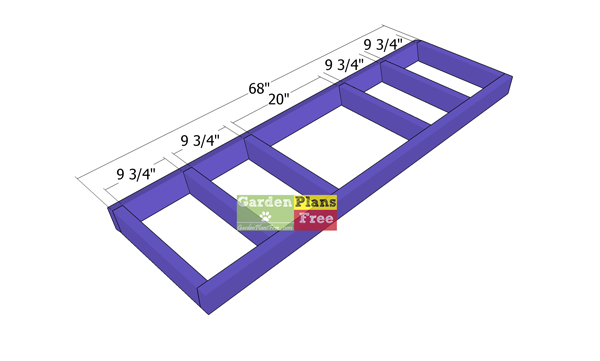
Assembling-the-bench-seat-frame
Next, we need to assemble the seat frame as shown in the diagram. Drill pilot holes through the 68″ long boards and insert 3 1/2″ screws into the perpendicular components. Make sure the corners are square and leave no gaps between the components.
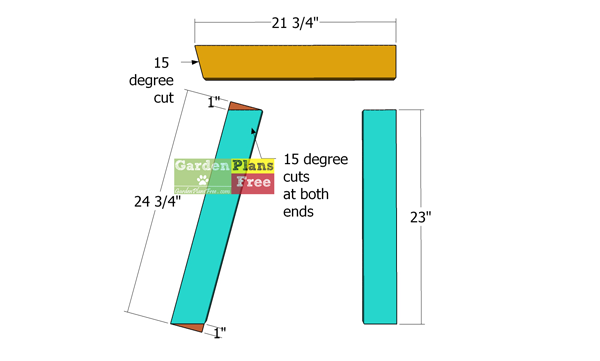
Components-for-the-sides-of-the-bench
Components-for-the-sides-of-the-bench
Build the legs and the supports for the side frames from 2×4 lumber. Use a miter saw to make 15 degree cuts, as shown in the diagram. Lay everything on a level surface.
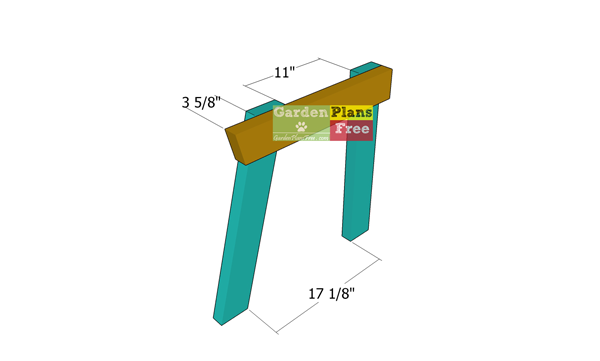
Assembling-the-side-frames-for-the-garden-bench
Attach the support to the legs, drill plot holes and insert at least 2 screws for each joint.
Step 2: Assembling the frame
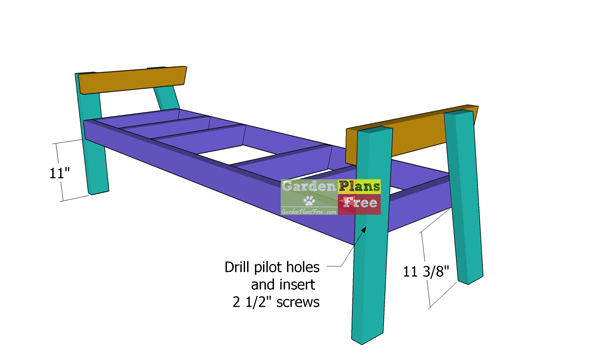
Assembling-the-frame-of-the-double-chair-bench
Attach the side frames to the seat frame of the large garden bench. Plumb the side frames and make sure the corners are square. Clamp the side frames to the seat frame, drill pilot holes through the seat frame and insert 2 1/2″ screws into the legs. Use at least 2 screws for each joint.
Step 3: Attaching the backrest
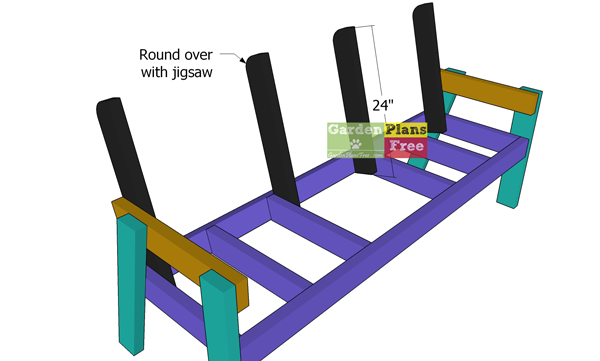
Attaching-the-backrest-supports
Use 2×4 lumber for the backrest. Round the exposed corner of the backrests with a jigsaw and smooth the edges. Fit the supports to the seat frame and clamp them into place tightly. Drill pilot holes through the supports and insert 2 1/2″ screws into the seat frame.
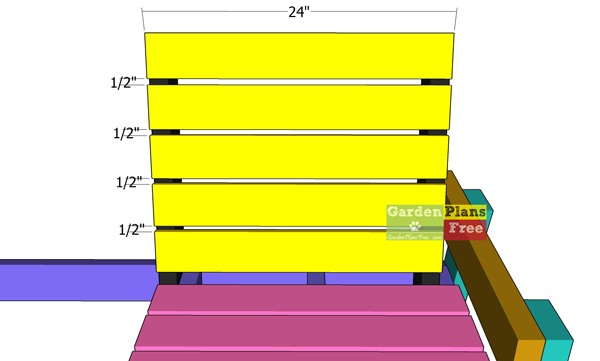
Fitting-the-backrest-slats—large-garden-bench
Attach the 1×4 boards to the backrest of the outdoor bench. Place 1/2″ plywood between the boards to create even gaps.
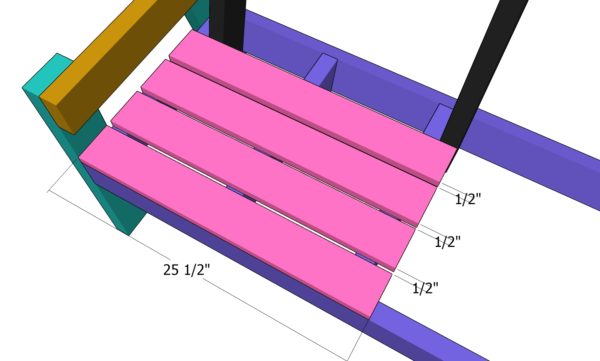
Fitting the seat slats
Attach the 1×4 boards to the seat frame. Place a piece of 1/2″ plywood between the slats to create even gaps. Drill pilot holes and insert 1 5/8″ screws to secure the boards into place. Use at least 2 screws for each joint.
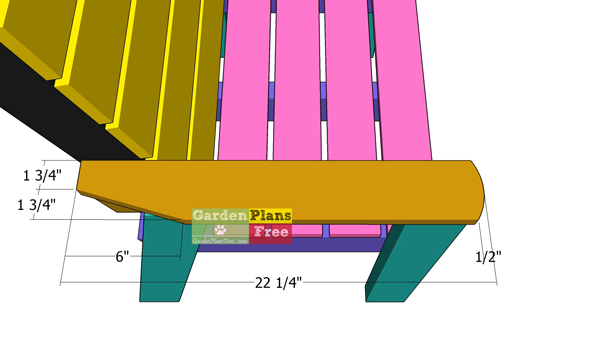
Attaching-the-armrests
Use 1×4 lumber for the armrests. Use jigsaw to make the cuts to the armrests.
Step 4: Building the table of the double bench
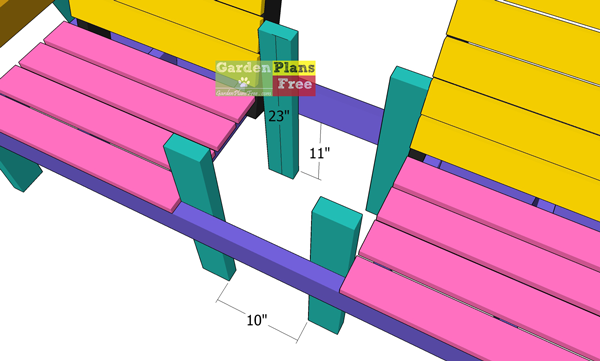
Fitting-the-middle-legs-for-the-table
Use 2×4 lumber for the table legs. Attach the legs to the seat frame and clamp them into place tightly. Drill pilot holes and insert 2 1/2″ screws to lock them into place tightly. Plumb the legs vertically with a spirit level.
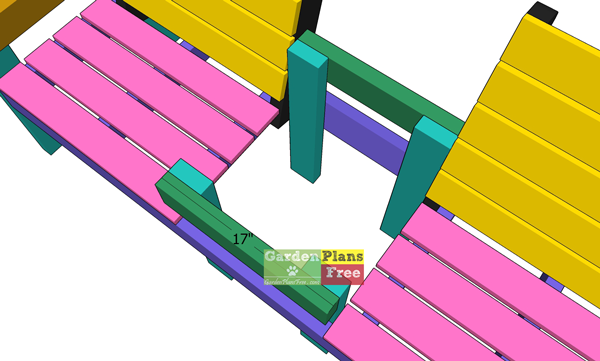
Table-frame
Fit the 2×4 supports to the top of the middle legs. Use a spirit level to check if the supports are perfectly horizontal. Drill pilot holes through the supports and insert 2 1/2″ screws to lock them into place tightly.
Fitting-the-table-slats
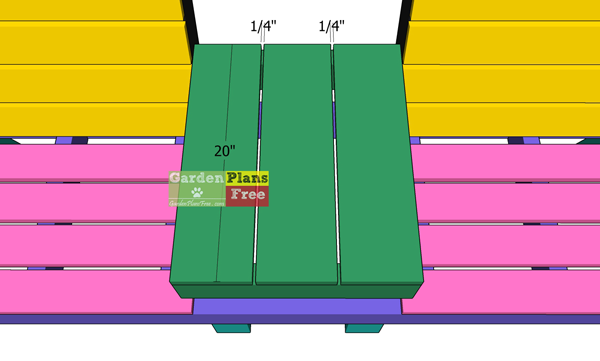
Attach the 1×6 slats to the supports, as shown in the plans. Place a piece of 1/4″ plywood between the slats to create even gaps. Drill pilot holes before inserting the 1 5/8″ screws into the slats.

Large double chair bench plans – front view
Last but not least, you need to take care of the finishing touches. Double check all the joints and make sure the bench is sturdy. Fill the holes with wood putty. Next, used a sander to smooth the bench and the edges. Since you are here you should also take a look over these simple double chair bench plans.
Double chair bench plans – back view
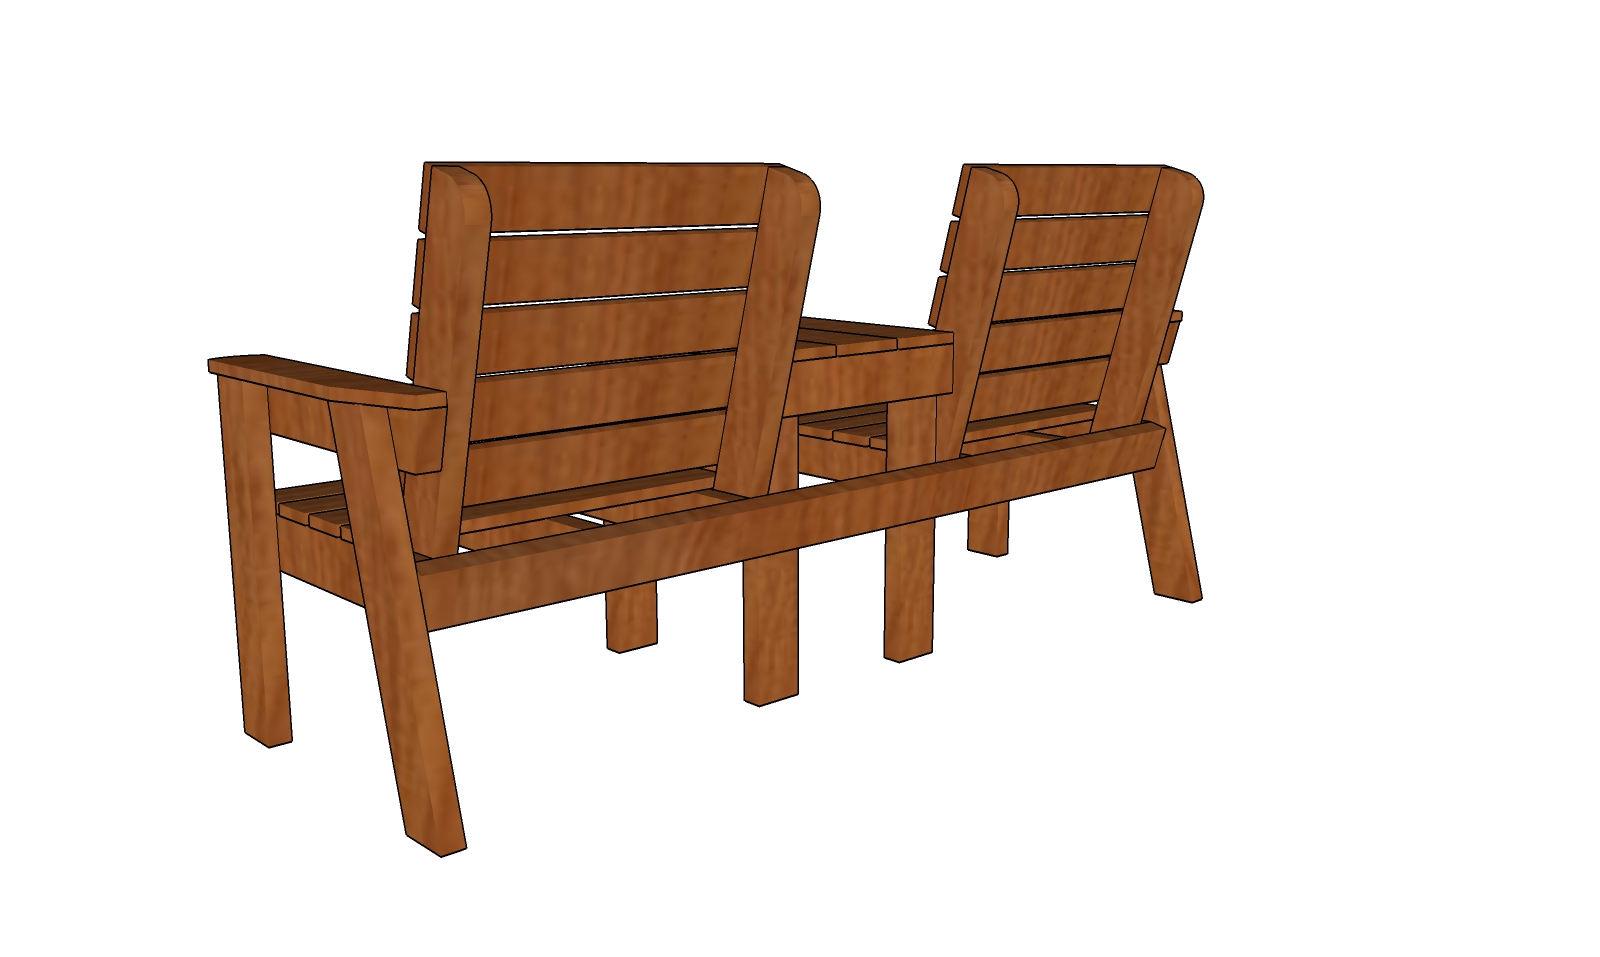
Apply a few coats of paint / stains over the outdoor large bench, so you make it beautiful and to protect it from the elements. This garden bench is super nice addition to your backyard. If you have a deck, a patio, a pergola or even a pavilion, this bench will create a beautiful and comfy place to enjoy your evenings.

Double chair bench – overall dimensions
Check out the rest of the project to learn more about building garden projects. See all my bench plans.
This diy project was about (free online) large double chair bench plans. If you have enjoyed the free project, we recommend you to share it with your friends, by using the social media widgets.


2 comments
I like how you lay out the plans and instructions. I hope to try the double seat bench soon. Thanks for sharing all these ideas.
Merci beaucoup pour les instructions. 👍