If you want to add character to your garden and make it unique, you should consider building a simple garden bridge. As strange as it might seem, choosing the right garden bridge plans for your needs is more difficult than you might imagine, as there are many alternatives. You can build arched frames, you could install railing or you could build just a basic wooden structure.
On the other hand, you should also pay attention to the materials you are going to use for your arched bridge. Although it will cost more than pressure-treated lumber, we recommend you to build at least the slats and the railings from redwood or cedar. Choose the wooden boards with great attention, as they should be in perfect condition (straight, no chips or other visible flaws).
How to build a garden bridge
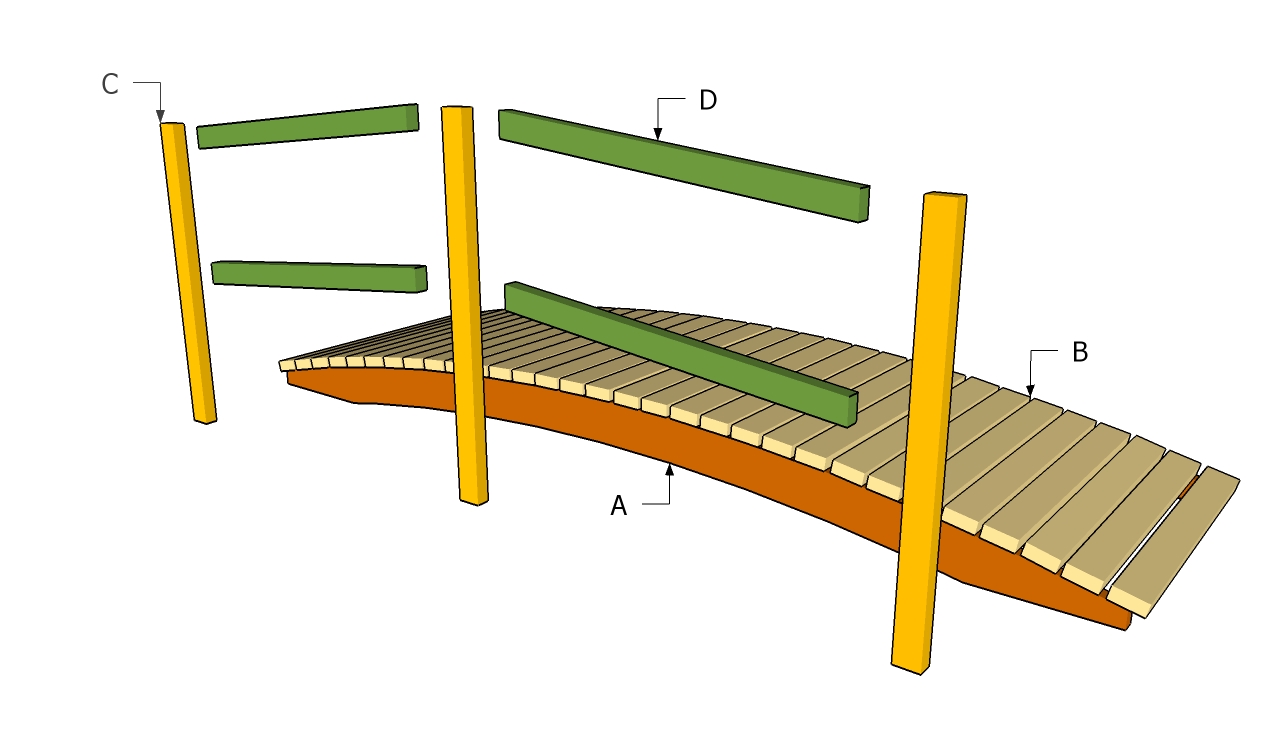
Building a garden bridge
Materials
- A – 2 pieces of 2×10 lumber – 120” long, 2 pieces of 2×4 lumber – 33″ long STRINGERS
- B – 31 piece of 2×4 lumber – 36″ long SLATS
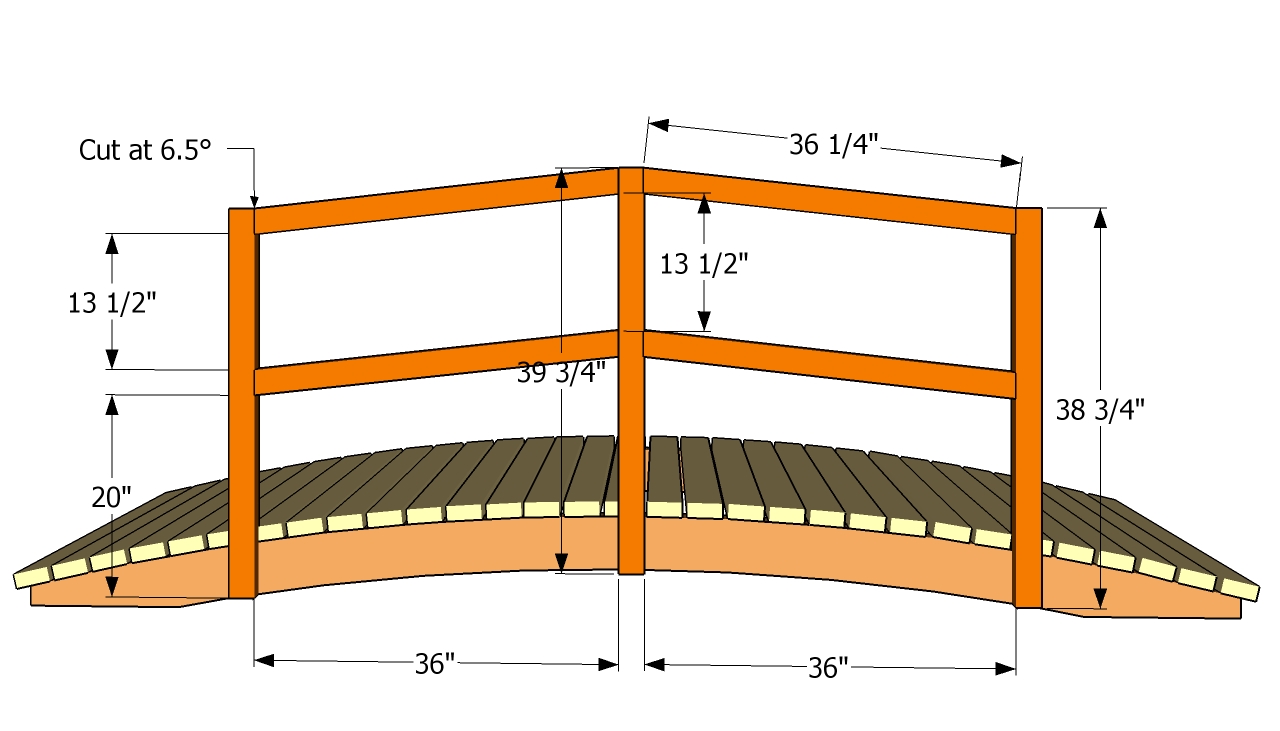
- C – 4 pieces of 2×4 lumber – 38 3/4” long, 2 piece – 39 3/4″ long POSTS
- D – 8 pieces of 2×4 lumber – 36 1/2” long – both ends cut at 6.5º RAILS
- 2 pieces of 2×10 lumber – 10 ft
- 16 pieces of 2×4 lumber – 8 ft
- 20 pieces of 3 1/2″ screws
- 100 pieces of 2 1/2″ screws
- wood stain
- wood filler
Tools
- Hammer, Tape measure, Carpentry square
- Miter saw, Drill machinery, Screwdriver, Sander, Router
- Safety Gloves, Safety Glasses, Respiratory Mask
Time
- One day
Garden Bridge Plans Free
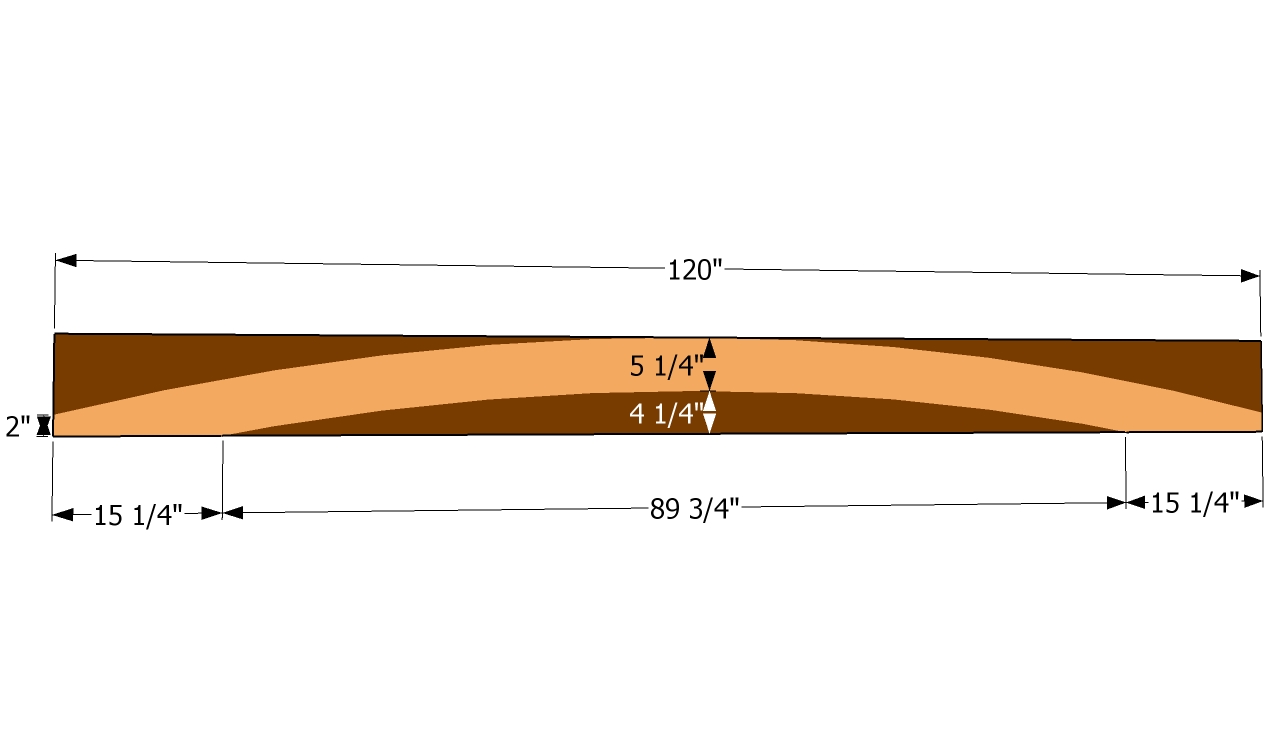
Cutting out the stingers
The first step of the woodworking project is to build the stingers of the arched bridge. In order to get a professional and durable result, you need to build the components out of 2×10 lumber. In order to draw the guidance lines, we recommend you to insert two screws at the ends of the wood piece and tie a string. Don’t forget that the longer the string the steeper the arch.
PRO TIP: Use a jigsaw with a sharp blade to cut the stinger. Smooth the cut edges with a sanding block, or make them round with a router.
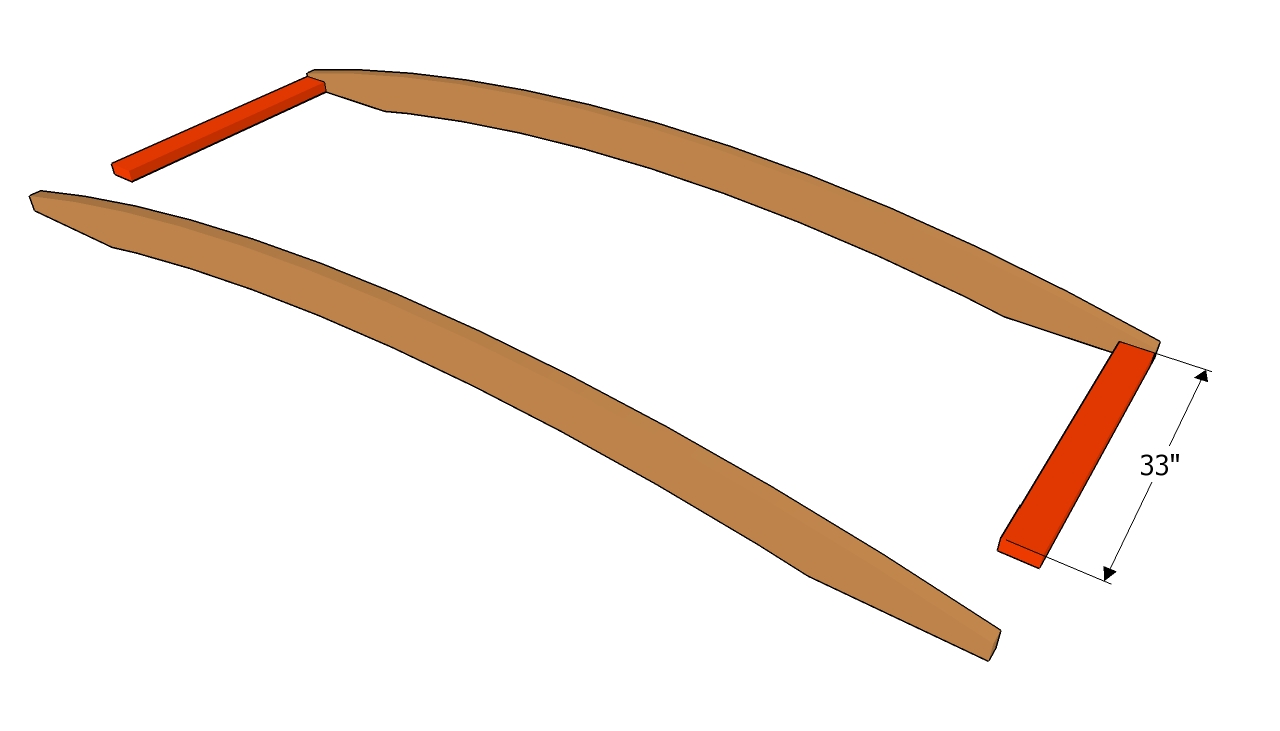
Building the frame of the bridge
Afterwards, you should assemble the stingers together by installing the 2×4 braces. Drill pilot holes trough the stingers, countersink them and drive in the 3 1/2” galvanized screws. Make sure the sides of the bridge are plumb, before driving in the wood screws.
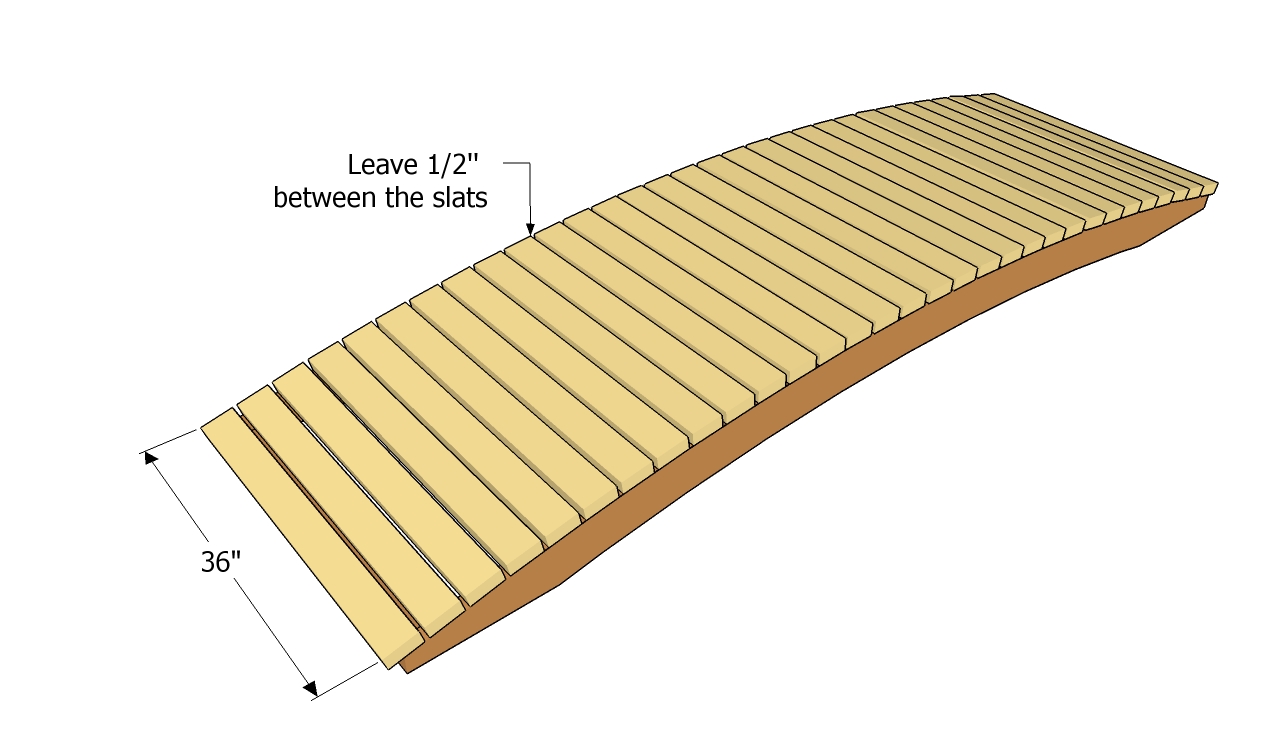
Installing the slats
Continue the woodworking project by fitting the 2×4 slats to the frame of the bridge. As you can see in the image, you need to leave about 1/2” between the slats. In order to get consistent gaps, you should place a nails or a small piece of wood between the boards.
PRO TIP: Drill pilot holes before inserting the screws, to prevent the wood from splitting. In addition, don’t forget to countersink the head of the screws.
Installing the railings
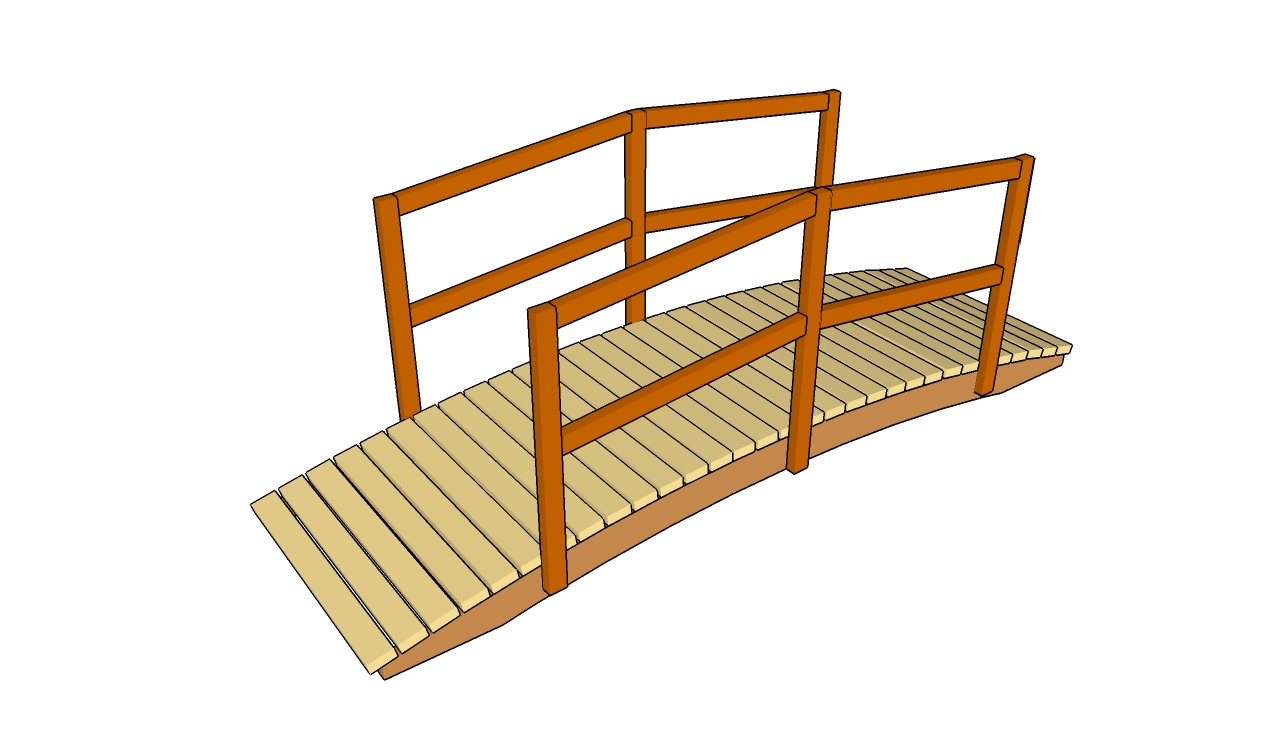
One of the last steps of the project is to build and attach the railings. In order to enhance the look of the bridge and make it look as authentic as possible, we recommend you to attach railings on both sides. Build the posts and the rails out of 2×4 lumber.
PRO TIP: Plumb the posts with a spirit level, before driving 2 1/2” screws into the stingers. Add glue to the joints, to enhance their bond and rigidity.
Garden bridge plans
Last but not least, there are several finishing touches you have to take care of. First of all, you should fill the holes and the cracks with a good wood filler and leave it several hours to dry out. Next, sand the wooden surfaces with 120-grit sandpaper and vacuum the residues thoroughly.
PRO TIP: Apply several coats of paint to the bridge, to protect the wooden components from wood decay. Move the bridge to the desired location and enjoy it with your friends. See all my woodworking plans HERE, listed by category so you can find your next project with ease.
This diy project was about garden bridge plans. If you have enjoyed the free project, we recommend you to LIKE and SHARE it with your friends, by using the social media widgets.


2 comments
Are directions missing for “Building the Frame of the Bridge”? How many 33″ 2×4 braces are added to the frame? Are these particular 2x4s included in the Materials List as 16 pieces of 2 x 4 lumber-8 ft?
The picture shows two and the cut instructions “A” show two as well. I’d probably put one in the middle too myself. but the slats are what make it sturdy I believe.