This detailed garden project is about 2×4 adirondack chair plans free. This is the simplest wooden chair you can build for your backyard patio. This chair features a backrest, comfy armrests and an appealing design that will make you shiver. These chairs will help you transform the look of your firepit, deck or front porch, with a minimal investment in materials. Invest in quality lumber (redwood, cedar or pine), as the components will be highly durable and have a nice appearance. See all furniture plans HERE.
We strongly recommend you to take a look over the rest of our plans, as there are may projects that could suit your needs and budget. Moreover, plan every aspect of the project to your needs before starting the actual construction. In this manner you can prevent mistakes and keep all the costs under control. Sand the edges of the slats with a sand-block in order to enhance the look of the chair.
Free Plans for a 2×4 Adirondack Chair – How To Guide

Building-a-2×4-adirondack-chair
Materials
- A – 2 pieces of 2×4 lumber – 31 3/4″, 1 piece – 24″ BACK LEGS
- B – 2 pieces of 2×4 lumber – 19 1/2″ LEGS
- C – 5 pieces of 2×4 lumber – 24″ SEAT
- D – 4 pieces of 1×4 lumber – 26″ ARMRESTS
- E – 2 pieces of 1×3 lumber – 22″, 1 piece of 2×2 lumber – 27″, 6 pieces of 2×4 lumber – 30″ BACKREST
- 1 piece of 1×3 lumber – 4 ft
- 1 piece of 2×2 lumber – 3 ft
- 6 pieces of 2×4 lumber – 8 ft
- 20 pieces of 3 1/2″ screws
- 200 pieces of 2 1/2″ screws
- 50 pieces of 1 5/8″ screws
- wood glue, stain/paint
Tools
- Hammer, Tape measure, Carpentry square
- Miter saw, Drill machinery, Screwdriver, Sander, Router
- Safety Gloves, Safety Glasses, Respiratory Mask
Time
- One day
Cut Layout Diagram – Materials list
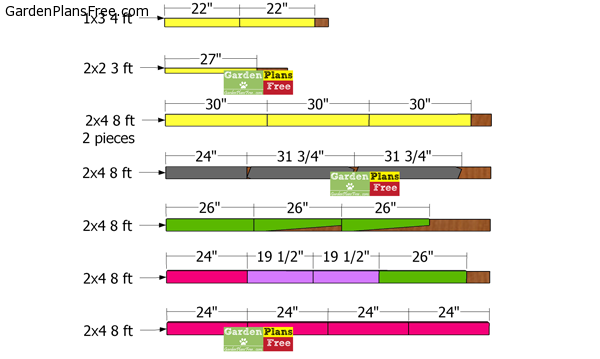
Cut-list—2×4-adirondack-chair
This is the cut layout diagram, where I show you how to cut the components from the materials, so you get minimal waste.
Adirondack chair plans from 2x4s
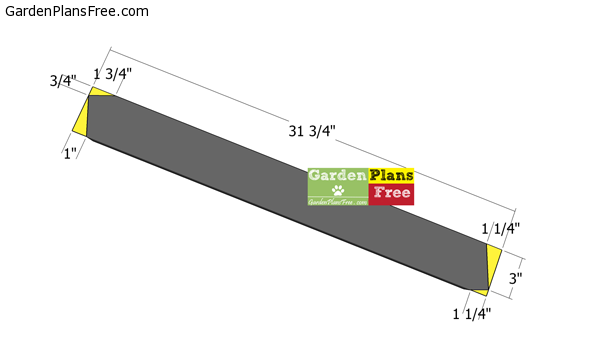
Building-the-back-legs—adirondack-chair
The first step of the woodworking project is to build the back legs. As you can see in the image, we recommend you to build the components from 2×4 lumber, making sure you follow the pattern shown in the plans. Use a saw to make the cuts and smooth the edges with sandpaper.
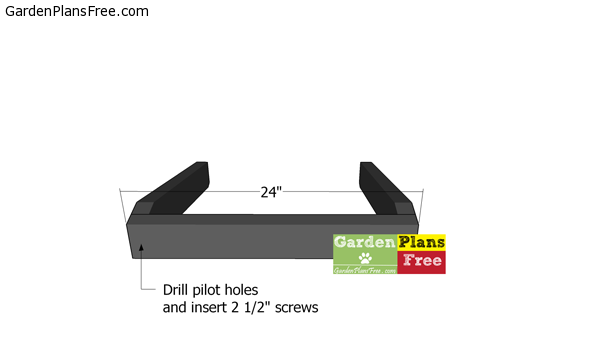
Assembling-the-seat-frame—chair
Attach the 2×4 apron to the side legs. Align the edges flush and make sure the corners are square. Drill pilot holes through the apron and insert 2 1/2″ screws into the legs.
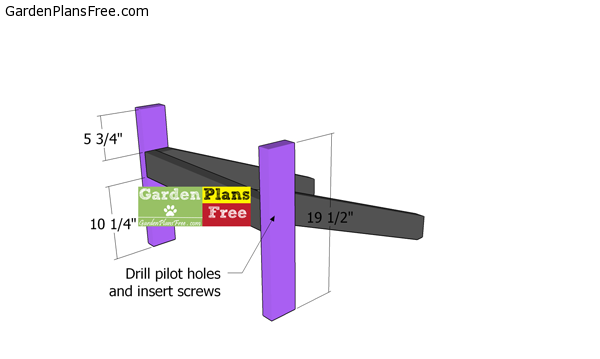
Attaching-the-front-legs
The next step of the project is to attach the front legs to the frame, as well as the frame of the chair. Use a spirit level to plumb the front legs and cleave no gaps between the components. Clamp the legs to the seat frame. Drill pilot holes through the legs and insert 2 1/2″ screws into the frame.
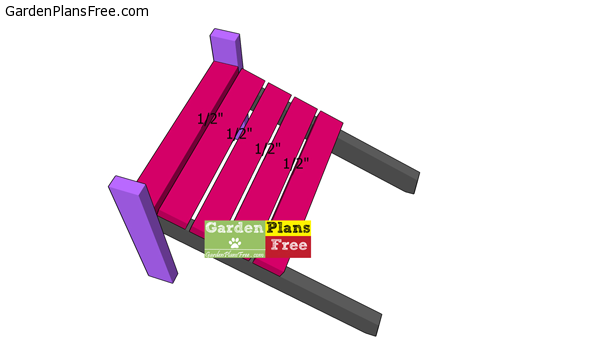
Fitting-the-seat-slats
Attach the 24″ slats to the seat of the adirondack chair. Place a piece of 1/2″ plywood between the slats to create even gaps. Drill pilot holes and insert 2 1/2″ screws to lock the slats to the seat frame. Use at least 2 screws for each joint.
Side-supports—2×4-adirondack-chair
Use 2×4 lumber for the armrest supports. Mark the cut lines to the board and get the job done with a saw.
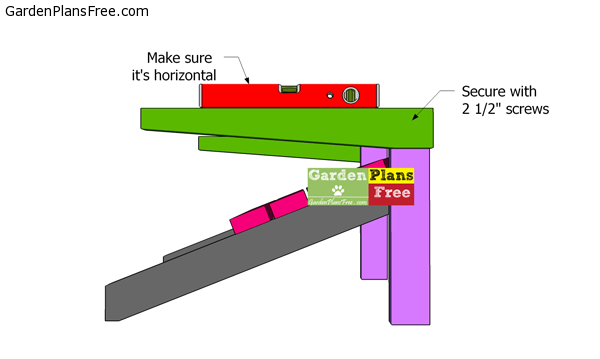
Fitting-the-side-supports
Fit the supports to the top of the front legs. Align the edges and clamp the supports to the legs. Use a spirit level to make sure the support is horizontal. Drill pilot holes and insert 2 1/2″ screws to lock them together tightly.
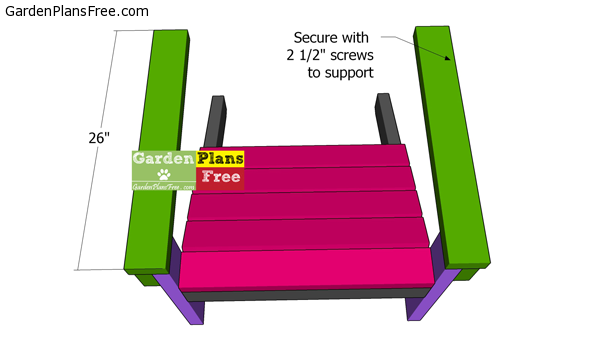
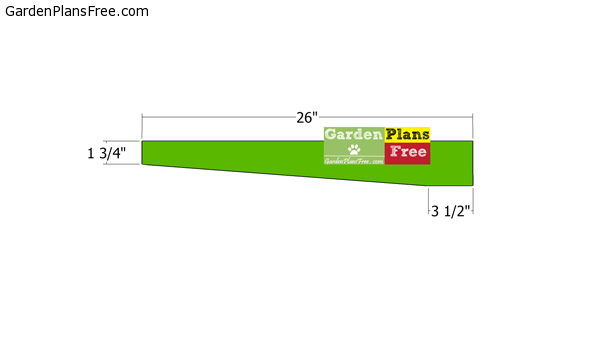
Armrests
Use 2×4 lumber for the armrests. Align the edges flush, drill pilot holes and insert 2 1/2″ screws to lock them into place tightly.
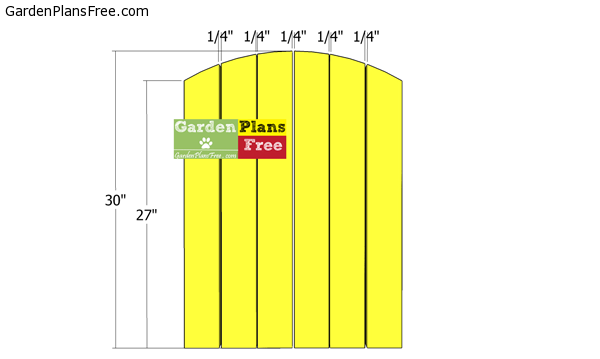
Assembling-the-backrest—wooden-chair
Use 2×4 boards for the backrest. Lay the boards on a level surface and fit 1/4″ plywood pieces between the boards. Align the edges as shown in the diagram.
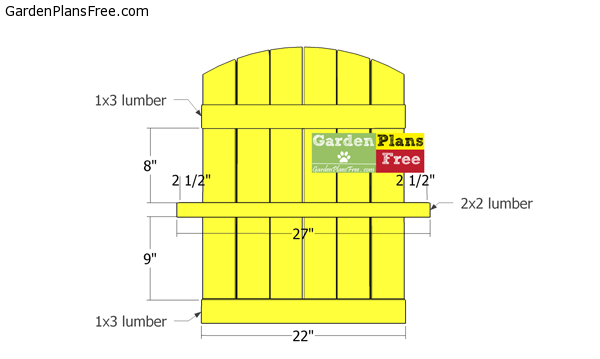
Assembling-the-backrest
Use 1×3 lumber for the backyard braces. Drill pilot holes and insert 1 5/8″ screws to lock the braces to the backrest slats. Use 2×2 lumber for the middle backrest support. Notice the 2 1/2″ side overhangs. Drill pilot holes through the middle support and insert 2 1/2″ screws into the backrest slats.
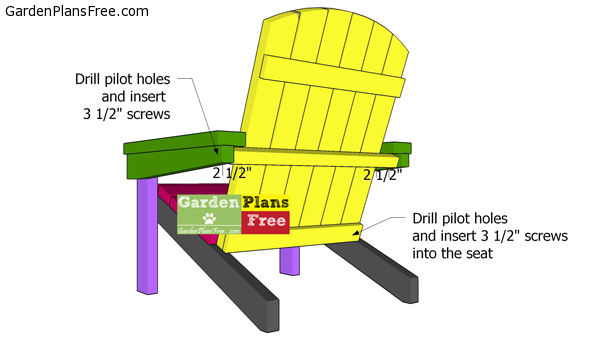
Attaching-the-backrest—outdoor-chair
Fit the backrest to the frame of the chair. Align the edges flush, as shown in the diagram. Drill pilot holes through the base and insert 3 1/2″ screws into the seat. Drill pilot holes through the side supports and insert 3 1/2″ screws into the middle support.
2×4-adirondack-chair—back-view
Lastly, take care of the finishing touches. Fill the holes with wood putty and smooth the surface with 120-220 grit sandpaper. You can use a router and a bit to round over the exposed edges.
.Apply stain or paint to protect the wood from the elements.
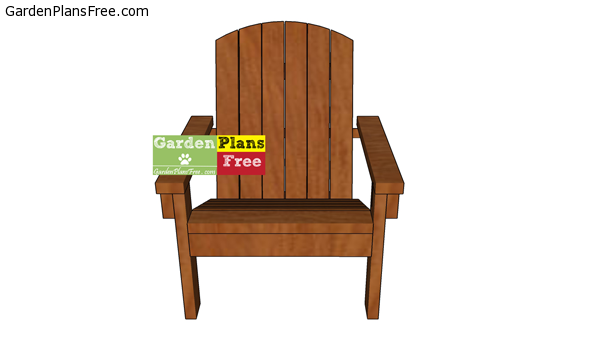
2×4-adirondack-chai—front-view
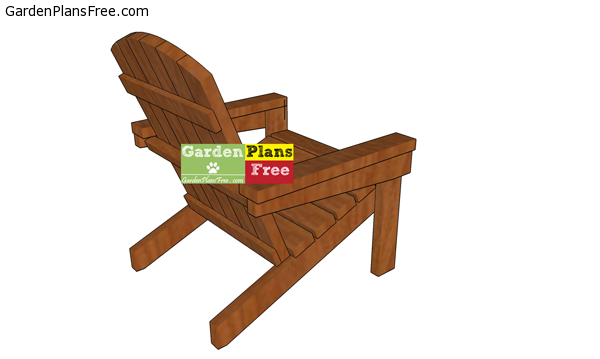
I hope you liked my tutorial on how to build a 2×4 adirondack chair and you give it a try. This makes for the perfect furniture around the firepit or on your deck.
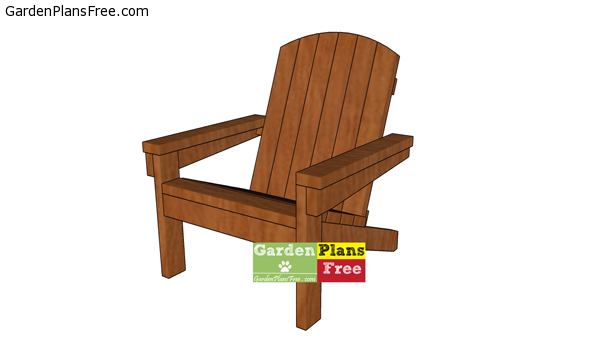
How-to-build-a-2×4-adirondack-chair
PRO TIP: This outdoor chair makes for the perfect addition to your patio. This is a comfy wooden chair with a modern design that is ideal for persons of all weights and heights. If you love this design I recommend you to take a look over the rest of my furniture plans.

This diy project was about adirondack chair plans made from 2x4s. If you have enjoyed the free project, we recommend you to share it with your friends, by using the social media widgets.
1 comment
this is good