This detailed garden project is about free 2×4 rain barrel stand plans. If you want to make the most of the rain water, so you can take care of the garden plants, a wooden stand for the barrel is a must have project. Even if you are new to woodworking, you can pull this project off and build yourself a very nice relaxation area in your backyard. See all furniture plans HERE.
We strongly recommend you to take a look over the rest of our plans, as there are may projects that could suit your needs and budget. Moreover, plan every aspect of the project to your needs before starting the actual construction. In this manner you can prevent mistakes and keep all the costs under control. Sand the edges of the slats with a sand-block in order to enhance the look of the chair.
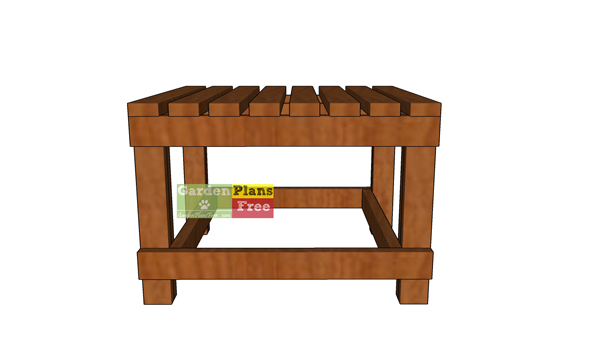
2×4 Rain Barrel Stand – Free DIY Plans
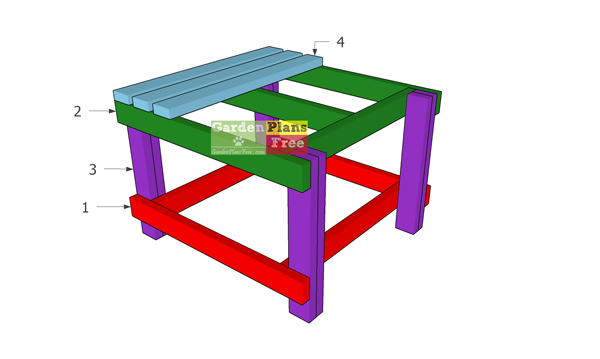
Building-a-rain-barrel-stand
Materials
- 1 – 2 pieces of 2×4 lumber – 31 1/2″, 2 pieces – 36″ FRAME
- 2 – 2 pieces of 2×4 lumber – 31 1/2″, 2 pieces – 36″, 21 piece – 26″ TOP FRAME
- 3 – 8 pieces of 2×4 lumber – 24″ LEGS
- 4 – 8 pieces of 2×4 lumber – 34 1/2″ TABLETOP
- 6 pieces of 2×4 lumber – 8 ft
- 2 pieces of 2×6 lumber – 10 ft
- 200 pieces of 2 1/2″ screws
- wood glue, stain/paint
Tools
- Hammer, Tape measure, Carpentry square
- Miter saw, Drill machinery, Screwdriver, Sander, Router
- Safety Gloves, Safety Glasses, Respiratory Mask
Time
- One day
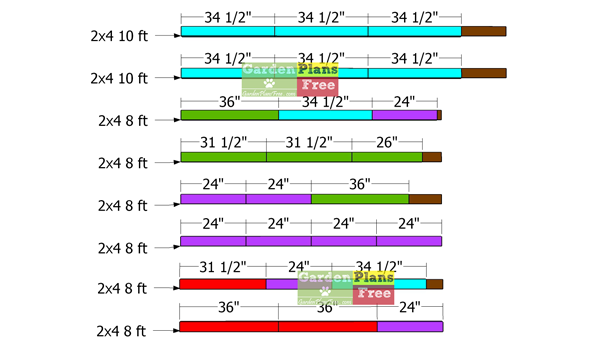
Cut Diagram for Rain Barrel Stand
Cut-diagram-for-rain-barrel
This diagrams shows you how to layout the components so you get the least waste. Follow the color code and you will cut all the components really fast and accurately. All you are left now is to assemble the stand.
How to build a rain barrel stand from 2x4s
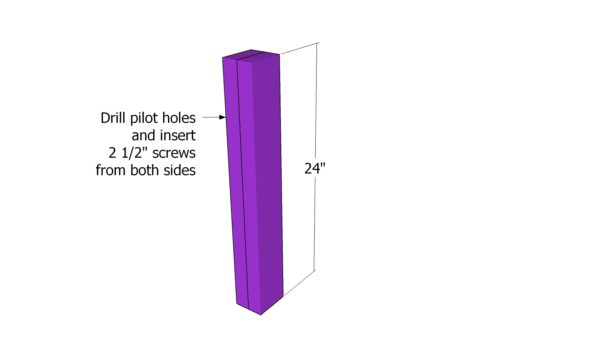
Assembling the legs for the stand
The first step of the project is to build the legs for the rain barrel stand. Therefore, cut the boards from 2×4 lumber at 24″. Add glue to the joints and then align the edges flush. Drill pilot holes and insert 2 1/2″ screws from both sides.
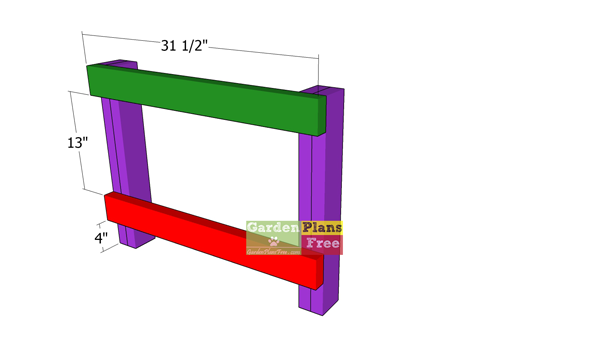
Assembling the legs for the stand
Attach the braces to build the sides for the wooden stand. Use 2×4 lumber. Lay the legs on a level surface and then attach the braces. Align the edges flush and make sure the corners are square. Drill pilot holes and insert 2 1/2″ screws to lock the braces to the legs. Insert at least 2 screws for each joint.
Fitting-the-top-braces
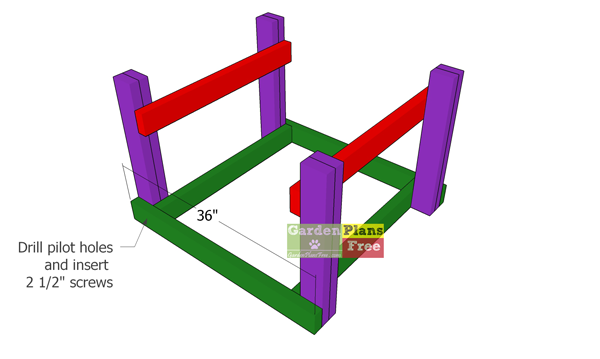
Next, we need to build the frame for the tabletop. Therefore, just add the 2×4 braces to the sides of the frame. Drill pilot holes through the supports and insert 2 1/2″ screws into the legs. Also insert the screws into the side braces. Make sure the legs are perfectly plumb, as well.
Fitting-the-stretcher
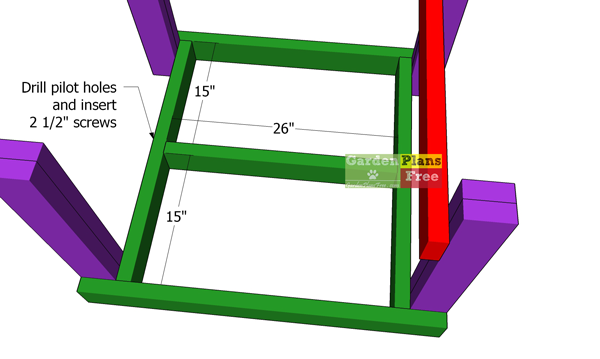
Fit a 2×4 stretcher to the middle of the frame, so you can add more support for the tabletop. The rain barrel will be heavy, so we need all the support we can get to hold the weight. Center the stretcher to the side braces, drill pilot holes and then insert 2 1/2″ screws to lock it into place. Use at least 2 screws for each joint.

Fitting-the-bottom-braces
Next, add the braces to the bottom of the stand. Align the edges flush and leave no gaps between the components. Drill pilot holes and secure the braces to the legs with 2 1/2″ screws.
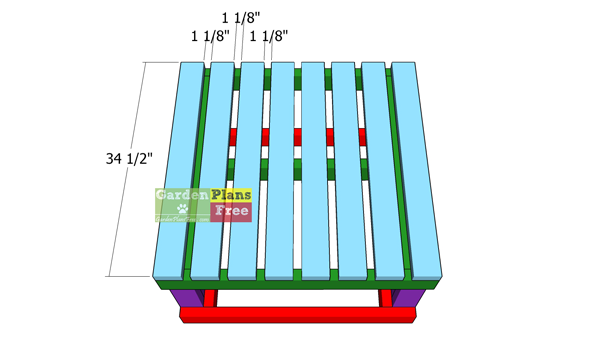
Fitting-the-top-slats
Attach the 2×4 boards to the top of the stand. Cut a block of 1 1/8″ and place it between the slats to create even and consistent gaps. You should start with a board on one side of the stand. Align the edges flush, drill pilot holes and insert 2 1//2″ screws into each board of the frame. Use 2 screws for each board.
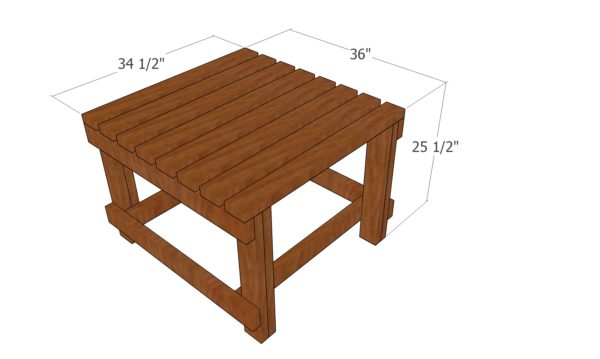
2×4 Rain barrel stand plans – dimensions
Wooden-rain-barrel-stand-plans
Last but not least, you need to check the joints and take care of the finishing touches. Smooth the edges with 120 grit sandpaper and then apply a few coats of stain or paint to protect the wood from the elements.
How-to-build-a-rain-barrel-stand
Simple-2×4-rain-barrel-stand-plans
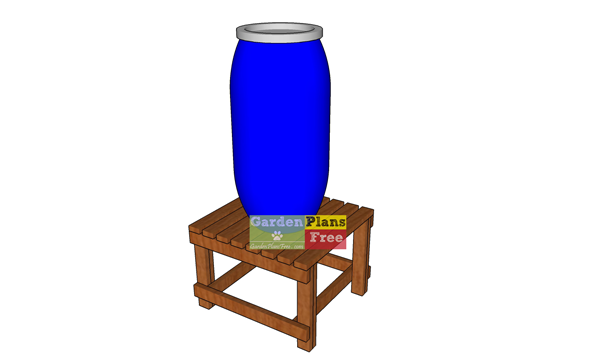
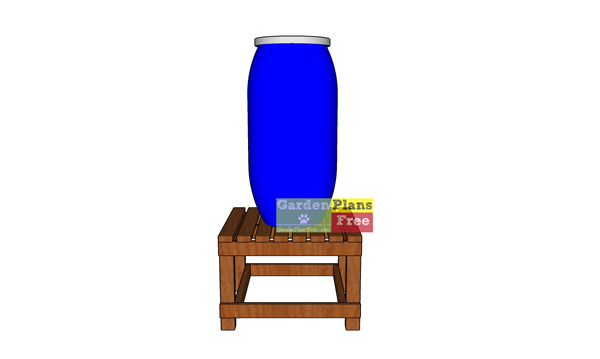
PRO TIP: This is a simple project that can be built by anyone with a drill and a saw. Behind this simple design, there is a sturdy stand that can hold your rain barrel. If you love this design I recommend you to take a look over the rest of my furniture plans.

This diy project was about simple 2×4 rain barrel stand plans. If you have enjoyed the free project, we recommend you to share it with your friends, by using the social media widgets.