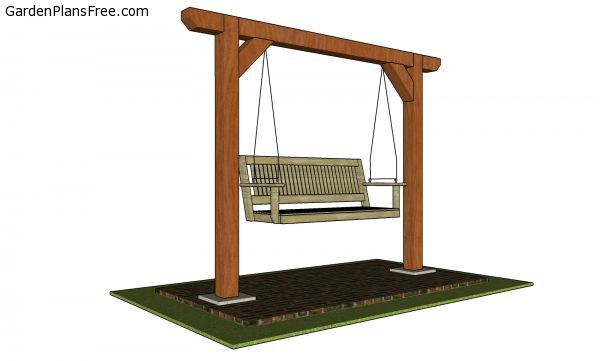
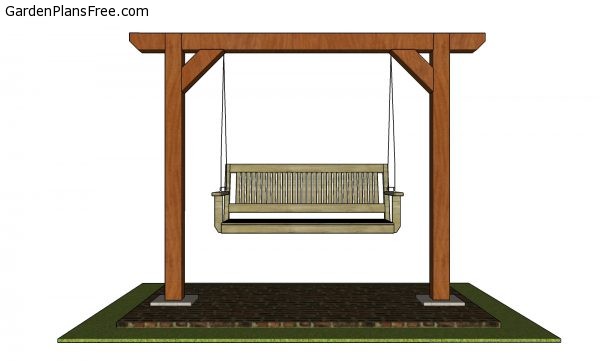
If you want to learn more about 2 post swing stand you have to take a close look over the free plans in the article. This is a permanent swing stand that you can make using basic materials and just a few tools. While this swing set is not designed for super strong swinging, it is still good enough for your afternoon play. In addition, considering it only has 2 posts, this swing frame doesn’t take a lot of space. You can make a few teaks to my plans so they suit your needs. More furniture projects HERE.
If you want to get the job done in a professional manner, we recommend you to plan everything with attention, as to prevent costly mistakes and to build a professional garden bench. Invest in high quality materials, such as cedar, pine or redwood, as the bench will be exposed to all kinds of weather. Apply a few coats of paint over the components, to enhance their appearance and to protect them from bad weather.
2 Post Swing Set – Free DIY Plans
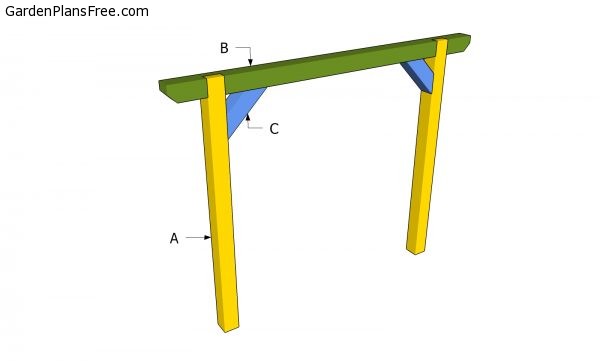
Building a 2 post swing stand
Materials
- A – 2 pieces of 6×6 lumber – 126″ long POSTS
- B – 1 piece of 6×6 lumber – 120″ long TOP BEAM
- C – 2 pieces of 6×6 lumber – 20″ long BRACES
- 2 pieces of 6×6 lumber – 12′
- 1 piece of 6×6 lumber – 10′
- 1 piece of 6×6 lumber – 4′
- 4 pieces of 6″ carriage bolts
- 5″ wood screws
- swing hangers
- wood glue, stain/paint
Tools
- Hammer, Tape measure, Carpentry square
- Miter saw, Drill machinery, Screwdriver, Sander, Router
- Safety Gloves, Safety Glasses, Respiratory Mask
Time
- One day
Made from this plan
Building the 2 post swing stand

Posts for swing set
The first step of the project is to gather the materials. For example, we will need 6×6 posts for the little swing set. As you can see in the diagram, the 3 ft section is the area that will be set into the ground. On the other hand, you can adjust the height of the posts that are visible to suit your needs.

Notch to the top of the posts
We need to make notches to the top of the 6×6 support posts. As you can see in the 3D plans, the notch has to be 2 3/4″ deep. The easiest way to get the job done is by using a saw to make parallel cuts inside the marked area. Use a chisel to clean the recess and smooth the surface with sandpaper.
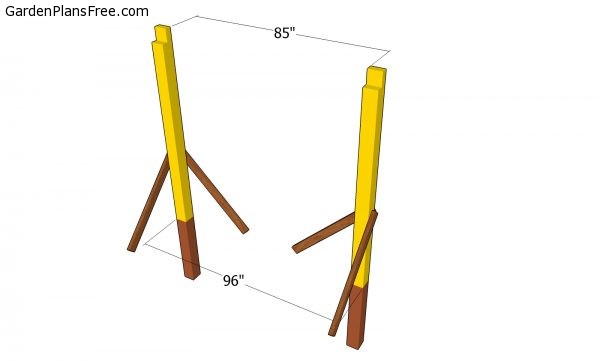
Laying out the posts – swing stand
Use string and batter boards to lay out the location for the posts. Dig 3 ft holes into the ground, making sure they have about 12″ in diameter. Fit the posts into the ground and plumb them with a spirit level. Use temporarily braces to make sure the posts are locked into placed while filling the holes with concrete. Let the concrete dry out for several days.
Before pouring the concrete you need to make sure the top of the posts are horizontal one to another. If the top of the posts are not horizontal, you will need to make adjustments to the notches and thus waste the work you’ve previously done.

Top beam – 2 post swing set
Use 6×6 lumber for the top beam. Mark the location of the notches to beam and then make the parallel cuts using a circular saw, after setting the depth at 2 3/4″. Remove the excess with a hammer and clean it with a chisel.
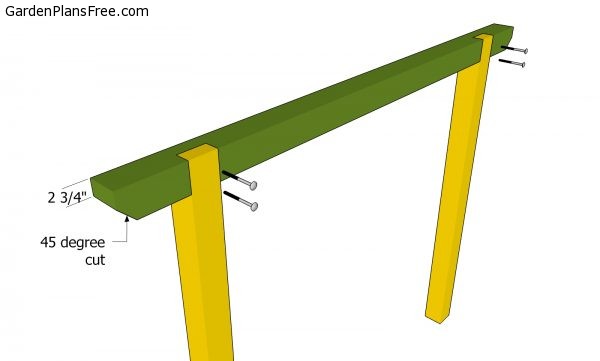
Fitting the top beam
Fit the top beam to the posts. Make sure the corners are square and align the edges flush. Drill pilot holes through the posts and beam, two for each joint. Insert 6″ carriage bolts and use washers and nuts to secure the joints.
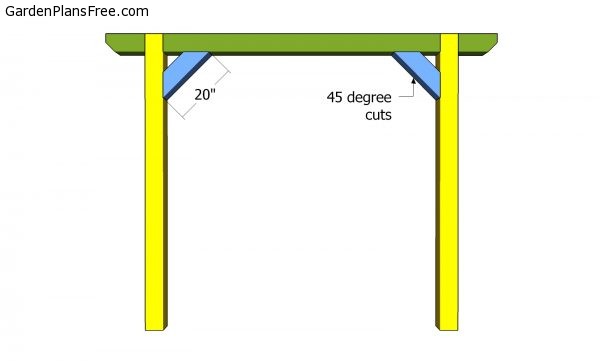
Fitting the diagonal braces
Use 6×6 lumber for the braces. Make 45 degree cuts to both ends of the braces and secure them to the frame of the stand. Drill pilot holes through the braces and insert 5″ screws to lock them into place tightly. Plumb the posts again and check if the top beam is horizontal. These braces will help you with lateral movement.
How to build a 2 post swing stand
After assembling the stand for the swing bench, you need to take care of the finishing touches. Fill the holes with wood putty and then smooth the surface with sandpaper. Apply a few coats of paint or stain to protect the wooden components from the elements. Moreover, a few coats of paint will make the swing set more cheerful and children friendly.
2 Post Swing Stand Plans
You should take a look over my other tutorial on how to build the swing bench HERE.

This diy project was about swing stand plans. If you have enjoyed the free project, I recommend you to share it with your friends, by using the social media widgets. You can always save the plans as PDF or Print them using the floating widget on the left side of the screen (working only on PC or laptop).
2 comments
Thanks this is awesome! What is the maximum weight the frame could accommodate for one person swinging? I have nephews coming to visit and one is a big boy 🙂
Hi, would it be possible to assemble on the ground and then put the entire thing in the concrete as one piece?