This diy woodworking project is about nesting box plans free. Therefore, if you want to have fresh eggs every morning or you just want a relaxing hobby, you should consider raising chickens in your backyard. Nevertheless, you should start with building a small shelter for the chickens, that is not only essential for your hobby but it also has the opportunity to be an attraction point of your garden.
Before starting the actual construction project, we recommend you to consider the local building codes and to get accustomed with the legal requirements. Afterwards, you should pay attention to the plans and designs you can choose from, taking into account your budget. Select the materials with great, making sure the plywood sheets and the lumber are in a good condition.
RELATED PROJECTS:
Nesting Box Plans
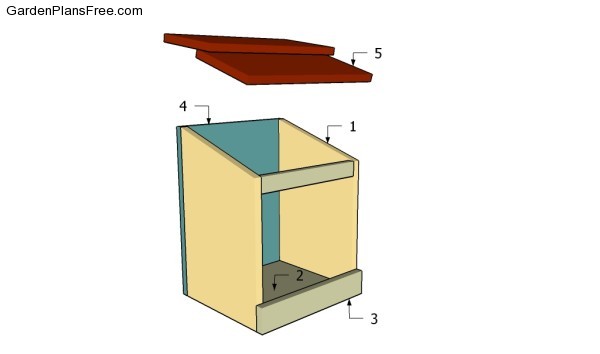
Building a nesting box
Materials
- 1 – 2 pieces of 1×12 lumber – 17 1/2″ SIDES
- 2 – 1 pices of 1×12 lumber – 12″ FLOOR
- 3 – 1 piece of 1×3 lumber – 13 1/2″, 1 piece of 1×2 lumber – 12″ SUPPORTS
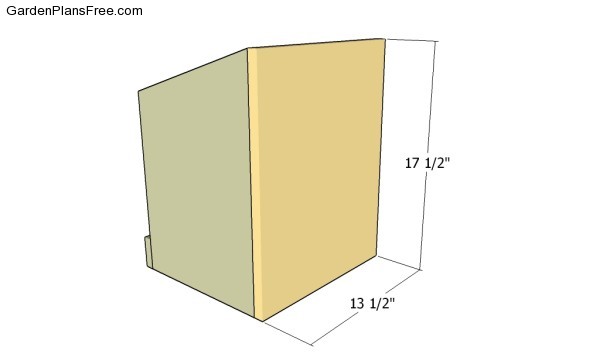
- 4 – 1 piece of 3/4″ plywood – 13 1/2″x17 1/2″ BACK
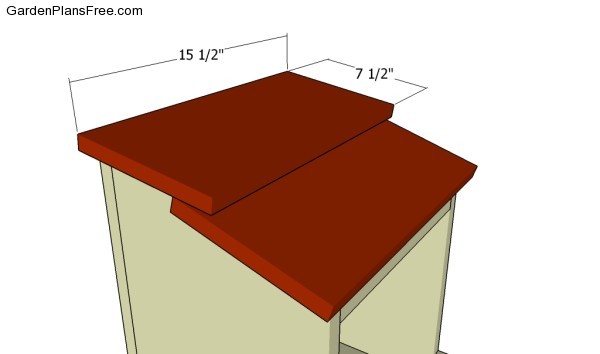
- 5 – 2 pieces of 1×8 lumber – 15 1/2″ ROOF
Tools
- Hammer, Tape measure, Carpentry square
- Miter saw, Drill machinery, Screwdriver, Sander, Router
- Safety Gloves, Safety Glasses, Respiratory Mask
Time
- One day
Building a nesting box
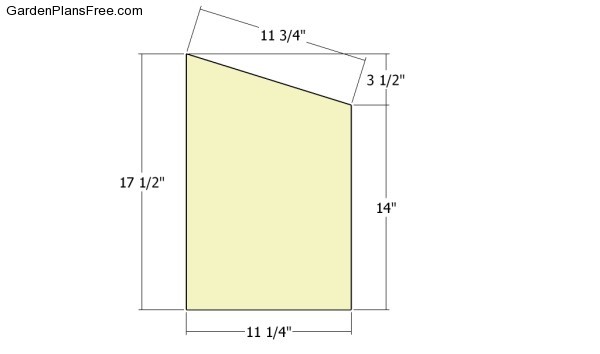
Building the sides of the box
The first step of the woodworking project is to build the sides of the nesting box. In order to get the job done in a professional manner, we recommend you to cut the side components out of 1×12 lumber. Take accurate measurements and use a circular saw to get the job done in a professional manner. Smooth the cut edges with sandpaper.
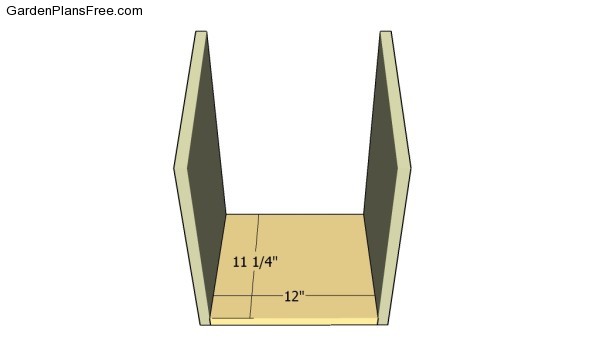
Attaching the bottom
Cut the bottom of the nesting box out of 1×12 lumber and attach it between the sides of the frame. Drill pilot holes through the of the side components and insert galvanized screws into the bottom. Add waterproof glue to the joints and make sure the corners are right-angled.
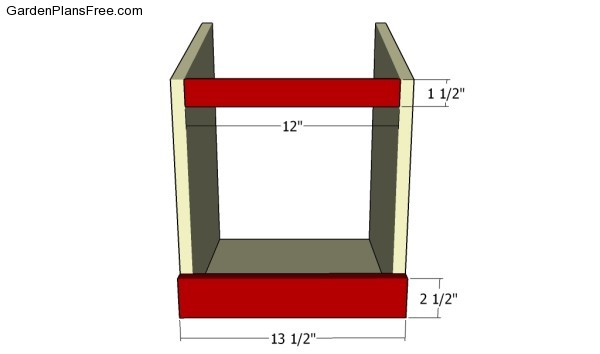
Fitting the face components
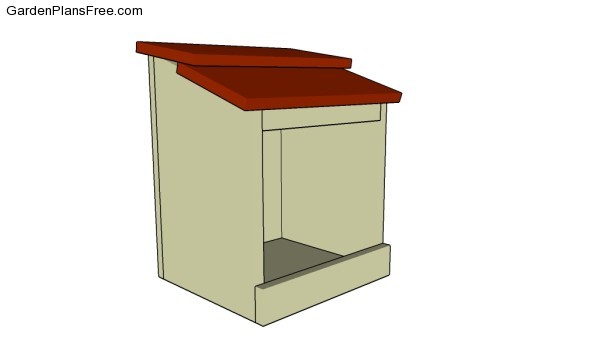
Continue the garden project by attaching the supports to the front face of the nesting box. Drill pilot holes through the bottom support and secure it to the frame, as described in the diagram. Drill pocket holes at both ends of the top support and secure it to the frame using 1 1/4″ screws.
Attaching the back
Cut a piece of 3/4″ plywood and attach it to the back of the nesting box. Pre-drill the piece of plywood before secure it to the box, in order to prevent the wood from splitting. Add waterproof glue to the joints and remove the excess.
Fitting the roofing slats
Attach the 1×8 slats to the top of the nesting box and secure it into place using 1 1/4″ finishing nails. Add glue to the joints in order to enhance the rigidity of the structure.
Nesting box plans
Lastly, we recommend you to get the final touches done. Therefore, fill the holes with putty and sand the surface thoroughly, after it gets dry. Choose a proper location for the nesting box, making sure it complies with the local building codes.
PRO TIP: Applying a few coats of paint will not only enhance the look of the box, but it will also protect the wooden components from water damage.
This diy project was about nesting box plans. If you have enjoyed the free project, we recommend you to LIKE and SHARE it with your friends, by using the social media widgets.
