If you want to learn more about how to build a chicken coop nesting boxes you have to take a close look over the free plans in the article. This is PART 2 of the easy chicken coop project, where I show you how to build the nesting boxes. The nesting box is attached to the back of the coop making the harvesting of the eggs a 30 second procedure.
If you want to get the job done in a professional manner, we recommend you to plan everything with attention, as to prevent costly mistakes and to build a professional garden project. Invest in high quality materials, such as cedar, pine or redwood, as the bench will be exposed to all kinds of weather. Apply a few coats of paint over the components, to enhance their appearance and to protect them from bad weather.
Chicken Coop Nesting Box – Free DIY Plans

Building a chicken coop
Materials
- I – 2 pieces of 2×2 lumber – 8″ long, 1 piece – 36″ long BASE
- J – 1 piece of 3/4″ plywood – 16″x34 1/2″ long, 2 pieces of 1/2″ plywood long – 16″x24 3/4″ long, 2 pieces – 16″x24″ long, 1 piece – 18 1/4″x36″ long BOX
- K – 1 piece of 3/4″ plywood – 18 1/2″x40″ long LID
- 1 pieces of 2×2 lumber – 6′
- 1 piece of 3/4″ plywood – 4’x4′
- 1 piece of 1/2″ plywood – 4’x8′
- asphalt shingles
- 1 5/8″ screws
- hinges
- 2 1/2″ screws
- 3 1/2″ screws
- wood glue, stain/paint
- chicken feeder
Tools
- Hammer, Tape measure, Carpentry square
- Miter saw, Drill machinery, Screwdriver, Sander, Router
- Safety Gloves, Safety Glasses, Respiratory Mask
Materials
- One week
Simple Chicken Coop – Video
STEP 1:
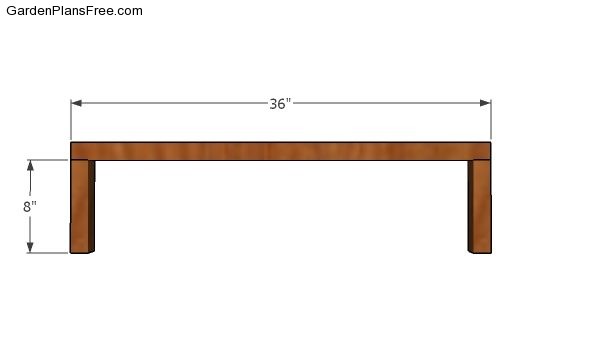
Building the support
The first step of the project is to build the support for the nesting box. Use 2×2 lumber for the support, as shown in the diagram. Drill pilot holes and insert 2 1/2″ screws to lock the base together tightly. Align the edges flush and make sure the corners are square.
STEP 2:

Fitting the braces
Next, attach the diagonal braces to the base. Make 15 degree cuts at both ends of the braces and lock them into place with 2 1/2″ screws.
STEP 3:
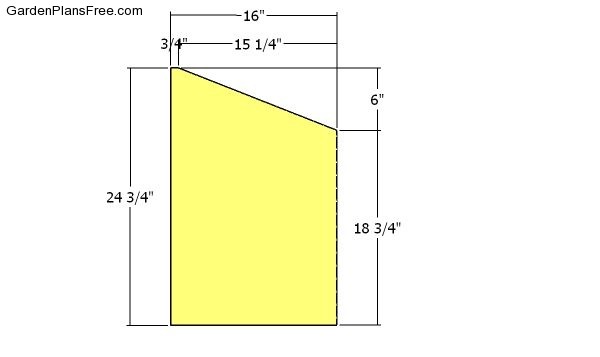
Side panels
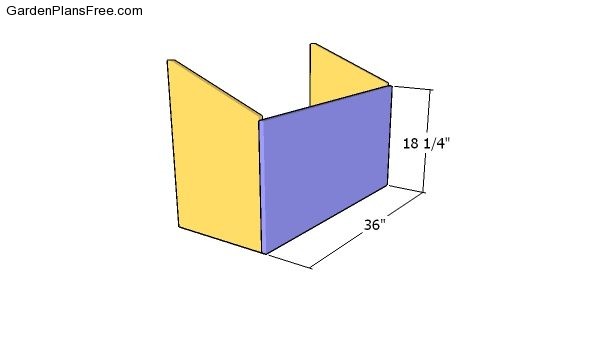
Next, build the sides for the nesting box from 1/2″ plywood. Mark the cut lines and the get the job done with a circular saw. Smooth the edges with attention.
STEP 4:
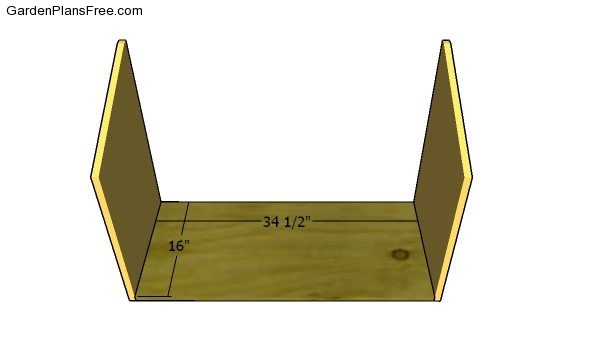
Attaching the bottom
Attach the sides to the 3/4″ plywood base. Align the edges, make sure the corners are square and insert 1 5/8″ screws to lock everything tightly. Leave no gaps between the components for a neat result.
STEP 5:
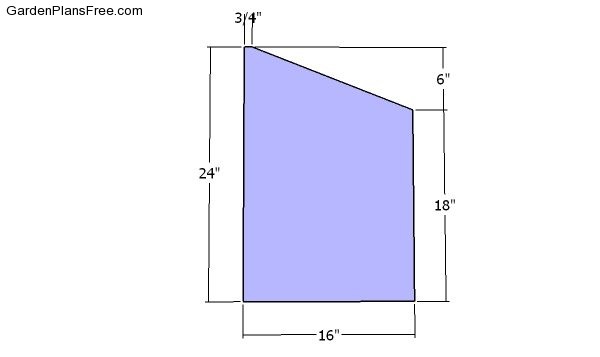
Partitions
Build the partitions for the nesting box from 1/2″ plywood.
STEP 6:
Fitting the back panel
Attach the 1/2″ plywood back to the box with 1 5/8″ screws.
STEP 7:

Fitting the partitions
Fit the partitions to the nesting box and secure them to the bottom and back with 1 5/8″ screws. Plumb the partitions with a spirit level before inserting the screws.
STEP 8:
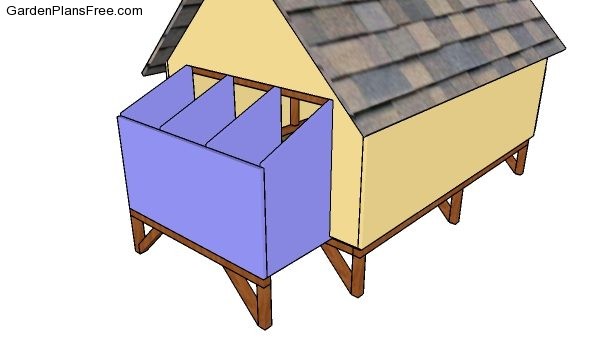
Fitting the nesting box
Fit the nesting box to the back of the chicken coop and make sure it fits perfectly inside the opening. Use 2 1/2″ screws to secure the nesting box to the frame of the chicken coop. Next, attach the base under the nesting box and insert screws to lock them together.
STEP 9:
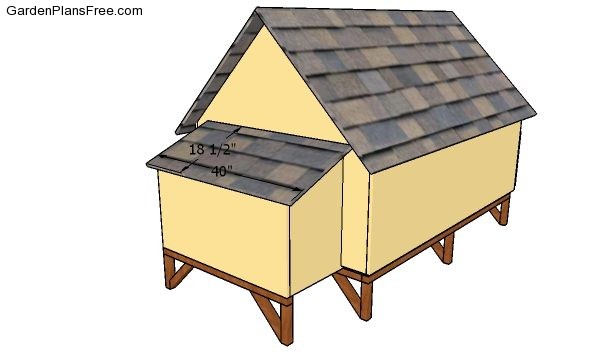
Fitting the lid to the nesting box
Attach the lid to the nesting box. Center the piece of 3/4″ plywood to the nesting box and then use hinges to attach it to the chicken coop. Add a handle for easier use of the lid. Cover the plywood lid with asphalt shingles to keep the nesting box waterproof.
STEP 10:

Easy chicken coop plans

After installing the nesting box to the chicken coop, you need to take care of the finishing touches. A few coats of paint will get you super far with the overall look of the coop. Check out PART 1 of the project to learn how to build the chicken coop. You can always save the plans as PDF or Print them using the floating widget on the left side of the screen (working only on PC or laptop).