If you want to learn more about how to build a 4×4 deer stand, take a close look over this article. If you like hunting, then chances are you need to build a shelter so you can hide from the elements while shooting. Pay attention to our step by step diy deer stand plans and adjust the size of the project, if you need something larger. You can see plans for a 6×6 deer stand here.
Even if you have no prior woodworking experience, you can still build this hunting blind in one weekend. The project is basically a simple box made form 2×4 lumber and 3/4″ plywood. If you want to get the job done in a professional manner, we recommend you to plan everything with attention, as to prevent costly mistakes and to build a professional garden swing. Invest in high quality materials, such as pressure treated lumber, as the stand will be exposed to all kinds of weather.
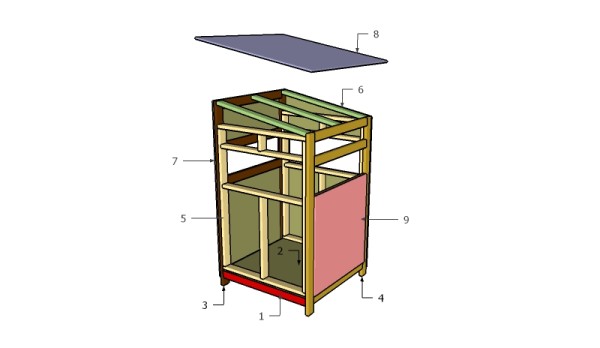
4×4 Deer Stand Plans
Building a deer stand
Materials
Tools
- Hammer, Tape measure, Carpentry square
- Miter saw, Drill machinery, Screwdriver, Sander, Router
- Safety Gloves, Safety Glasses, Respiratory Mask
Time
- One day
Made from this plans
Small Deer Blind Plans
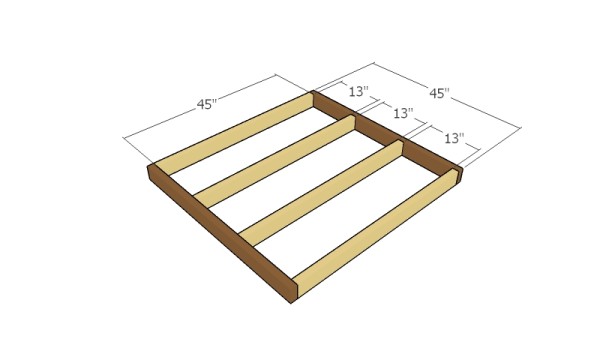
Building the floor
The first step of the project is to build the floor for the deer blind stand. Cut the joists from 2×4 lumber. Drill pilot holes through the rim joists and insert 2 1/2″ screws into the perpendicular joists. Make sure the corners are right-angled.
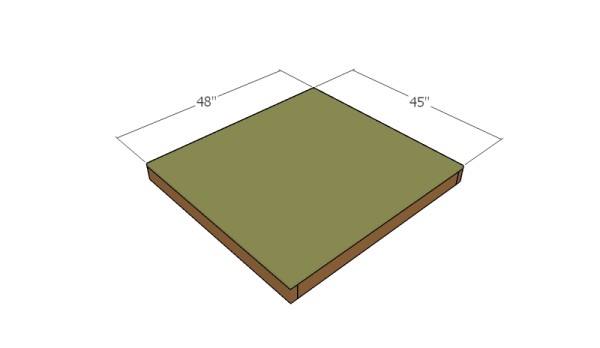
Fitting the floor
Cut a piece of 3/4″ plywood and attach it to the joists, as shown in the diagram. Use 1 1/4″ screws to lock it to the joists. Align the edges with attention, making sure they are flush.
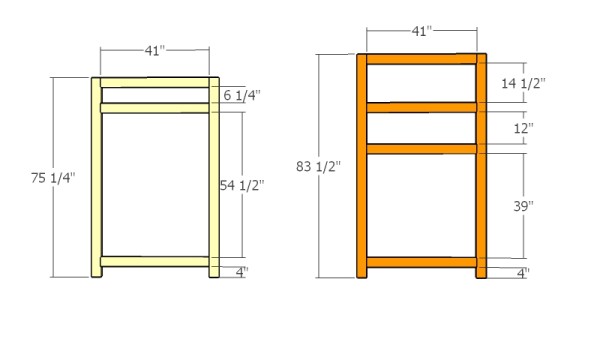
Building the front and back wall
Build the front and back walls for the deer stand. Cut the components from 2×4 lumber. Drill pocket holes at both ends of the horizontal components and secure them to the vertical posts with 2 1/2″ pocket screws. Make sure the corners are square and add waterproof glue to the joints.
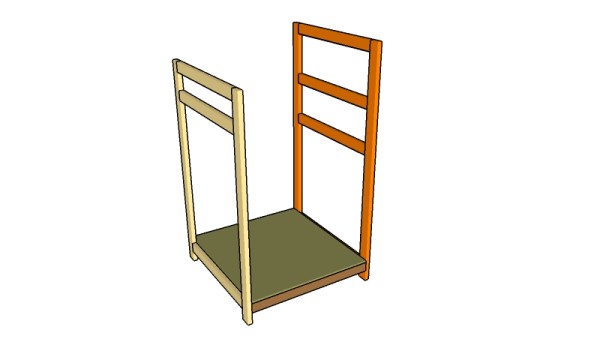
Fitting the front and back walls
Fit the front and back walls to the floor frame, as shown in the diagram. Drill pilot holes through the wall frames and insert 2 1/2″ screws into the floor frame. Use a spirit level to plumb the walls before locking them into place with the screws.

Building the side walls
Next, you need to assemble the side walls from 2×4 lumber. Cut the components from 2×4 lumber and lock them together with 2 1/2″ screws. Make sure the corners are square and drill pilot holes before inserting the screws. In addition, you can adjust the size of the windows to suit your needs.
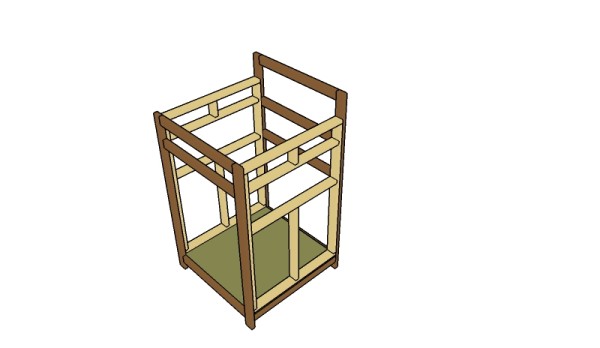
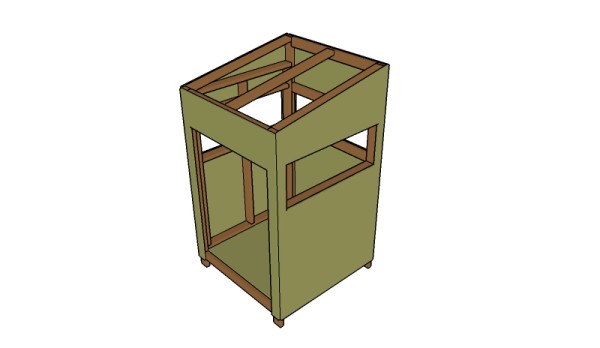
Fitting the side walls
Fit the side walls to the floor, as shown in the diagram. Drill pilot holes through the bottom plates and insert 2 1/2″ screws into the floor. In addition, you should lock the adjacent walls together by inserting 2 1/2″ screws. Make sure the corners are square.
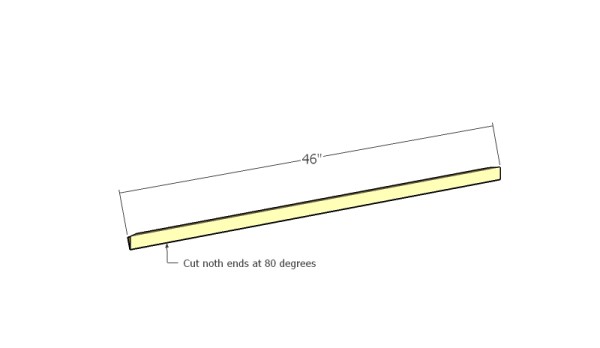
Building the rafters
Use 2×4 lumber for the rafters. Cut both ends of the rafters at 80 degrees, using a miter saw.
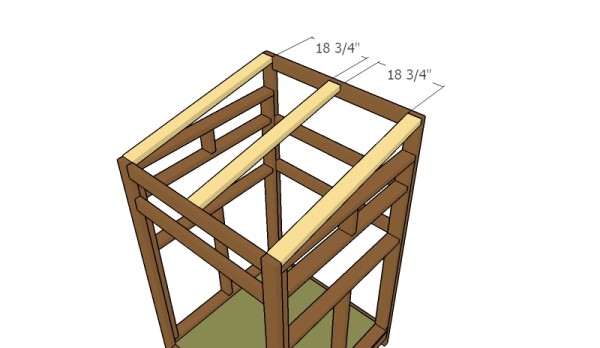
Fitting the rafters
Fit the rafters to the top of the deer stand. Drill pilot holes and insert 2 1/2″ screws to lock them into place tightly.
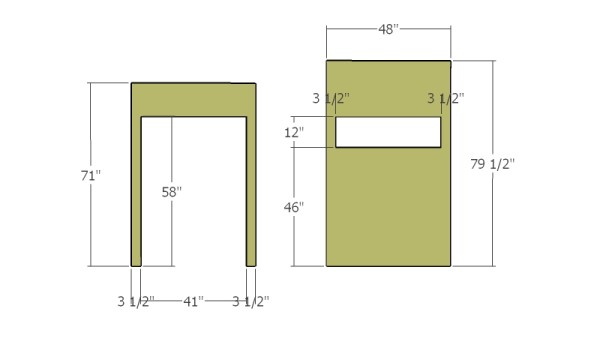
Building the front and back walls
Next, you need to build the front and back walls for the one person deer blind. Use a circular saw to make the cuts to the 3/4″ plywood sheets. Drill a starting hole and cut out the windows using a jigsaw. Smooth the edges with sandpaper.

Side walls
Repeat the process for the side wall.
Fitting the exterior walls
Attach the walls to the exterior of the deer stand. Align the edges with attention and use 2″ brad nails or 1 1/4″ screws to lock them into place. Leave no gaps between the panels and the frame.
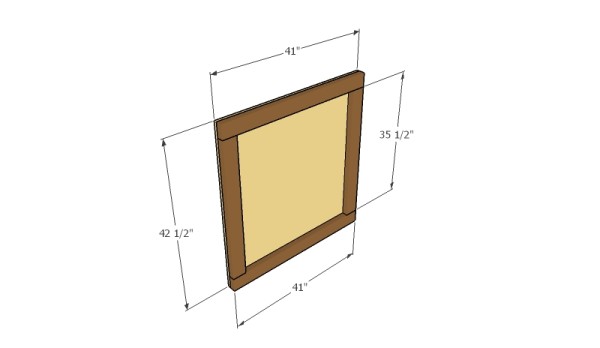
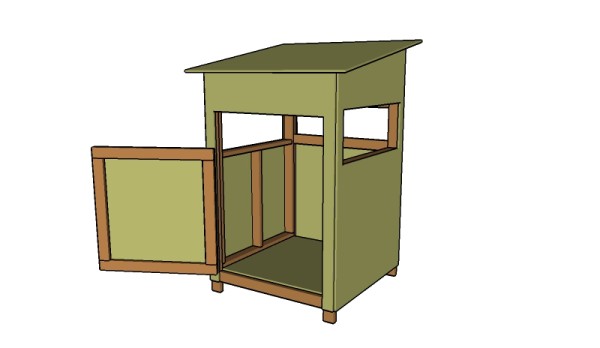
Building the door
Use the panel you cut out from the back wall. Assemble a frame from 2×4 lumber using pocket screws. Drill pocket holes at both ends of the vertical components and insert 2 1/2″ screws into the horizontal components. Use 1 1/4″ screws and waterproof glue to secure the panel to the frame.
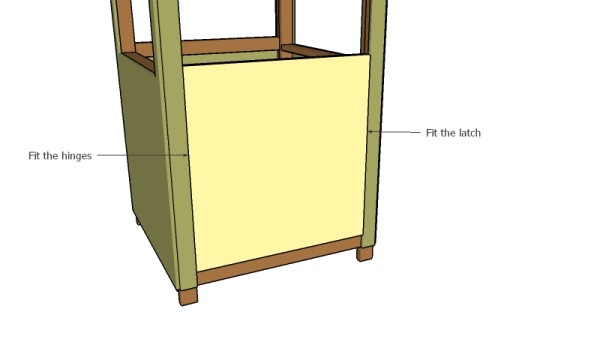
Fit the door to the stand
Fit the door to the back wall of the deer stand. Use two hinges to secure the door into place. In addition, use a latch to keep the door closed.
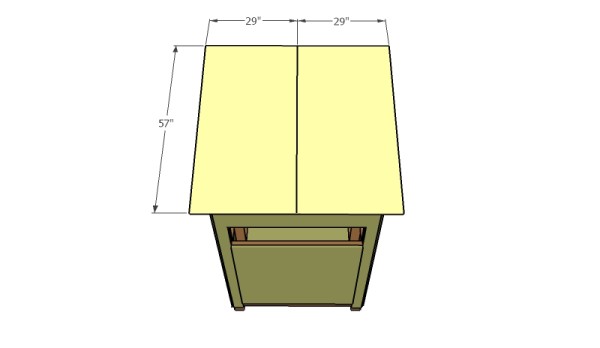
Fitting the roof
Use 3/4″ plywood to build the roof for the deer stand. Use 1 1/4″ screws to lock the plywood sheets into place. Use primer and paint to waterproof the roof. You can also staple tar paper to the roof, for a better result.
4×4 Deer Stand Plans
Next, you need to take care of the finishing touches. Apply a few coats of paint to the exterior of the deer blind, so it can blend in with the surrounding. You can also make some custom windows, if you want to seal the structure.

How to Build a Deer Stand
We recommend you to check if the components are locked into place properly and structure is rigid enough for your garden. Make sure there are no protruding screws or sharp edges. I also have free plans for a 4×8 deer stand.
PRO TIP: Fill the holes with a good wood filler and smooth the surface with medium-grit sandpaper. Apply several coats of paint or stain over the components, in order to protect them from decay. Check out the rest of the project to learn more about building garden projects.

This diy project was about 4×4 deer stand plans. If you have enjoyed the free project, we recommend you to share it with your friends, by using the social media widgets.
7 comments
4’×4’×7′ stand. 4 sheets 1/2″ plywood, 1 sheet 3/4″ plywood, 12 8′ 2×2s, small box 1 1/2″ drywall screws, $15 hardware. 1 day const.,can take apart in 1 hr ,knocks down to 6 pieces, lay flat in bed of truck for transport and 1 man reassembly. Very sturdy, waterproof. Easy full width plexiglass windows, for less than $5 over cost of plexiglass. Built two, 6 yrs one lease, tookbapart and reassembled on other lease and left them there after 7 yrs and were fine when we left. Minimum tools and skill needed.
How do I go about getting plans for 4×4 deer blind
See GET PDF PLANS button at the end of the article
Why does the PDF cost $4.99? it is the same information that is available for free here. Am I missing something?
Yes,, you are missing the essential. If you want to print the plans, you need to pay 4.99 for the PDF. If you are fine with having the plans online, go ahead, no issue.
I would like to get the 4’x4’ deer stand plan, but I do not find anywhere to order the PDF plan in print for $4.99. How do I do that?
I only sell PDF download plans. Press the GET PLANS then I want this.