Gardening for the first time can feel a little overwhelming, especially when you’re staring at rows of seed packets or scrolling through endless planting guides. What’s the best thing to grow first? What if you mess up? Do you need a huge yard or fancy tools? The good news is you absolutely don’t need to be a master gardener or live on a farm to grow your own food. In fact, getting started is a lot easier than it seems when you pick the right vegetables and take things one step at a time.
There’s something incredibly satisfying about planting a seed, watching it sprout, and then harvesting something you grew with your own two hands. It’s a little bit of science, a little bit of magic, and a whole lot of fun. And trust us—your future self will thank you when you’re tossing fresh-picked lettuce into a salad or sautéing green beans straight from your backyard. Whether you’re working with a big suburban backyard, a few raised beds, or just a couple of containers on the balcony, there’s room to grow something delicious.
This guide is all about making gardening simple, rewarding, and beginner-friendly. We’ve rounded up ten of the easiest vegetables to grow, chosen because they’re low-maintenance, quick to mature, and super forgiving. These are plants that thrive in a wide range of climates, especially if you live in USDA hardiness zones 5 through 9, which cover much of the U.S. You’ll also find basic gear suggestions, a quick rundown of how to start, and even planting timelines to make your journey smoother. These veggies don’t require expert skills or a green thumb—just a bit of sun, some water, and a little curiosity. So grab your gloves, dust off that trowel, and let’s get growing. It’s time to roll up those sleeves and dig in (literally and enthusiastically)!
Essential Beginner Gardening Tools and Supplies
Before we dive into the veggies, let’s talk tools and supplies. You don’t need fancy equipment to start a garden, but a few basic items will make the job easier and more enjoyable:
- Garden Gloves: A sturdy pair of gloves protects your hands from dirt, thorns, and blisters. They’ll keep you comfortable while digging and weeding.
- Trowel or Hand Shovel: Perfect for digging small holes, planting seeds or seedlings, and pulling up weeds. A good trowel is like an extension of your hand in the garden.
- Watering Can or Hose with Spray Nozzle: Gentle watering is crucial for young plants. A watering can or a hose attachment that delivers a soft shower will help avoid displacing seeds or damaging delicate seedlings.
- Soil and Compost: Good soil is the foundation of a healthy garden. If you’re filling raised beds or containers, use quality garden soil or potting mix. Mixing in compost provides nutrients and improves soil structure, giving your veggies a great start.
With these essentials in hand, you’re ready to plant! Now, let’s count down ten easy vegetables that will reward you with a great harvest even if you’re new to gardening.
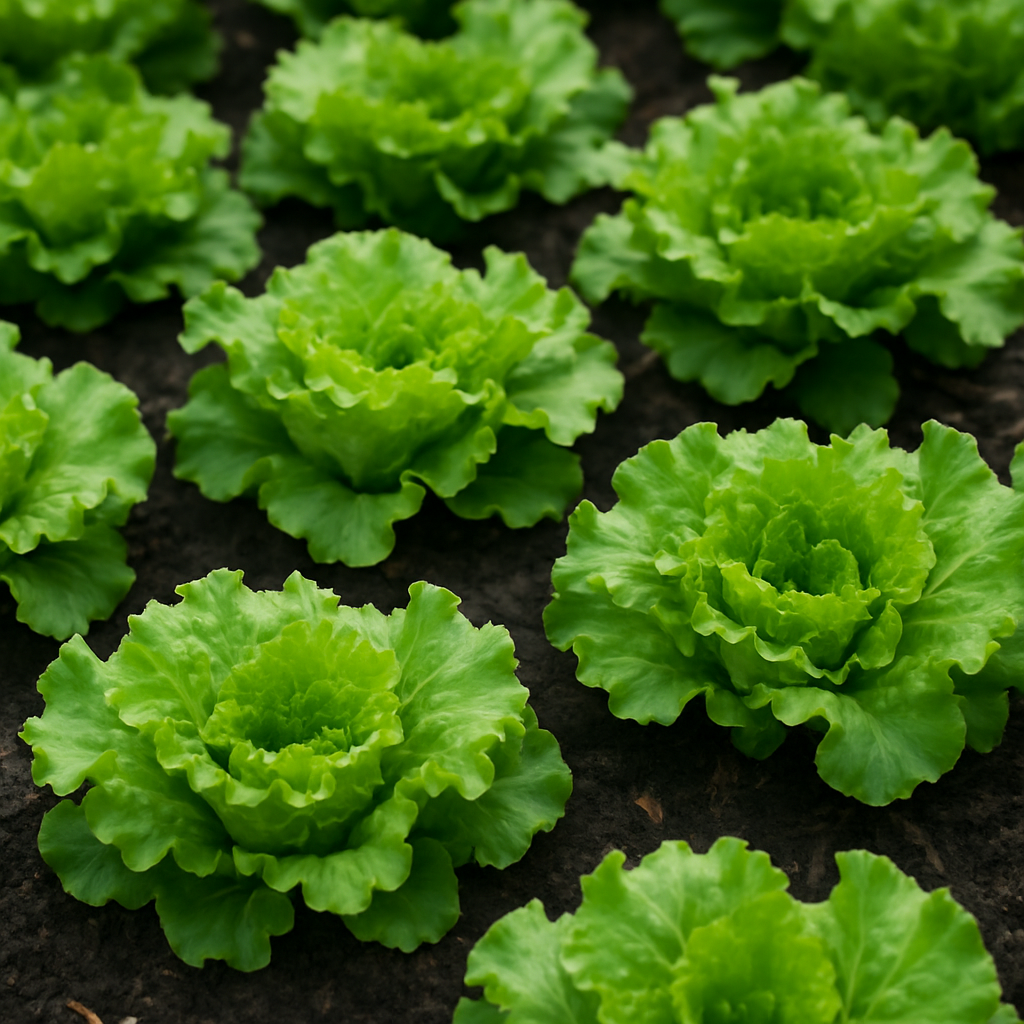
1. Lettuce
Lettuce is a quick-growing salad staple and one of the easiest greens for beginners. It thrives in cooler weather and doesn’t require intense sun all day, which means you can grow it in spring and fall in most regions. You can even grow lettuce in containers or window boxes. There’s nothing like stepping outside to pick a fresh salad!
Sun & Soil: Lettuce grows best with plenty of light but will tolerate partial shade, especially as the weather warms. In hot climates or summer months, a bit of afternoon shade prevents it from bolting (going to seed too early). Plant it in loose, well-draining soil enriched with compost. Because lettuce has shallow roots, it appreciates consistent moisture – water regularly to keep the soil slightly moist, but avoid waterlogging.
Planting & Spacing: You can sow lettuce seeds directly in the garden as soon as the soil can be worked in spring (lettuce can handle a light frost). Scatter the tiny seeds or plant them about 1/4 inch deep. Because the seeds are so small, it’s common to sprinkle them in a row or patch and then thin the seedlings once they’ve sprouted. Give each lettuce plant a bit of elbow room – thin seedlings to about 4–8 inches apart, depending on the variety. This spacing allows heads or loose leaves to develop fully without overcrowding. If you don’t want to bother with thinning, you can also sow a few seeds at each spot with the proper spacing and simply pluck out the weaker ones if more than one seedling comes up. (Diagram: A seed spacing illustration for lettuce could be helpful here, showing how to thin crowded seedlings to the proper spacing.)
Growing Tips: Lettuce grows fast. You can harvest baby leaves in as little as 3–4 weeks, or wait a bit longer (6–8+ weeks) for full-sized heads. To keep the harvest coming, sow new seeds every couple of weeks in succession. This way, as you pick one batch, the next is on its way. In warm weather, keep an eye out – when days get long and hot, lettuce will bolt (send up a flower stalk). The leaves turn bitter at that point, so plan to harvest or pull up plants once they show signs of bolting. For an extended harvest, plant heat-tolerant varieties or provide shade cloth during heat waves.
- When to plant: Start lettuce in early to mid-spring, as soon as the soil can be worked (often March or early April). For an autumn crop, sow again in late summer (once the intense heat of summer fades).
- Harvest window: Generally 30–60 days after planting, depending on variety and desired leaf size. Pick outer leaves young for a cut-and-come-again approach, or harvest whole heads when they become firm and full-sized.
- Varieties to try: Black Seeded Simpson (a classic looseleaf lettuce that’s quick and easy) and Buttercrunch (a butterhead type known for its sweet, tender leaves) are reliable, widely available choices for beginners.
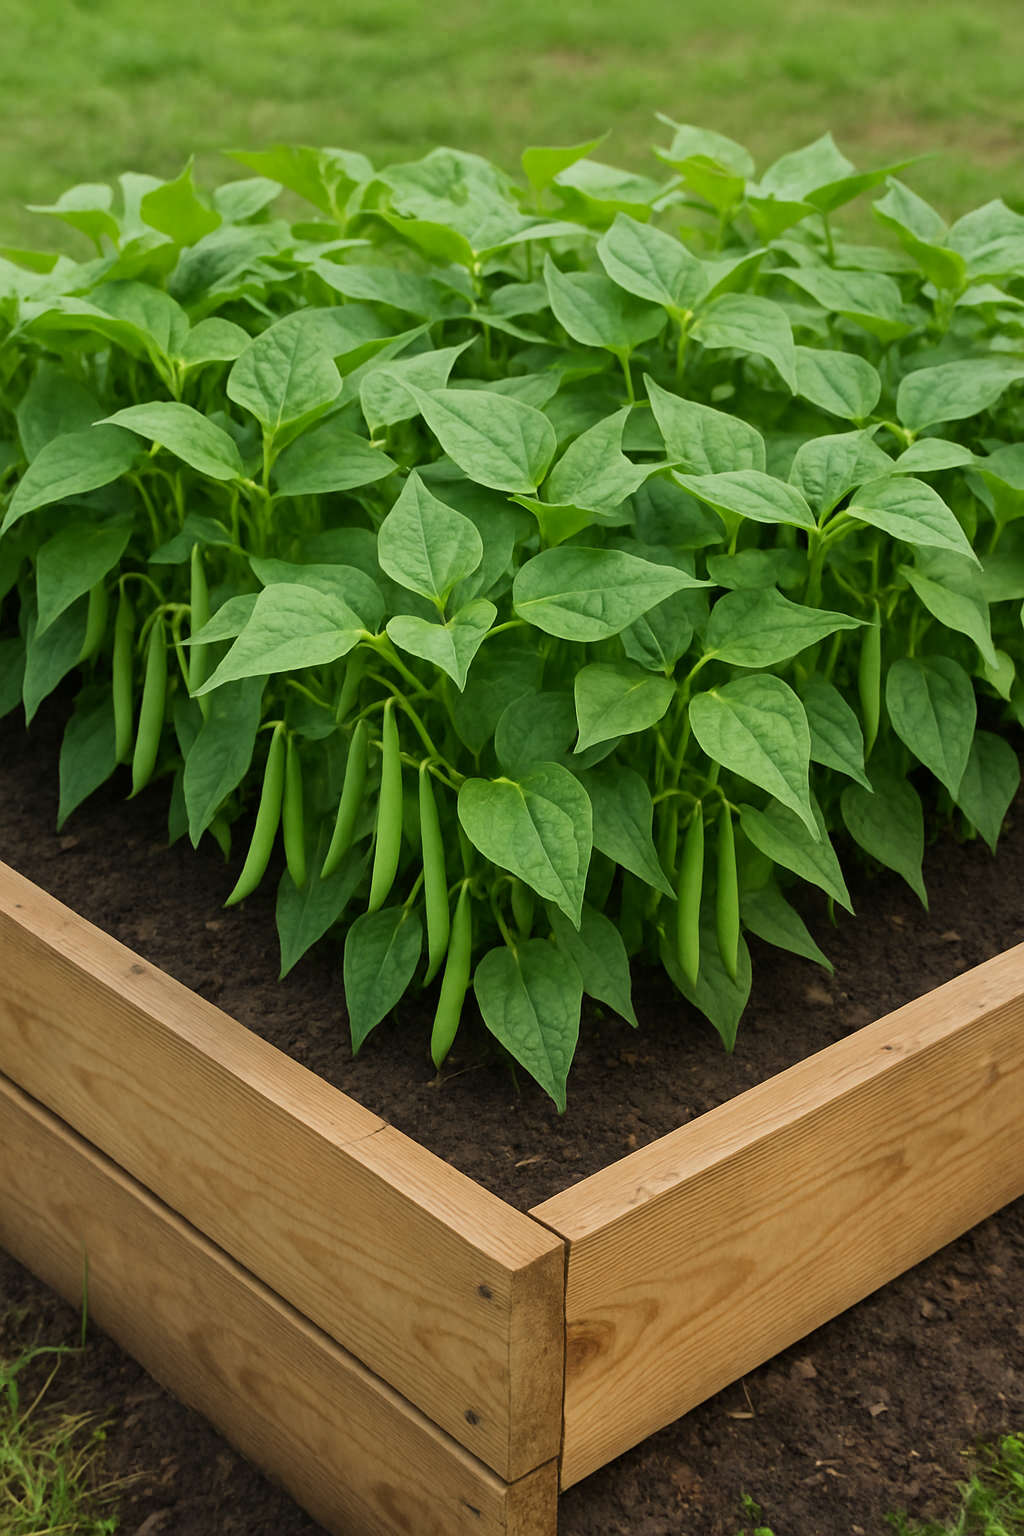
2. Green Beans (Bush Beans)
Green beans are a beginner’s delight because they germinate easily, grow vigorously, and don’t require much fuss. Bush beans, in particular, are compact plants that stand upright on their own (no trellis needed) and produce plenty of tender beans for you to snap and enjoy. Even a small patch can yield a big bowl of beans. They’re also fairly quick to mature, so you get results in one season.
Sun & Soil: Plant green beans in a spot that gets full sun (around 6–8 hours of sunlight a day). They prefer well-drained soil – beans don’t like their “feet” too wet, so avoid soggy areas. Work some compost into the soil before planting to give them a nutrient boost. Unlike some heavy feeders, beans often do fine without a lot of extra fertilizer (too much nitrogen can actually lead to more leaves than beans).
Planting & Spacing: Sow bush bean seeds directly into the garden after all danger of frost has passed – these are warm-season veggies that won’t germinate in cold soil. Plant the seeds about 1 inch deep. Space them a few inches apart; typically, you can plant seeds 2–4 inches apart in rows, then thin to about 4 inches apart if they all sprout. If you’re planting in rows, keep rows about 18 inches to 2 feet apart so you have room to walk and harvest. Bush beans grow quickly and will start flowering and setting beans before you know it, usually within 50–60 days of planting.
Growing Tips: For a continuous bean supply, try staggered planting. For example, plant a short row of beans one week, then another row two weeks later, and so on. This way, new plants will keep producing as older ones slow down. Green beans are fairly low-maintenance; just water them when the top inch of soil feels dry, aiming to keep soil consistently moist during flowering and pod formation for the best yield. When the beans reach about as thick as a pencil and before the seeds inside bulge too much, they’re perfect to pick. Regular harvesting (every few days) actually encourages the plant to produce more. Also, because bush beans are compact, they do well even in raised beds or large containers.
- When to plant: Direct-sow beans in late spring after your last frost date (beans need warm soil around 60°F to germinate). You can continue planting more beans every 2–3 weeks until mid-summer for a continuous crop.
- Harvest window: About 7–8 weeks after planting for the first flush. Once they start, beans can be picked continuously for a couple of weeks from each planting. Pods are ready when they are firm, ~4–6 inches long (depending on variety), and before you see the seeds inside bulging.
- Varieties to try: Blue Lake 274 (a classic, productive bush bean with stringless pods) and Provider (an early bush bean that germinates well in cooler soil) are excellent choices for beginners.
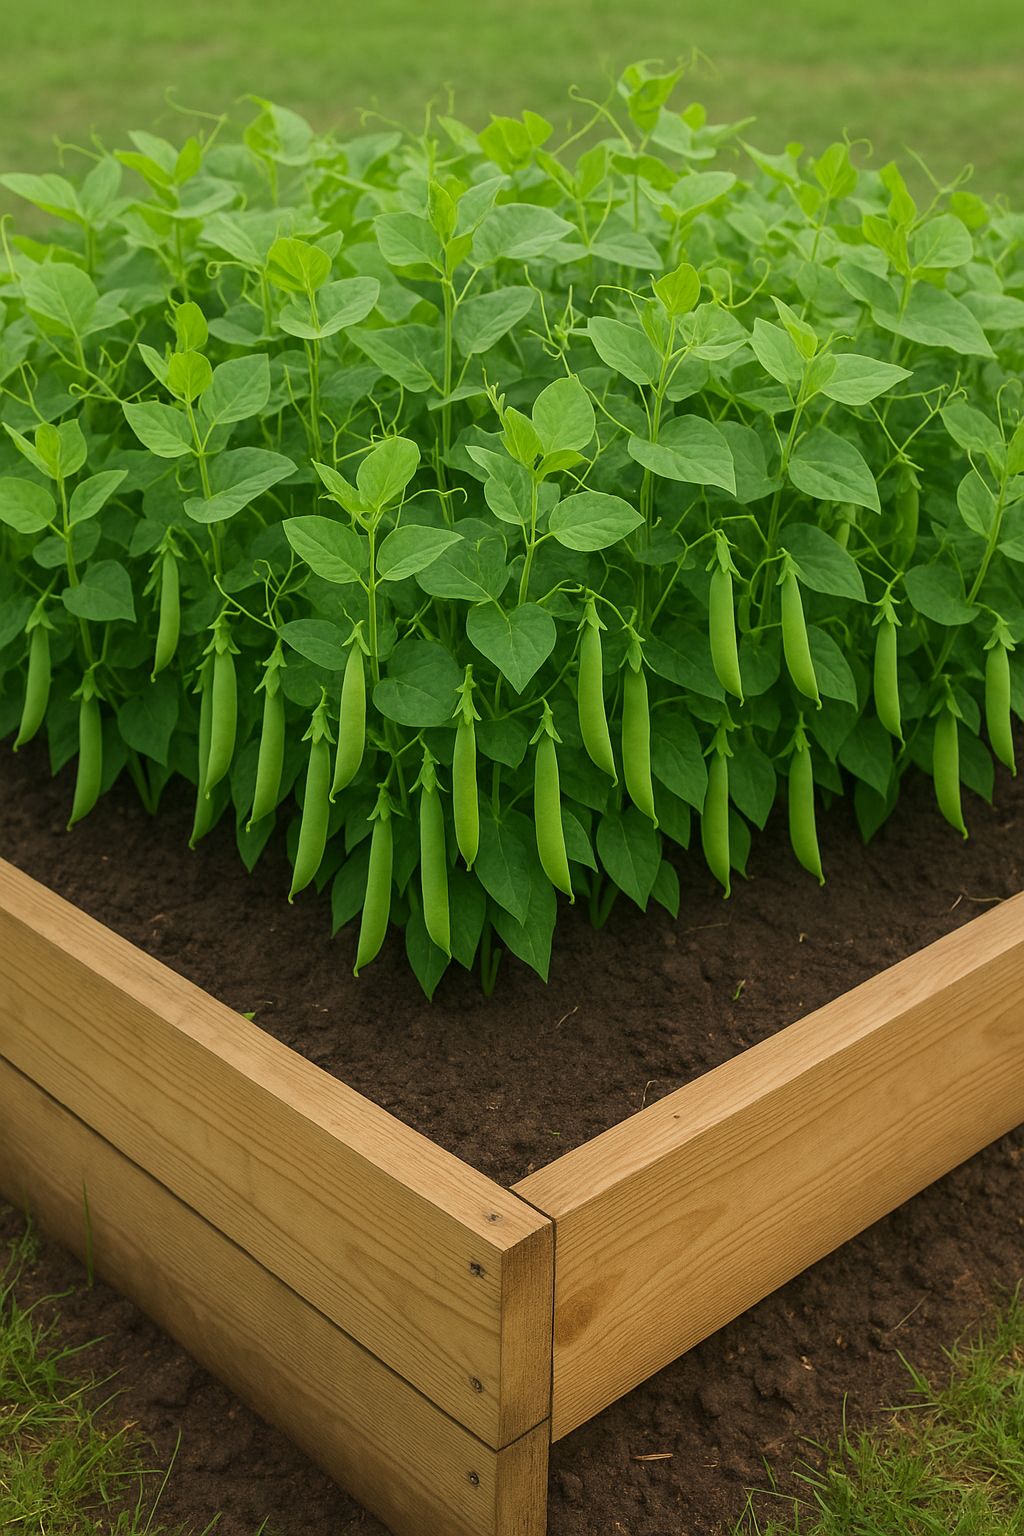
3. Peas (Snap & Snow Peas)
Peas are a cool-season crop that are as sweet and crunchy as they are easy to grow. They actually like the chilly weather of spring (and fall), so you can start them early when few other veggies can be planted. Snap peas and snow peas are especially fun because you eat the whole pod (no shelling required), and they’re delicious straight off the vine (a great snack while you garden!).
Sun & Soil: Choose a sunny spot for peas, though they can handle part-day sun in warmer areas. They prefer the cool, moist soil of early spring. Peas don’t thrive in hot midsummer weather, so the goal is to plant early enough that they mature before the worst heat hits. Soil should be well-drained (soggy soil can rot the seeds) but rich in organic matter to hold moisture. Add compost to the planting area to help feed the plants and retain moisture. Peas can also be grown in large containers as long as they have something to climb on.
Planting & Spacing: One of the best things about peas is that you can plant them super early – often as soon as the ground has thawed and can be worked at the end of winter. In many regions, that’s a couple of weeks before the last spring frost. The seeds actually prefer cool soil for germination. Plant pea seeds about 1 inch deep and roughly 2 inches apart in the row. They’ll germinate in soil as cool as the 40s °F. As the seedlings emerge, consider putting up some support next to them. Even short varieties benefit from a trellis or stakes with twine, because most peas love to climb. Giving them something to scramble up makes for healthier plants and easier picking. (Image: A simple trellis of bamboo stakes or wire mesh would be great for peas – an image here could show how to support pea vines.)
Growing Tips: Keep peas well-watered, especially once they start flowering and forming pods – consistent moisture makes for plump, sweet peas. Because peas grow during the cool season, you can succession-plant a little differently: plant a batch in early spring, then another a few weeks later, as long as it’s not too late in the season. By late spring in most areas, you’ll stop planting, since peas sown too late will struggle in summer heat. (In zones 8–9, peas are often planted in late fall or winter for a spring harvest.) Harvest peas when the pods have filled out but are still tender. For snap peas, that’s when pods are plump and round; for snow peas, when pods are broad but before the peas inside get too big. Pick often – every day or two – to catch them at peak sweetness and to encourage more production. Pea plants don’t produce for very long (just a few weeks), so enjoy them while they last! Once they fizzle out in the heat, you can pull them up and perhaps plant a different summer crop in that spot.
- When to plant: Plant peas as soon as the soil can be worked at the end of winter – often a few weeks before the last spring frost. In many areas this is late February or March. (In very warm climates, peas are planted in fall or winter.)
- Harvest window: Usually ~60–70 days from planting. Spring-sown peas are generally ready by late spring. You’ll know it’s harvest time when pods are green and filled out. For a continuous supply, sow a new round about every 2 weeks until early summer (or until the weather gets too hot).
- Varieties to try: Sugar Ann (a dwarf snap pea that matures early, great for small spaces) and Oregon Sugar Pod II (a reliable snow pea with large, tender pods). If you prefer shelling peas, try Wando (it tolerates warmer temperatures better than most, extending the pea season).
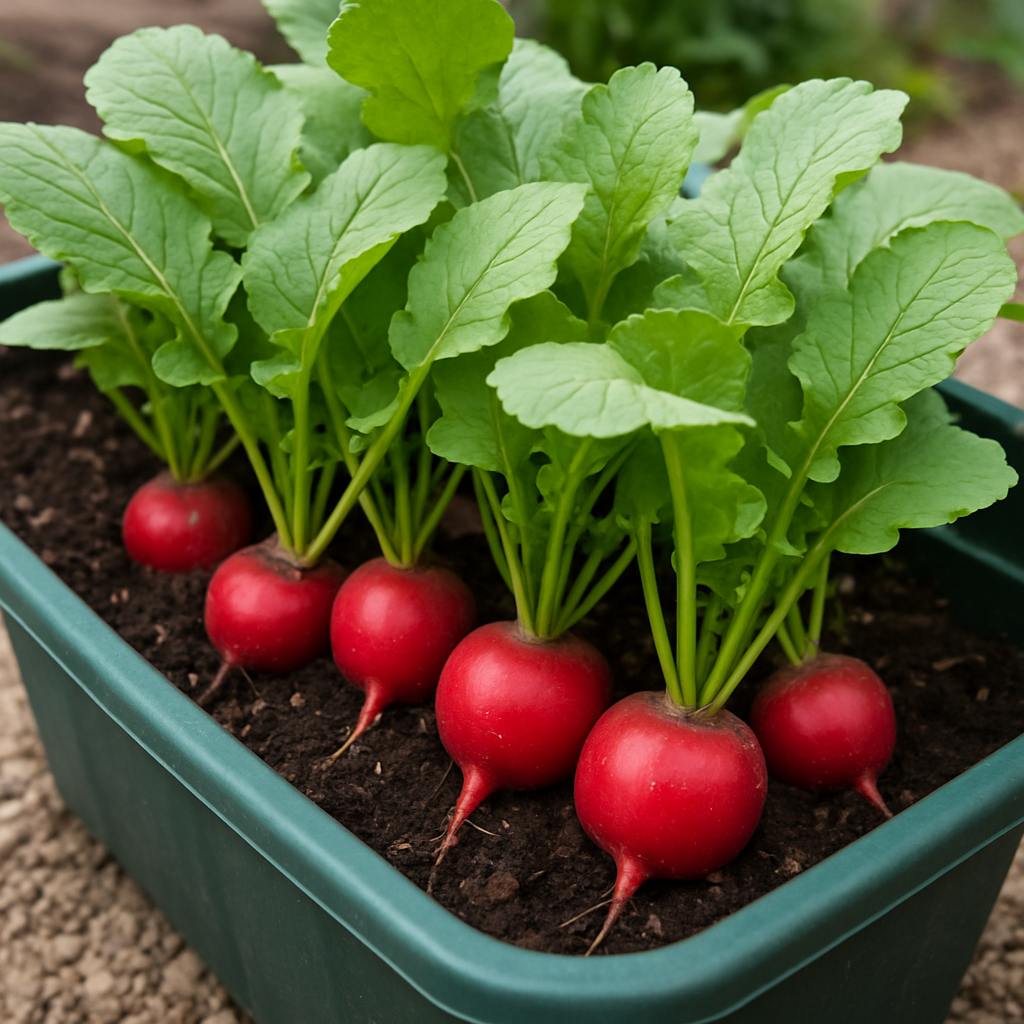
4. Radishes
If patience isn’t your strong suit, radishes will be your new best friend. These zippy little root veggies can go from seed to harvest in as little as three to four weeks! Radishes are practically the poster child for easy gardening – they germinate quickly, don’t need much space, and aren’t too fussy about soil. Plus, their bright red, pink, or purple roots add a pop of color to salads and snacks. Even if you think you don’t like radishes, growing your own might change your mind (fresh homegrown radishes are often milder and crisper than store-bought).
Sun & Soil: Radishes do best in the cooler parts of the growing season (spring and fall). They like sun, but in hot weather a bit of light shade can prevent them from getting overly spicy or bolting. They aren’t heavy feeders; just ensure the soil is loose and drains well. Compacted or rocky soil can make radishes grow in funky shapes (or not bulb up well), so loosen the soil to a depth of at least 6–8 inches. A little compost mixed in will help maintain moisture and provide nutrients, but avoid too much nitrogen (it can cause lots of leaves and little root).
Planting & Spacing: As soon as you can work the soil in spring, you can plant radish seeds – they don’t mind chilly soil at all. Sow the seeds about 1/2 inch deep. They are often planted in rows or even scattered in between slower-growing veggies. (Radishes grow so fast, they’ll be out of the ground by the time the other crop needs the space.) Space the seeds roughly 1–2 inches apart. If you drop them in a furrow somewhat close, you can later thin them to about 2 inches apart once they sprout. Actually, you might not even need to thin if you sowed with a bit of spacing – radish seedlings are easy to pluck out and even edible as microgreens. They germinate quickly (sometimes in just 3–5 days in mild soil), which is gratifying for a new gardener.
Growing Tips: Radishes grow fast, but that means they can also mature and get overripe fast. Check them often once they’re about 3 weeks old. Harvest when the roots are roughly the size of a large marble or a ping-pong ball (for round varieties like Cherry Belle). If you leave them in the ground too long, they can get pithy or woody. For a steady supply, plant a few radishes every week or two throughout the spring. Then take a break during the hottest part of summer (they will bolt in high heat and long days). You can start planting radishes again in late summer for a fall crop – late August or September plantings (depending on your frost date) will yield crisp radishes as the weather cools. One neat trick: interplant radishes with carrots. As the Old Farmer’s Almanac suggests, mixing radish seeds with carrot seeds can help break up the soil for the slower-sprouting carrots; as you harvest the radishes, the carrots will fill in the row. It’s a win-win for efficient use of space.
- When to plant: Early spring as soon as the ground is thawed (March or April in many areas). Plant successive batches every week or two throughout spring. Pause during the hottest part of summer (radishes don’t like high heat). In late summer, start planting again for a fall crop.
- Harvest window: As quick as 24–30 days for many spring radish varieties! Most will be ready in under 4 weeks from seeding. Fall-planted radishes may take a little longer in cooler weather. Don’t let them sit in the ground too long after maturing – they’re best harvested promptly for crisp texture.
- Varieties to try: Cherry Belle (the classic small red radish, quick to grow) and French Breakfast (an heirloom variety that’s elongated pink-and-white, very crunchy and mild).
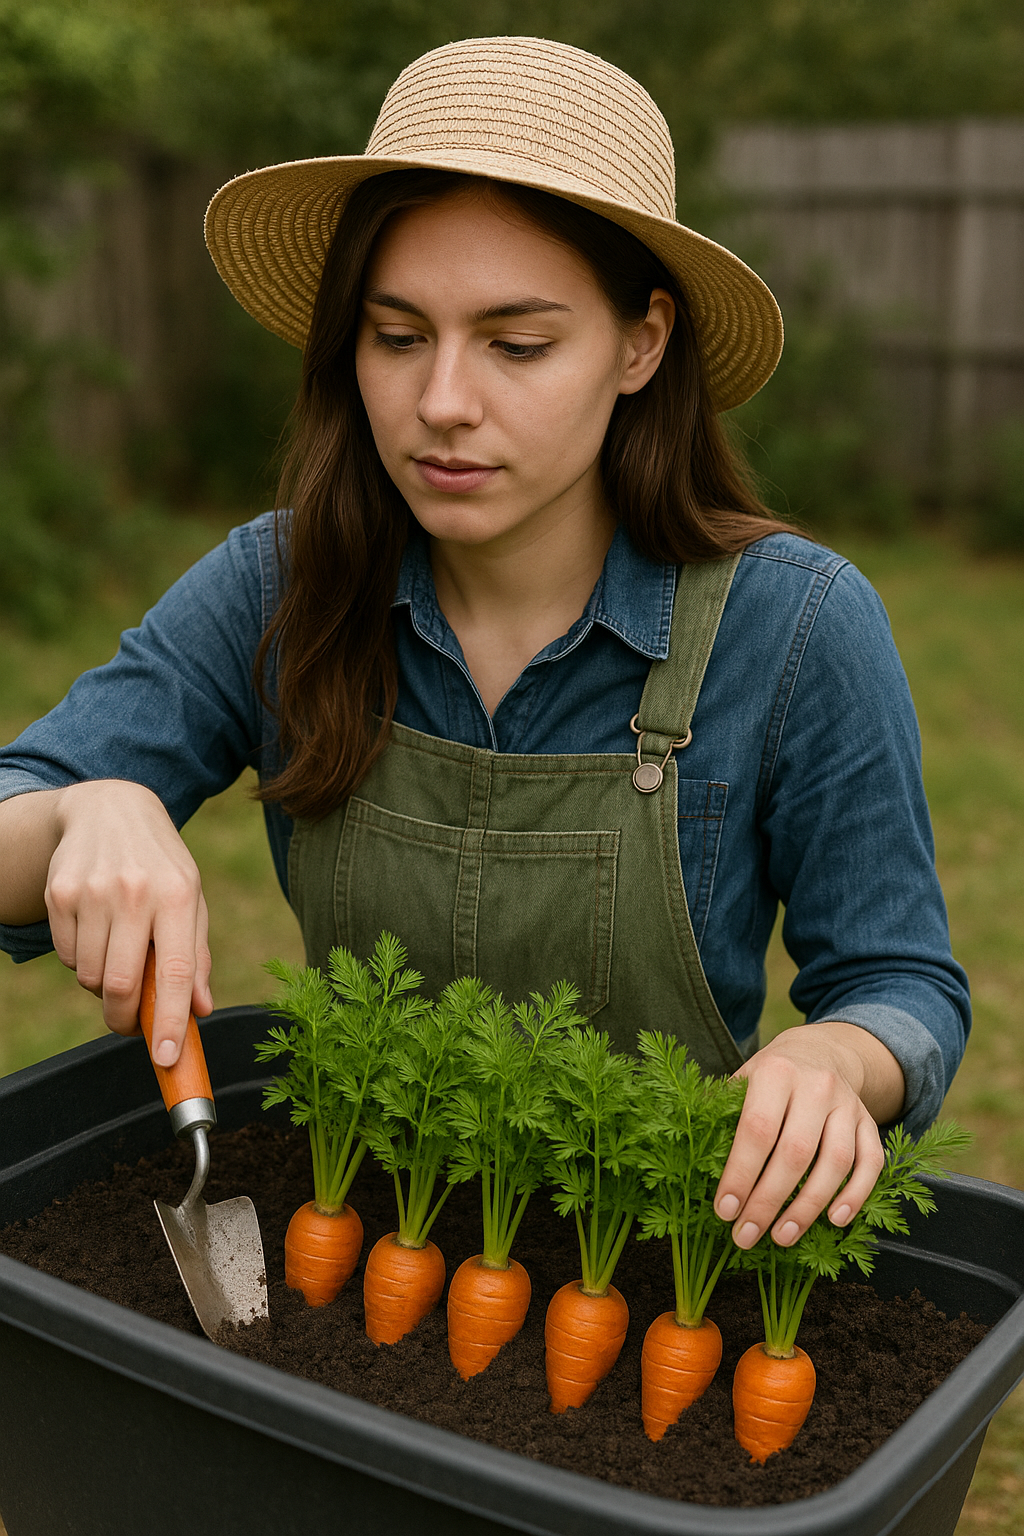
5. Carrots
Carrots can be a tad trickier than radishes, but they’re still among the easiest root veggies for beginners – as long as you give them loose soil and a little patience. Home-grown carrots are worth the effort: they’re sweet, crisp, and come in fun colors beyond the typical orange. Growing carrots will teach you the importance of thinning seedlings (removing extras) and reward you with a crunchy crop.
Sun & Soil: Carrots prefer full sun (6+ hours a day), but they can tolerate partial shade. The most important factor is soil preparation. They need loose, fluffy soil that’s free of rocks and clumps for their roots to grow straight and long – hard, compacted soil can cause carrots to fork or grow misshapen. If your garden soil is heavy clay or very rocky, consider using a raised bed or mixing in sand and compost to improve the texture. Carrots also appreciate steady moisture and cooler temperatures – they thrive in the mild weather of spring and fall, and can tolerate light frosts.
Planting & Spacing: Carrot seeds are very small and can take up to 2–3 weeks to germinate, so don’t worry if they don’t pop up right away. Sow the seeds about 1/4 inch deep. Try to sprinkle them thinly in the row, aiming for an inch or so between seeds. (It’s easy to sow too many – you can always thin them later.) After planting, water gently and keep the soil consistently moist during the germination period. Once the seedlings are a couple of inches tall, thin them out so that the remaining plants are about 2 inches apart – this is crucial for proper root development, because overcrowded carrots will end up stunted or twisted. It may feel odd to pull up some seedlings, but trust us, it’s worth it for nice big carrots (and you can eat those tiny baby carrots you thinned out, too!).
Growing Tips: Be patient with carrots. They typically take around 2 months (60+ days) to reach maturity, depending on the variety. Keep them watered during dry spells – about 1 inch of water per week is a good rule of thumb. Inconsistent watering (letting them dry out then suddenly soaking) can sometimes cause carrots to crack, so try to keep the soil evenly moist. You don’t have to harvest all your carrots at once; you can gently dig up what you need and leave the rest in the ground a bit longer. The flavor often improves in cooler weather, and carrots can even stay in the ground after a light frost (just harvest before the ground freezes solid).
- When to plant: Sow carrots in early to mid-spring, as soon as the soil is workable (around 50°F). Continue planting every few weeks until early summer for a continuous crop. For a fall harvest, plant in late summer (about 8–10 weeks before your first frost).
- Harvest window: Typically 60–80 days after planting. Early varieties can be ready in about 2 months (late spring/early summer); later varieties and fall crops might take 3 months. Carrots can be harvested over a period of weeks – you don’t have to pick them all at once. Pull them as needed once they’re big enough. If left in the ground into cool fall weather, they generally keep well until a hard freeze.
- Varieties to try: Nantes types like ‘Scarlet Nantes’ (sweet, straight cylindrical roots) and Danvers Half-Long (a classic variety that is a bit more tolerant of heavier soils). If your soil is shallow or rocky, try a round variety like Parisian (small globe-shaped carrots) which don’t need deep soil.

6. Tomatoes
Tomatoes are often the first vegetable (well, technically fruit!) that people want to grow. There’s nothing like a sun-ripened tomato from your own backyard – the flavor will beat any grocery store tomato. While tomatoes need a bit more care than some easier veggies, they’re still very manageable for beginners. With a little attention, a single tomato plant can produce numerous juicy fruits.
Sun & Soil: Tomatoes love sun. Give them a spot that receives 6–8+ hours of sunlight daily – the more, the better for a sweet and bountiful harvest. They also appreciate rich, well-draining soil. Mix in compost or aged manure before planting; tomatoes are fairly heavy feeders and will benefit from extra organic matter. Good soil moisture is important, but tomatoes don’t like to sit in waterlogged soil (their roots can rot). Aim for a steady supply of moisture by watering deeply and mulching around the plants to conserve water. Mulch (straw, shredded leaves, or even newspaper) also helps prevent soil from splashing up on the leaves, which can help reduce disease.
Planting & Spacing: Most beginners start tomatoes from nursery seedlings (transplants) rather than seed, which simplifies things. Wait to plant them outdoors until all danger of frost is past and daytime temperatures are warm. Tomatoes can be permanently stunted or killed by frost, and even cool nights below 50°F can cause them to drop blossoms and struggle. When planting, dig a hole and bury the transplant deeper than it was in its pot (you can cover the stem up to the top few leaves – tomatoes will sprout extra roots along the buried stem for a stronger root system). Space tomato plants about 2 to 3 feet apart to give them ample room and good air circulation. It’s important to provide support: insert a sturdy stake or tomato cage into the ground near the plant at planting time. As the tomato grows, tie the stems gently to the stake or let them grow up through the cage. This keeps the plant upright, lifts fruit off the ground, and makes harvesting easier. (Image: A tomato plant supported by a wire cage or stake would be shown here, demonstrating proper support.)
Growing Tips: Water tomatoes deeply and regularly. A good soaking once or twice a week (depending on rain) encourages deep roots; avoid frequent light waterings. Try to water at the base of the plant to keep the leaves dry – wet foliage can lead to fungal diseases like blight. Fertilize lightly; too much nitrogen will give you lots of leaves but not many tomatoes. Once the plant starts setting fruit, consistent watering is important to prevent a common problem called blossom-end rot (when the bottoms of the tomatoes turn black and leathery). This disorder is often caused by irregular water supply, so keep the soil moisture steady. Harvest tomatoes when they are fully colored (red, or the ripe color for that variety) and just slightly soft to the touch. If you have a lot of green tomatoes and a frost is approaching, pick them and let them ripen indoors on a countertop or windowsill – no gardener wants to lose their tomatoes to a surprise freeze!
- When to plant: Set out tomato transplants in mid to late spring, after your area’s last frost date (often around April or May). Make sure nights are consistently above 50°F before planting.
- Harvest window: Early tomato varieties start ripening fruit about 60 days after transplanting (mid-summer). Main-season tomatoes usually produce ripe fruit in 75–85 days. In a typical garden, you might start picking tomatoes by July and continue into September. In warmer regions, the harvest will start earlier and last longer (potentially all summer into early fall, until frost).
- Varieties to try: For beginners, cherry tomatoes are a sure bet – they yield lots of bite-sized tomatoes with minimal fuss. Sweet 100 (red cherry tomato known for long clusters of sweet fruits) and Sun Gold (golden-orange cherry tomato with exceptional flavor) are favorites. For a medium-sized slicer, try Early Girl (an early-ripening red tomato) or Celebrity (a disease-resistant, productive variety).
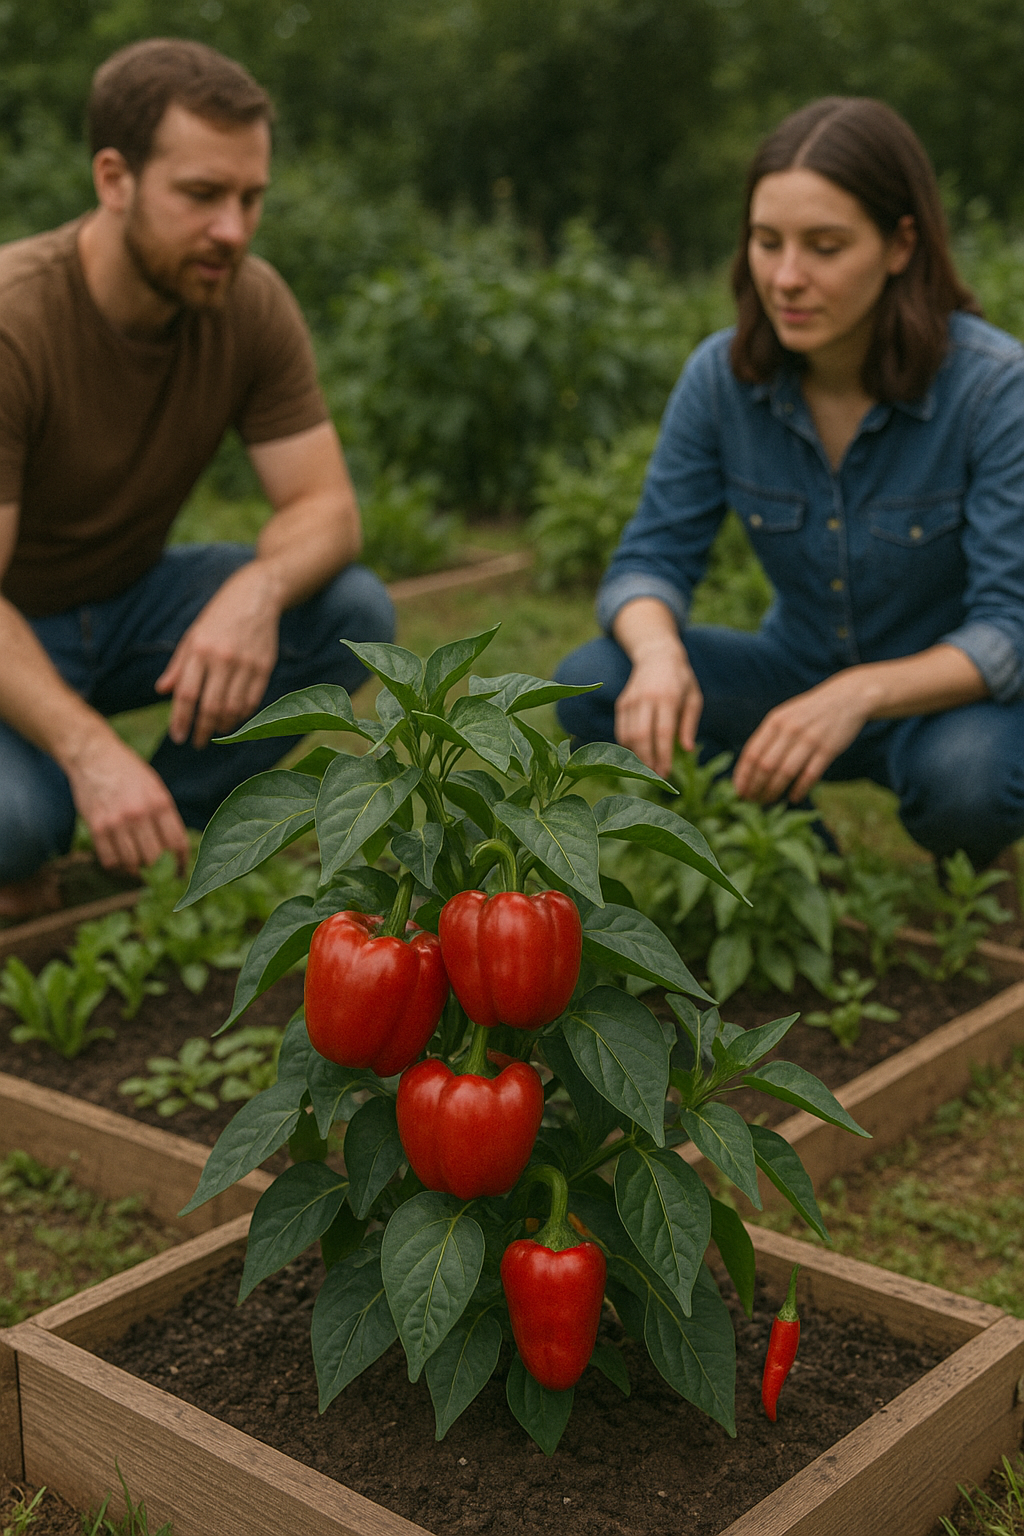
7. Peppers (Bell & Hot Peppers)
Peppers add color and flavor to the garden, and they’re quite straightforward to grow in warm weather. Whether you want sweet bell peppers for salads or hot jalapeños to spice up your salsa, peppers are a rewarding choice for beginners. They don’t take much space, can even grow in large pots, and typically have few disease problems. The main thing peppers need is heat – so be prepared to pamper them until summer weather settles in.
Sun & Soil: Like their tomato cousins, peppers crave full sun and heat. Choose the sunniest, warmest part of your garden for peppers. In zones with cooler summers, using dark-colored mulch or even black plastic around peppers can help keep the soil warm for better growth. Peppers prefer well-drained soil that’s rich in organic matter. Mix compost into the soil to help retain moisture and nutrients. They do well in soil with a slightly acidic to neutral pH (around 6.0–7.0). Good soil moisture is important – peppers have somewhat shallow roots, so they appreciate consistent watering, but be careful not to overwater (soggy soil can lead to root issues). A layer of mulch around pepper plants will keep the soil evenly moist and suppress weeds.
Planting & Spacing: Pepper seeds are usually started indoors (or purchased as nursery seedlings) because they need warm conditions to germinate and have a long growing season. If you’re a beginner, it’s easiest to buy a small pepper transplant for each spot rather than starting seeds. Wait until after the last frost to plant peppers outside, and ideally until nights are well into the 50s °F. Cold nights can stunt peppers or cause them to drop their flowers, so don’t rush it. Plant seedlings about 18 to 24 inches apart. They might look small at first, but they will bush out. If planting in rows, leave ~2–3 feet between rows. You can plant peppers a tad deeper than they were in their pot (up to the first set of true leaves), but it’s not as crucial as with tomatoes. Many pepper varieties benefit from a small stake or cage, since a plant loaded with heavy bell peppers can sometimes lean or snap. This is especially useful for taller varieties or those with lots of fruit.
Growing Tips: Once the weather warms up, peppers grow quickly. Water them consistently; during hot spells, they may need water every other day if in the ground (and daily if in containers). If a plant is healthy and flowering, but not setting many peppers during the peak of summer, it might be due to very high temperatures (above 90°F) causing blossom drop – this is common and usually temporary. As the weather cools a bit, they’ll start setting fruit again. One issue to watch for is blossom-end rot (like tomatoes, peppers can get a black spot on the bottom of fruits). This is usually due to inconsistent watering or a calcium deficiency, so keeping soil moisture even will help. If you prepared your soil with compost, feeding peppers is simple – they should have plenty of nutrients. You can side-dress with a balanced fertilizer or compost tea when the plants start to set fruit if they need a boost. Harvest peppers when they reach a good size and firm feel. Most green bell peppers are actually unripe – if you leave them on the plant, they will eventually turn red (or yellow or orange, depending on variety) and get sweeter. Hot peppers also change color (green jalapeños will turn red if left longer). You can harvest at either stage. Use scissors or pruners to cut peppers off the plant (rather than pulling), to avoid breaking the branches. In most regions, pepper plants will keep producing from mid-summer until the first frost in fall ends the season. Enjoy the range of flavors from your pepper plants, and remember, even a single plant can yield dozens of peppers.
- When to plant: Set pepper transplants out in late spring once nights stay reliably above 55–60°F. This is usually a couple of weeks after the last frost date (peppers love warmth, so don’t rush them).
- Harvest window: Peppers typically start producing about 60–80 days after transplanting. Once they begin, they can continue setting fruit through summer and into fall. You might pick bell peppers green at first (perhaps July or August for the first fruits), then let later ones ripen to red on the plant. Hot peppers (like jalapeños) are often ready green by mid-summer; you can also let them turn red for more heat. Peppers generally keep fruiting until cool weather slows them down.
- Varieties to try: California Wonder (a classic green bell pepper that turns red when ripe – reliable and widely available) and Jalapeño (a popular hot pepper that’s productive and easy). If you prefer a no-heat sweet pepper, try Sweet Banana (yellow banana peppers are prolific and easy to grow).
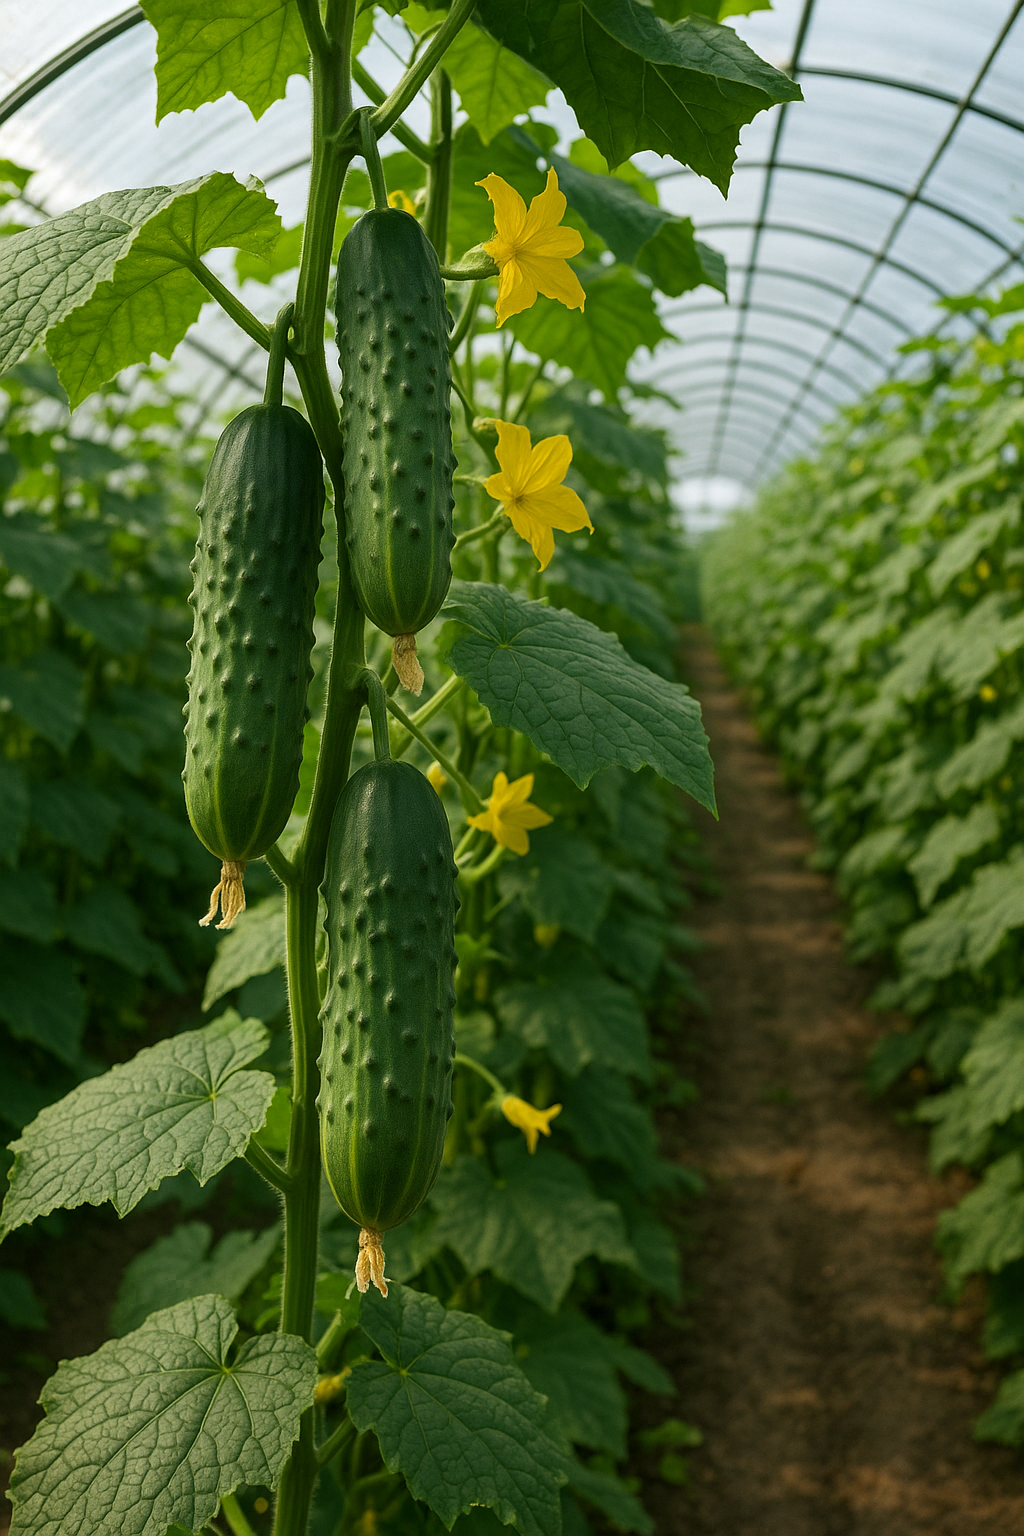
8. Cucumbers
Cucumbers are fast-growing vines that can yield an abundance of crunchy cukes for your salads, pickling jars, and summer drinks. They’re famously easy to grow as long as they get enough warmth and water. Many beginners are amazed at how a small cucumber seedling can take off and cover a trellis with vines in no time, producing more cucumbers than you might know what to do with. And if space is a concern, bush cucumber varieties or training vines up a trellis can make cucumbers doable even in a small garden.
Sun & Soil: Cucumbers love the heat and prefer full sun (at least 6–8 hours daily). However, in very hot climates, a little afternoon shade can prevent leaf scorch. Plant them in rich soil with lots of compost or organic matter, as they are fairly heavy feeders and will reward you with bigger yields if well-fed. Good drainage is important; they enjoy moisture but sitting in water can invite diseases. A soil that holds moisture but doesn’t stay soggy is perfect – adding compost helps achieve that balance. It’s also a good idea to plant cucumbers in a spot sheltered from strong winds (especially if trellised), because their big leaves can act like sails on a windy day.
Planting & Spacing: Wait until after the last frost and the soil has warmed to at least 60°F before planting cucumbers outdoors. You can plant seeds directly in the ground or use transplants. If direct-seeding, sow them about 1 inch deep. Cucumbers can be planted in rows or in “hills.” For rows, thin seedlings to about one plant every 12 inches or so, giving vining types ample room to spread. If you’re using a trellis, you can space them a bit closer since the vines will go up. For hills, plant 3–5 seeds in one spot (a small mound) and later thin to the best 2–3 plants per hill, with hills spaced about 3–4 feet apart. Bush varieties (often labeled as such) can be spaced closer, roughly 2 feet apart, since they won’t vine out as much. Remember, cucumbers crave warmth, so plant them in the sunniest, warmest part of your garden. In cooler areas, using black plastic mulch or planting next to a south-facing wall can help give them a heat boost early on.
Growing Tips: Cucumbers grow quickly and need consistent moisture – if they dry out too much, they can become bitter. Water deeply once or twice a week (more often in very hot weather) and try to avoid wetting the leaves to minimize diseases like powdery mildew. A drip line or soaker hose works great for cucumbers. Once the plants are established and start flowering, you might side-dress with a bit of balanced fertilizer or compost tea, as they appreciate the extra nutrients while setting fruit. Trellising your cucumbers is highly recommended: it keeps the fruits clean, makes them easier to pick, and saves space. Even a simple trellis or some vertical netting can help. Check your cucumber patch often – in peak season, they can seem to go from blossom to full-sized cucumber overnight! Harvest cucumbers when they’re still green, firm, and before they get too large (which makes them seedy and sometimes bitter). For most varieties, pick fruits when they’re medium-sized: about 6–8 inches long for slicing cucumbers, or 3–5 inches long for pickling types. Regular picking encourages the plant to keep producing more cukes. If you see any that got oversized (yellowing and giant), remove them to keep the plant productive – letting a cucumber fully mature on the vine signals the plant to slow down.
- When to plant: Plant cucumbers in late spring once nights are mild and the soil is warm (for most people that’s around May). You can also sow a second batch in mid-summer (around early July) for a late summer/fall harvest, since cucumbers grow quickly.
- Harvest window: Cucumbers can start producing about 50–70 days from planting (depending on the variety). Once they start, they produce continuously. For a spring planting, expect to pick cucumbers throughout the summer (June through August). A later planting will yield in late summer into fall until cold weather slows them down. In peak season, check vines every day or two – cucumbers size up fast!
- Varieties to try: Marketmore 76 (a popular, disease-resistant slicing cucumber that produces reliably) and Boston Pickling (a classic pickling cucumber with abundant smaller fruits). If space is limited, look for Bush Champion or Patio Snacker (bush varieties bred for container gardens). For something different, Lemon Cucumber produces round, yellow cucumbers that are fun and easy to grow.
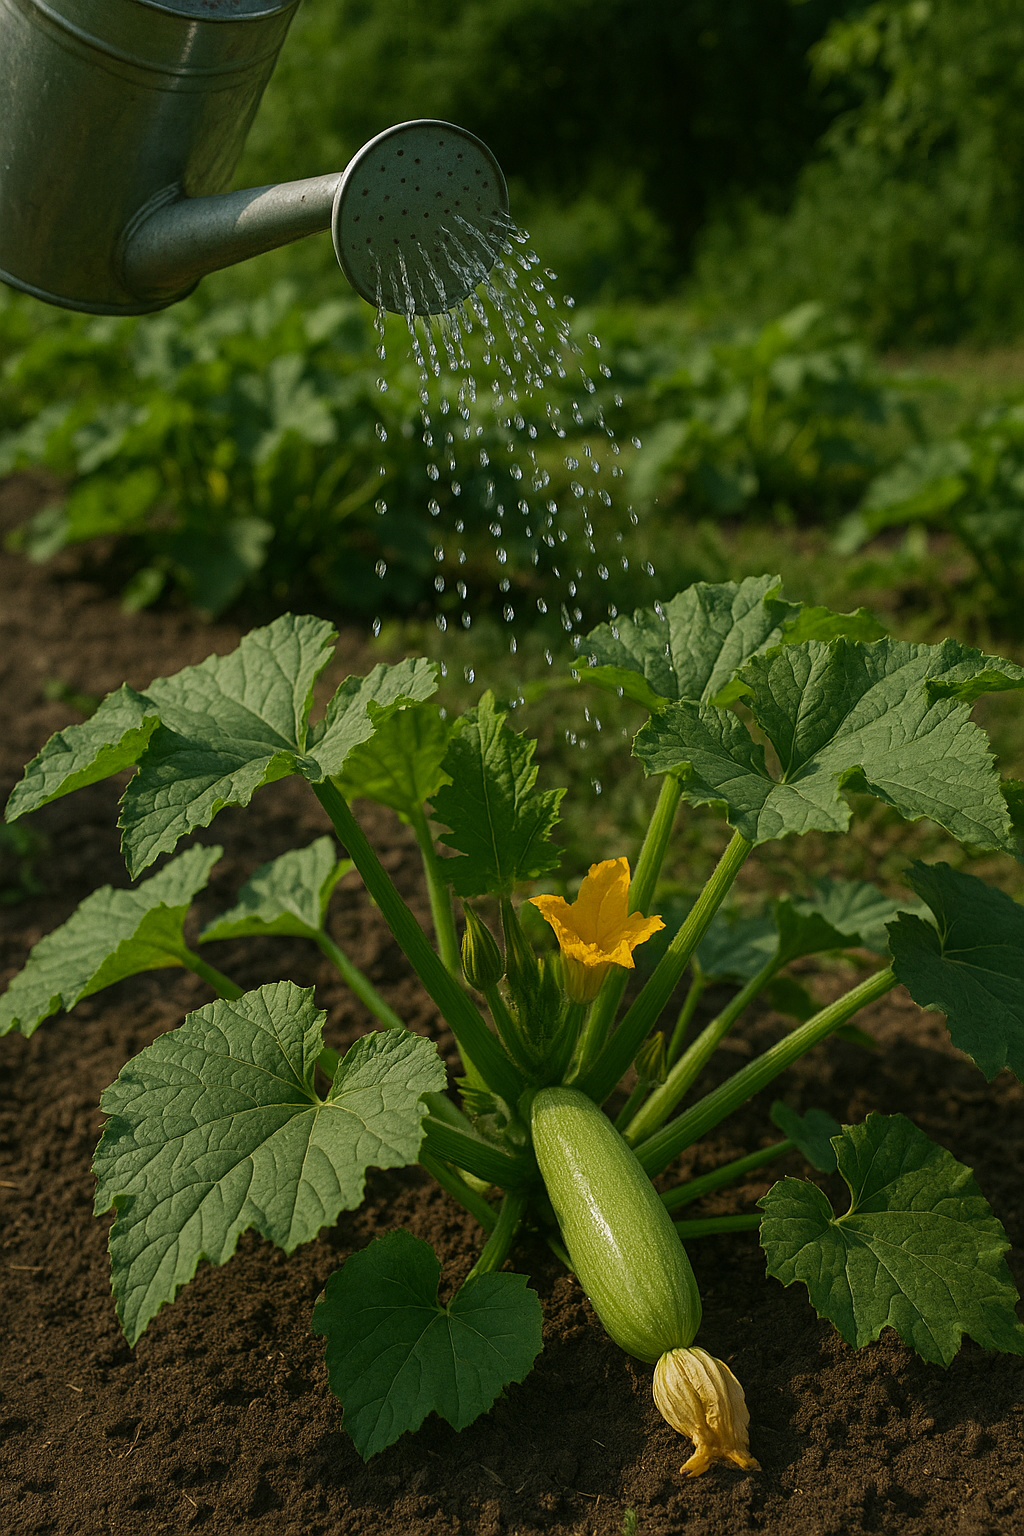
9. Zucchini (Summer Squash)
Zucchini has a bit of a reputation in gardening circles – mainly because a single plant can produce so much that people joke about leaving baskets of zucchini on their neighbors’ doorsteps! The truth is, zucchini (and its relatives like yellow squash and pattypan squash) are very easy to grow and extremely productive. If you plant even one or two zucchini plants, get ready to enjoy a bounty of squash all summer long. They’re great grilled, sautéed, baked into bread, or sliced into salads. For beginners, zucchini provides a satisfying “wow, I grew that!” experience due to its fast growth and high yield.
Sun & Soil: Zucchini and other summer squashes are sun-loving, warmth-loving plants. Give them a spot with full sun (6+ hours). They appreciate rich soil with plenty of compost or well-rotted manure mixed in, as they are heavy feeders. The soil should be well-draining – while zucchini likes consistent moisture, its roots can rot in standing water. A slightly acidic to neutral soil pH (around 6.0–7.0) is ideal but not usually something to worry about. Before planting, it helps to loosen a wide area of soil and mix in organic matter, because these plants have broad root systems and large leaves that will pull a lot of nutrients and water from the soil.
Planting & Spacing: Plant zucchini seeds or transplants after your last frost, once the soil has warmed up. Zucchini grow quickly, so you can direct-sow seeds in the garden with great success. Sow seeds about 1 inch deep. These plants get large, so give them room – space zucchini about 3 to 4 feet apart to allow for their sprawling growth and big leaves. Some gardeners plant in “hills” by putting 2–3 seeds in one spot and then thinning to the strongest one or two seedlings. If space is tight, look for bush varieties of zucchini that stay smaller. After planting, water well to help them establish.
Growing Tips: Zucchini grows rapidly and will start flowering within several weeks of planting. The first flowers to appear are often male flowers (on long, thin stalks) – they may bloom and fall off without fruiting, which is normal. Soon, female flowers (with a tiny baby zucchini behind the bloom) will emerge and begin setting fruit. Make sure the plants get regular water, especially once they start bearing. Water at the base of the plant rather than overhead to help prevent powdery mildew on the leaves. Mulching around the plant can keep the soil moist and cool, and also suppress weeds. Check your zucchini often once it starts producing – the fruits grow very fast! Harvest zucchini when the fruits are about 6–8 inches long (for most varieties) or about 2 inches in diameter. Smaller zucchini are tender and have the best flavor. If you let them grow monster-big, they become seedy and less tasty (though you can still use overgrown ones for zucchini bread or stuffing). By picking frequently – every couple of days – you’ll encourage the plant to keep producing new fruits. During peak season, you might be harvesting more zucchini than you know what to do with! If your first planting starts to slow down in late summer, you can always plant a second round in July to enjoy a fall harvest of squash.
- When to plant: Sow zucchini or set out young plants in late spring after the last frost (around May in most regions). A second planting in mid-summer (June or July) can provide a late summer and fall harvest.
- Harvest window: Zucchini typically start producing about 50–60 days from planting. Once they start, they will keep producing continuously. In a warm summer, a single plant can give new zucchini every day or two. Pick fruits when they reach about 6–8 inches long (or even smaller, for extra tenderness). The harvest will continue until cooler fall weather or a frost slows the plants down.
- Varieties to try: Black Beauty (a classic green zucchini that’s very productive) and Golden Crookneck (a yellow summer squash with a buttery flavor). For container gardens or smaller spaces, try Bush Baby zucchini or Patio Star, which are bred to stay compact but still yield well.
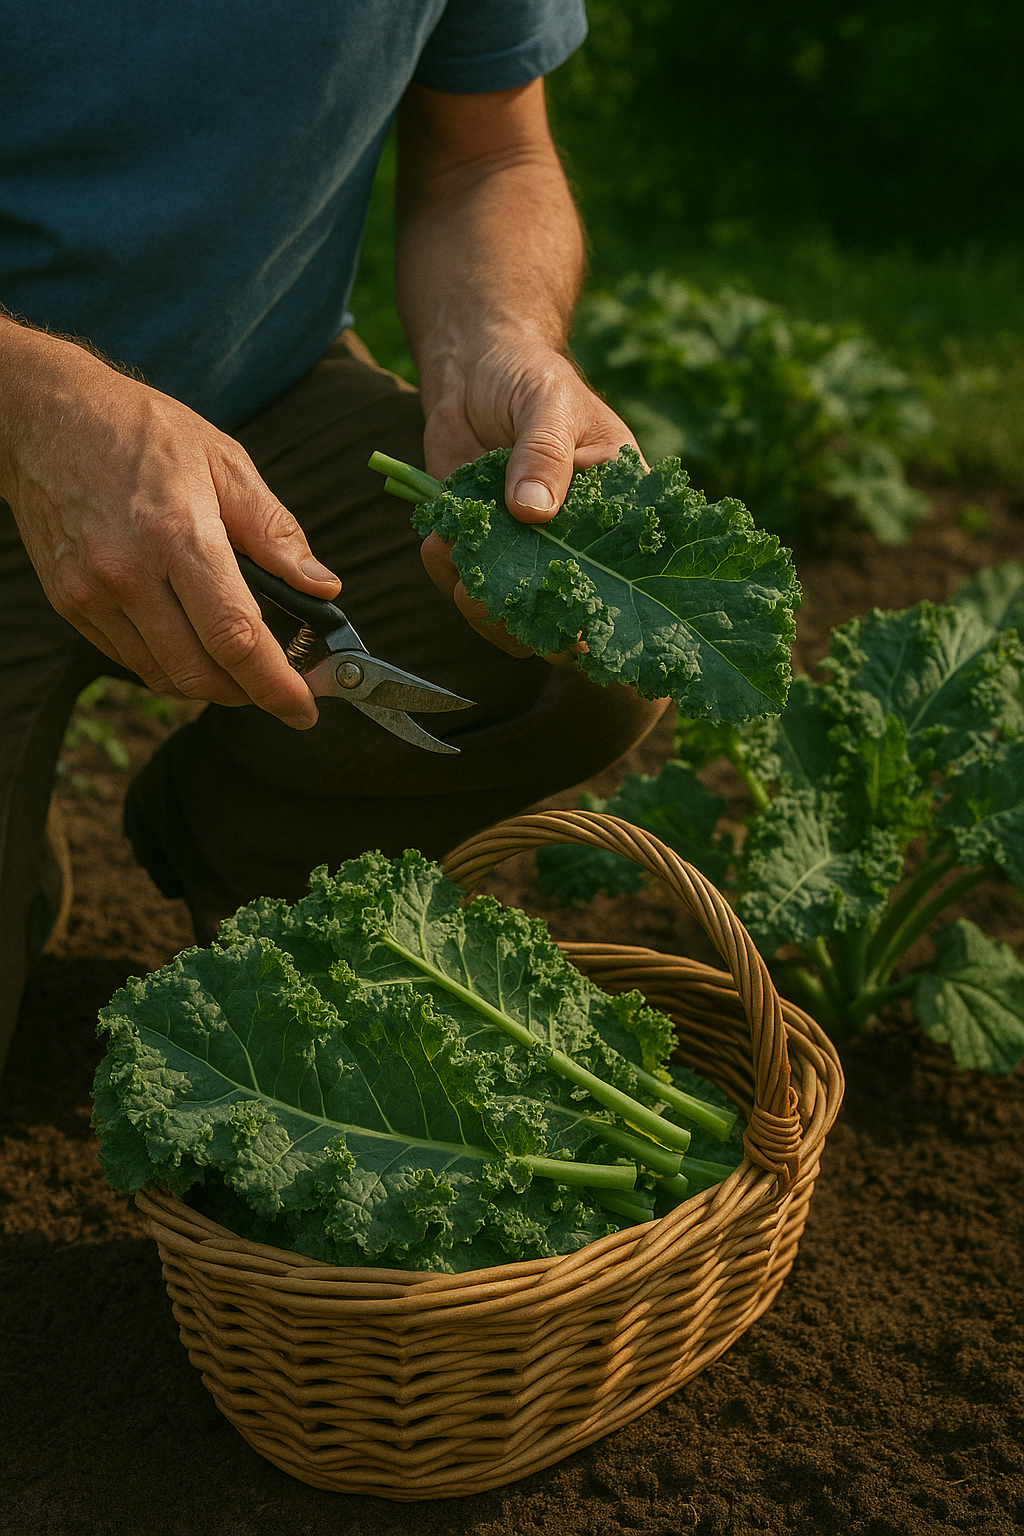
10. Kale
Kale has surged in popularity due to its “superfood” status, but gardeners love it because it’s ridiculously easy to grow and can produce almost year-round in many climates. This leafy green is related to cabbage and broccoli, but it doesn’t form a head – instead, it grows tender leaves that you can keep picking over time. For beginners, kale is very forgiving: it can handle frost, a bit of heat, and isn’t too prone to disease. Plus, it can be grown in spring, fall, and even winter in mild areas. If you’ve only tasted store-bought kale (which can be tough), you’ll be amazed at how much better homegrown baby kale or freshly picked leaves taste.
Sun & Soil: Kale thrives in cool weather but will grow decently in summer, especially if given some afternoon shade in hot climates. In spring and fall, full sun (6+ hours) is ideal to fuel its growth, but in summer a little shade isn’t a bad idea to keep leaves more tender. Soil-wise, kale enjoys rich, well-drained soil with plenty of organic matter. It’s a leafy green, so it likes nitrogen – mixing in compost or a balanced fertilizer at planting will keep the leaves lush. Kale isn’t too picky about soil pH; anything in the neutral range (around 6.0–7.0) is fine. It’s also fairly drought-tolerant once established, but regular watering will give you the most tender growth.
Planting & Spacing: You can start kale from seeds or transplants. It tolerates cold so well that you can plant it in early spring, even a few weeks before your last frost. Many people also plant kale in late summer for a fall harvest, since it actually tastes sweeter after a touch of frost in the fall. For spring planting, you can start seeds indoors 4–6 weeks before the last frost and transplant out, or direct-sow seeds in the garden about 2–4 weeks before the last frost. Plant seeds 1/4 to 1/2 inch deep. They germinate fairly quickly in cool soil (about 5–10 days). If direct seeding, thin the seedlings once they’re a couple of inches tall. Space kale plants roughly 12 to 18 inches apart to let each plant form a nice rosette of leaves. Kale can also be grown in containers (choose at least a 12-inch-wide pot). If using nursery transplants, plant them at the same depth as they were in the pot and water them in well.
Growing Tips: Keep an eye out for pests on kale. Watch for cabbage worms (green caterpillars) on the leaves; if you see holes, inspect the undersides and pick off any worms you find. Despite these occasional critters, kale is pretty low-maintenance. Make sure it gets regular water – if the soil stays too dry, kale leaves can get tough or bitter. Harvest kale continuously by snipping off outer leaves as you need them, once the plant is about 8–10 inches tall. Always leave a few central leaves so the plant can keep growing. New leaves will grow from the center. You can also harvest whole young plants (baby kale) if you sow seeds densely, but for a long-term crop it’s best to pick leaves as the plant matures. Kale leaves tend to be sweetest in cool weather – the fall crop often has the best flavor after a frost or two. Kale is extremely cold-hardy; mature plants can survive hard frosts and even snow. In zones 7–9, a fall-planted kale will often overwinter and produce new leaves again in spring.
- When to plant: For spring crops, plant kale as soon as the soil can be worked – often a few weeks before the last frost. For fall crops, sow seeds or set transplants about 6–8 weeks before your first fall frost (late summer in most areas). Kale can even overwinter in very mild regions if planted in fall.
- Harvest window: Kale is often ready to start picking about 50–60 days from seeding (or 30–40 days from transplanting). You can harvest baby greens even sooner. For full-sized leaves, expect to start picking by late spring for a spring planting. A fall planting will be ready by mid to late fall and can continue through winter. You can harvest kale for many weeks or even months by continuously removing outer leaves – it’s a gift that keeps on giving.
- Varieties to try: Dwarf Blue Curled (a compact, frilly kale that is very cold-hardy and tender) and Lacinato (also called Dinosaur kale – dark blue-green leaves that are hearty and great for cooking). Red Russian is another easy variety with pretty, oak-shaped leaves that stay sweet through fall.
Conclusion
Starting a vegetable garden is an exciting journey. With these ten easy-to-grow vegetables, you’ll set yourself up for success right from the get-go. Remember, every gardener – even those DIY pros – started as a beginner at some point. The key is to start small, learn as you go, and enjoy the process. Don’t worry if not everything is perfect; nature is forgiving and plants want to grow. By choosing these hardy and productive veggies, you’ll be filling your salad bowl and dinner plate with homegrown produce in no time. Happy gardening, and here’s to a bountiful harvest!