If you want to grow aromatic plants in your kitchen or on your deck, you should consider building a small planter box. As you will see in this woodworking project, any person with basic woodworking skills can get the job done in just a few hours, as it doesn’t require extensive knowledge or expensive power tools. Nevertheless, we recommend you to select the herb planter box plans with attention, as to fit your needs from the very start.
Choose the lumber with good judgement, if you want to get a professional result. From our experience, redwood, pine or cedar are great choices, provided the slats are straight and in a good condition. In order to join the components properly and to build a durable box, we recommend you to use pocket holes for the frame and pilot holes when attaching the slats into place.
How to build a planter box
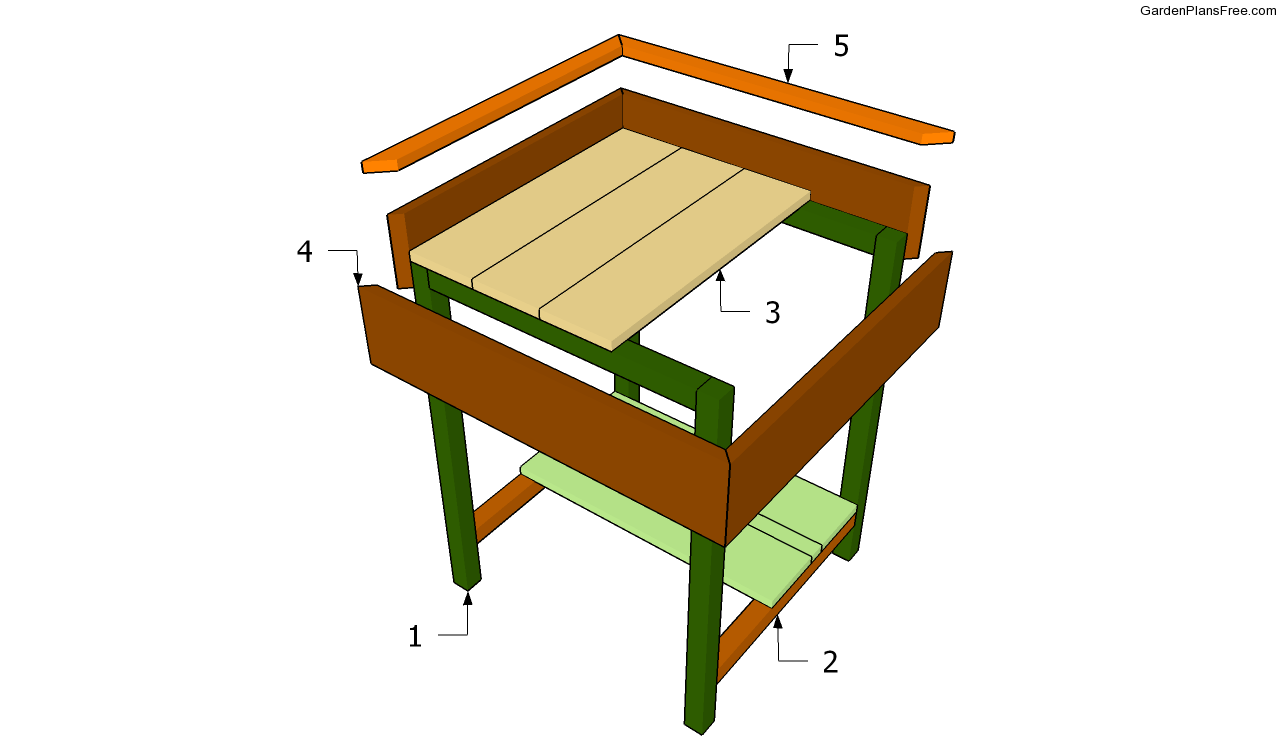
Building a herb planter
Materials
- 1 – 4 pieces of 2×2 – 30” long LEGS
- 2 – 2 pieces of 2×2 – 19 1/2″, 2 pieces of 1×6 lumber – 24″, 2 pieces of 1×2 lumber – 24″ BOTTOM SHELF
- 3 – 2 pieces of 2×2 – 21″ long, 5 pieces of 1×6 lumber – 22 1/2” long BOTTOM
- 4 – 11 pieces of 2×2 lumber – 117″ long SIDE FACES
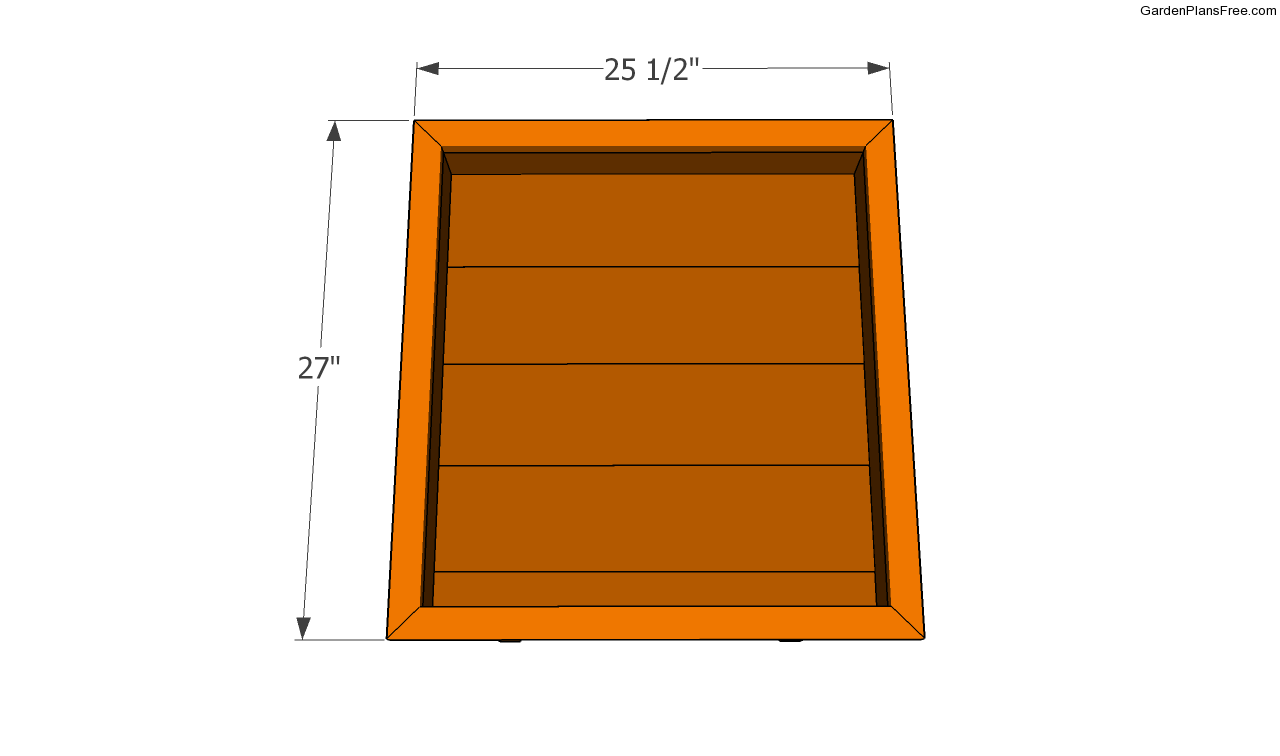
- 5 – 2 pieces of 1×2 lumber – 25 1/2”, 2 pieces of 1×2 lumber – 27″ long TRIMS
Tools
- Hammer, Tape measure, Carpentry square
- Miter saw, Drill machinery, Screwdriver, Sander, Router
- Safety Gloves, Safety Glasses, Respiratory Mask
Time
- One day
Herb Planter Box Planter
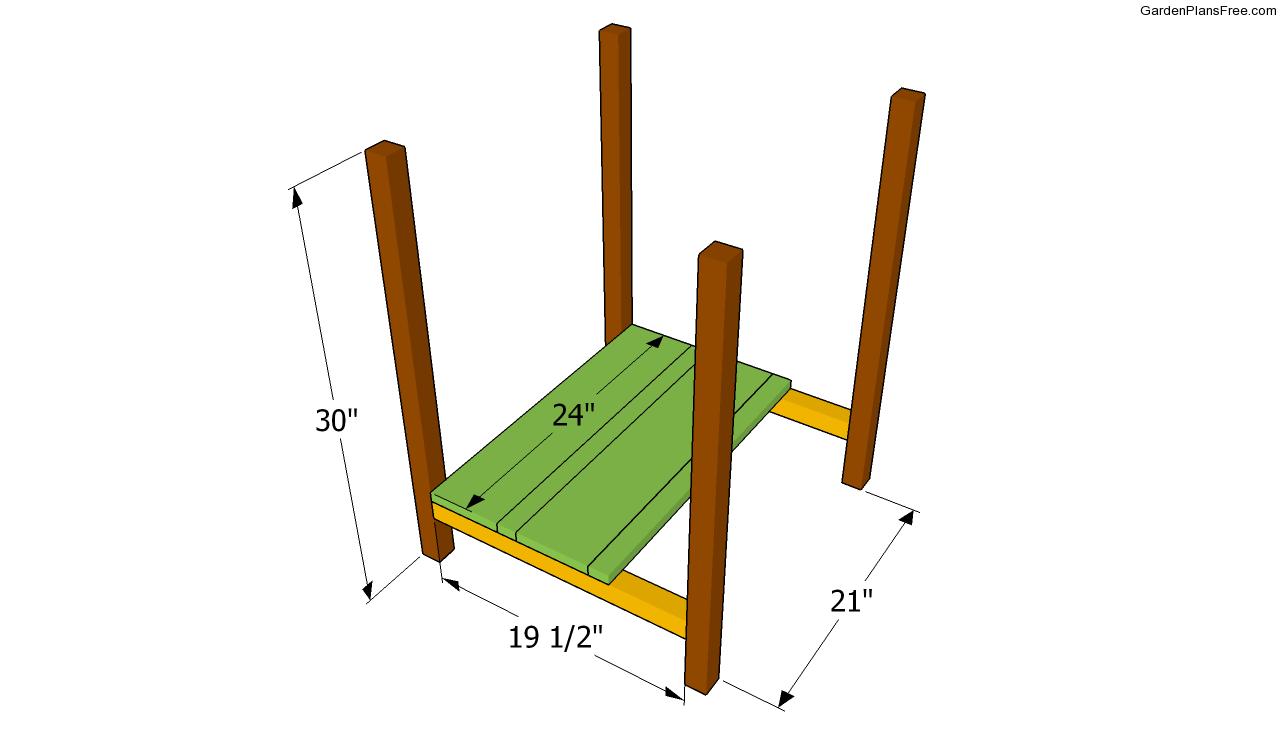
Building the frame of the herb planter
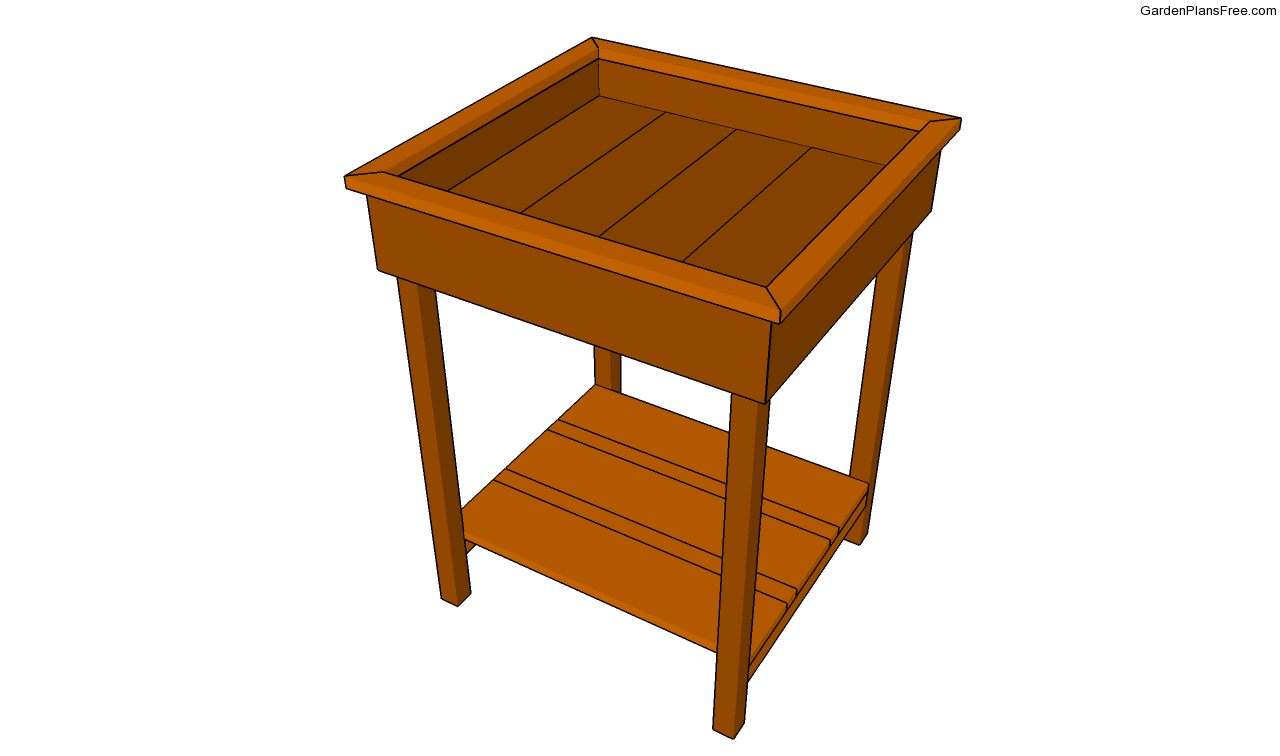
The first step of the project is to build the frame of the herb planter. As you can easily notice in the image, this project is a little more complex than a regular box planter, as it also features a bottom shelf. You could either drill pilot holes trough the legs of the planter and insert 3” galvanized screws or use pocket holes screws.
PRO TIP: Secure the 1×6 and 1×2 cedar slats on top of the braces, in order to lock them into place. Countersink the head of the screws, if you want to get a neat appearance.
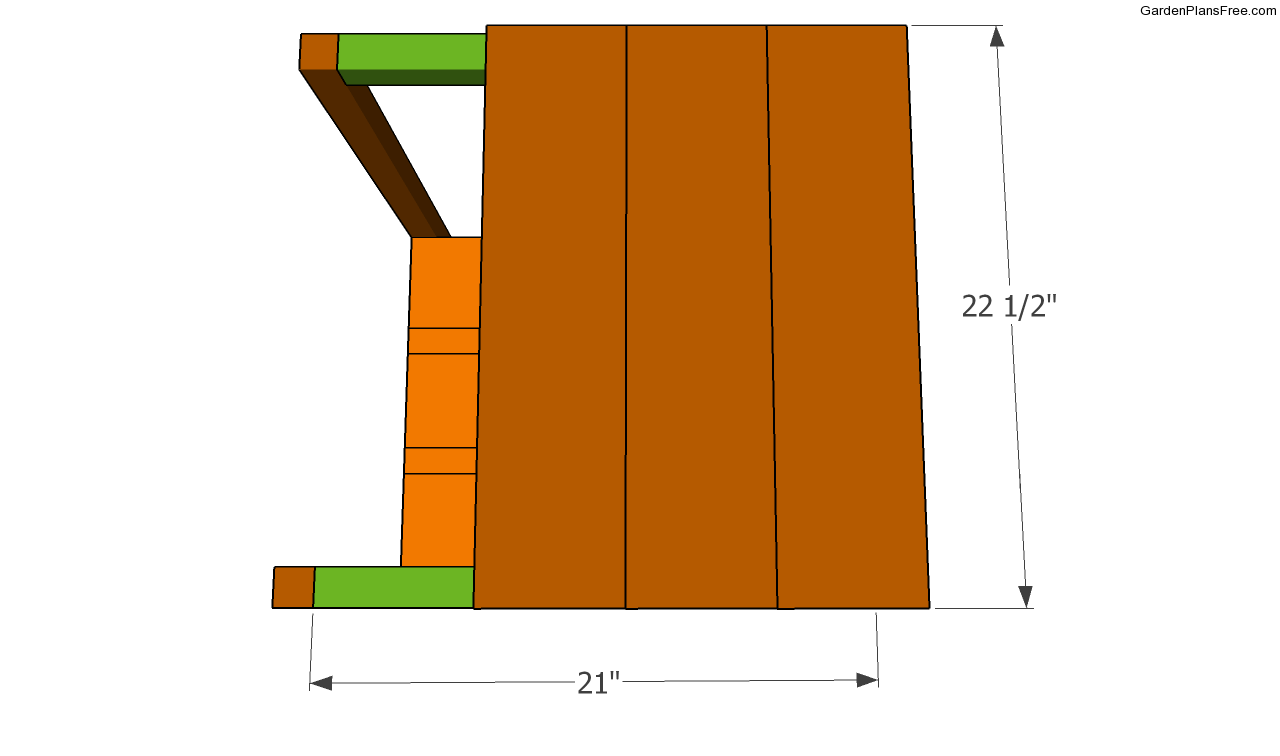
Building the bottom
Continue the woodworking project by fitting the bottom of the actual herb planter. Attach 2×2 supports between the legs of the frame and lock them into place with screws. Next, attach 1×6 tongue and groove cedar slats on top of the supports. Pre-drill the slats at both ends, countersink the head of the screws and drive in 2” wood screws.
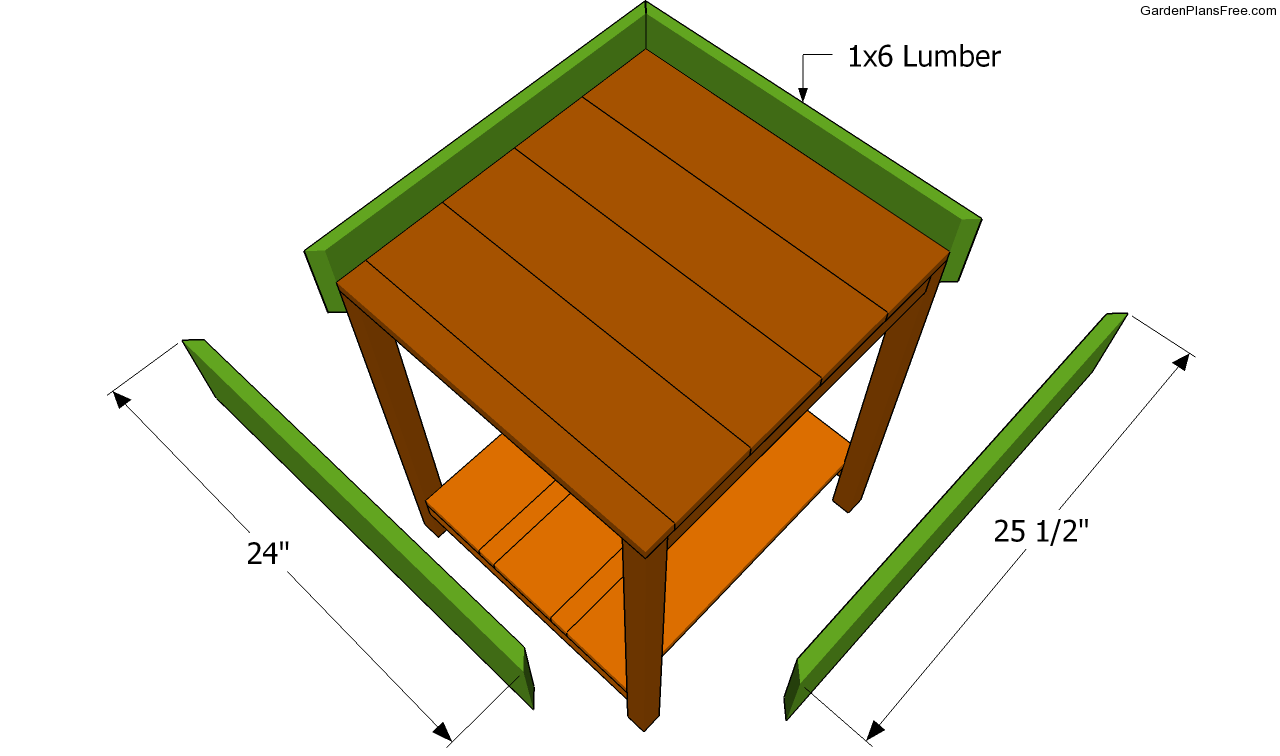
Installing the planter’s side walls
Building the side faces of the herb planter is a straight forward process, if you use the right plans and materials. As you can see in the plans, you should miter cut both ends of the 1×6 components at 45º. Align the slats properly, checking if the corners are right angled, before inserting the 1 1/4” finishing nails.
PRO TIP: Add glue to enhance the rigidity of the joints. Use a carpentry square, to check if the corners are right-angled. Lock the frame to the frame using 1 1/4” finishing nails, every 2”.
Fitting the trims
If you want to enhance the look of the herb planter box, yous should attach 1×2 trims to the top edges. Cut the ends of the trims at 45º, in order to join properly. Secure the components into place with 1 1/4” finishing nails and wood glue. Moreover, you could round the exterior edges of the trims, using a router and a 3/4” bit.
Herb planter box plans
Last but not least, you should take care of the final touches. If you want to obtain a professional result, we recommend you to fill the holes and gaps with wood putty and let it dry out for several hours. Afterwards, smooth the surface with fine-grit sandpaper and vacuum the residues.
PRO TIP: Protect the lumber from wood decay by applying several coats of paint or wood stain. Refresh the paint coats every few years, otherwise the wooden components won’t be weather-resistant.
This diy project was about herb planter box plans. If you have enjoyed the free project, we recommend you to LIKE and SHARE it with your friends, by using the social media widgets.
