Building a grape arbor is both a fun woodworking project and it doesn’t require a significant investment. Maybe the most important aspect of any garden project is choosing the right plans for your needs. There are many alternatives to choose from, so make sure you select the grape arbor plans that fit both your needs and budget. Any person that knows the basic woodworking techniques can get the job done in less than a day.
We strongly recommend you to use quality materials, if you want to obtain a professional result. Therefore, buy weather-resistant lumber, as it won’t rot and it will have a beautiful natural finish (pine, cedar, redwood). Check if the lumber is perfectly straight and in a good condition. In addition, drill pilot holes before inserting the galvanized screws, to prevent the wood from splitting.
How to build a grape arbor
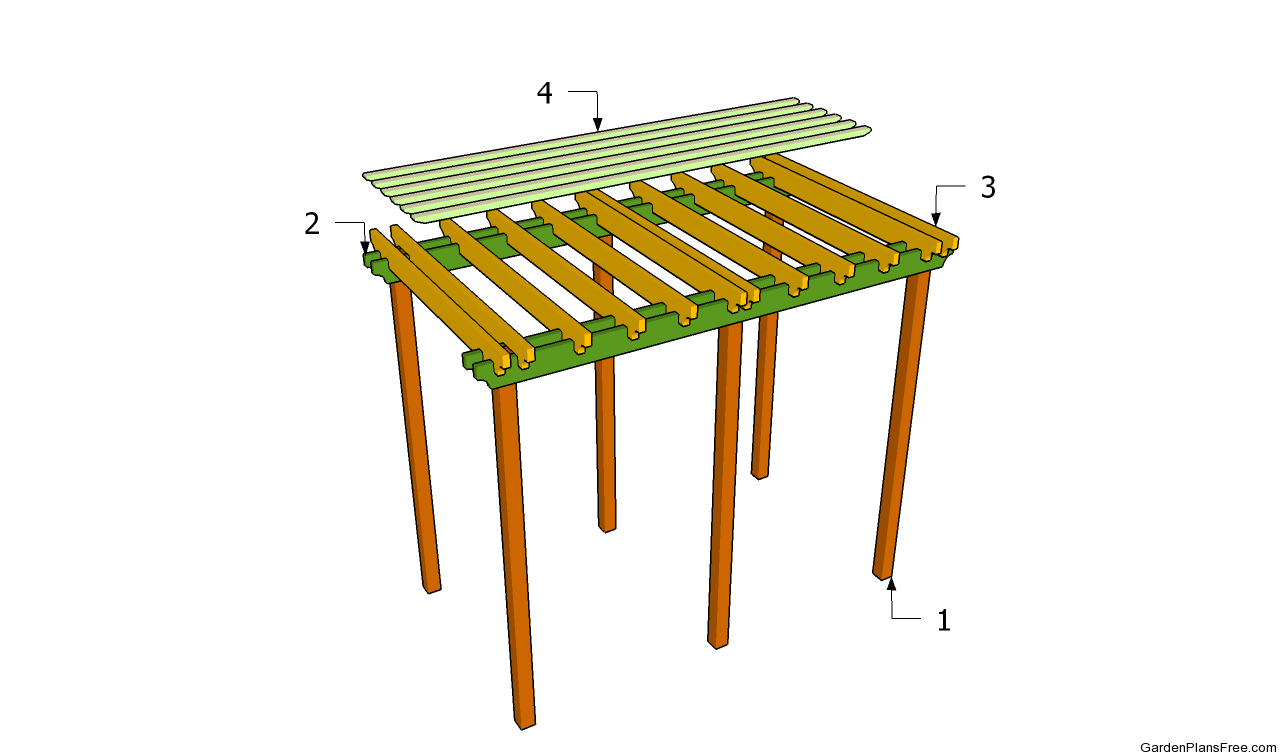
Building a grape arbor
Materials
- 1 – 6 pieces of 4×4 – 96” long POSTS
- 2 – 4 pieces of 2×6 – 120″ long SUPPORT BEAMS
- 3 – 12 pieces of 2×6 – 72″ long CROSS-BEAMS
- 4 – 11 pieces of 2×2 lumber – 117″ long SLATS
- 6 pieces of 4×4 lumber – 8 ft
- 4 pieces of 2×6 lumber – 10 ft
- 6 pieces of 2×6 lumber – 12 ft
- 11 pieces of 2×2 lumber – 10 ft
- wood glue, stain
- 3 concrete bags
- 6 posts anchors 4×4
- 12 pieces of 7″ carriage bolts
- 50 pieces of 5″ screws
- 100 pieces of 2 1/2″ screws
Tools
- Hammer, Tape measure, Carpentry square
- Miter saw, Drill machinery, Screwdriver, Sander, Router
- Safety Gloves, Safety Glasses, Respiratory Mask
Time
- One day
RELATED PLANS:
Grape Arbor Plans
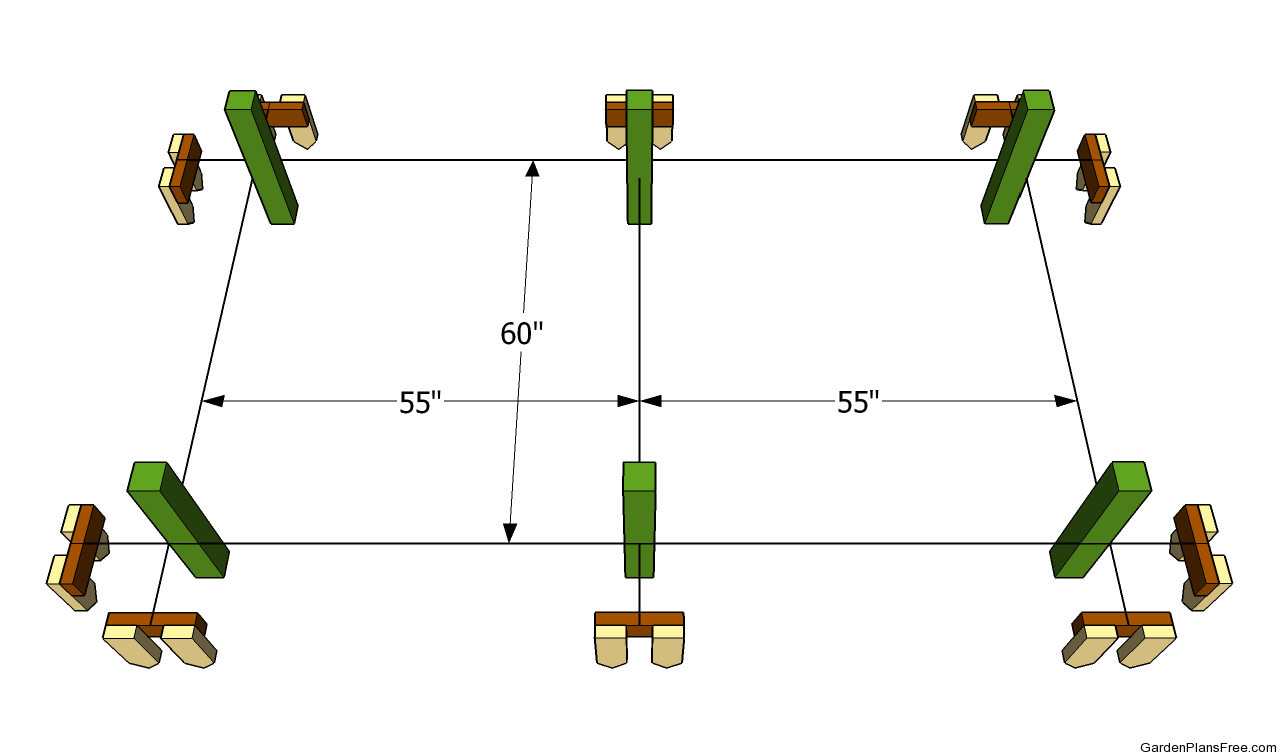
Laying out the grape arbor
The first step of the project is to lay out the grape arbor in a professional manner. Therefore, we strongly recommend you to use batter boards and strings, as in the plans. Check if the diagonals of the rectangle are equal, before digging the holes.
PRO TIP: Use a large L-square or apply the 3-4-5 rule to check if all the four corners are right angled.
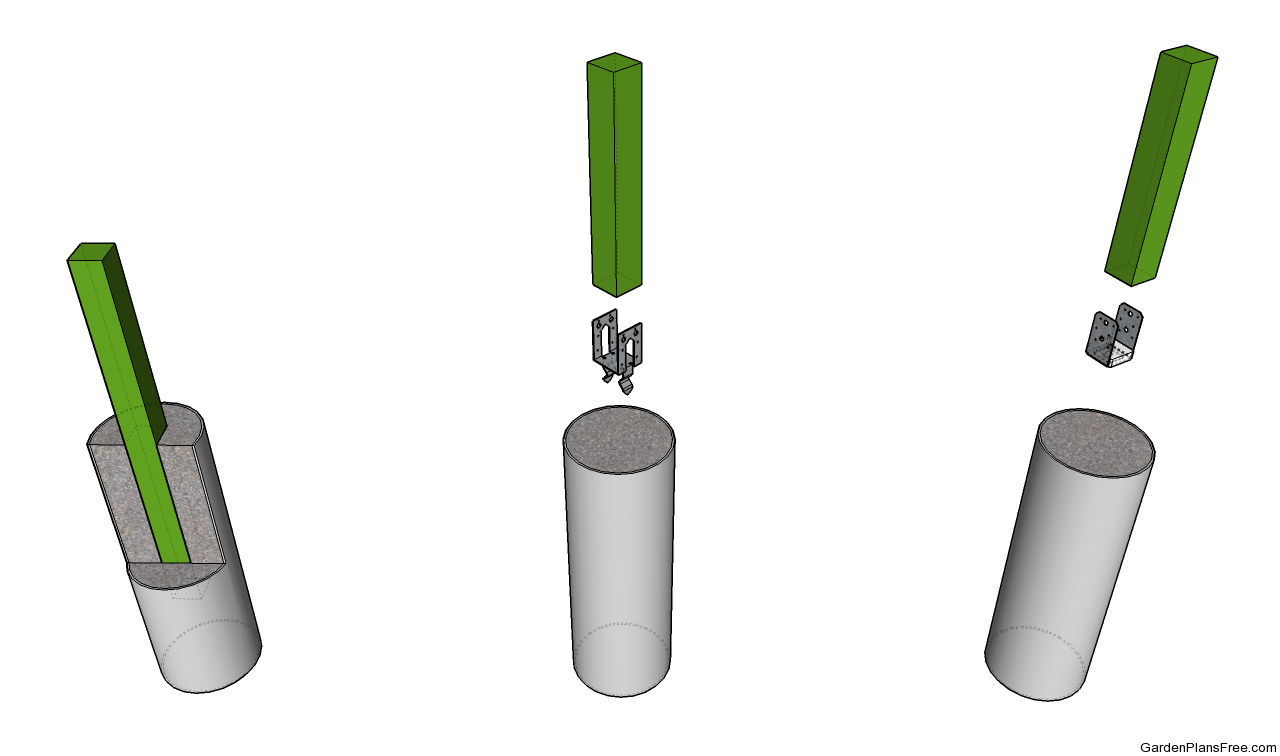
Fitting the posts into concrete
You have several alternatives to secure the 4×4 posts into place tightly. On one hand, you could set them into concrete, use post anchors or attach them to a concrete surface. Irrespective of your choice, you need to dig 3′ deep holes in the ground (at least 6” under the frost line) and fit a tube form. Pour a 2” layer of gravel on the bottom of the holes and compact it thoroughly.
PRO TIP: Use a spirit level to check if the surface is perfectly horizontal. After pouring concrete set the posts into place and secure them temporarily with 2×4 braces, on two perpendicular directions.
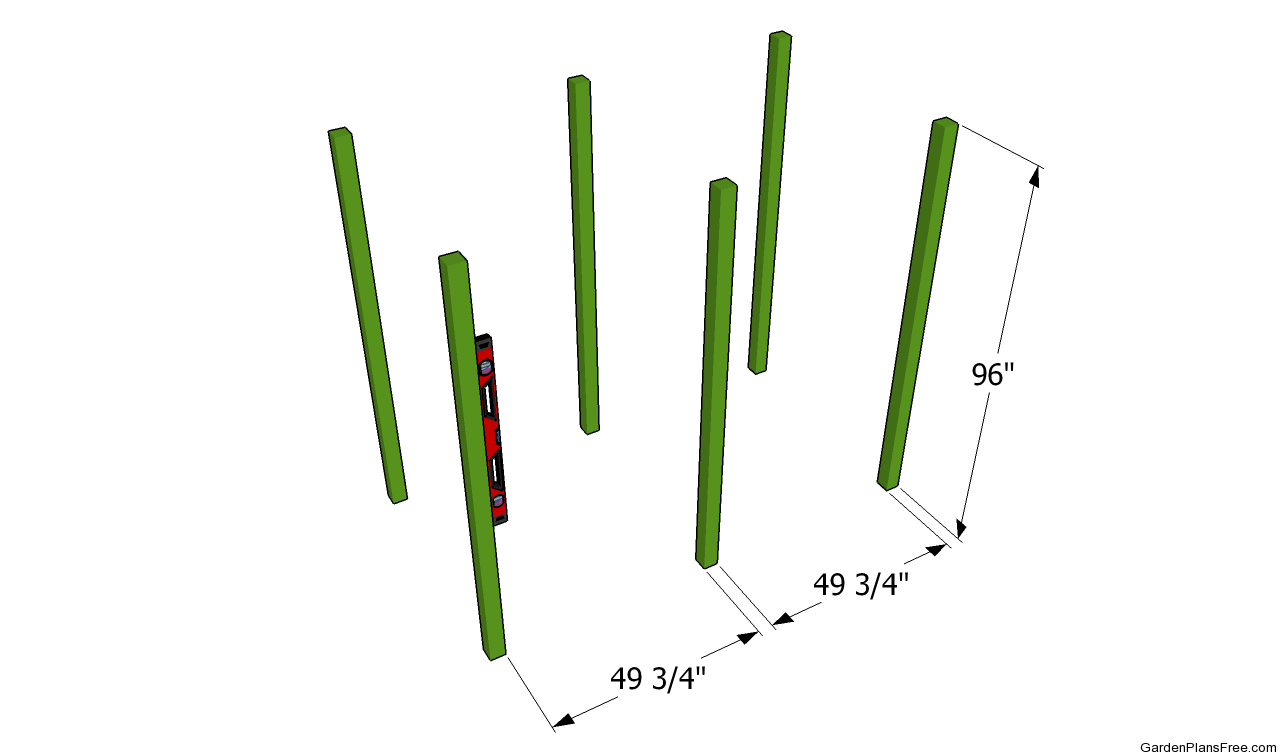
Grape arbor layout
It is essential to plumb the posts with a spirit level, before securing them into place tightly. Use the information from our plans, if you want to build a grape arbor with a similar look. Nevertheless, you could easily adjust the size of the arbor, in order to fit your needs and tastes.
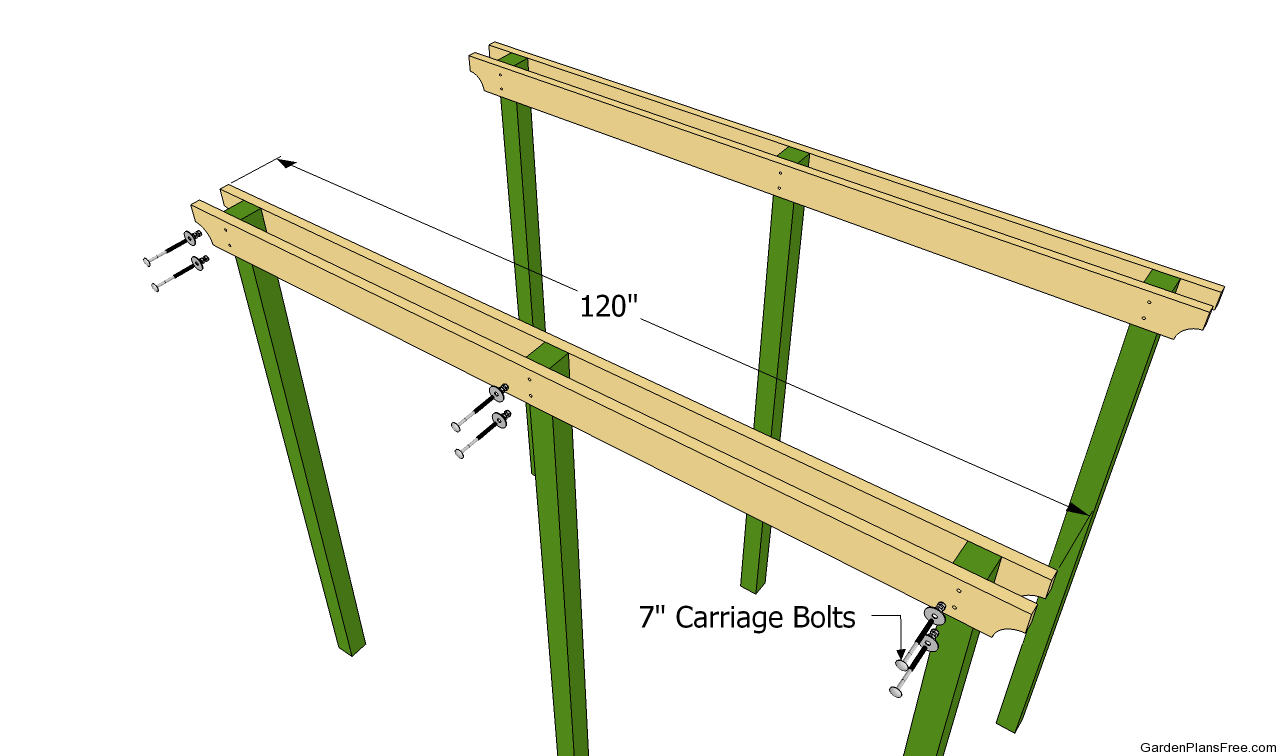
Installing the support beams
The next step of the woodworking project is to attach the support beats to the tops of the posts, on both sides of the grape arbor. If you want to get a professional result, we recommend you to use 2×6 lumber. In addition, drill pilot holes both trough the beams and posts and insert 7″ carriage bolts.
PRO TIP: Lift the beams into place, align them at both ends (they should overhang about 5″ at both ends) and clock them with several C-clamps. After drilling the pilot holes with a drill machinery and a long bit, you can insert the bolts.
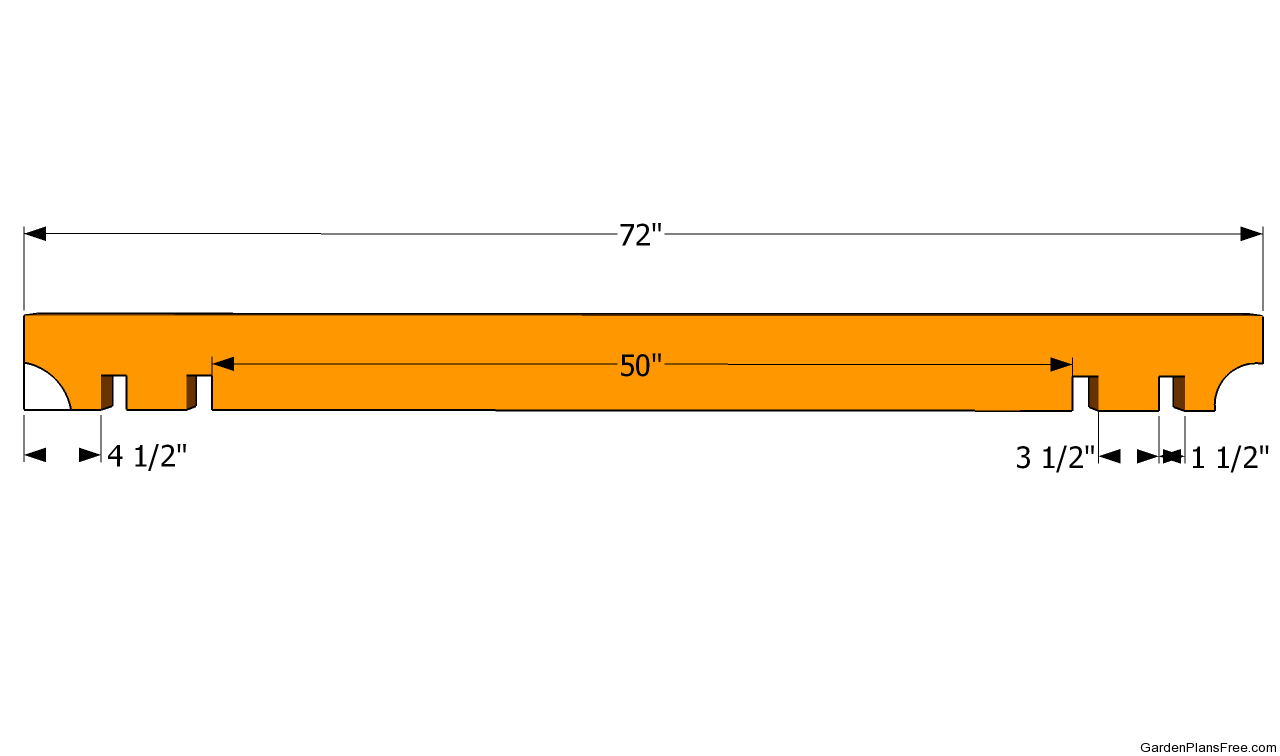
Crossbeam plans
In this image, you can see a close up with the cross-beams. As you can easily notice, you need to cut out several notches in the 2×6 beams, before fitting them into place. In addition, you can cut their end with a jigsaw, if you want to enhance the look of your grape arbor.
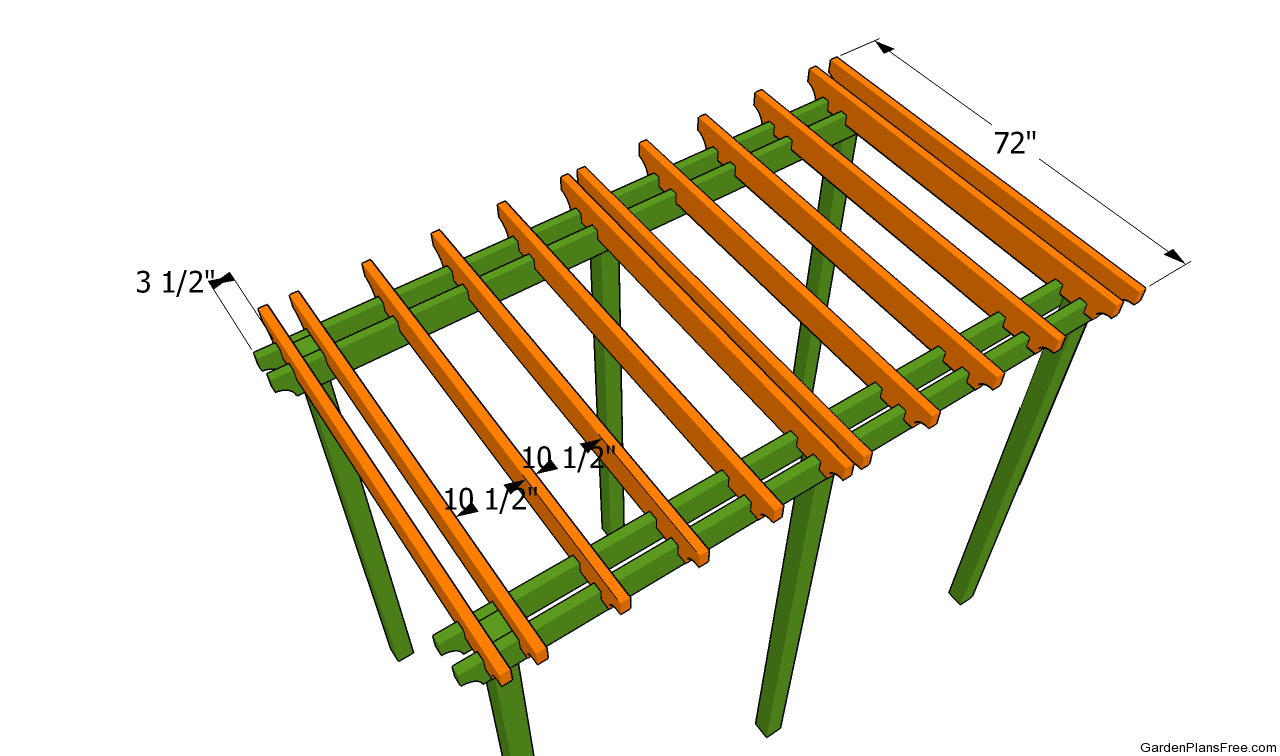
Installing the crossbeams
Fit the cross elements over the support beams and align them at both ends. Drill pilot holes trough at both ends and drive 5” galvanized wood screws into the support beams. As you can see in the plans, you can adjust the gaps between the cross-beams, as to fit your needs.
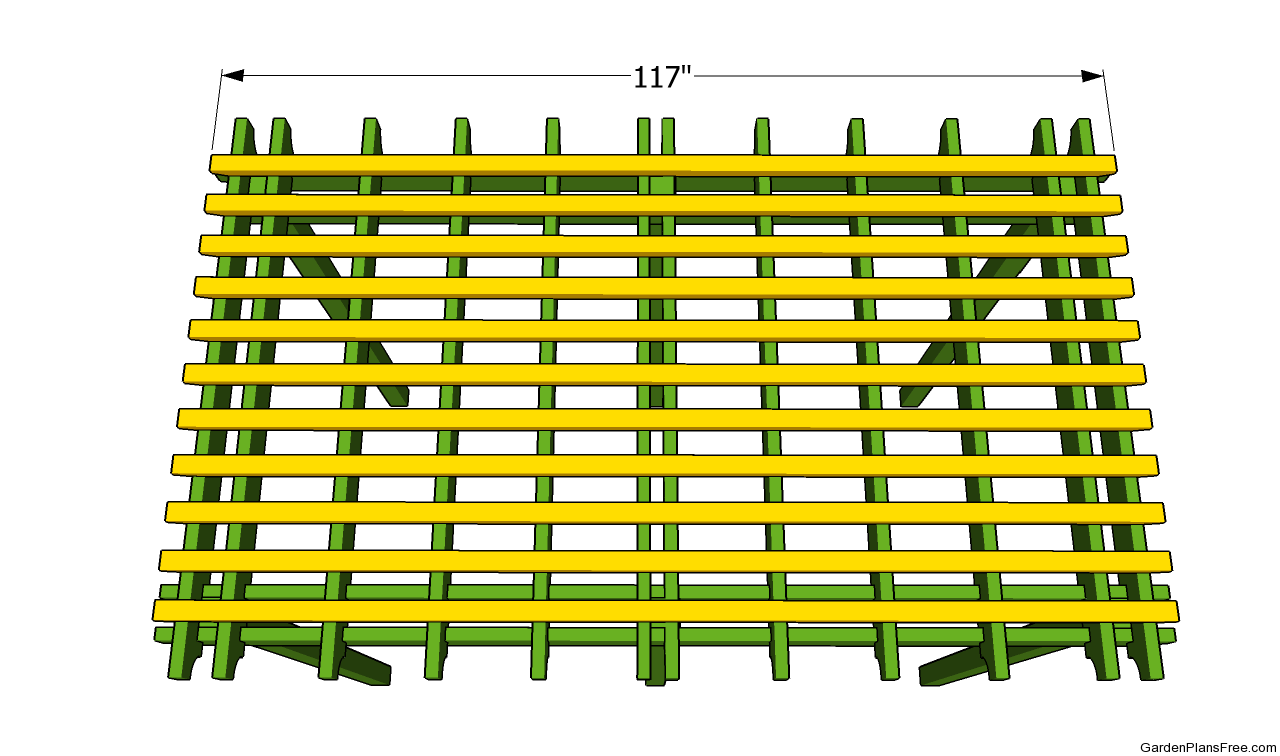
Instaling the slats
Although this step is optional, we highly recommend you to take it into account, if you want to add character to your woodworking project. Therefore, you could fit 2×2 slats over the cross-beams, as in the image. Adjust the gaps between the slats according to how much light you want to get trough the wooden elements. Drill pilot holes and secure the components to the underneath beams with 2 1/2” decking screws.
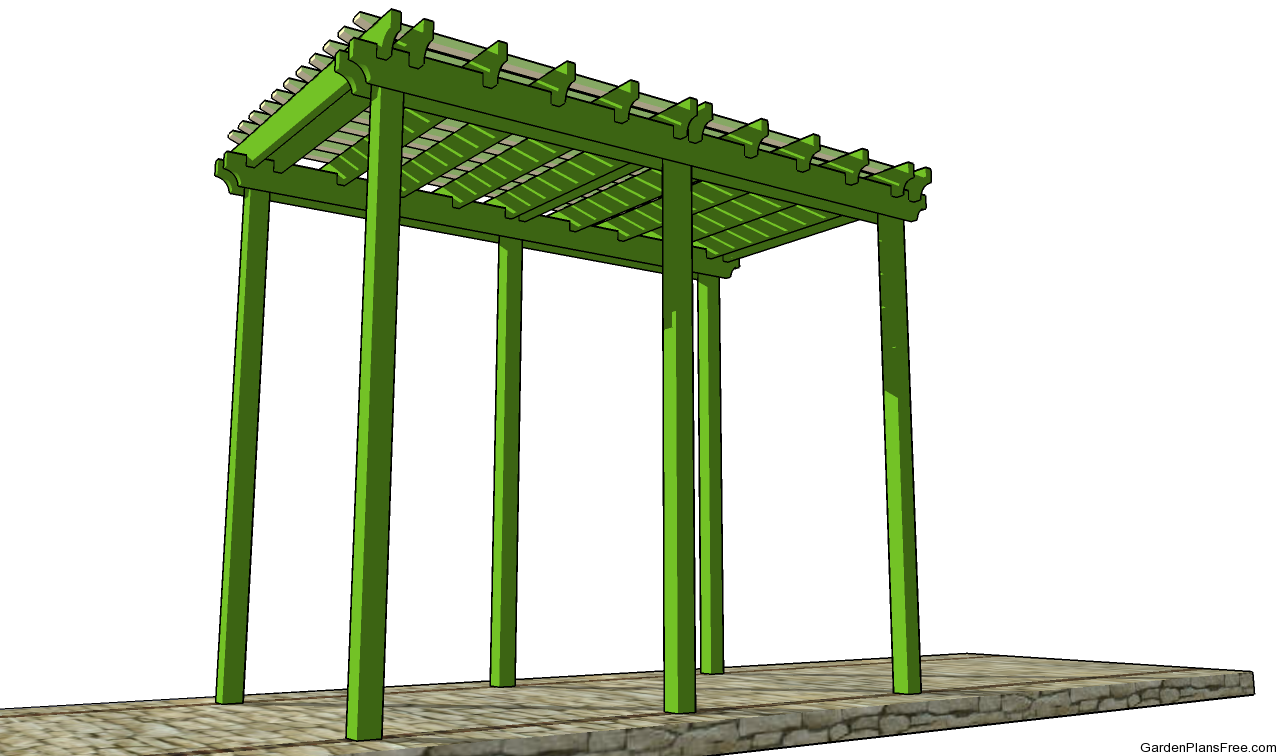
Grape arbor plans
Last but not least, you should take care of the final touches. In order to build a grape arbor with a professional loo, you should fill the holes with wood filler and let the compound dry out for several hours. Afterwards, smooth the wooden surface with 120-grit sandpaper, along the wood grain.
PRO TIP: Protect the lumber from wood decay by applying several coats of paint or wood stain. Refresh the paint coats every few years, otherwise the wooden components won’t be weather-resistant.
This diy project was about grape arbor plans free. If you have enjoyed the free project, we recommend you to LIKE and SHARE it with your friends, by using the social media widgets.
