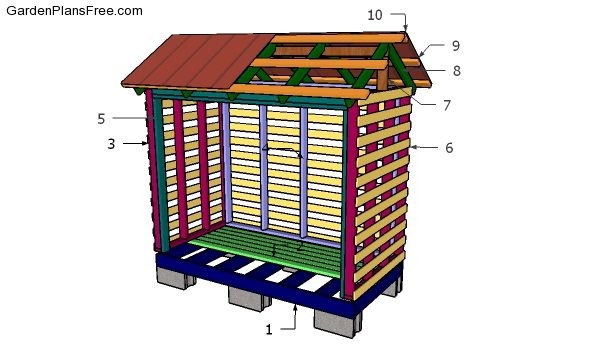
If you want to learn more about 4×8 firewood shed plans you have to take a close look over the free plans in the article. I have designed these simple firewood shed plans so you can shelter your logs and keep them dry for increased heating efficiency. This is compact shed so don’t expect it to hold lots of cords of wood. However, you can keep the same principles and stack a few of these together. This shed is sturdy and the floor is set on cider blocks, to keep the firewood dry. The gable roof has generous overhangs for good protection against the elements. To download the plans as a PDF file, check out my Shop.
If you want to get the job done in a professional manner, we recommend you to plan everything with attention, as to prevent costly mistakes and to build a professional garden project. Invest in high quality materials, such as cedar, pine or redwood, as the bench will be exposed to all kinds of weather. Apply a few coats of paint over the components, to enhance their appearance and to protect them from bad weather.
4×8 Firewood Shed – Free DIY Plans
Building a 4×8 firewood shed
Materials
- 1 – 2 pieces of 2×6 lumber – 96″ long, 7 pieces – 45″ long BASE
- 2 – 11 pieces of 2×4 lumber – 96″ long FLOOR
- 3 – 2 pieces of 2×4 lumber – 48″ long, 4 pieces – 69″ long 2xSIDE WALL
- 4 – 2 pieces of 2×4 lumber – 89″ long, 5 pieces – 69″ long BACK WALL
- 5 – 2 pieces of 2×4 lumber – 67″ long, 3 pieces – 89″ long FRONT WALL
- 6 – 22 pieces of 1×4 lumber – 48″ long, 12 pieces – 96″ long SIDE SLATS
- 7 – 2 pieces of 2×4 lumber – 12″ long, 1 piece – 96″ long RIDGE BEAM
- 8 – 10 pieces of 2×4 lumber – 36″ long RAFTERS
- 9 – 6 pieces of 2×4 lumber – 108″ long PURLINS
- 10 – 60 sq ft of metal sheets ROOFING
- 6 cider blocks
- 6 pieces of 2×6 lumber – 8′
- 39 pieces of 2×4 lumber – 8′
- 6 pieces of 2×4 lumber – 10′
- 23 pieces of 1×4 lumber – 8′
- 60 sq ft of metal sheets
- 2 1/2″ screws
- 3 1/2″ screws
- wood glue, stain/paint
- rafter ties
- firewood axe
Tools
- Hammer, Tape measure, Carpentry square
- Miter saw, Drill machinery, Screwdriver, Sander, Router
- Safety Gloves, Safety Glasses, Respiratory Mask
Time
- One weekend
STEP 1:
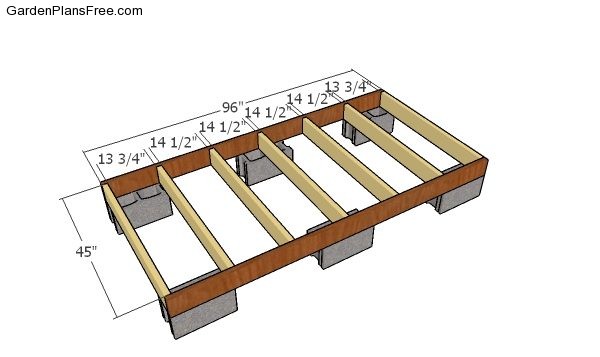
Floor frame
The first step of the project is to build the floor frame for the firewood shed. As you can see in the diagram, you need to cut the joists from 2×6 lumber. Lay the components on a level surface annd align the edges flush. Drill pilot holes and insert 3 1/2″ screws to assemble the frame. Make sure the corners are square.
Select the location for the firewood shed and remove the vegetation layer. Lay 6 cider blocks under the floor frame so you lift it from the ground and protect the firewood from moisture.
STEP 2:
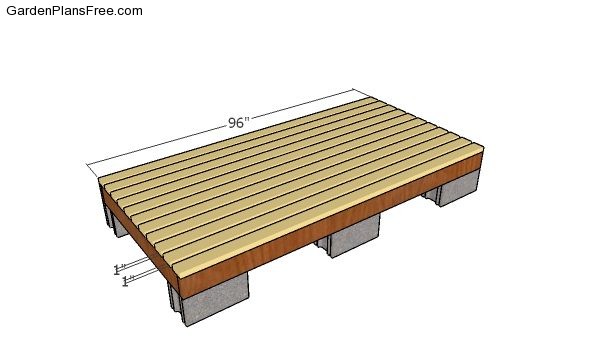
Fitting the floor boards
Next, lay the 2×4 boards to the floor frame. Align the edges with attention and leave about 1″ between them. You can place a piece of wood between the boards to create consistent gaps. Drill pilot holes and insert 2 1/2″ screws to lock them to the joists.
STEP 3:
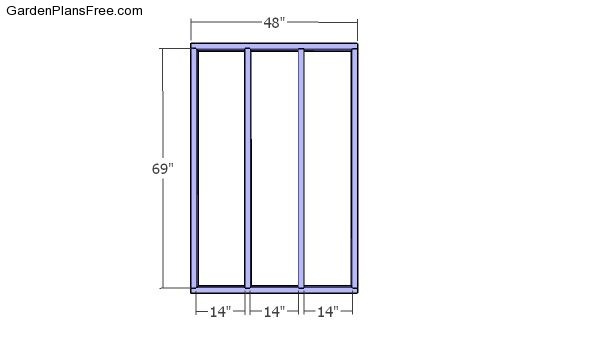
Side wall frame
The next step of the project is to build the side wall frames. Cut the components at the right dimensions and drill pilot holes through the plates. Insert 3 1/2″ screws to lock the plates to the studs. Make sure the corners are square.
STEP 4:
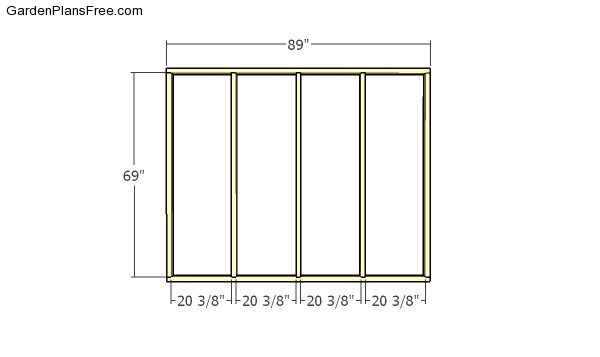
Back wall frame
Use 2×4 lumber for the back wall frame. Assemble the wall with 3 1/2″ screws.
STEP 5:
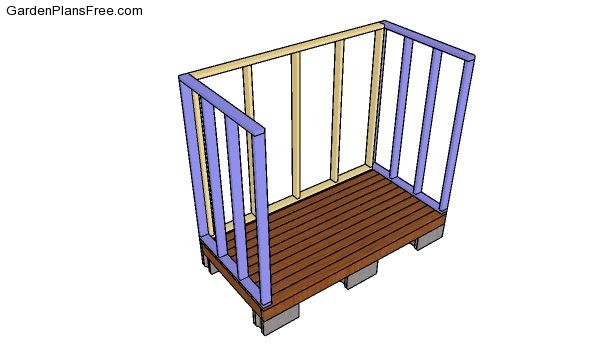
Assembling the shed frame
Fit the wall frames to the floor and plumb them with a spirit level. Drill pilot holes through the bottom plates and insert 3 1/2″ screws into the skids. Lock the adjacent walls together with 3 1/2″ screws. Make sure the corners are square.
STEP 6:
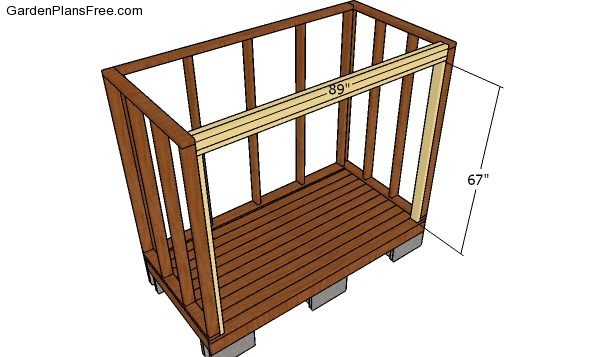
Building the front wall
Use 2×4 lumber for the wall frame, as well. Notice the double 2×4 header. Use 3 1/2″ screws to secure the posts and the header into place.
STEP 7:

Fitting the slats to the sides
Attach the 1×4 slats to the sides of the firewood shed. Place the slats equally spaced and insert 1 5/8″ screws to lock them into place tightly.
STEP 8:

Front and back slats
Attach the 1×4 slats to the back of the shed. Place the slats equally spaced and insert 1 5/8″ screws to lock them into place tightly.
STEP 9:
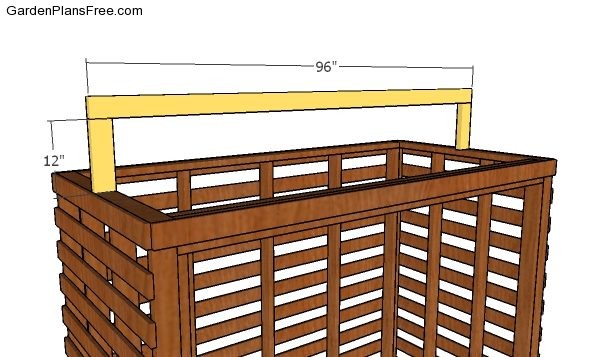
Fitting the ridge beam
Use 2×4 lumber for the supports and for the ridge beam. Plumb the supports and make sure the corners are square.
STEP 10:
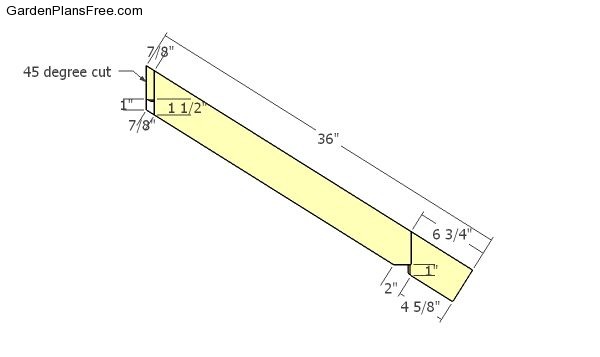
Building the rafters
Use 2×4 boards to build the rafters. Use a circular saw to make the birdmouth cuts.
STEP 11:
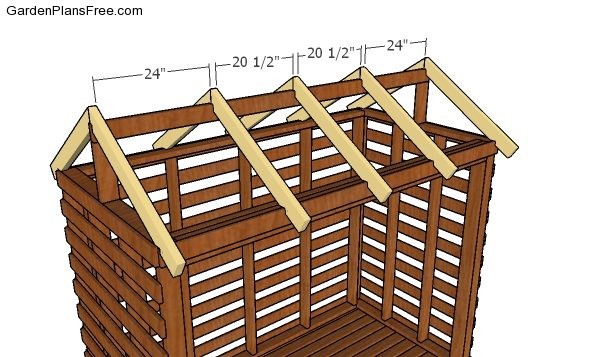
Fitting the rafters
Fit the rafters to the ridge beam, as shown in the diagram. Lock them to the plates and to the top beam with 3 1/2″ screws, after drilling pilot holes. Alternatively, you can use rafter ties.
STEP 12:

Fitting the purlins
Use 2×4 boards for the purlins. Center the purlins to the top of the gable roof, making sure you have equal overhangs on both sides. Drill pilot holes and insert 2 1/2″ screws to lock the purlins to the rafters.
STEP 13:
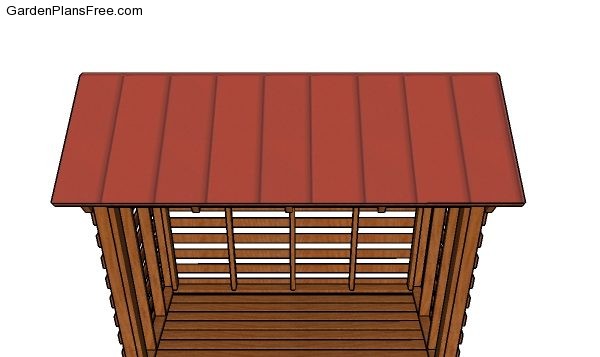
Fitting the metal sheets
Attach metal sheets to the purlins, as shown in the diagram.
STEP 13:
4×8 Firewood Shed Plans GPF
After installing the roofing, there are still a few finishing touches you have to take care of. First of all, you could fill the holes and gaps with wood filler and smooth the surface with medium-grit sandpaper.
STEP 14:
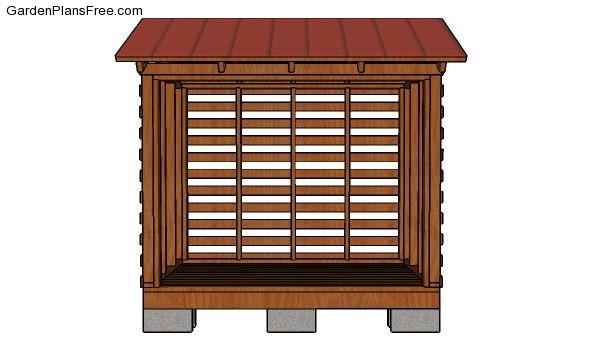
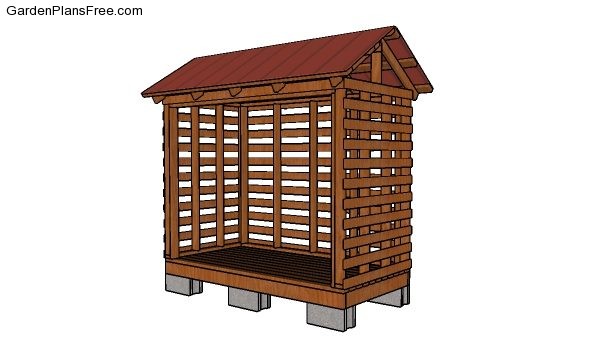
4×8 Firewood Shed Plans – Front views
This 4×8 firewood shed is simple to build and it is also beautiful, so that it will become a focus point of your garden. You can make a few of these and stack them together, so you increase the storage capacity. See more outdoor storage plans and ideas HERE. To download the plans as a PDF file, check out my Shop.

This diy project was about 4×8 firewood shed plans. If you have enjoyed the free project, we recommend you to share it with your friends, by using the social media widgets.